- Dec 21, 2009
- 448
- 15
- 121
Building the Chicken McMansion (Part 3) https://www.backyardchickens.com/forum/viewtopic.php?id=283812
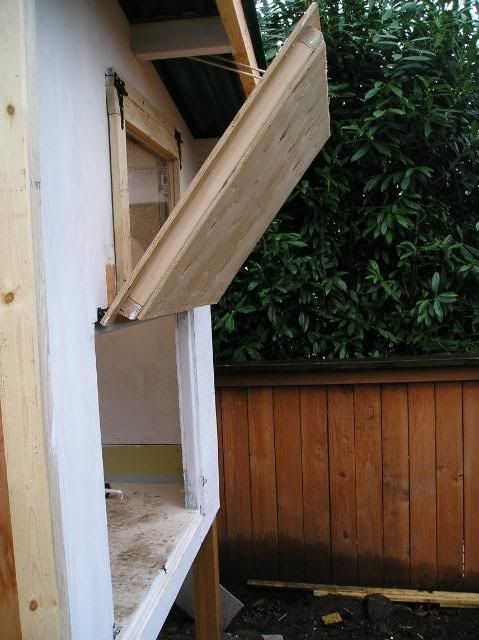
It's been a busy week already. The weather here has been in the fifties, breezy with the occasional shower, but decent to work under the cover of the run.
I've always intended to put the roost against the South wall, and in front of the cleanout door, but I never got around to the specifics until today. I have been sealing, priming and painting the entire interior of the Chicken McMansion. The floor is painted with tan garage floor epoxy, and the walls with light blue porch paint. Everything has been primed first with Kilz latex primer, and most of the seams and gaps have been filled with paintable silicon caulking. Filling the cracks is important for keeping the coop from getting buggy. Durable primer and paint keeps everything from rotting out.


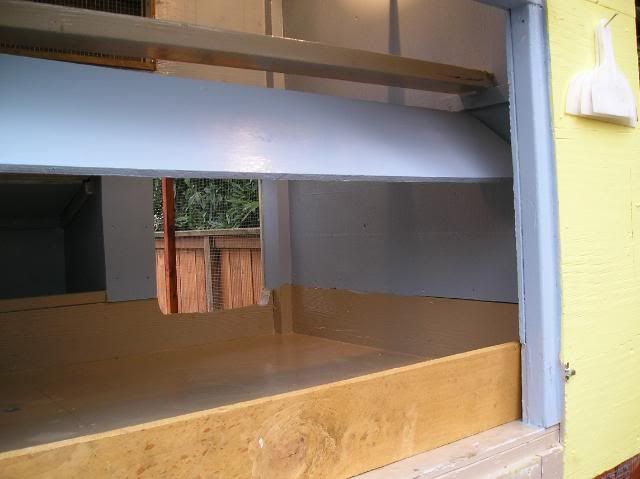
I sat in the coop and carefully measured everything with my drawing pad in my lap, in order to get this right. First, I cut the roost to length, fit it level into the coop, and then painted it with two coats of the same epoxy that I painted the floor with. I installed 1x2 lugs on each side of the coop to level and place the roost where I wanted it.
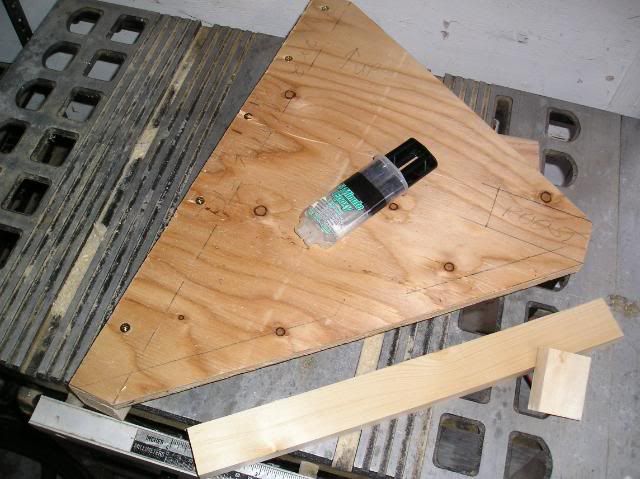
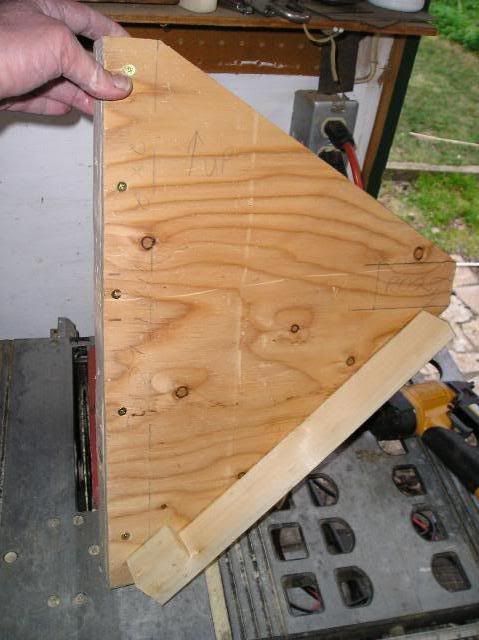
Using the measurements I took, I drew out a triangular piece of 1/2" ply, reinforced it with a 2x2 nailer to attach it to the wall, then used epoxy glue and wire nails to attach a poop board bracket. I attached the whole assembly to the wall of the coop, right next to the cleanout door, with construction screws.

From there it was simple to install the roost, and put in the slanted poop board underneath it.


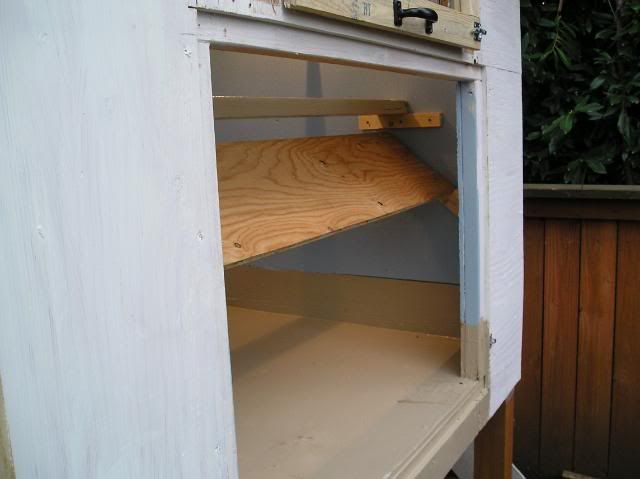
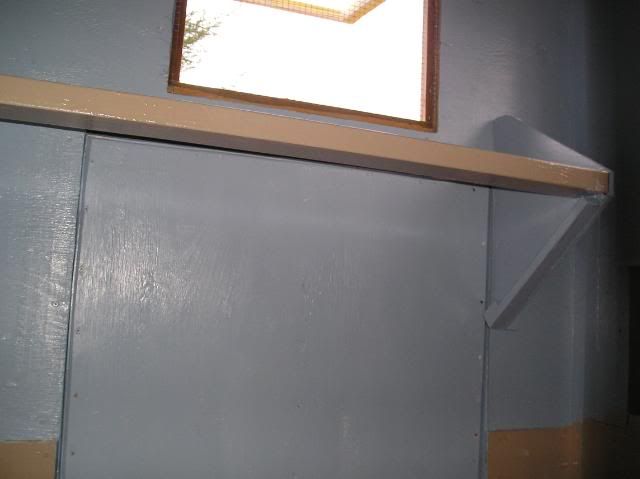
The poop board needs to be primed and covered with linoleum. It is about 4 feet long and 10 1/2 inches wide. It is sloped toward the rear cleanout door. I will have a cedar board across the door opening to hold in the litter, and anything that falls off the board will be in the litter right underneath. It should be very easy to scrape the board and the roost daily. The board comes out very easily to get at the rest of the coop for poop patrol. In addition, the triangular end bracket also keeps the end of the roost away from the opening of the nest box.
The painting has largely been an exercise in reuse and recycle. The Kilz primer was left over from installing windows last year; the porch paint was left over from painting the floor of my shop over 10 years ago. I didn't have to buy new paint (except for the floor) and that has helped hold down the cost of the coop. In any case, the porch paint is a light blue semigloss paint, and the reflectivity really brightens the coop a lot. I suppose there is a touch of Feng Shui in the coop but it really wasn't intentional.
I have the roost mounting primed and will paint everything blue tomorrow. Next is to finish building and mounting the windows, and to paint them. I have fly screen that needs to be installed, but that means inside window trim to hold it in place, and I want to do all three windows at once.
It's coming along...What's particularly cool is that the roost is up at window level so we should be able to count heads in the morning through the window.

It's been a busy week already. The weather here has been in the fifties, breezy with the occasional shower, but decent to work under the cover of the run.
I've always intended to put the roost against the South wall, and in front of the cleanout door, but I never got around to the specifics until today. I have been sealing, priming and painting the entire interior of the Chicken McMansion. The floor is painted with tan garage floor epoxy, and the walls with light blue porch paint. Everything has been primed first with Kilz latex primer, and most of the seams and gaps have been filled with paintable silicon caulking. Filling the cracks is important for keeping the coop from getting buggy. Durable primer and paint keeps everything from rotting out.
I sat in the coop and carefully measured everything with my drawing pad in my lap, in order to get this right. First, I cut the roost to length, fit it level into the coop, and then painted it with two coats of the same epoxy that I painted the floor with. I installed 1x2 lugs on each side of the coop to level and place the roost where I wanted it.
Using the measurements I took, I drew out a triangular piece of 1/2" ply, reinforced it with a 2x2 nailer to attach it to the wall, then used epoxy glue and wire nails to attach a poop board bracket. I attached the whole assembly to the wall of the coop, right next to the cleanout door, with construction screws.
From there it was simple to install the roost, and put in the slanted poop board underneath it.
The poop board needs to be primed and covered with linoleum. It is about 4 feet long and 10 1/2 inches wide. It is sloped toward the rear cleanout door. I will have a cedar board across the door opening to hold in the litter, and anything that falls off the board will be in the litter right underneath. It should be very easy to scrape the board and the roost daily. The board comes out very easily to get at the rest of the coop for poop patrol. In addition, the triangular end bracket also keeps the end of the roost away from the opening of the nest box.
The painting has largely been an exercise in reuse and recycle. The Kilz primer was left over from installing windows last year; the porch paint was left over from painting the floor of my shop over 10 years ago. I didn't have to buy new paint (except for the floor) and that has helped hold down the cost of the coop. In any case, the porch paint is a light blue semigloss paint, and the reflectivity really brightens the coop a lot. I suppose there is a touch of Feng Shui in the coop but it really wasn't intentional.
I have the roost mounting primed and will paint everything blue tomorrow. Next is to finish building and mounting the windows, and to paint them. I have fly screen that needs to be installed, but that means inside window trim to hold it in place, and I want to do all three windows at once.
It's coming along...What's particularly cool is that the roost is up at window level so we should be able to count heads in the morning through the window.