Show Me Your Pallet Projects!

That looks very labor intensive to me! Just because you have to constantly check the water level for each and every cup. Maybe easier with clear plastic cups so you can see the water level without lifting?

Well, there was another YouTube that I did not link to that discusses the disadvantages to the double solo cup method. First and foremost, was that if you have any number of those double cups, it gets to the point where it does indeed take a lot of labor time to check and water each cup. He said it was a great system for a handful of plants, but if you are staring 50, 100, etc... then forget about it. Too much time to check each cup.

I put my seed cups in large shallow trays and water from below by simply pouring some water into the bottom of the tray...about a quarter inch deep each water. Quick and easy both to see if they need water and to add it.

Thanks. That is what I intend to do with my seed starting. I bought a 50 pack of 3-inch net pots, and I plan on just putting them in some 10X20 trays, or tote lids, fill up the tray with 1/4-inch of water like you said, and then let is soak up the water. Repeat in a few days if the soil is drying out.

I think I can get about (18) 3-inch net pots into each 10X20 tray. Like you said, just bottom water, checking the water level in the tray, and you are watering 18 pots at one time.

I was out in the garage this afternoon looking for my 10X20 trays. I only found one. I thought I had more than that. Probably safely stored away somewhere.... :tongue

Anyways, I checked my reclaimed shelving boards and they are 3/4-inch thick X 15-1/4 inch wide X 46 inches long. I have 4 of those shelves. Looks like I can build a 4 tier seed starting shelf. I bought 5 LED 4-foot-long shop lights, so I think I will be able to have most of the shelves fully lit with the lights, 2 LED lights per shelf and one shelf with just one light. Should be good, I hope.
 
No, this is my first yr trying anything. I did wonder abt something like this...and likely will try it next yr.

It looks like a good system for a small number of plants. But, as previously mentioned, it might take too much time to check and fill lots of those cups with water. Seems like a great system for a small number of plants and there are a number of people on YouTube talking about the double Solo cup method. I have never tried it, single or double cup method.

:caf Hope you have time to post your results with your Solo cups. Although I have gardened for many years, this is also my first year trying to early start seeds in house. So, I'm learning a lot, too.
 
Well, there was another YouTube that I did not link to that discusses the disadvantages to the double solo cup method. First and foremost, was that if you have any number of those double cups, it gets to the point where it does indeed take a lot of labor time to check and water each cup. He said it was a great system for a handful of plants, but if you are staring 50, 100, etc... then forget about it. Too much time to check each cup.


Thanks. That is what I intend to do with my seed starting. I bought a 50 pack of 3-inch net pots, and I plan on just putting them in some 10X20 trays, or tote lids, fill up the tray with 1/4-inch of water like you said, and then let is soak up the water. Repeat in a few days if the soil is drying out.

I think I can get about (18) 3-inch net pots into each 10X20 tray. Like you said, just bottom water, checking the water level in the tray, and you are watering 18 pots at one time.

I was out in the garage this afternoon looking for my 10X20 trays. I only found one. I thought I had more than that. Probably safely stored away somewhere.... :tongue

Anyways, I checked my reclaimed shelving boards and they are 3/4-inch thick X 15-1/4 inch wide X 46 inches long. I have 4 of those shelves. Looks like I can build a 4 tier seed starting shelf. I bought 5 LED 4-foot-long shop lights, so I think I will be able to have most of the shelves fully lit with the lights, 2 LED lights per shelf and one shelf with just one light. Should be good, I hope.
Sounds great!
 
I dropped a hint to hubby that I'd like a pallet to make something with. Ok, not a hint. I said, I need a pallet to make the lids for my sprouting totes. Hope he can get one soon, though I'll make do without it.

🤔 Curious, what do you use as sprouting totes and why would you want a pallet wood lid? I am familiar with the 10X20 black seed starting trays with the transparent plastic humidity domes on top. Just having a hard time imagining where you are going with the pallet wood totes and lids.
 
:caf Almost done with the pallet wood seed starting shelf. I got all the pieces cut and assembled most of the framing last night to make a 4-tier shelf. But, since I made everything out of those 2X4 stretchers that have the cutouts, the whole unit assembled would be too heavy for me to do the final assembly in the garage and carry it into the house. So, I have to move the pieces into the house for final assembly, I hope later today....

We had a small snow storm last night-early this morning, so I just got done spending an hour+ outside blowing snow. I am soaking wet with sweat. :tongue Just cooling down now so I can jump into a warm shower.

Back to the pallet wood seed starting shelf, I decided to fasten it together with screws. That should make it really easy to take apart in a few months and either put it into storage, or use the wood for a different project. Other than a handful of screws, I put no money into this project build! :clap

I think I could have made this shelving frame out of 2X2's instead of the much heavier 2X4's. But my table saw is buried away for the winter with lots of storage stuff all on top and around the table saw. It was not worth my time, or effort, to get the table saw out for use. So, this build, I just used the 2X4 stretchers as they came off the pallet disassembly, with almost no cutting. All in all, I think I had only 8 cuts for short 13-inch sections of 2X4,s for cross pieces for the shelves.

🤔 Minor setback, I mentioned I only found one of my 10X20 trays for the seed starting. Last night I washed it up nice and clean, but I noticed there was a few small holes in one of the bottom corners of the tray. That means it will not hold water for bottom watering like I wanted to do. So, I am moving on to Plan B, which is maybe using some plastic tote bin tops as the trays.

Another idea is using some Dollar Tree dishwashing bins to hold the net cups. I use those Dollar Tree bins for lots of stuff, so it never hurts to buy a few more, if needed.

Anyways, if everything comes together, literally, I will be posting a picture of my finished pallet wood seed starting 4-tier shelf later tonight, or tomorrow. Later...
 
Curious, what do you use as sprouting totes and why would you want a pallet wood lid? I am familiar with the 10X20 black seed starting trays with the transparent plastic humidity domes on top. Just having a hard time imagining where you are going with the pallet wood totes and lids.
I have my seed starting pots in plastic totes with hardware cloth over them like this:
IMG_3229.JPG

What I would like pallet wood for is to make a frame to attach the hardware cloth to.

As they are now, the hardware cloth fits over the totes snugly, but I think a mouse could still get in at the corners. I'm going to weigh down the corners with rocks/bricks.

My winter green house growing was a total bust this year, due to mice. They ate the seedlings, and scratched through the dirt for the seeds. I caught 4-5 mice in a snap trap, but not before they did their destruction.

So, I don't want a lid, really; that was not a good choice of word. I want a frame of a lid.

I've thought about dedicating these totes to this use, and cutting the center out of the lid that goes with it. Then I could use the rim, with its clamping handles to hold the hardware cloth on. I've priced more totes... $18-30 each, depending on size. They have to be clear, to let in the light.

I might do that with a couple of totes. These were scavenged from our basement, where they held shelf stable food like pasta, dried beans, etc. Stuff that mice could gnaw through the container. Because, yeah, we have mice in our basement. It goes with living out in the boonies.
 
What I would like pallet wood for is to make a frame to attach the hardware cloth to.

As they are now, the hardware cloth fits over the totes snugly, but I think a mouse could still get in at the corners. I'm going to weigh down the corners with rocks/bricks.

OK, that makes sense.

My winter green house growing was a total bust this year, due to mice. They ate the seedlings, and scratched through the dirt for the seeds. I caught 4-5 mice in a snap trap, but not before they did their destruction.

:tongue Mice eating seeds. My Dear Wife is from the Philippines. She got some kind of special cucumbers or bitter melons from a friend last year. She carefully let one of them ripen enough to save the seeds, Then she set them out on the floor in front of our south facing window to dry out. Seemed to be working OK until one day we looked down and all the seeds where gone! Mouse in the house! :tongue

So, I bought some snap traps and caught the offending mouse, but it was too late in that it had already eaten all her seeds. I still keep the traps out, but so far, just that one mouse.
 
:clap I finished my pallet wood seed starting shelf. Here is a picture of the frame all put together. Sorry for the bad angles on these photos, but the shelf is in our second bathroom and I could only back up so far to take the pictures...

1679542596835.jpeg


As you can see, I mainly used those 2X4 stretchers with the cut outs for the frame. I did not cut any them in this build, just used them as they came off the pallet disassembly. Only thing I did was to pull all the nails out of the wood.

Here is a picture of the shelf with the reclaimed shelving board in place.

1679542746358.jpeg


I think it looks OK, for a temporary seed starting shelf for a few months. I can still get the bathroom door shut, so that is a bonus. You can see on the top shelf that I was checking the shelves for level both side to side and front to back. It's not perfect, but darn close.

The shelf is 4 feet high and 4 feet wide. The reclaimed shelving boards were just a little shorter at 46 inches. The shelves are 15-1/2 inches deep. I expect I will be able to get all my plants I intend to start on 1 or 2 shelves. But I imagine I will find a good use for the other shelves. Probably end up potting more seeds that I intend at this time. But that would be OK.

Next step is to install the LED shop lights and get everything hooked up to a timer.

Yesterday, I bought a Ferry Morse heating mat for seed starting.

60660007_3.jpg


:idunno 
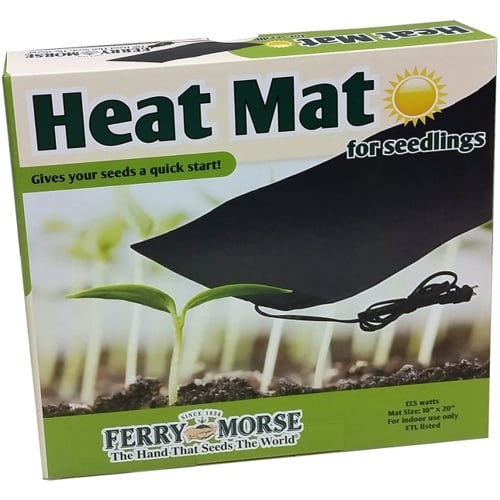
Since this is my first year attempting to start seeds in the house, I decided to get a heat mat because the temp in that bathroom is about 63F, which I read is on the cool side for seed germination. It was an additional expense I had not planned on, but I hope it is a good investment. I got it our local Fleet Store for $28.00 less a 15% discount on their "Bucket Days" sales. So, final cost was $23.80 plus tax for that mat. I checked out some less expensive seed starting mats on Amazon, but when I read more than one negative review that the cheap mats from Amazon almost burned down their house, I decided to go with the name brand Ferry Morse mat for the extra $10.00. And, I like to purchase locally when I can to support our brick and mortar stores.

:caf Now it's time to pot up those 3-inch net cups and get some seeds germinating. If anyone has any suggestions for me on my first year attempt of seed starting, please post a comment. I'm open to any constructive ideas. Later...
 

New posts New threads Active threads

Back
Top Bottom