Started as a 4X8 Pallet

32bantam

In the Brooder
8 Years
Nov 10, 2011
43
2
24
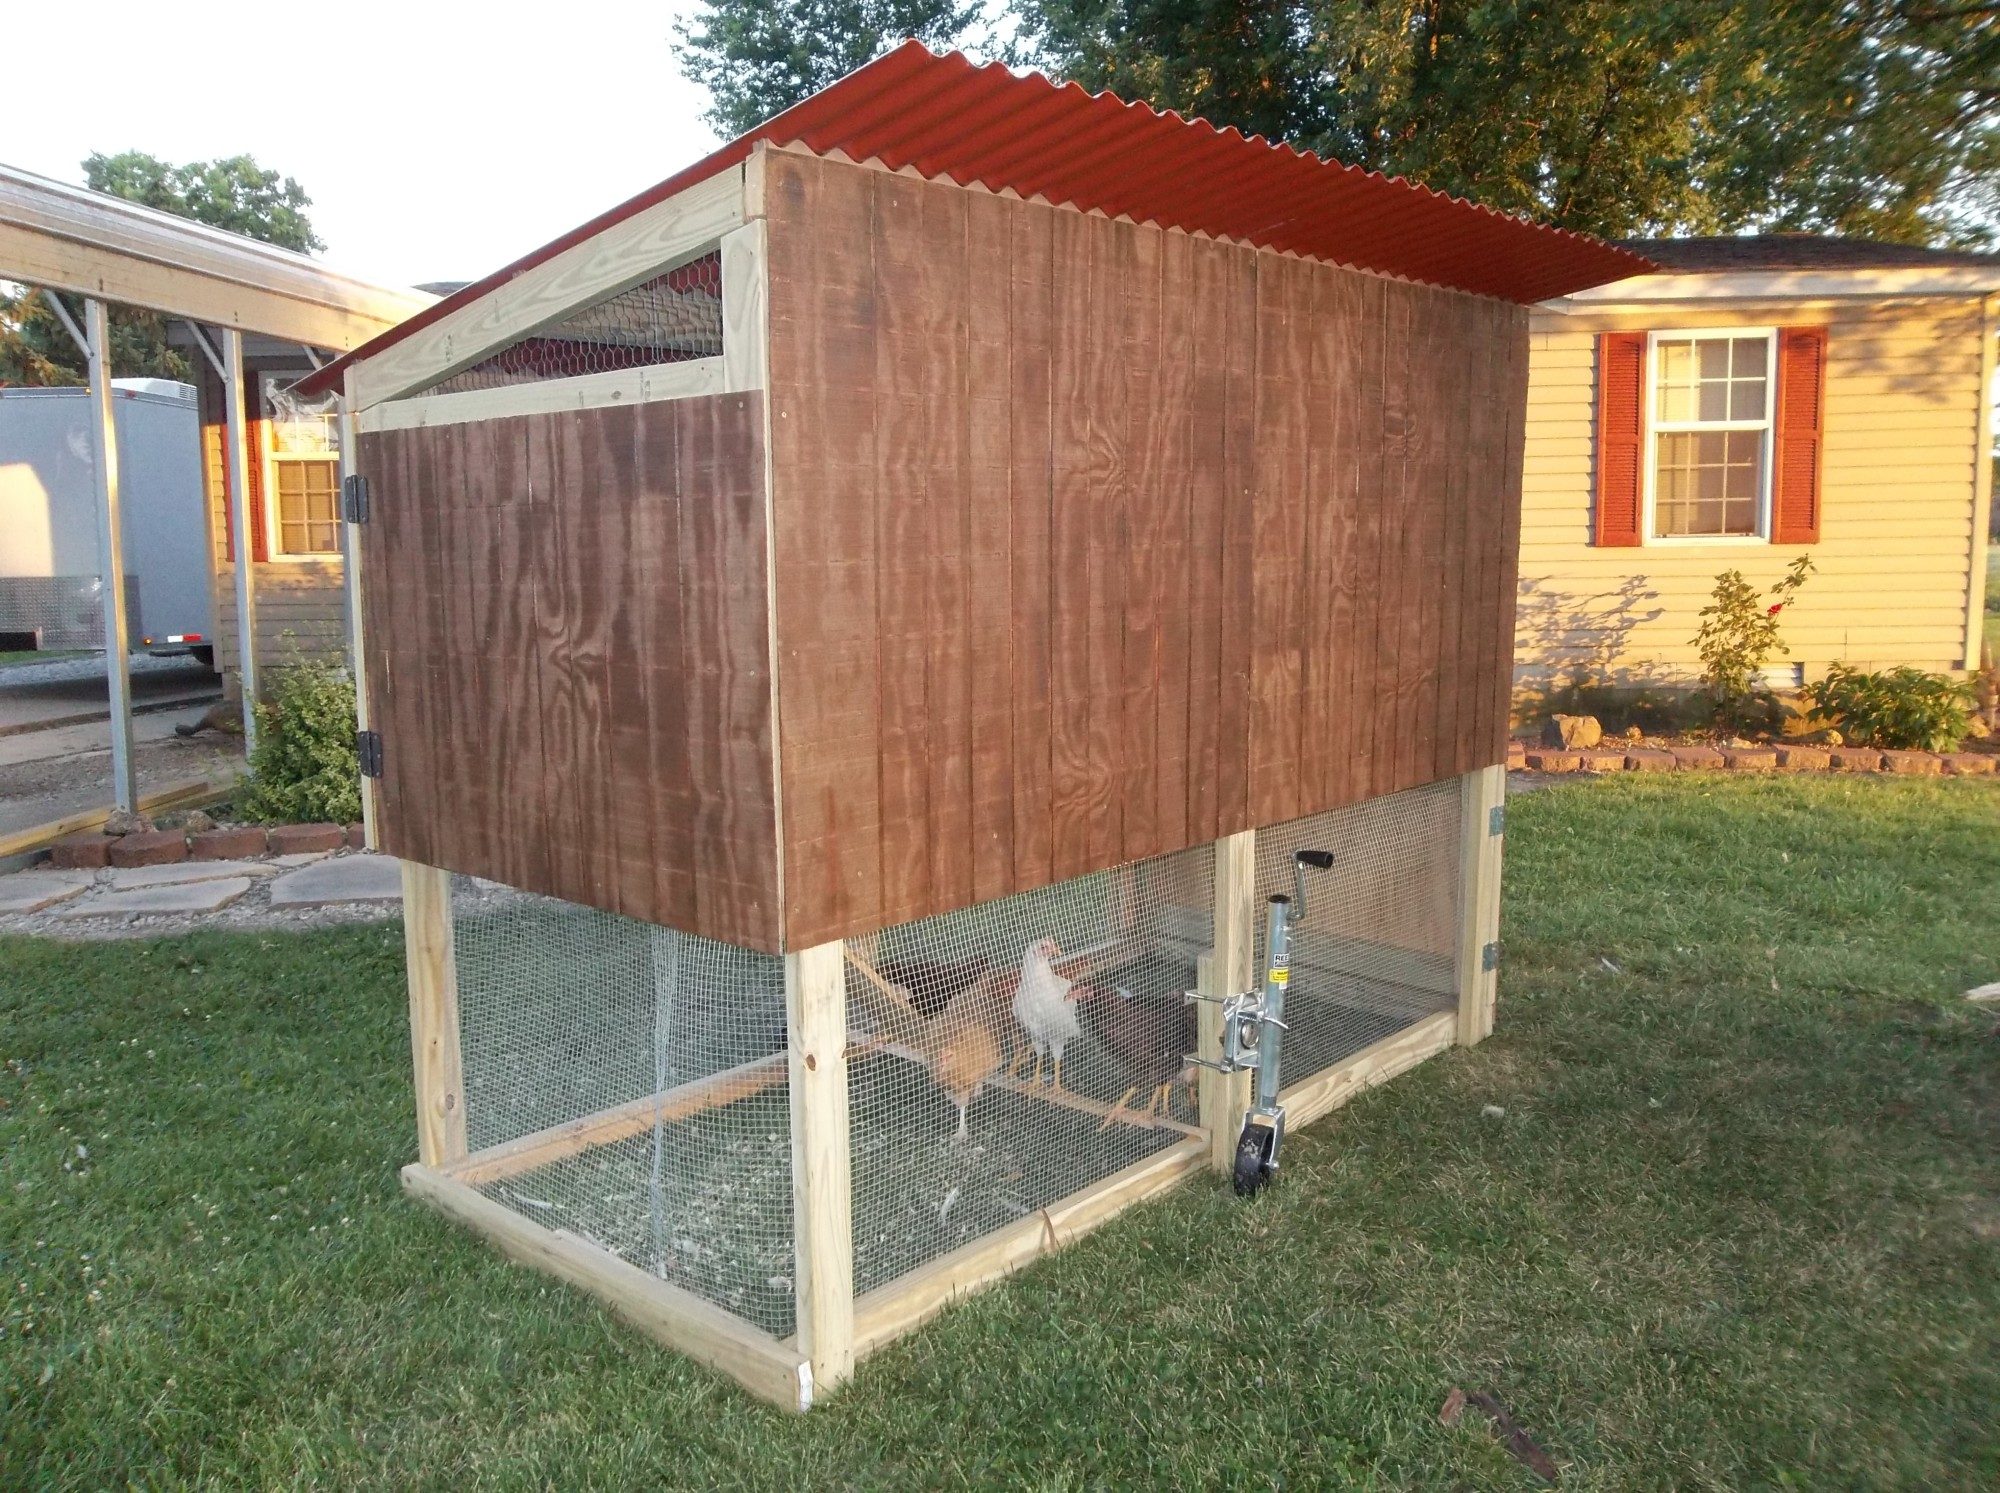
It started as a 4x8 pallet. I put it up on legs to get the floor about 36" off the ground. That way I can pull a wheelbarrow right up to it to clean it out.
I painted the floor with some really ugly green paint but it was free.


It's usable but there are a few things I still need to do.


The entire back wall is hinged.


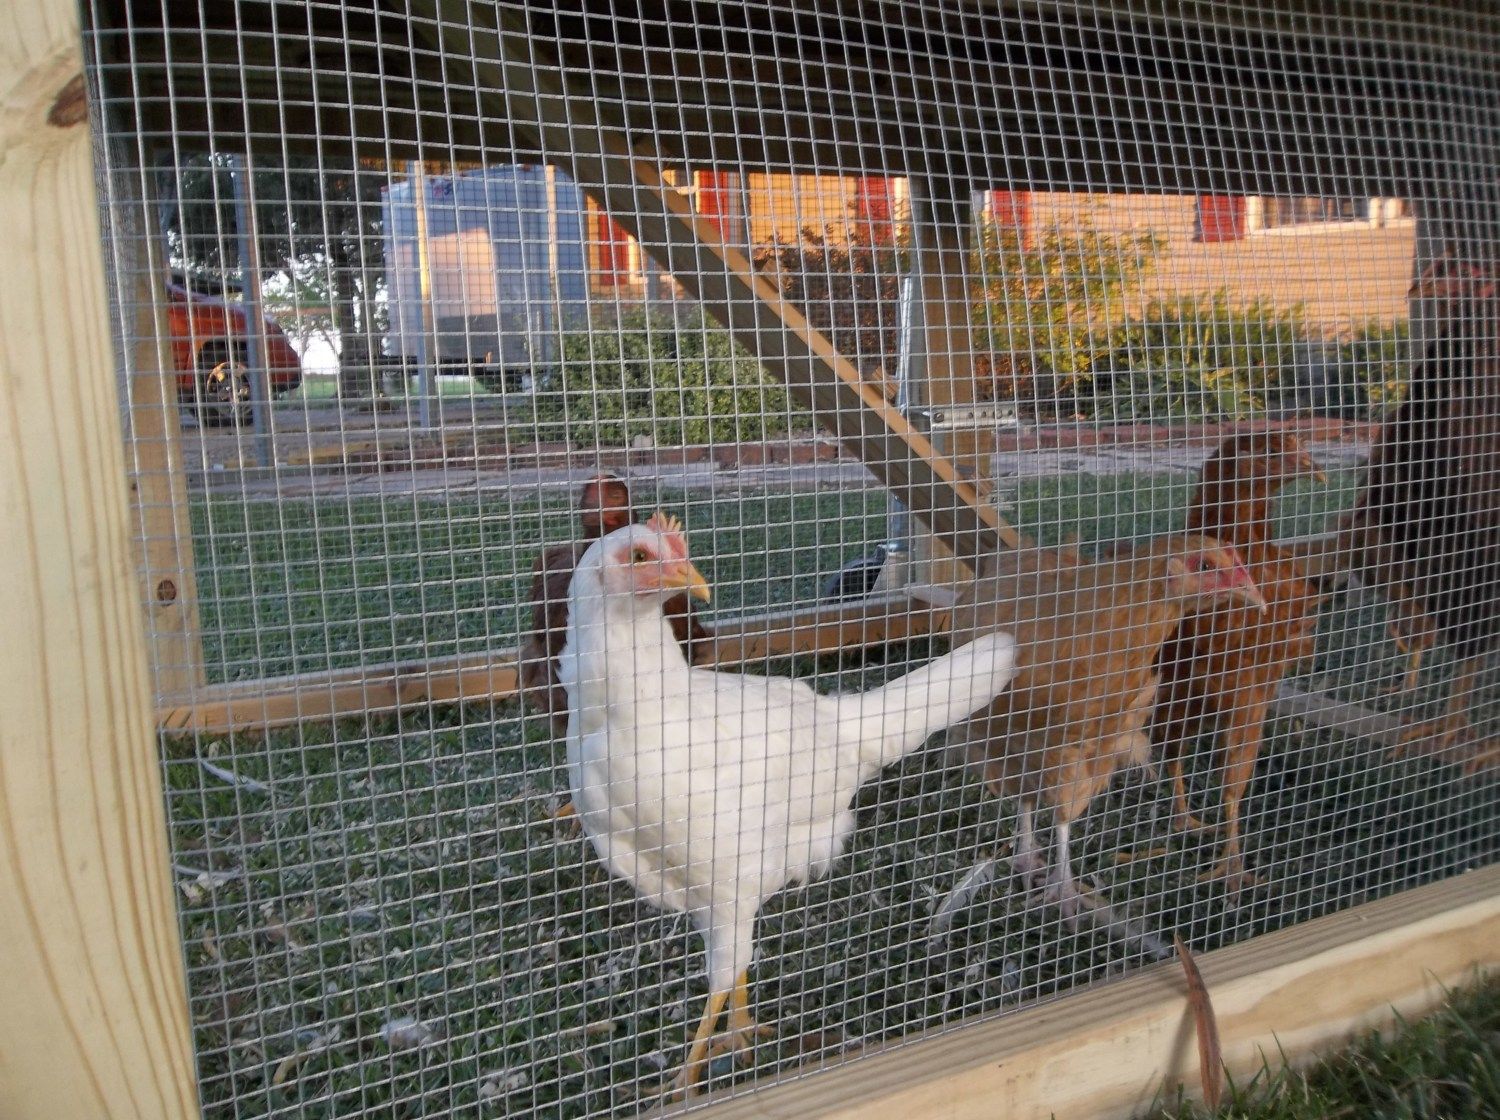
Here's the hole they use to get to the bottom.


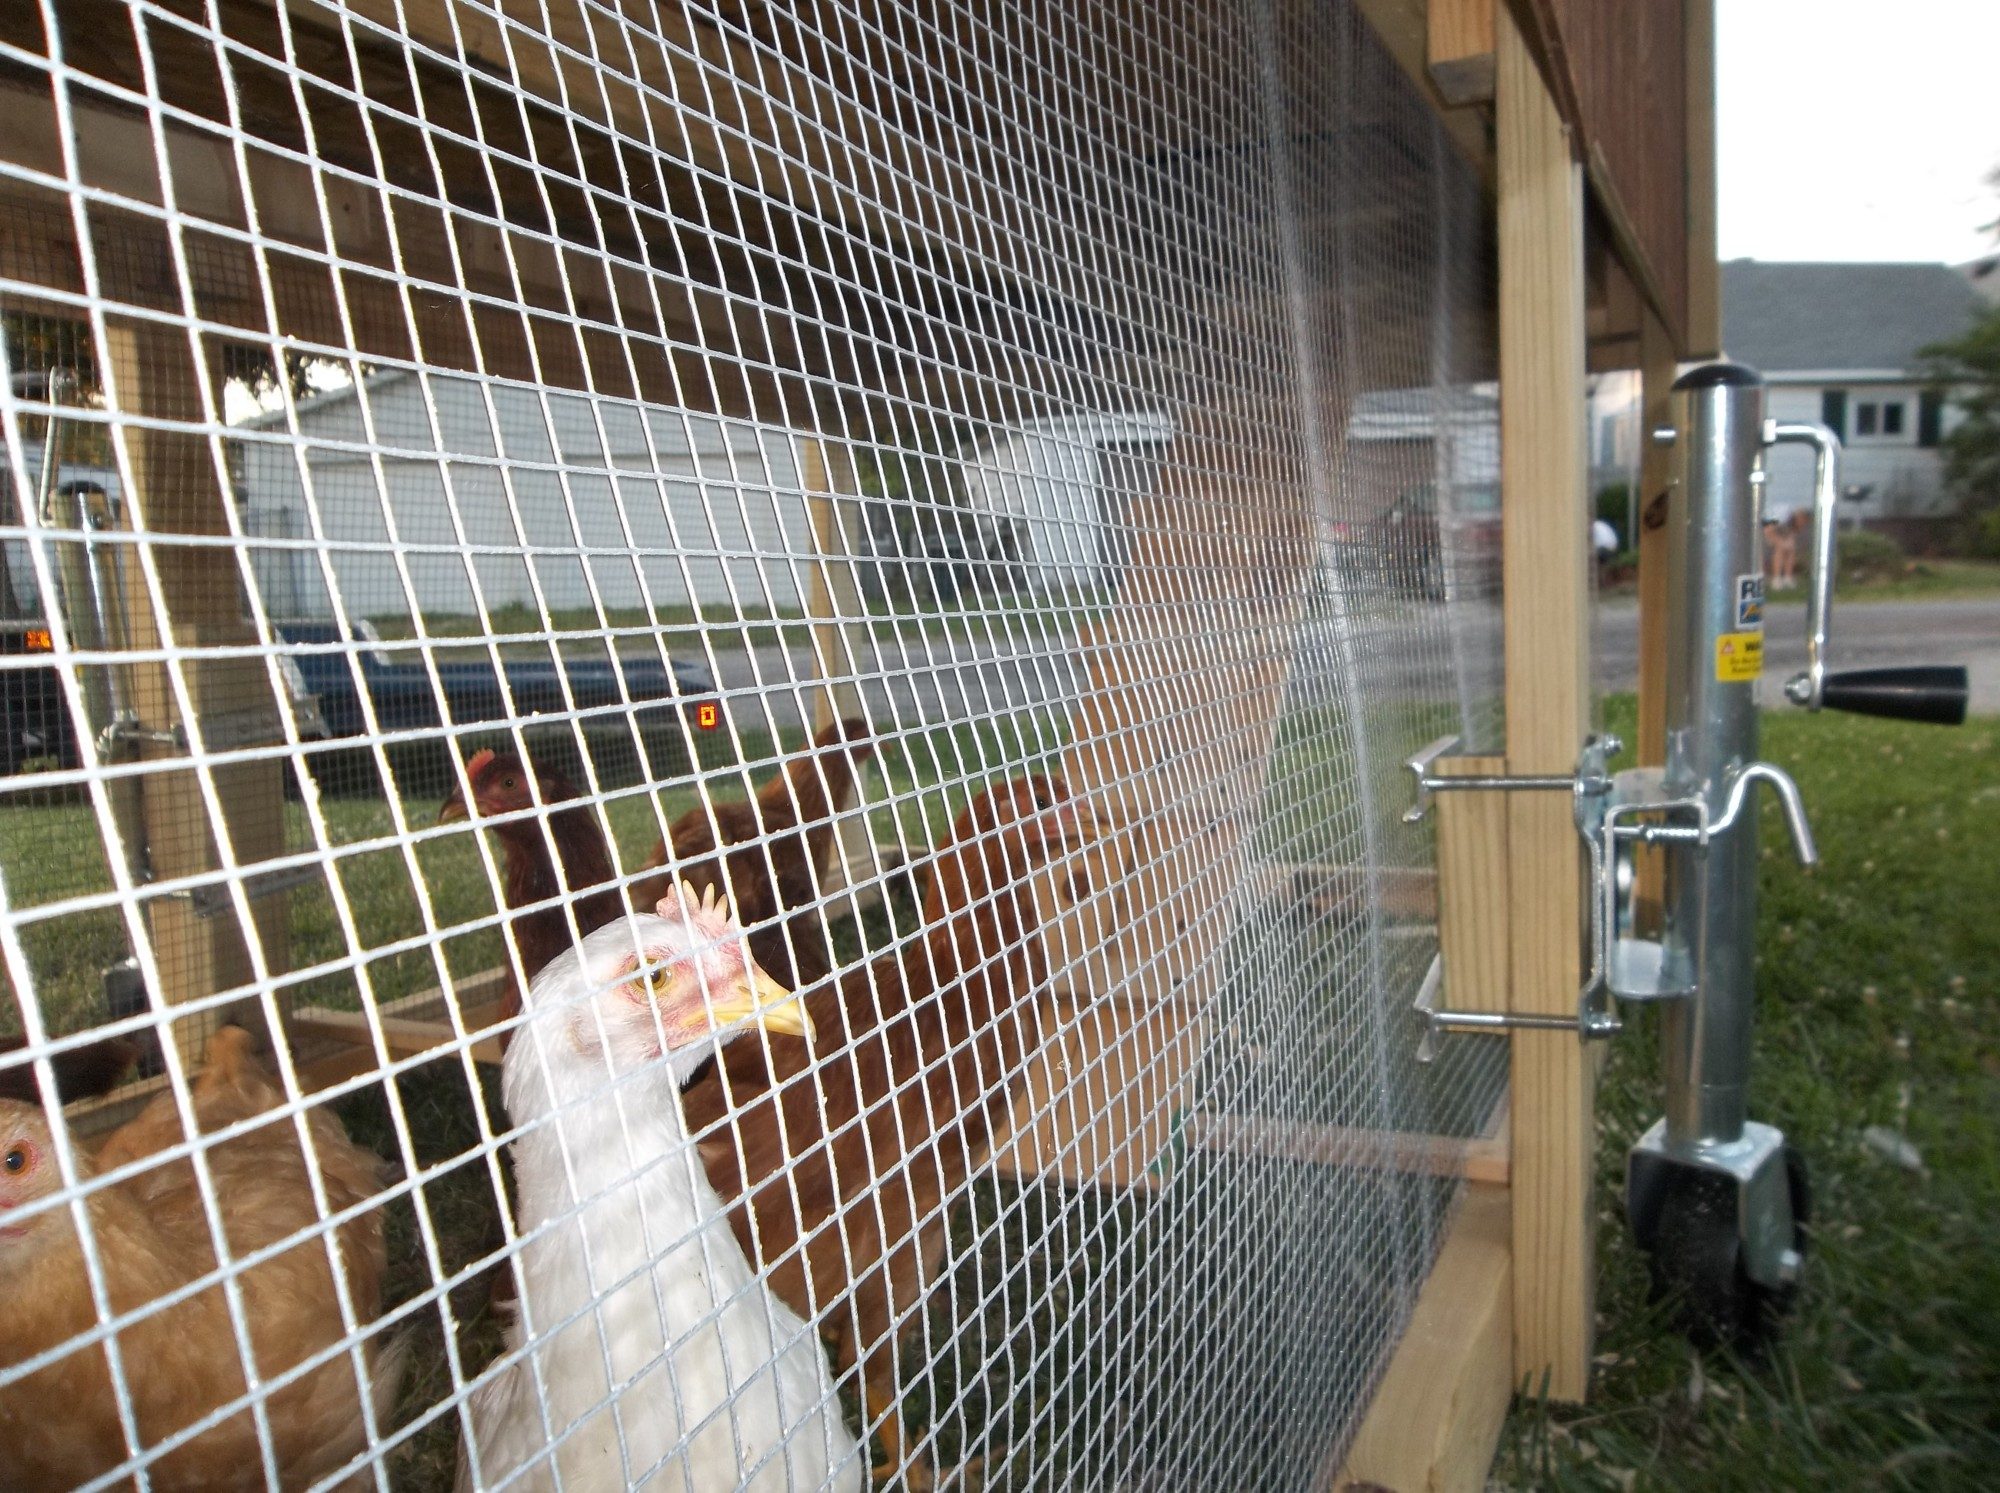
I mounted trailer jacks on both sides. You can crank them up and move the coop.

 
You made a nice coop. Think your chickens are going to love it. I'd put the food and water underneath in the run but that's up to you.
 
The food and water containers are probably easier to manage in the top where you have them - and that keeps them out of the weather, too. So I'd leave it like you've got it. The chickens won't mind going up the ramp to get their food and water. Looks great!
 
That's awesome. I wish you'd detailed the steps you took a little more, though, in case I come across a large pallet
wink.png
 
How did you build the roost? Is it freestanding or is it attached to the backwall? I need to do something like this and hadn't quite figured out how to do it so that it wouldn't tip over when they jump on/off.
 
Last edited:
I'll add more details when I get some extra time.

The roost is freestanding. I made it from some left over 2x4's. No measuring. I found one that was alost as wide as the coop. I found 2 short ones. I cut one short board in half for the uprights and the other I cut in half for the feet. Then I just screwed them together.

The best tip I can post is that we used deck screws with Torx heads for the whole project. No slipping or stripping heads.
 
Trailer Jacks........Brilliant.
Actually I think I saw it on here somewhere. They were on sale at Tractor Supply for about $20 each. I like it because it allows the coop to sit flat on the ground. If I put regular whels on it, It would have a gap at the bottom all the time. I need to put some handles on one end so you can pull it. It doesn't push to easy. You might be able to put one on each corner or 2 on one end and one on the other. That way you wouldn't have to balance it when you move it. you could spin it up and pull it with a 4 wheeler or lawn tractor pretty easy.
 
I worked on their run today. It started out as 2 cattle panels. I covered them in chicken wire. I zip tied one end together. I would make a big eye shape with it and let them run around itside.
Today, I added a 8' plastic pipe to keep it open wider. I notched both ends an slid it over the cattle panel down low so the girls could roost on it if they chose.


I then used an old door off a dog kennel and some plastic pipe to rig up a door for the run. Here's my stepson working on the door.


We cut the end of the pen apart and added the gate. You can see Poop Stain inspecting the work.


I bought 2 10' schedule 40 pipes 1/2" in size and a cross connector. I cut the pipes in half and made a big "X". I drilled holes in the ends and used zip ties to attach them to the top of the pen.


I zip tied a couple of tarps over the top for now.


Now they can be outside without me worrying the will fly out of the pen and be a meal for our dogs. It will be a whole lot easier getting into the pen also.
 

New posts New threads Active threads

Back
Top Bottom