- Thread starter
- #151
AugeredIn,,the hamster cage in has been gaining rpms on this project upgrade.What I will need to do first is completely unroll the tarp and stretch it out,make sure I have the 40' dimension as the width,,the 50' length should give me a 2' leeway that can be used to attach one end firmly to either the tops of the 4x4's,,or the top cable,,or the 2x4 welded wire sides,,I'm thinking I will need to make a wood "L" shaped bracket and attach these to the very top of the 4x4 posts,,this is where the tarp will sit when rolled up,,,and not used as a cover.
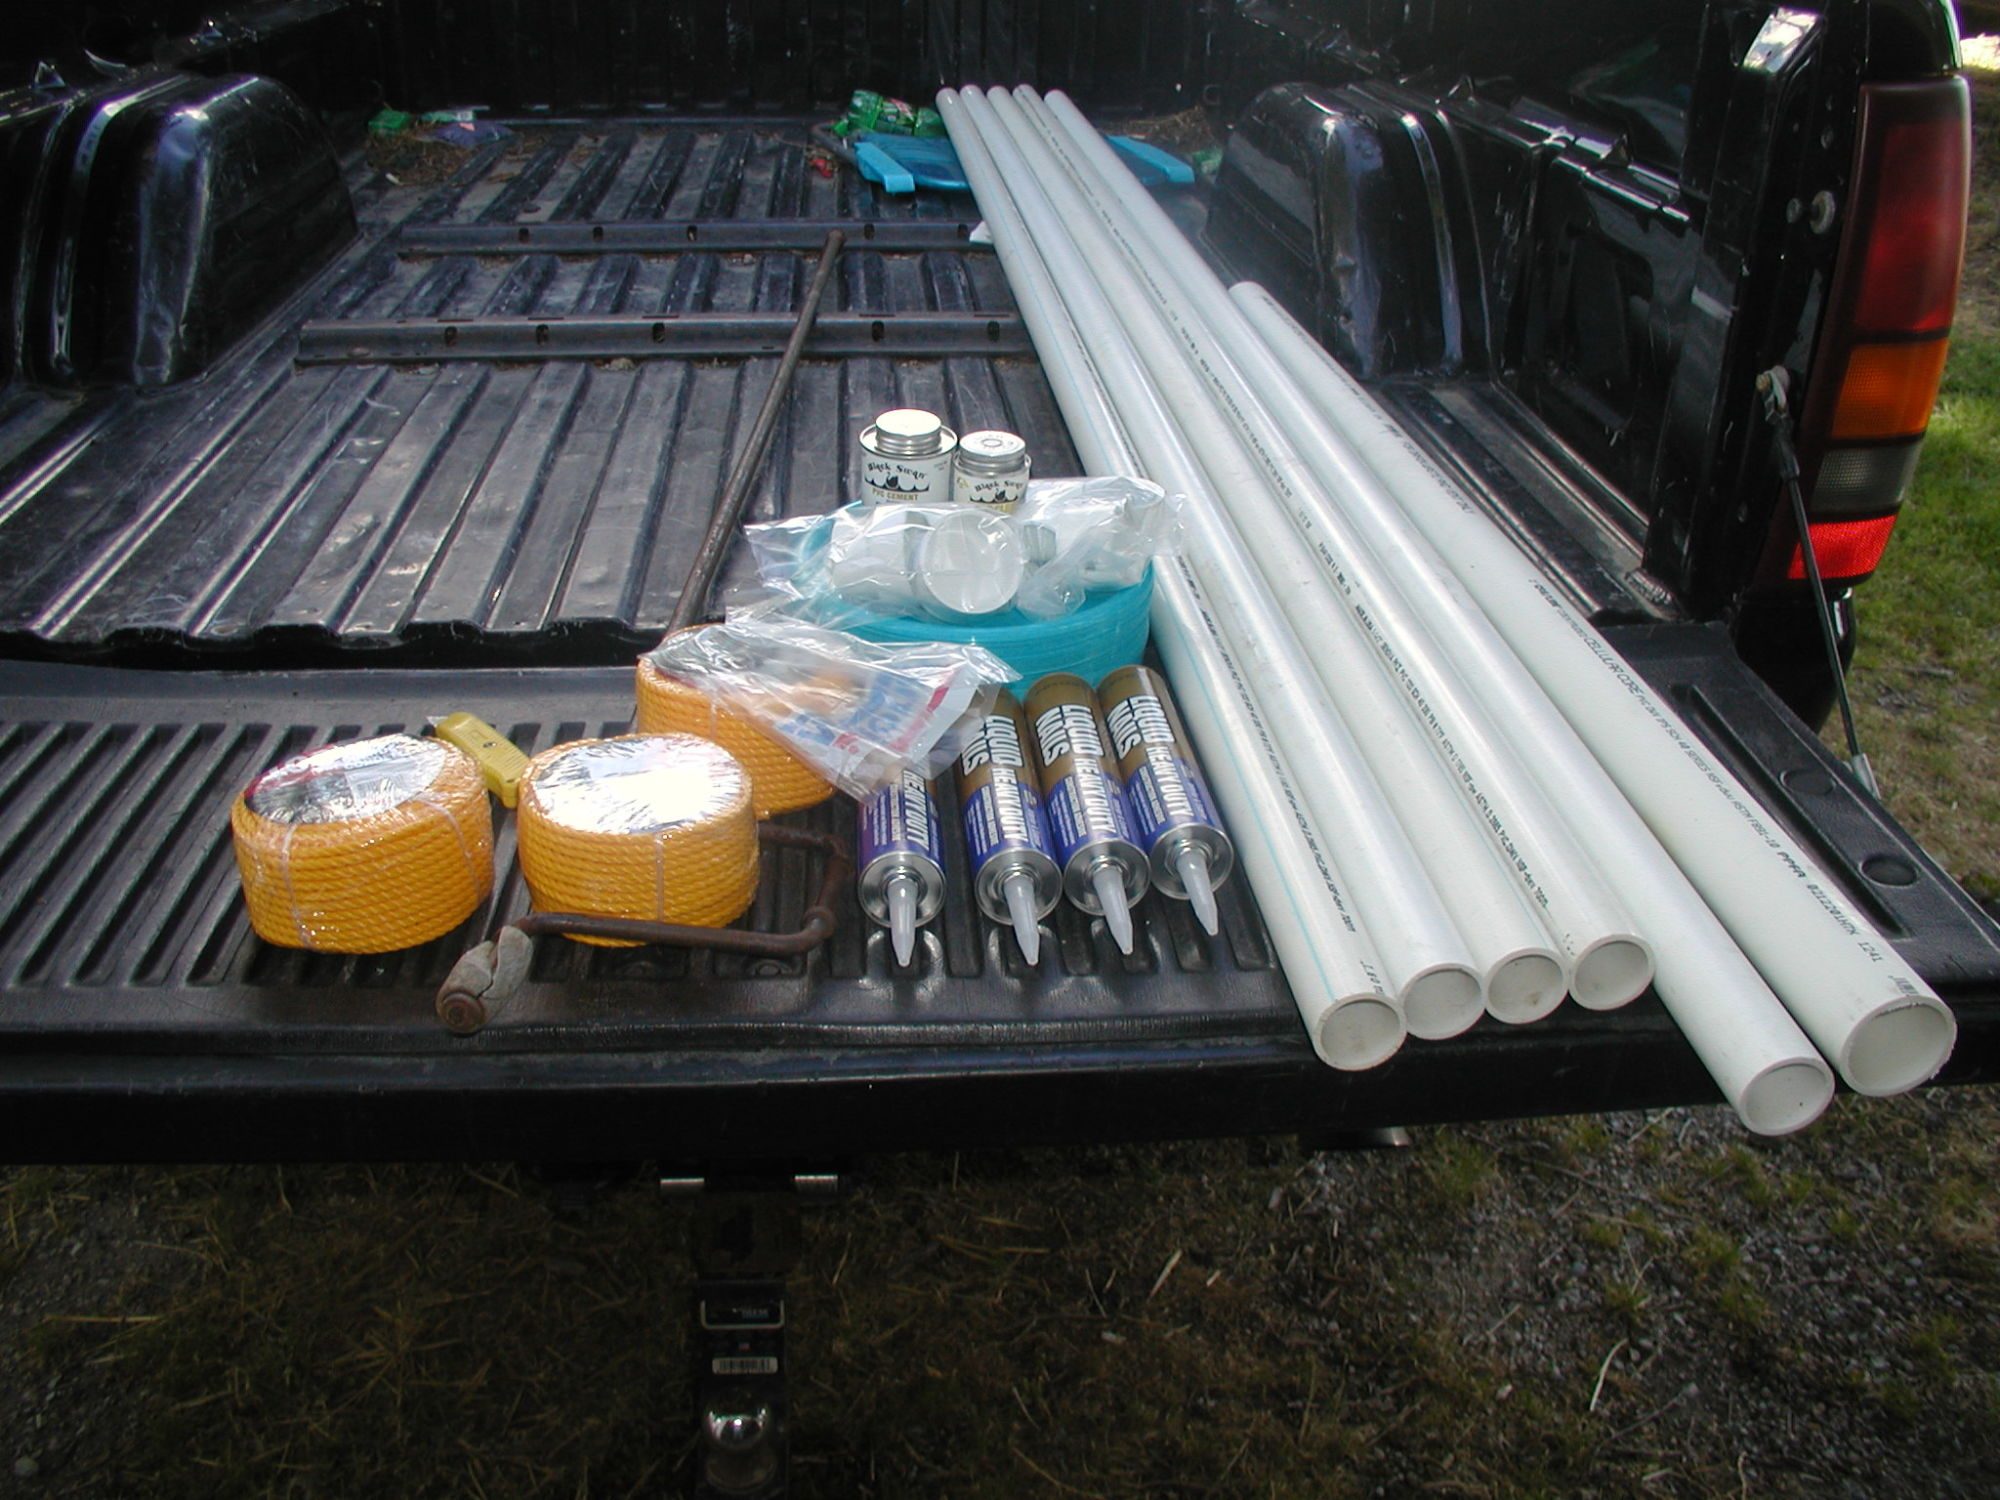
The tarp is supposed to have rings app. every 3' along it's edge.I'm going to the local Farm and Fleet store today to get ideas on PCV plastic pipe.but I know the larger diameter I use,the easier it will be to roll up.I plan to buy 45' of PCV,,and about 220' of rope.The rope will be cut into 2 equal lengths.I think if I lay the 2" PCV pipe out,use pipe cement and join the 10' pieces until I have one long tube 45' long,this will give me 5' of PCV that will hang over one edge.I plan to cap this end and use a homemade hand crank to roll the tarp up with.I hope to attach the PCV pipe to one end of the tarp by drilling a small hole in the pipe where every ring-grommet is along the tarp edge,,13-14 spots altogether.I will then use the self tapping roofing screws with a large enough washer on it to cover the ring-grommet completely.About 10' in on each side of the tarps edge,,I will attach a 110' long section of rope.this rope will be rolled up as the tarp is cranked back and not in use,,but when I want to unroll the tarp,and cover the birds,,I can grab each of these ropes and walk to pull the tarp into it's covering position,then go along and attach bungee cords thru the rings on the other two sides to keep it from flapping when we do get a slight breeze.This is my initial plan so far,,tarp is supposed to be here by Friday,,temps expected near 90 on Saturday,Sunday and Monday with no rain in the forecast.I'm going to a truck junkyard too and try to locate a tarp crank off a grain truck bed. I will do a picture file of this addition and upload as progress is made.Tarp and shipping was about $120,,,my time and ingenuity to make this work?? If only the Peas would be more supportive,,but I know all the cat calls I'll get while working on this project,especially above their heads no less!!
The tarp is supposed to have rings app. every 3' along it's edge.I'm going to the local Farm and Fleet store today to get ideas on PCV plastic pipe.but I know the larger diameter I use,the easier it will be to roll up.I plan to buy 45' of PCV,,and about 220' of rope.The rope will be cut into 2 equal lengths.I think if I lay the 2" PCV pipe out,use pipe cement and join the 10' pieces until I have one long tube 45' long,this will give me 5' of PCV that will hang over one edge.I plan to cap this end and use a homemade hand crank to roll the tarp up with.I hope to attach the PCV pipe to one end of the tarp by drilling a small hole in the pipe where every ring-grommet is along the tarp edge,,13-14 spots altogether.I will then use the self tapping roofing screws with a large enough washer on it to cover the ring-grommet completely.About 10' in on each side of the tarps edge,,I will attach a 110' long section of rope.this rope will be rolled up as the tarp is cranked back and not in use,,but when I want to unroll the tarp,and cover the birds,,I can grab each of these ropes and walk to pull the tarp into it's covering position,then go along and attach bungee cords thru the rings on the other two sides to keep it from flapping when we do get a slight breeze.This is my initial plan so far,,tarp is supposed to be here by Friday,,temps expected near 90 on Saturday,Sunday and Monday with no rain in the forecast.I'm going to a truck junkyard too and try to locate a tarp crank off a grain truck bed. I will do a picture file of this addition and upload as progress is made.Tarp and shipping was about $120,,,my time and ingenuity to make this work?? If only the Peas would be more supportive,,but I know all the cat calls I'll get while working on this project,especially above their heads no less!!
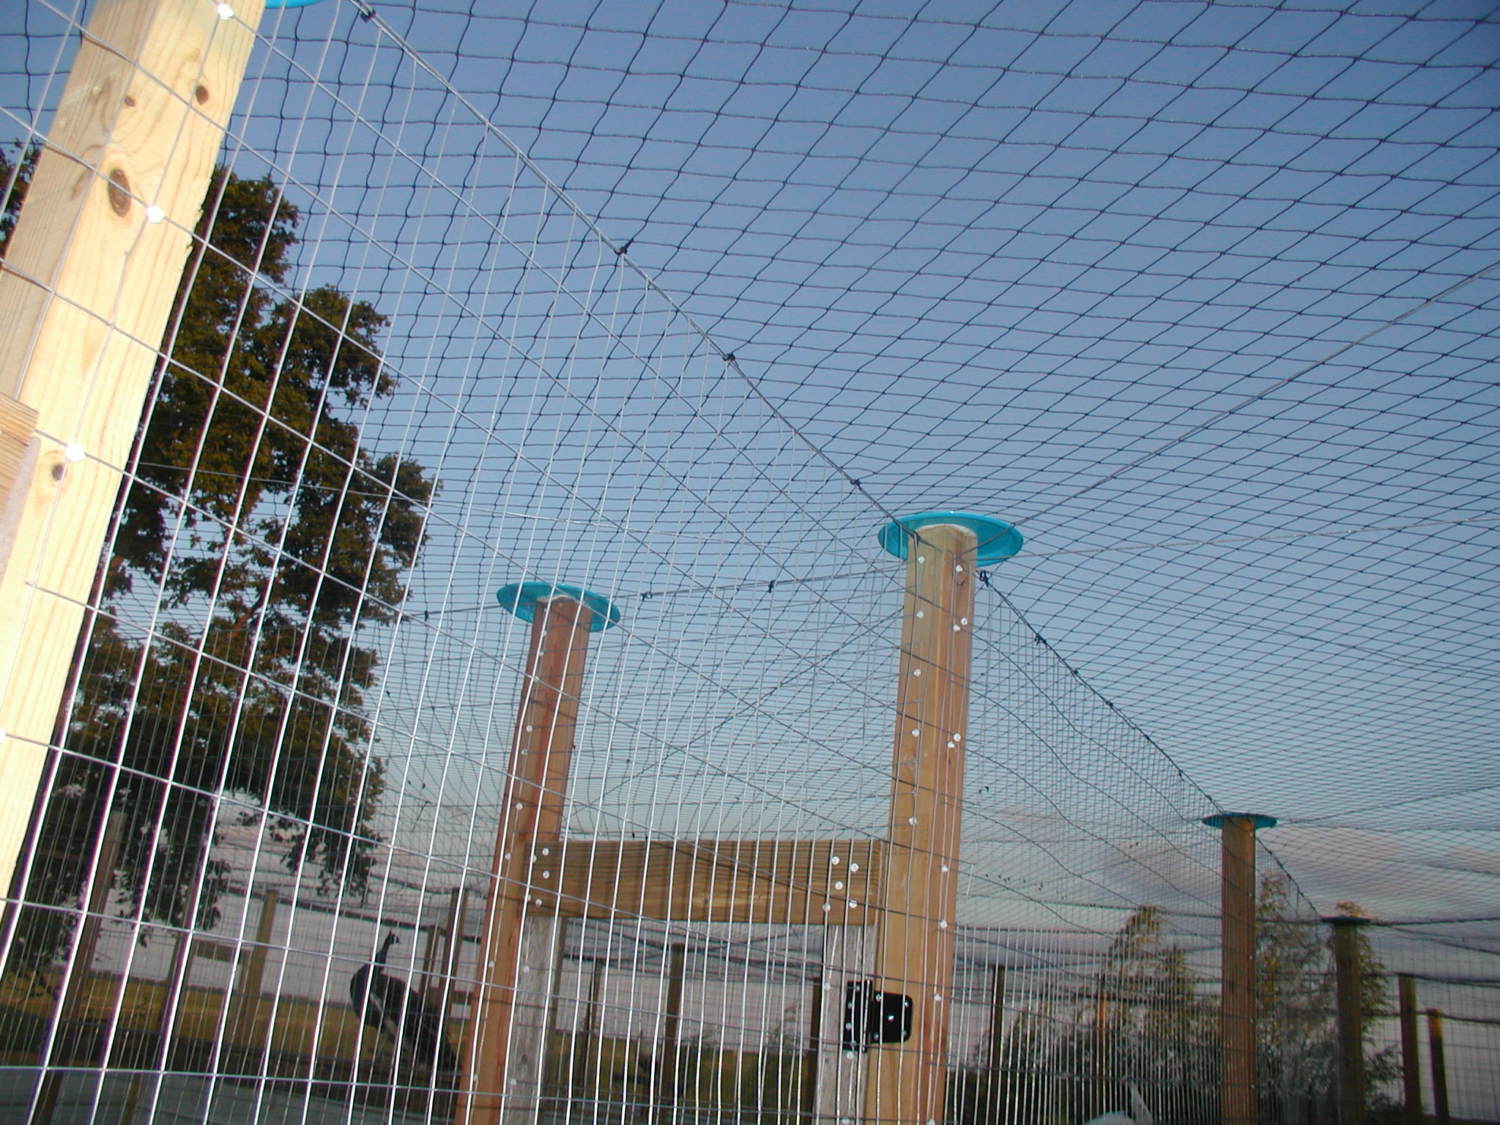
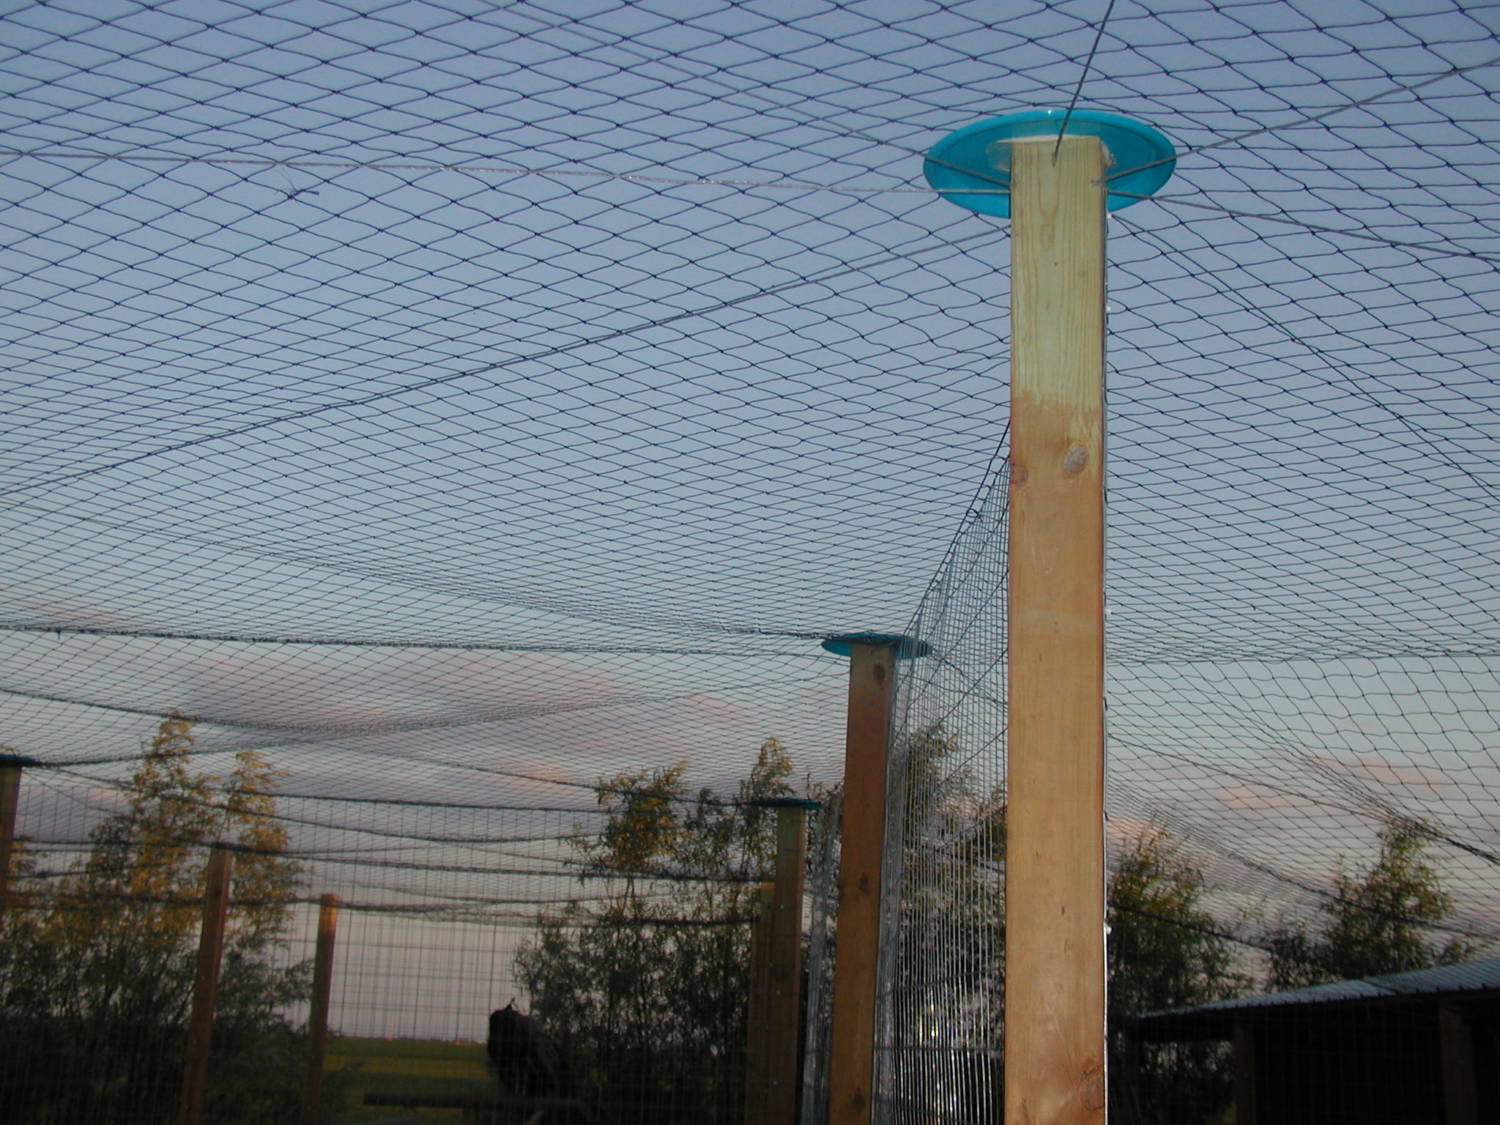
") Of course some of my yard looks like a giant plumbing nightmare! HA!
Of course some of my yard looks like a giant plumbing nightmare! HA!