We just moved. Lets give you the stats on the coops before and after...
Old Place:
1 6x8 shed/coop
1 30x12 shed, divided down to 22x12 for the layers 8x12 for a feed/brooding room
1 4x8 Cochin Condo
1 10x12 "stall pen" in the barn
1 6x12 dog kennel w/ dogloo
New place:
(* means it came with us)
1 6x12 dog kennel w/ dogloo *
1 4x8 Cochin Condo *
1 10x10 coop
1 10x8 metal shed
1 4x4 coop w/ 4x6 covered run
1 10x12 metal shed (unusable)
1 20x6 dog kennel w/ no housing (unusable)
I lost a lot of space with the move. I can't free range now, either because the neighbor refuses to keep his dogs on his property.
I couldn't get my mom's boyfriend to haul my 6x8 coop with his rollback (the way it got to the old place). I am so ticked about this. I could get my overcrowded sheds issue solved if I had this coop. Instead... Well, I have very choice words for this idiot. He cost me a $1000-1200 shed I now have to replace.
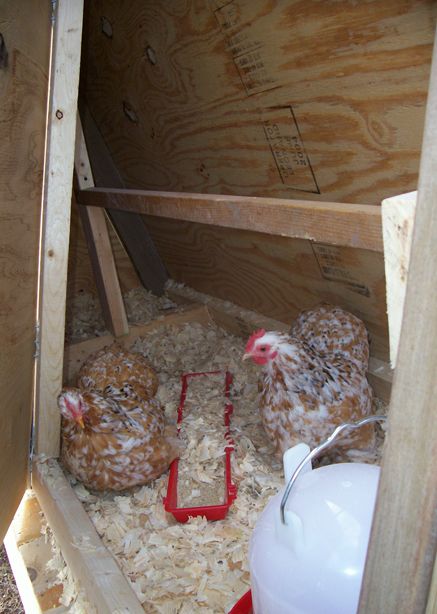
With the winter weather, I can't use the dog kennel with the dogloo because I refuse to ruin another tarp up here on this windy hill. Plus, I need to put my bantam Cochins back together as breeding sets because they are finally laying. I have no place to put my bachelor boys. I also have to many chickens in the 10x10 coop. I have to many in the 4x4 coop. I have my 6 BW/W Ameraucanas in the smaller metal shed but it has no windows, so I have to keep the door cracked for air and light for them. Yes - a window installation is on the agenda but I can't get my miter or table saw out yet.
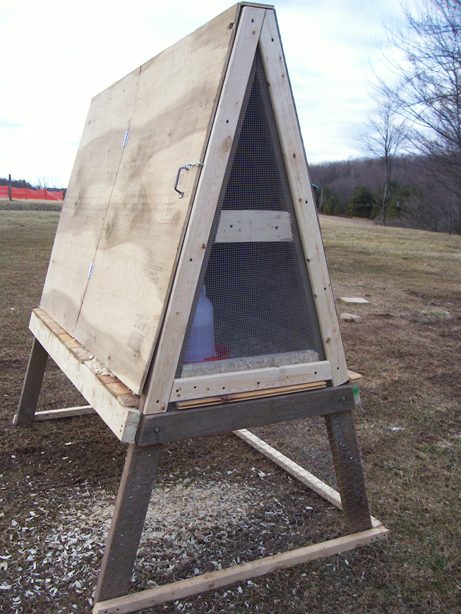
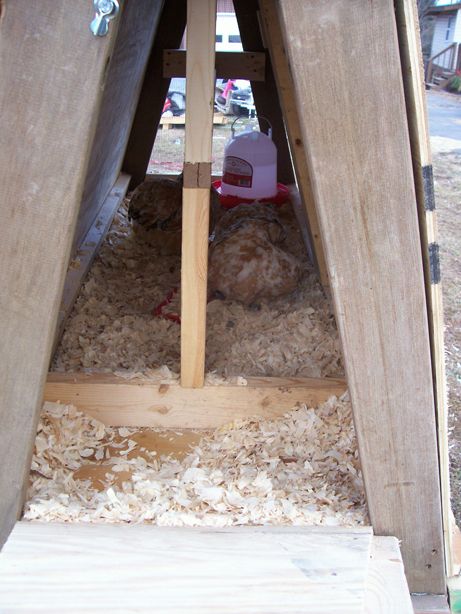
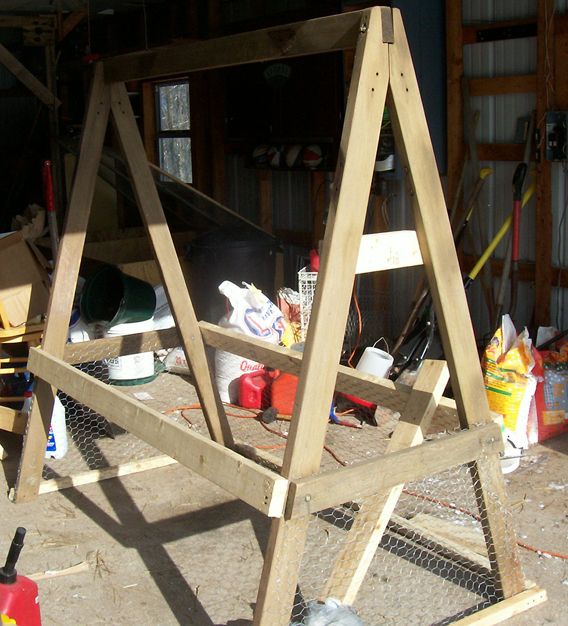
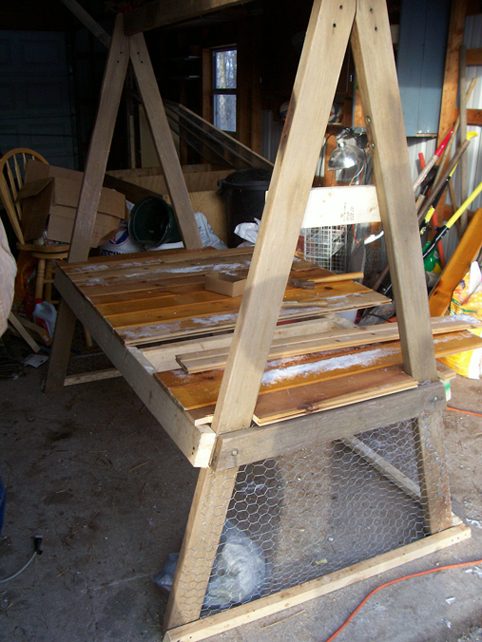
So, I am going to build a little A-Frame coop for the bachelor bantam Cochins. When we moved ehre there was a broken, wooden swing frame (for a porch like swing) in the yard. We almost threw it out until my chicken brain kicked in. I kept it.
Today we took off the extra supports and fixed the legs that were no longer attached. I put on the chicken wire for the bottom run. I know, chicken wire is cheesy but it's what I have from past projects. I plan on shutting the coop up at night anyways. I put 2x2's around the bottom on 3 sides (the 4th will be a door) and 2 2x4's on the long ends for the floor supports to attach to.
I'll get pictures up tomorrow. Hopefully it will be usable as soon as tomorrow! This should be quite and easy build! I hope...
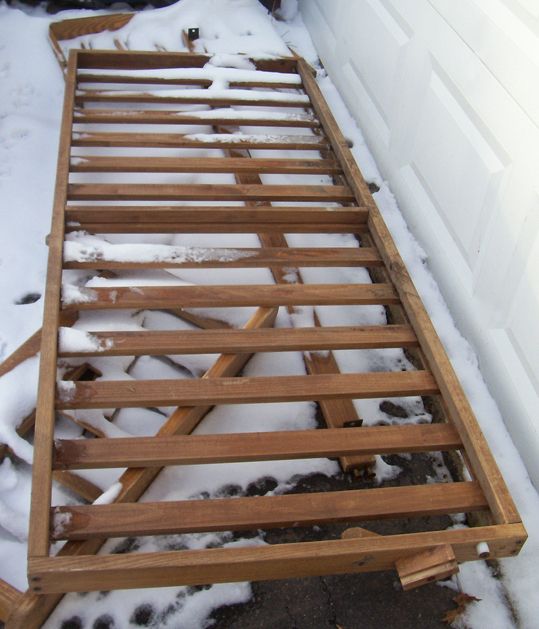
On top of this, the old tenants left two homemade pallet like things. It's basically a shed floor, so I am going to use them for coops, too! Both are 4x8. These should fix my space issue. Now, to come up with materials to build!
Old Place:
1 6x8 shed/coop
1 30x12 shed, divided down to 22x12 for the layers 8x12 for a feed/brooding room
1 4x8 Cochin Condo
1 10x12 "stall pen" in the barn
1 6x12 dog kennel w/ dogloo
New place:
(* means it came with us)
1 6x12 dog kennel w/ dogloo *
1 4x8 Cochin Condo *
1 10x10 coop
1 10x8 metal shed
1 4x4 coop w/ 4x6 covered run
1 10x12 metal shed (unusable)
1 20x6 dog kennel w/ no housing (unusable)
I lost a lot of space with the move. I can't free range now, either because the neighbor refuses to keep his dogs on his property.
I couldn't get my mom's boyfriend to haul my 6x8 coop with his rollback (the way it got to the old place). I am so ticked about this. I could get my overcrowded sheds issue solved if I had this coop. Instead... Well, I have very choice words for this idiot. He cost me a $1000-1200 shed I now have to replace.
With the winter weather, I can't use the dog kennel with the dogloo because I refuse to ruin another tarp up here on this windy hill. Plus, I need to put my bantam Cochins back together as breeding sets because they are finally laying. I have no place to put my bachelor boys. I also have to many chickens in the 10x10 coop. I have to many in the 4x4 coop. I have my 6 BW/W Ameraucanas in the smaller metal shed but it has no windows, so I have to keep the door cracked for air and light for them. Yes - a window installation is on the agenda but I can't get my miter or table saw out yet.
So, I am going to build a little A-Frame coop for the bachelor bantam Cochins. When we moved ehre there was a broken, wooden swing frame (for a porch like swing) in the yard. We almost threw it out until my chicken brain kicked in. I kept it.
Today we took off the extra supports and fixed the legs that were no longer attached. I put on the chicken wire for the bottom run. I know, chicken wire is cheesy but it's what I have from past projects. I plan on shutting the coop up at night anyways. I put 2x2's around the bottom on 3 sides (the 4th will be a door) and 2 2x4's on the long ends for the floor supports to attach to.
I'll get pictures up tomorrow. Hopefully it will be usable as soon as tomorrow! This should be quite and easy build! I hope...
On top of this, the old tenants left two homemade pallet like things. It's basically a shed floor, so I am going to use them for coops, too! Both are 4x8. These should fix my space issue. Now, to come up with materials to build!
")