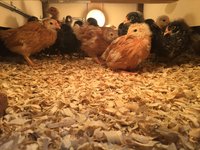
AKA hover brooders. I stumbled across mention of it in a different thread that was a few years old, followed the link, and decided to give it a try. This thing is, for me, 100x better than brooding chicks in my basement.
We don't have a garage, so that's not an option for me to have chicks OUT of the house. I have brooded chicks in a kiddie pool with improvised walls. In a plastic dog crate. And in a galvanized industrial brooder (that we got with a bunch of incubating stuff after they had storage unit auctions, and someone craigslist-ed all the chicken stuff they accidentally bought.) The result is always the same: chick dust all over EVERYTHING in my basement, and after about 3 weeks I have to clean the brooder daily or my whole house smells like chick poo. I don't usually get 5 or 10 chicks at a time, for which MHP would be a great option. NOPE. When I get chicks, it's severe chicken math, and it's more like 30+ at a time. What I DO have is an extra small grow-out/breeder/isolation section in my main coop shed. It's 3ft x 8ft, and the exterior walls are insulated because Northern Michigan gets cold, and where I live it's always windy.
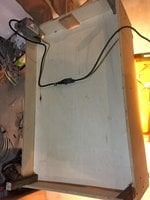
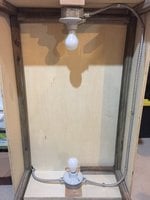
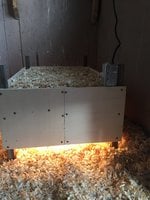
Knowing my collector's ways, I didn't have DH build our brooder the standard 2x2 size, I had him build it 2x3. This used one half-sheet of plywood plus 2ft of some scrap 1x4 we had after I goofed on the cut-pattern and we had to connect 2 short pieces, and I used old porch ballusters that we had laying around for the legs. This size gives me 6in of clearance on each side of the brooder so chicks can't pile up in a corner and get trapped, and I kept it about 6-8in off the back wall for the same reason. We used metal boxes, porcelain fixtures, and regular incandesant 100watt bulbs. DH is an electrician, so he decided to use scrap metal-clad wire for the wiring connecting the 2 bulbs, but if you just did 2 separate cords/plugs you wouldn't need to do this as there wouldn't really be any wiring in the "chick area."
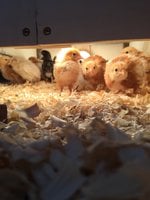
I turned the brooder on for about 3 hours before adding chicks. I put a remote thermometer sensor under it and it was reading right around 90 degrees. At the time our daytime temps were in the upper 20s and nighttime lows were in the teens. During the 2nd week, it was 8 degrees one night (which was about 12 degrees colder than the forecast). I put a combination of 34 1-week-old and 3-week-old chicks in. We are starting week 3 of them being outside. I have had 0 losses. Yesterday I used 4 pavers to prop the brooder up a little higher because they are getting bigger and I'm wanting to wean them off the heat a bit more. All of the chicks are almost fully-feathered, although their heads are still pretty down-y still. Adding pics to the 2nd post since they're all on my phone.

