Coop de Ville Dave & Jennifer Hennessey
Broad Run, Virginia
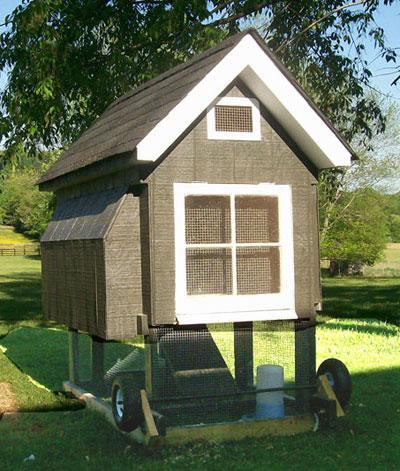
The ground floor is the kitchen area. There are two opening doors on the right side, and one on the rear. All sides are covered with hardware cloth (2 squares/inch) which is stapled in place. A "stairway" provides access to the second floor.
The second floor is the nesting area / family room. The window, which was recycled from the basement of a 1939 house, opens outward from the bottom. A hardware cloth screen a few inches inboard allows the window to be propped open during hot weather and still keep predators out. The nesting boxes are on the left side, with an "egg port" opening door. The right side is an opening panel to provide access for the "maid service".
The attic is the sleeping area. The chickens roost on the 2x2 floor joists in the attic.
This photo shows the final "flip-under" wheel design.
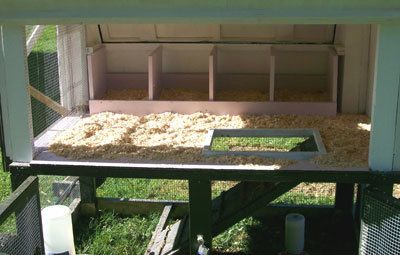
A shot of the interior after spring cleaning.
The nesting boxes are a removable unit, which makes cleaning easier - just remove them and hose down the interior.
I later added the 1"x 1" frame around the stairway opening to keep the wood shavings from all falling down the stairway hole.
Jennifer wanted a coop on wheels so we could move it around the yard. During construction, it slowly became more and more deluxe. Deluxe coop on wheels? The name Coop de Ville just popped into my head.
Coop de Ville was designed for 4-6 chickens. We live in a semi-rural area, and they free-range outside most of the day, but return to the kitchen for a couple of meals during the day. Just before dark, they return and head for the attic.
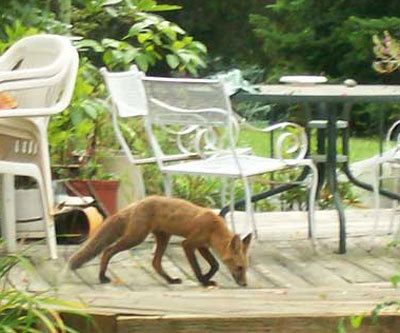
The coop had to be sturdy and secure, since we get some foxy visitors from time to time.
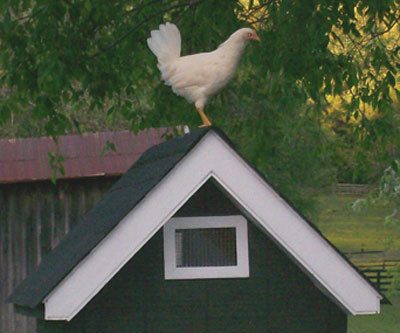
What kind of hood ornament does a chicken tractor have? A chicken, of course.
Here's "White" auditioning for the job...
Construction
Dimensions are 3' wide by 5' long. The bump-out for the nesting boxes is about 6", allowing the 2nd story floor to be covered with a single sheet of plywood or OSB. Each story is 24" high.
The 2x4 shown at the top left is continued around the whole structure
The wheel design shown here did not work well, and was modified later. See "Lessons Learned".
The roof has a 6/12 pitch which makes for easy 45° cuts, and allows sufficient height in the attic for roosting.
The gable ends really spruce up the coop, but they have functional purposes as well. They keep rain out of the vents (front & rear) and window, and they provide a lifting point needed for the ultimate wheel design.
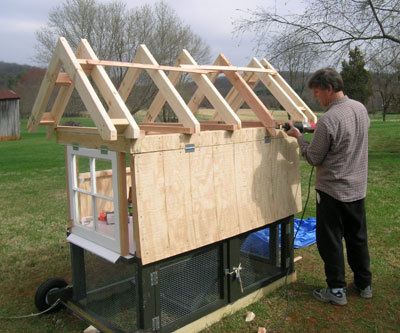
I used 3/8" CDX plywood on the roof, and stapled 30 lb. tarpaper on it. Then came the asphalt shingles (cheapest I could find). I cut regular shingles to form the cap over the ridge.
The exterior is 3/8" T1-11 which was the most expensive part of the project. I bought a 2-gallon pail of Kilz-2 on sale, and liberally applied one or two coats on all surfaces. The "Oops" shelf at Home Depot yielded a gallon of dark green exterior latex for a whopping $5.
The chickens "free-range" around the yard most of the time. The run allows the girls to be outside when we're not home.
The bottom of the coop is "winterized" with plywood panels to keep the wind out - they'll come off in the spring.
Lessons Learned
This thing is very heavy! A corrugated metal roof would have been much lighter.
Work out the wheel design before you get too far. My original design was to lift one end, and the stationary wheels would act like a hand-truck does. But the finished coop is way to heavy for simply lifting one end. Also, it worked great on the garage floor, but got stuck on slightly uneven ground. I've modified the wheel design to a "flip-under" system one one end. I'm going to add another flip-under set of wheels on the other end.
The "maid service panel" would have been nicer if it was two doors opening outward instead of one door opening upward.
Cut the rafter tails before nailing the roof assembly into place (duh) But a Sawzall fixes most things...
Enjoy yourself! I spent many enjoyable hours building this. It didn't quite turn out the way I had envisioned it, but so what? We've got a nice coop, it looks good, and the tenants pay the rent on time.
Excellent display pictures and story line.
Really good build descriptions.
The last section was much appreciated.
A design layout would have been helpful.
Thanks for describing this coop in detail, and sharing what you would have done differently. One point that seems like a great space-saver is that your roof is tall enough to have a roost up pretty high in there. Thanks so much for posting!
I am designing a tractor using the best of all these great creations. I will certainly be using some of your visions. Like the nesting quarters enclosed and living quarters open, and the egg port door. Most excellent !!