HomeMade Brooder
After deciding we were hooked on hatching we decided
to build a durable brooder that we could us over and over.

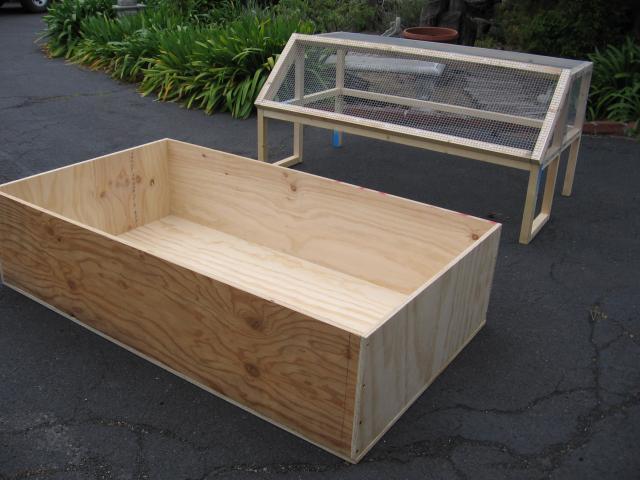
We decided to make it in 2 sections that could be taken
apart for cleaning.
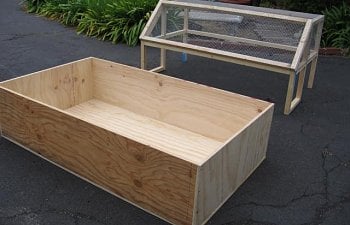
We first built the bottom section, using 2 sheets of
4' x 8' exterior plywood.
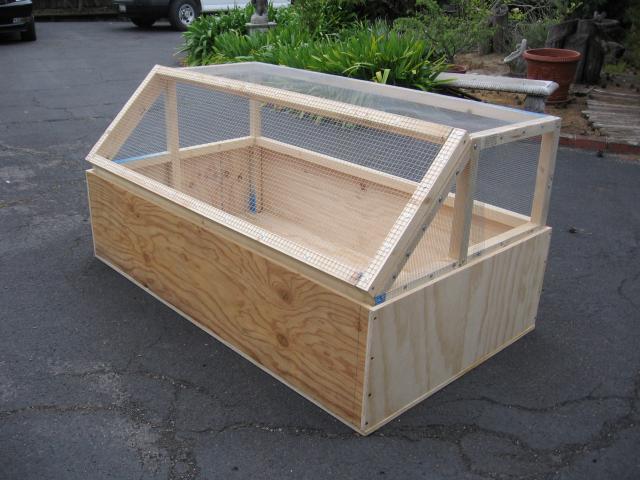
The bottom measures 60" long x 34" wide and 14" deep.
We screwed the box together for added strenght.
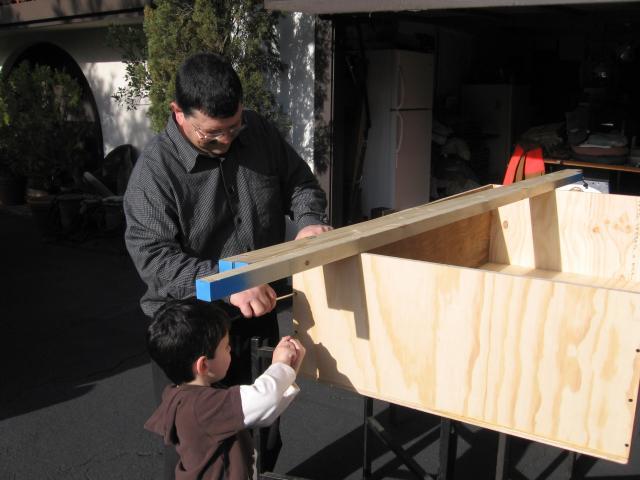
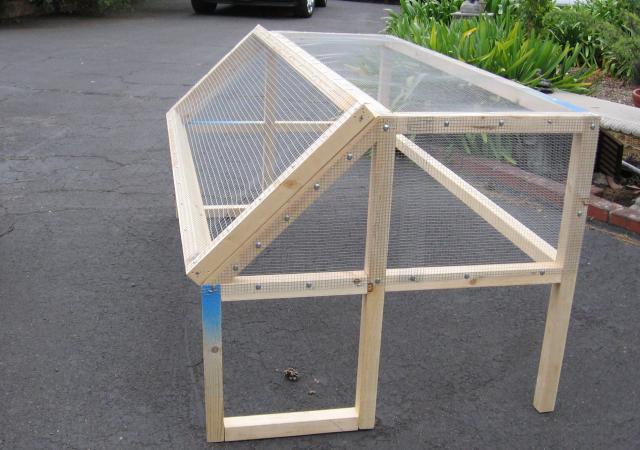
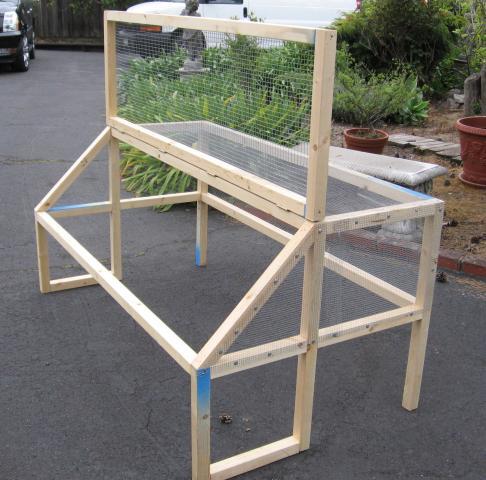
We then built the upper portion of the brooder.
We used 2" x 2" x 8' lumber. 8 Pieces in all.
The top we made just slightly smaller than the bottom so that the top could
fit inside the bottom box without any gaps.
The top and sides we used 1/4" mesh wire and the opening front door we used 1/2" wire mesh
so that the visibilty would be better.The top portion measures 28" tall.
We started the slope for the door 19" from the back.
One thing we did to keep a tight fit between the top and bottom is that the 2x2 that goes around the perimeter
of the upper portion. We made sure half of the 2x2 was below the edge of the lower box and the other half of the 2x2 was above
the edge of the lower box.
The front door runs the full lenght of the brooder.
It is attached at the top by 4 hinges.
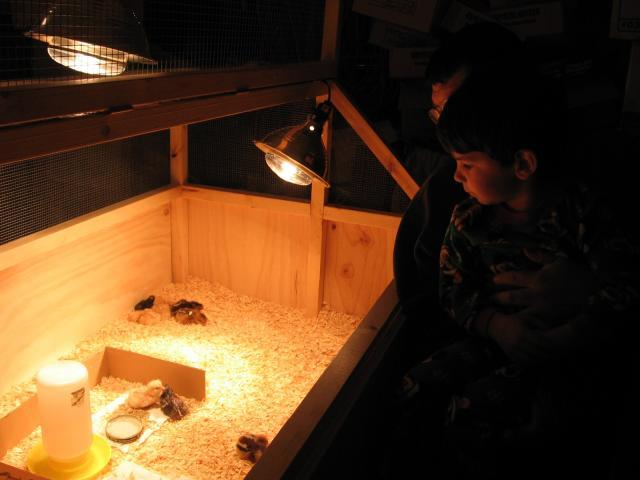
Once the 2 bottom and top are constructed
you can just drop the top right into the bottom and you have a 2 piece
brooder that is really easy to clean and with the large front opening you have
great access to the inside of the brooder.
It took took 2 full days to construct just because of the tight fit we tried to acheave between the top and bottom.
It really needs to be very square. That takes time.
Over all it cost about $125.00 to construct.
It adds up quick!!!
Link to BYC
After deciding we were hooked on hatching we decided
to build a durable brooder that we could us over and over.
We decided to make it in 2 sections that could be taken
apart for cleaning.

We first built the bottom section, using 2 sheets of
4' x 8' exterior plywood.
The bottom measures 60" long x 34" wide and 14" deep.
We screwed the box together for added strenght.
We then built the upper portion of the brooder.
We used 2" x 2" x 8' lumber. 8 Pieces in all.
The top we made just slightly smaller than the bottom so that the top could
fit inside the bottom box without any gaps.
The top and sides we used 1/4" mesh wire and the opening front door we used 1/2" wire mesh
so that the visibilty would be better.The top portion measures 28" tall.
We started the slope for the door 19" from the back.
One thing we did to keep a tight fit between the top and bottom is that the 2x2 that goes around the perimeter
of the upper portion. We made sure half of the 2x2 was below the edge of the lower box and the other half of the 2x2 was above
the edge of the lower box.
The front door runs the full lenght of the brooder.
It is attached at the top by 4 hinges.
Once the 2 bottom and top are constructed
you can just drop the top right into the bottom and you have a 2 piece
brooder that is really easy to clean and with the large front opening you have
great access to the inside of the brooder.
It took took 2 full days to construct just because of the tight fit we tried to acheave between the top and bottom.
It really needs to be very square. That takes time.
Over all it cost about $125.00 to construct.
It adds up quick!!!
Link to BYC
 Thank you!