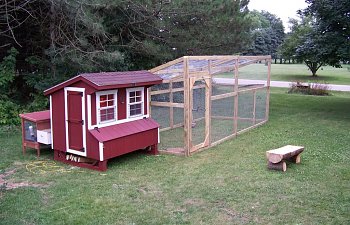
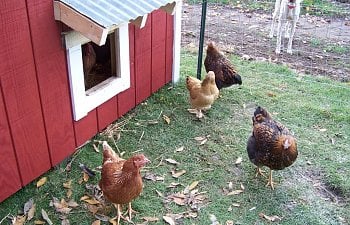
[FONT=verdana,geneva]One day my family decided I had finally lost my mind completely. That was the day I announced that not only did I have chickens coming via the United States Post Office, but that I had also ordered a chicken coop. My husband was a carpenter for 15 years. He was not happy that I ordered a coop. Unfortunately, neither was I once I started using it. It's a great coop, don't get me wrong...but I'm disabled and a 4' x 6' coop with a 1' step-up and definitely NO room for a walker or wheelchair (not currently being used, but not out of the question in the near future)... Let's just say it quickly became "The Crib" and will ultimately be used in the future to winterize my Silkies! At the moment, it houses both my Silkies and my Polish and works fine for this 'lighter' group of chickens.[/FONT]

My husband did build a fantastic custom screen door on The Crib with a custom Silkie handle...and that has been a wonderful addition!! And, yes, it really was 100 degrees that day!
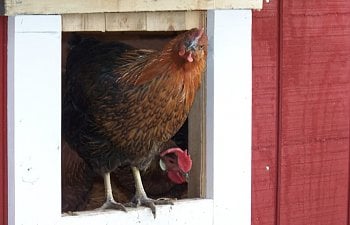
Next bright idea: Move the layers to the shed in our backyard. Did I mention we have German Shorthaired Pointers? BIRD dogs. This was also definitely NOT the final answer!! Although The Crib does work nicely for the Polish and Silkies...the shed wasn't going to work out for the larger birds!! In the picture is Charlie, my beautiful GSP and Jake, my beautiful Buff Orpington Roo. I don't think they care for each other! LOL!
In the meantime, my mother-in-law was distraught over the fact we no longer had a shed. She's a very Type A and did not like the lawn mower being in the garage. LOL! Oh, if she only knew. I have a husband, 2 teenagers, 5 German Shorthaired Pointers and 27 chickens. A lawn mower in my garage wasn't much of a concern. However...
She ordered us a brand new shed kit as an early Christmas present. An 8' x 8' gambrel-roofed shed. A CHICKEN COOP in the making!! My husband was disappointed that the new Coop was a kit - he really wants want to do his own Coop from scratch, but we made it work!
It was delivered on a cool morning in October...
[FONT=verdana,geneva]The driver placed it in our driveway. It definitely didn't look like much yet! Nothing but a pile of lumber, shingles and no directions! I downloaded the directions from Menards.com, which is where my mother-in-law ordered it from. No problem.[/FONT]
Hubby got busy reading the directions - which were really messed up & even some of the dimensions for cutting were off. So happy my husband knew what he was doing!! I was in our dining room & caught this picture of him going over what I had printed. See how small The Crib is?? I'm way too serious a chicken lover to even consider that a coop!! LOL!
Our son cut the tresses, while my husband & I put the frames together.
The next day, my husband (Chuck), a friend of ours (Dustin) and I put the siding on the front & back in our driveway.
I smashed my thumb hammering down the flooring...but not bad enough to lose my nail. LOL!
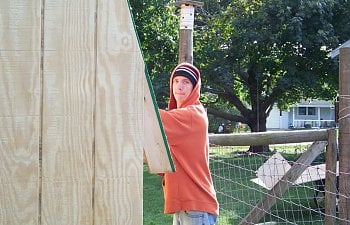
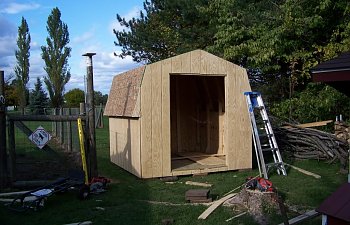
We got the sides up without any trouble. At this point we were in the East side yard where the Coop will permanently be located.
Daizy, our crazy Cockatiel, watched from the window...
During construction of The Coop, the chickens never complained once. They enjoyed some dog-free time in the backyard. Jake is very protective over his ladies!! LOL!!
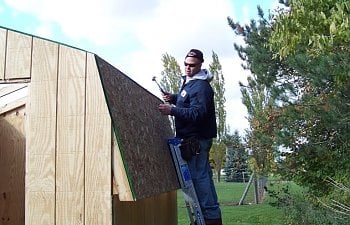
Our son Cole and my husband Chuck put the roof on next...
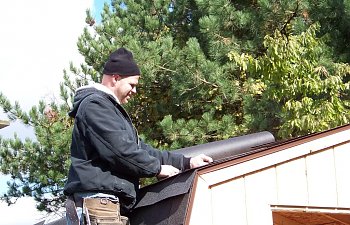
Next came the tar paper & shingles...I handed Chuck shingles & he did all the ladder work. LOL!
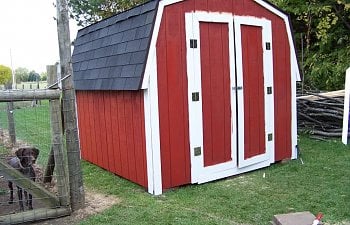
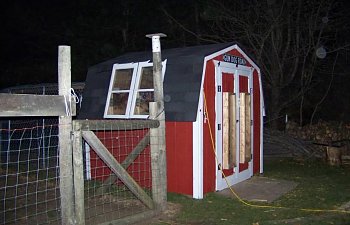
Chuck & I put the doors together, painted the trim and added it to the Coop.
I spent a day painting while Chuck slept - he works 3rd shift. I didn't quite get it done, but that was mostly due to rain. Blech. Still have some touch-up on the trim.
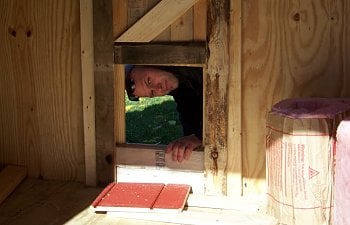
The next weekend, Chuck made a custom chicken door. The door is on a pulley and can be open & shut right inside the Coop, thereby eliminating the need to go all the way in or open/shut from the outside.
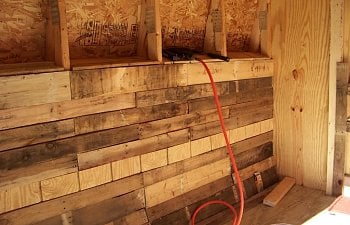
The kids & I insulated the inside, using store bought insulation and skid wood.
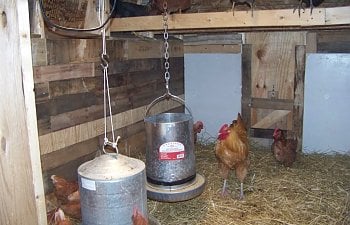
Chuck put in two 8' long roosts and hung the feeder and waterer. After doing a lot of research, we decided to place both roosts at the same height, a little over a foot apart and higher than their nesting boxes. This has worked out great!!
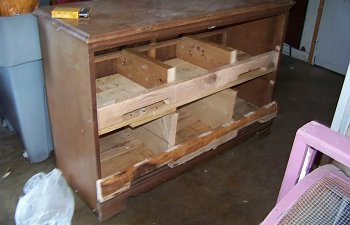
We turned an old, unused dresser into nest boxes.
Chuck made a cute overhang for the chicken door.
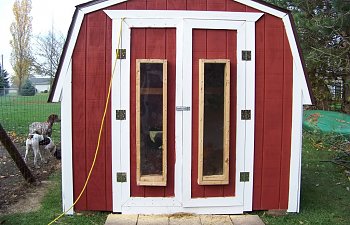
He also added 2 wonderful windows on the front doors - both for natural sunlight & to help make the doors a little tougher. I still need to touch-up the trim paint, so when I get out the supplies, I'll paint the window frames too.
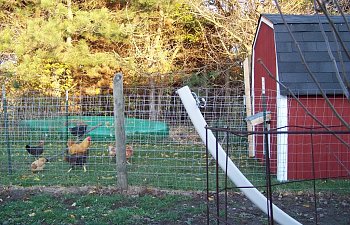
We have a temporary play yard for the chickens. It's not predator-proof and the chickens can fly out if they want, but it'll do for now.
Aussie, my Black Star, will tell you this Coop is great!
We have added two new windows...soon to add two more on the opposite side. Chuck's going to build a small dormer roof for over the new windows, using more of the corrugated steel roofing we recycled.
You can see in this picture (a li'l bit) the dog kennel we turned into a chicken yard. There is poultry fencing wrapped around it (24" high) and also covering the entire top to keep wild birds out...we occasionally have wild turkeys...don't want them in with my chickens! LOL! The chickens are secure & as we get opportunities, we will be adding more kennels to give them even more yard space!
And the eggs just keep coming!
Things I will change: Chuck will need to install electricity so I don't have an outdoor extension cord running from the house to the coop!! LOL! We will also be installing more windows - some which open with screens and we still need to add the 2 vents. One will go over the front doors and one on the back. My husband is also making a custom feeder and auto waterer to help me out.
Things I would do differently if building from scratch: I would make it larger (a coop can never be too big!!). I would also have a tac area for storing feed, cleaning supplies, etc. I guess that will have to wait until we finish Coop #2 (10' x 12' for the Polish with tac area). All in all, I'm pleased with the way Coop #1 turned out.

My husband did build a fantastic custom screen door on The Crib with a custom Silkie handle...and that has been a wonderful addition!! And, yes, it really was 100 degrees that day!


Next bright idea: Move the layers to the shed in our backyard. Did I mention we have German Shorthaired Pointers? BIRD dogs. This was also definitely NOT the final answer!! Although The Crib does work nicely for the Polish and Silkies...the shed wasn't going to work out for the larger birds!! In the picture is Charlie, my beautiful GSP and Jake, my beautiful Buff Orpington Roo. I don't think they care for each other! LOL!

In the meantime, my mother-in-law was distraught over the fact we no longer had a shed. She's a very Type A and did not like the lawn mower being in the garage. LOL! Oh, if she only knew. I have a husband, 2 teenagers, 5 German Shorthaired Pointers and 27 chickens. A lawn mower in my garage wasn't much of a concern. However...
She ordered us a brand new shed kit as an early Christmas present. An 8' x 8' gambrel-roofed shed. A CHICKEN COOP in the making!! My husband was disappointed that the new Coop was a kit - he really wants want to do his own Coop from scratch, but we made it work!
It was delivered on a cool morning in October...


[FONT=verdana,geneva]The driver placed it in our driveway. It definitely didn't look like much yet! Nothing but a pile of lumber, shingles and no directions! I downloaded the directions from Menards.com, which is where my mother-in-law ordered it from. No problem.[/FONT]
Hubby got busy reading the directions - which were really messed up & even some of the dimensions for cutting were off. So happy my husband knew what he was doing!! I was in our dining room & caught this picture of him going over what I had printed. See how small The Crib is?? I'm way too serious a chicken lover to even consider that a coop!! LOL!

Our son cut the tresses, while my husband & I put the frames together.

The next day, my husband (Chuck), a friend of ours (Dustin) and I put the siding on the front & back in our driveway.

I smashed my thumb hammering down the flooring...but not bad enough to lose my nail. LOL!

We got the sides up without any trouble. At this point we were in the East side yard where the Coop will permanently be located.

Daizy, our crazy Cockatiel, watched from the window...

During construction of The Coop, the chickens never complained once. They enjoyed some dog-free time in the backyard. Jake is very protective over his ladies!! LOL!!

Our son Cole and my husband Chuck put the roof on next...


Next came the tar paper & shingles...I handed Chuck shingles & he did all the ladder work. LOL!

Chuck & I put the doors together, painted the trim and added it to the Coop.

I spent a day painting while Chuck slept - he works 3rd shift. I didn't quite get it done, but that was mostly due to rain. Blech. Still have some touch-up on the trim.

The next weekend, Chuck made a custom chicken door. The door is on a pulley and can be open & shut right inside the Coop, thereby eliminating the need to go all the way in or open/shut from the outside.

The kids & I insulated the inside, using store bought insulation and skid wood.

Chuck put in two 8' long roosts and hung the feeder and waterer. After doing a lot of research, we decided to place both roosts at the same height, a little over a foot apart and higher than their nesting boxes. This has worked out great!!

We turned an old, unused dresser into nest boxes.


Chuck made a cute overhang for the chicken door.

He also added 2 wonderful windows on the front doors - both for natural sunlight & to help make the doors a little tougher. I still need to touch-up the trim paint, so when I get out the supplies, I'll paint the window frames too.

We have a temporary play yard for the chickens. It's not predator-proof and the chickens can fly out if they want, but it'll do for now.

Aussie, my Black Star, will tell you this Coop is great!

We have added two new windows...soon to add two more on the opposite side. Chuck's going to build a small dormer roof for over the new windows, using more of the corrugated steel roofing we recycled.

You can see in this picture (a li'l bit) the dog kennel we turned into a chicken yard. There is poultry fencing wrapped around it (24" high) and also covering the entire top to keep wild birds out...we occasionally have wild turkeys...don't want them in with my chickens! LOL! The chickens are secure & as we get opportunities, we will be adding more kennels to give them even more yard space!
And the eggs just keep coming!

Things I will change: Chuck will need to install electricity so I don't have an outdoor extension cord running from the house to the coop!! LOL! We will also be installing more windows - some which open with screens and we still need to add the 2 vents. One will go over the front doors and one on the back. My husband is also making a custom feeder and auto waterer to help me out.
Things I would do differently if building from scratch: I would make it larger (a coop can never be too big!!). I would also have a tac area for storing feed, cleaning supplies, etc. I guess that will have to wait until we finish Coop #2 (10' x 12' for the Polish with tac area). All in all, I'm pleased with the way Coop #1 turned out.


")