Like everyone else on here I wanted to have chickens, my husband... not so much! So, I hired a guy to build me a coop. Problem was that I don't speak 'carpenter' and he didn't speak 'chicken-crazed-wife-lingo' so my husband had to step in anyway and interpret! But to my wonderful hubby's credit, he knew exactly what I was talking about with all my hand-gestures and "thingy-mo-jigger" talk!
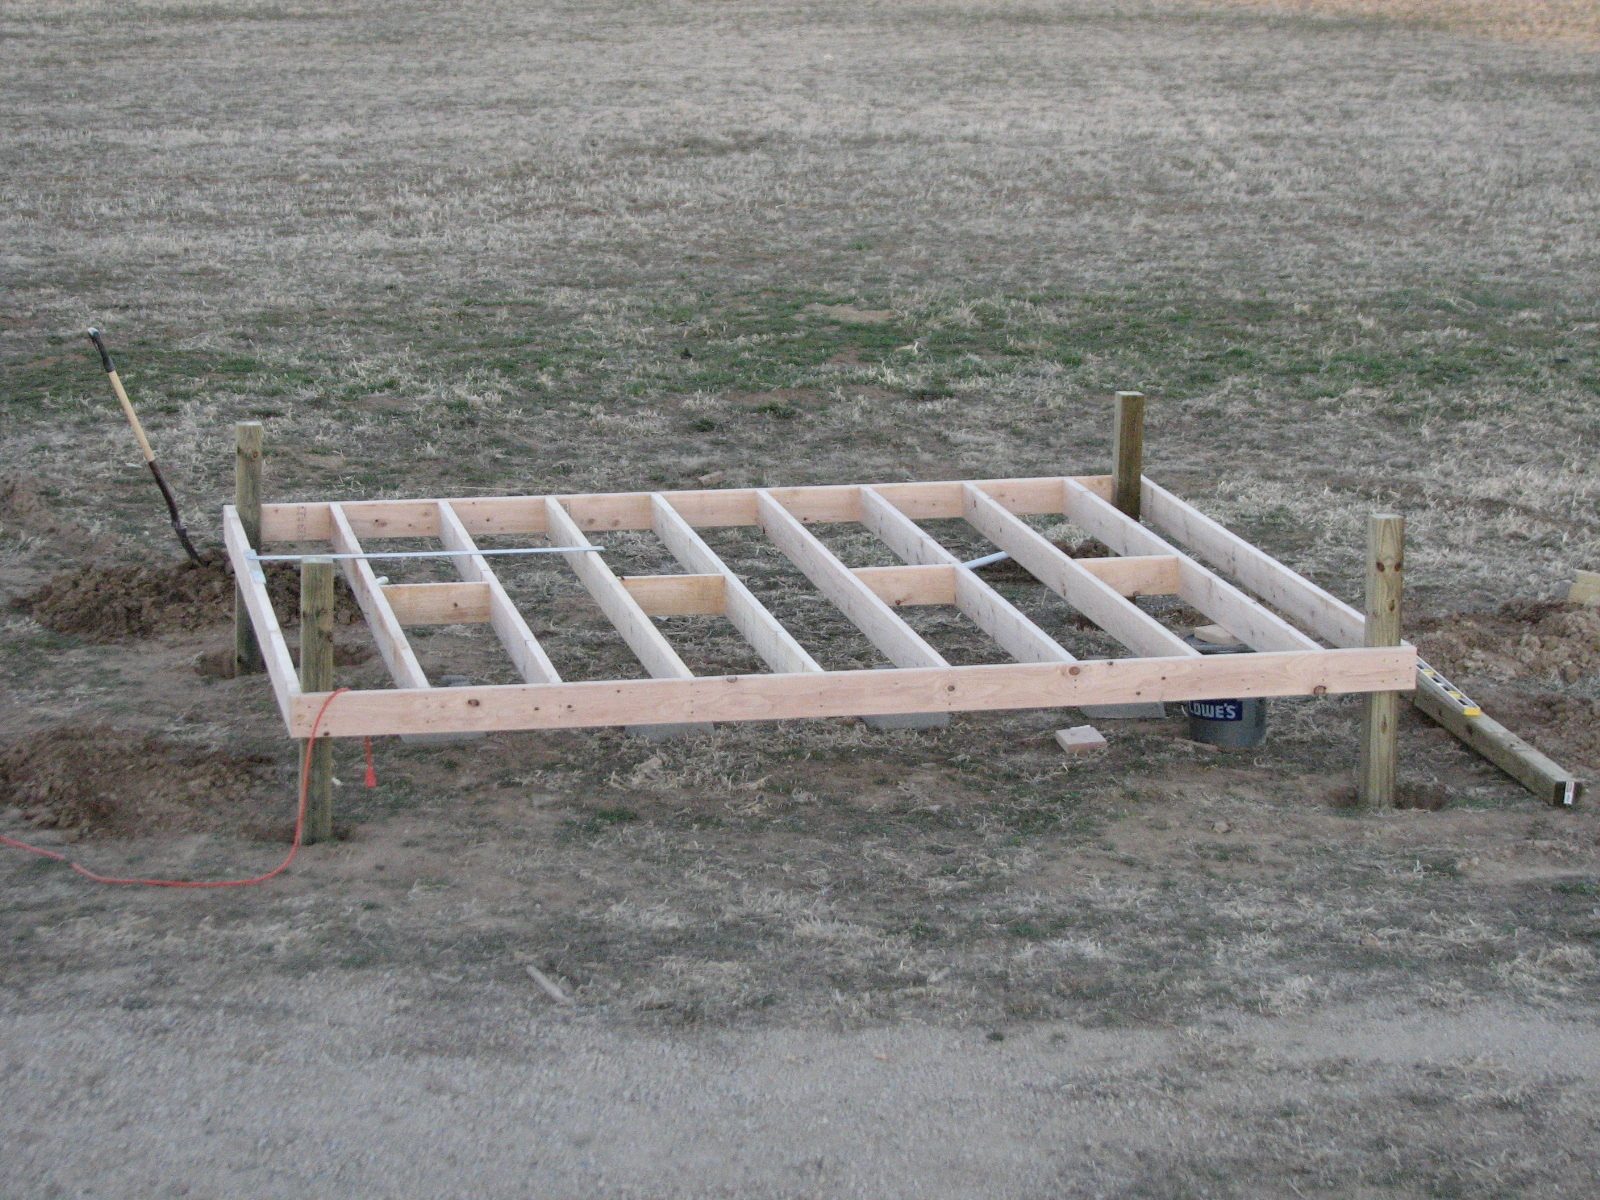
Like most folks on here, I went out and got my chicks as soon as I had HOA approval! Yep, the chicken came WAY before the egg! Work began on a 10x12 shed, elevated for predator control. Being elevated was also going to provide some shade for the ladies, like I have seen some other designs offer. But how in the world can you clean chicken dookie from under a 10x12 shed that is enclosed with chicken wire for predator protection........? Yeah, you can't do that very well, so the ladies will get shade from some trees that I will plant later and from their overhang from the roof (shown in later pics).

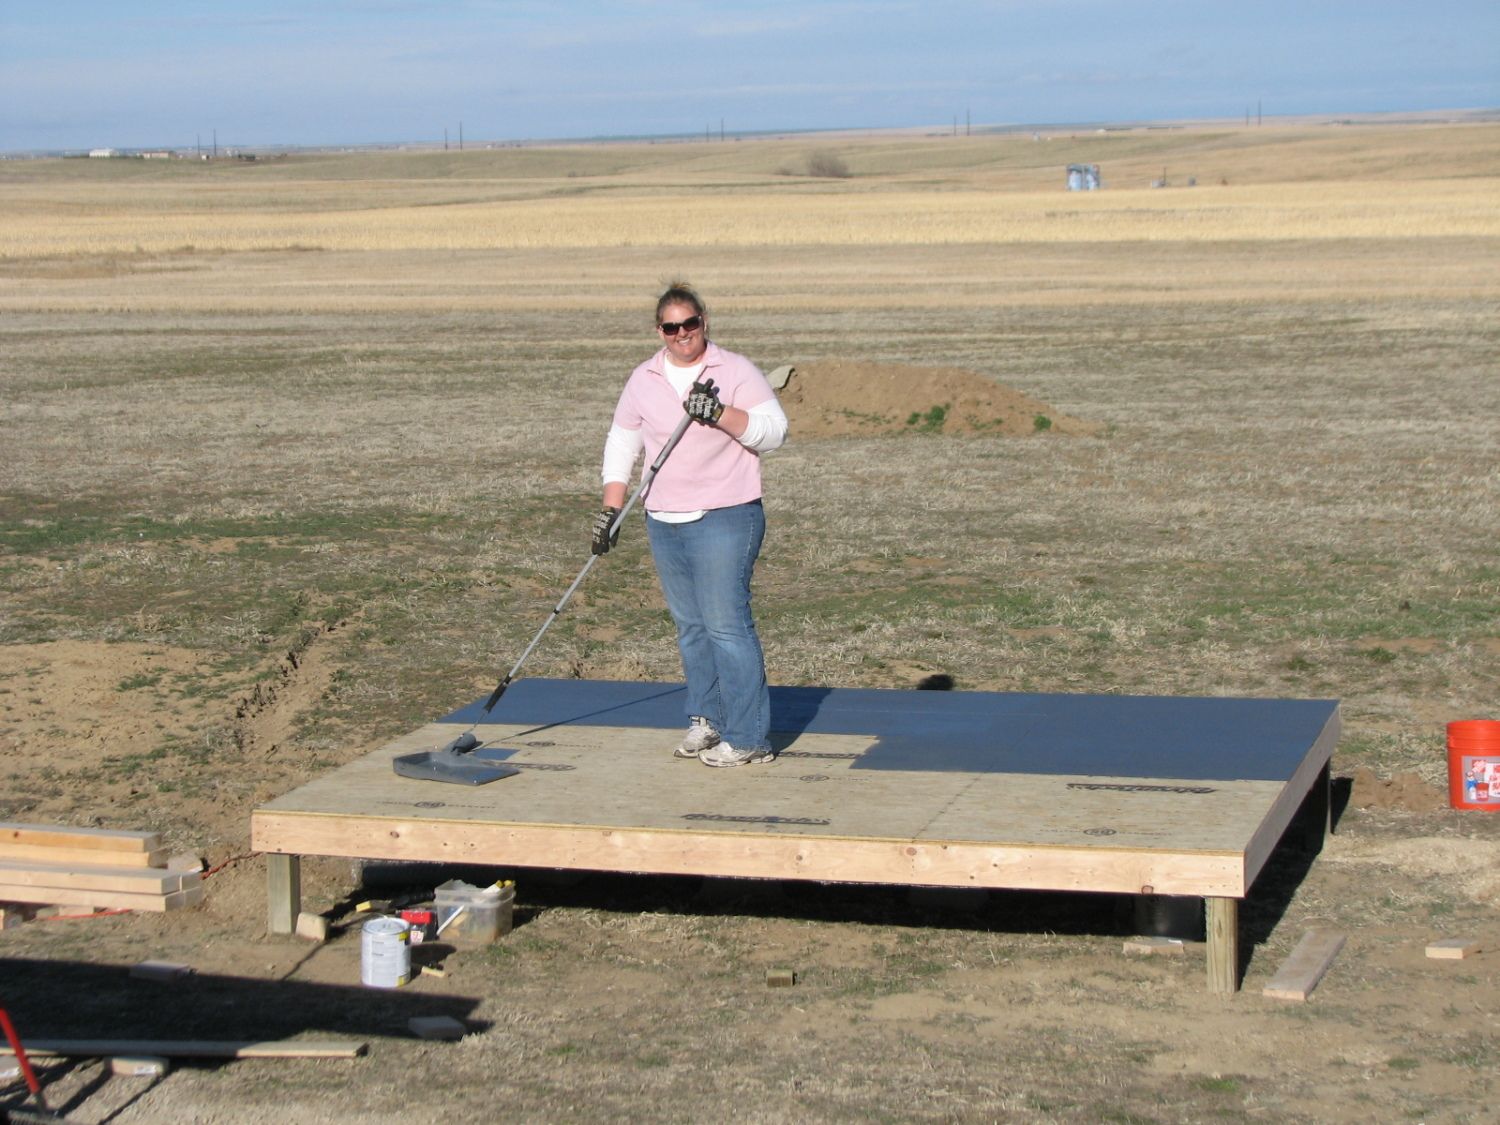
I decided to use an epoxy on the floor with a clear coat over it. This is the same thing some people use on their garage floors to make oil and gas spills easier to clean up. If it works for that stuff I'm hoping it works on chicken-poo too! Cheaper then floor covering and hopefully more durable. I went to the big box stores and looked for flooring remnant pieces, as some people on here suggest. Problem: the scrap pieces only come in 10x8 and are about $50-$70. I would have to buy two pieces to cover the entire 10x12 floor, so we are talking $100 +. The epoxy was $30 and the clear coat for it was about $10. AND, I have enough left over to epoxy the roost bars for easily cleaning, and the nest boxes to make it nice and dark in there so the ladies feel safe laying their eggs in there! Win - Win I think!!
While I paint and seal the floor my hubby digs out the area for the chicken run. The run will be 10x20 and will be south-facing to give the ladies the early morning light/warmth.
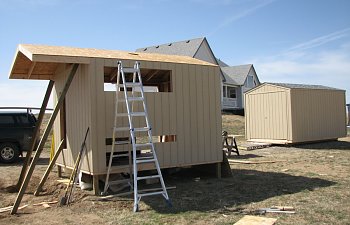
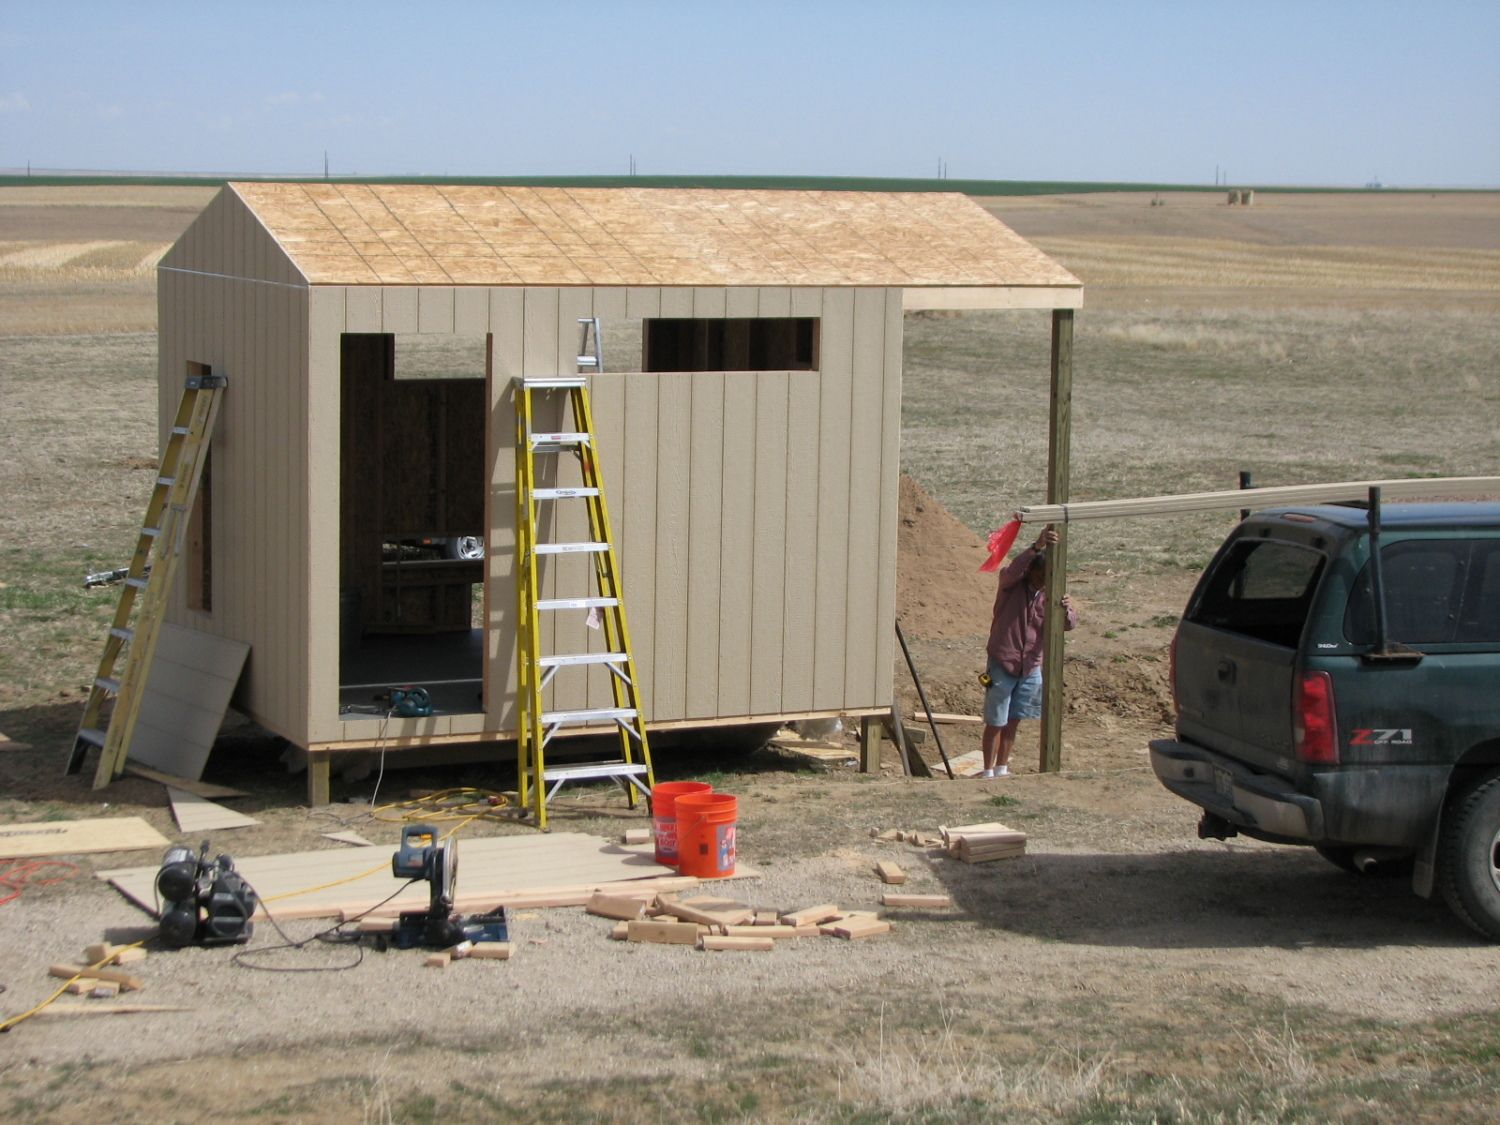
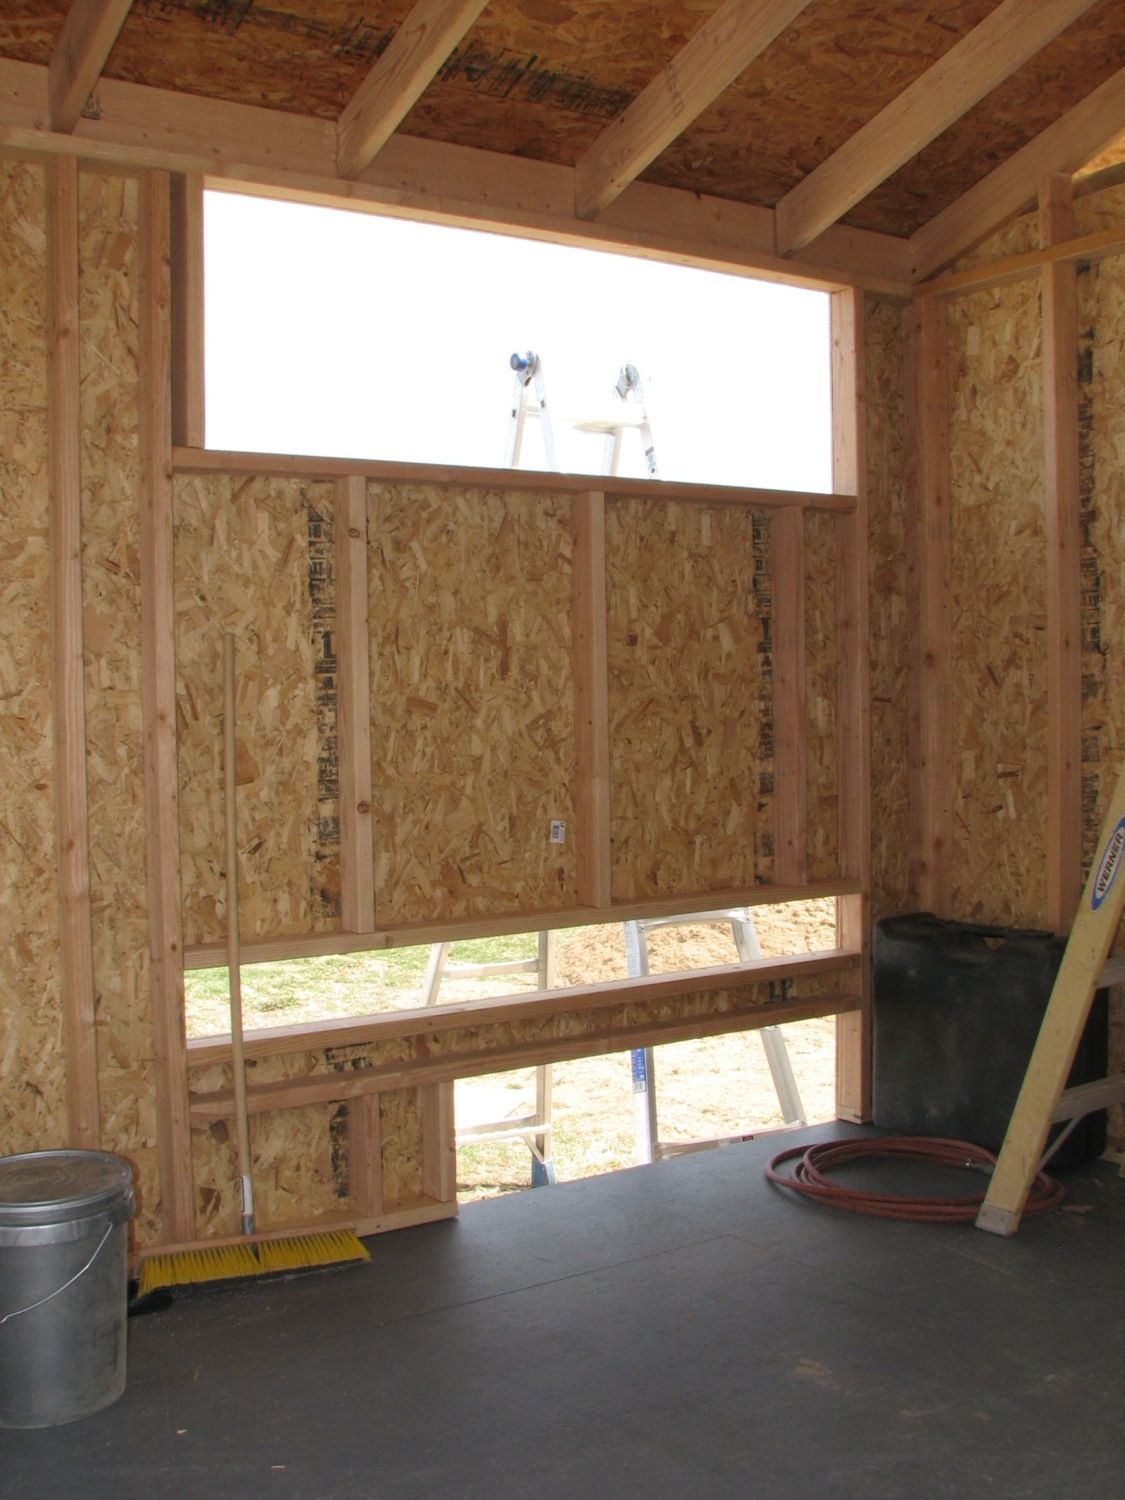
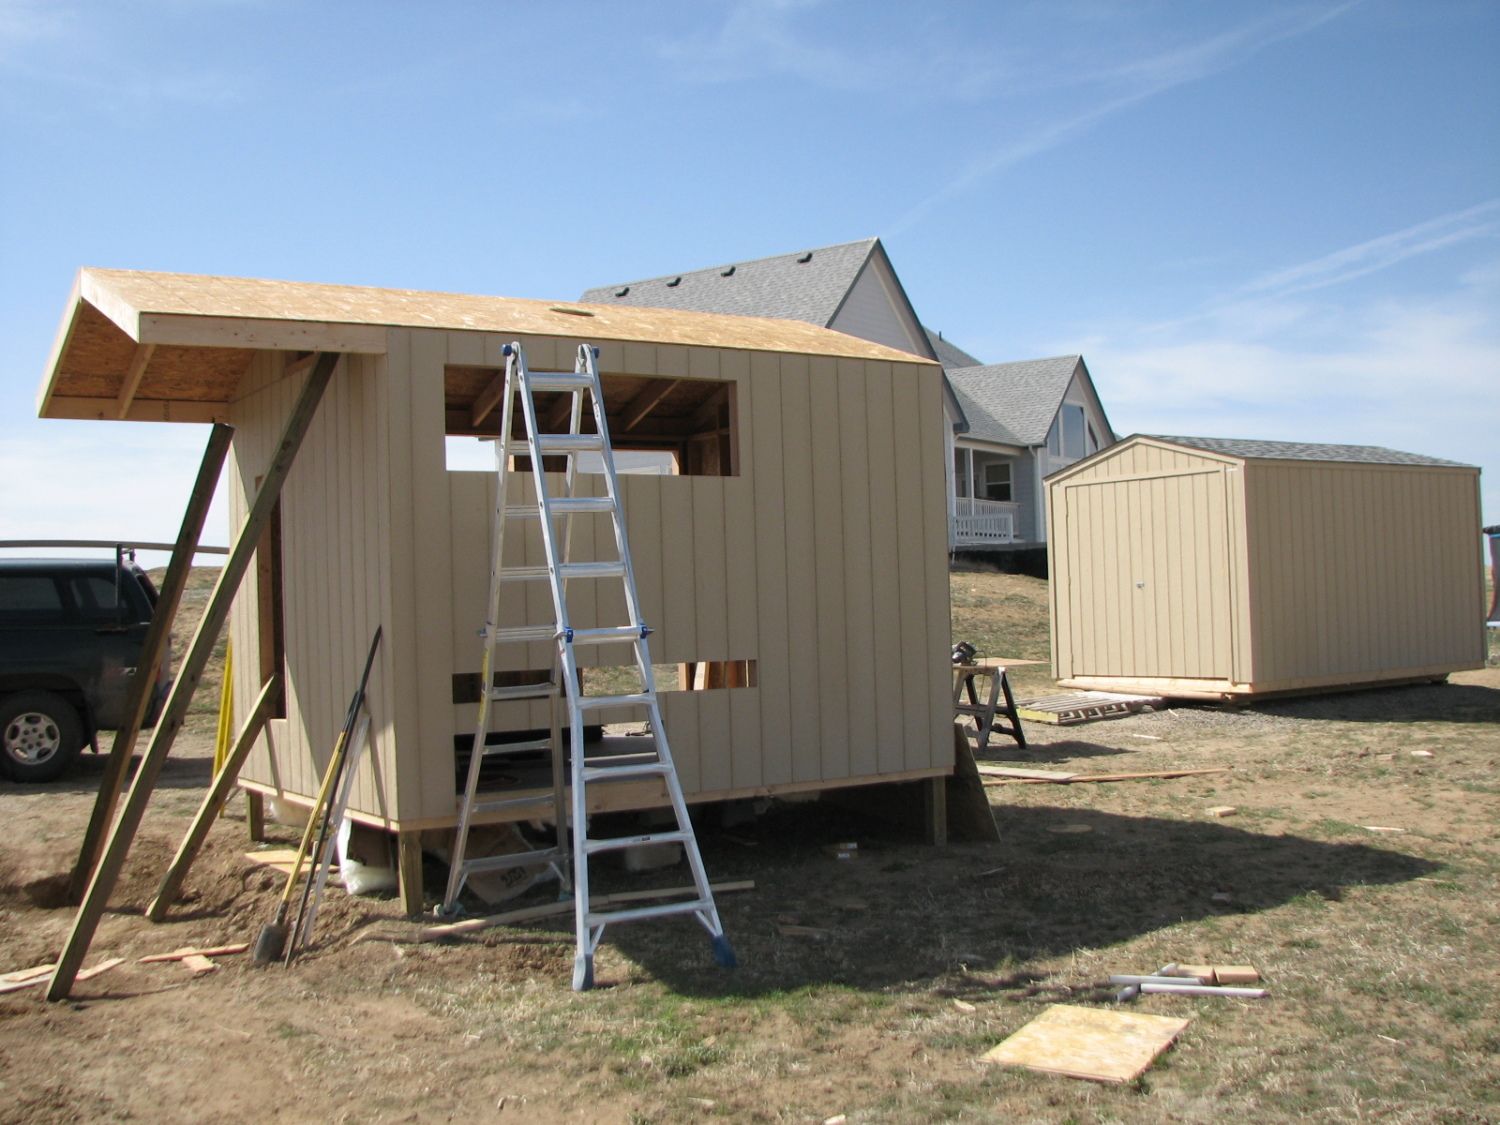
The walls and the roof are up! On the left side of the coop you can see there will be a long window there that will open for ventilation. Of course there will be a people-door installed later in the largest hole. The hole up high and to the right of the people-door will be a window (not one that opens, just to provide light for the ladies!). You can also see the roof overhang that is intended to provide a little shade from the hot, high-noon sun, since the under the chicken coop idea did not pan out too well for me.
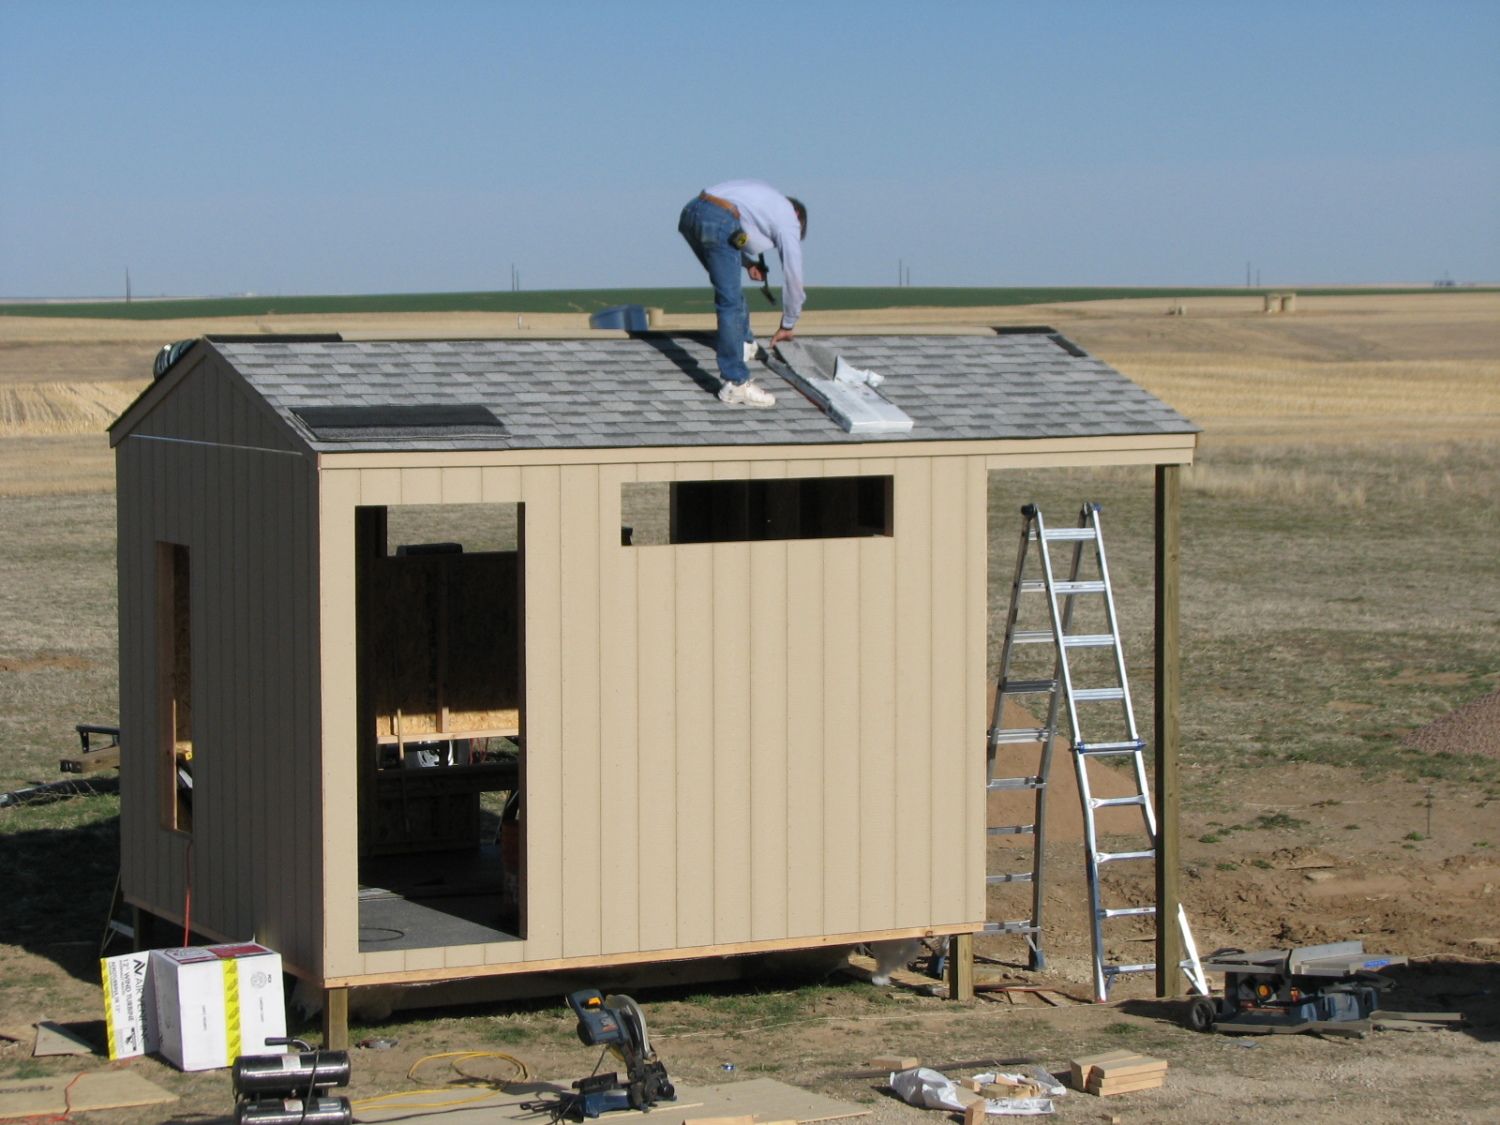
The shingles go on.
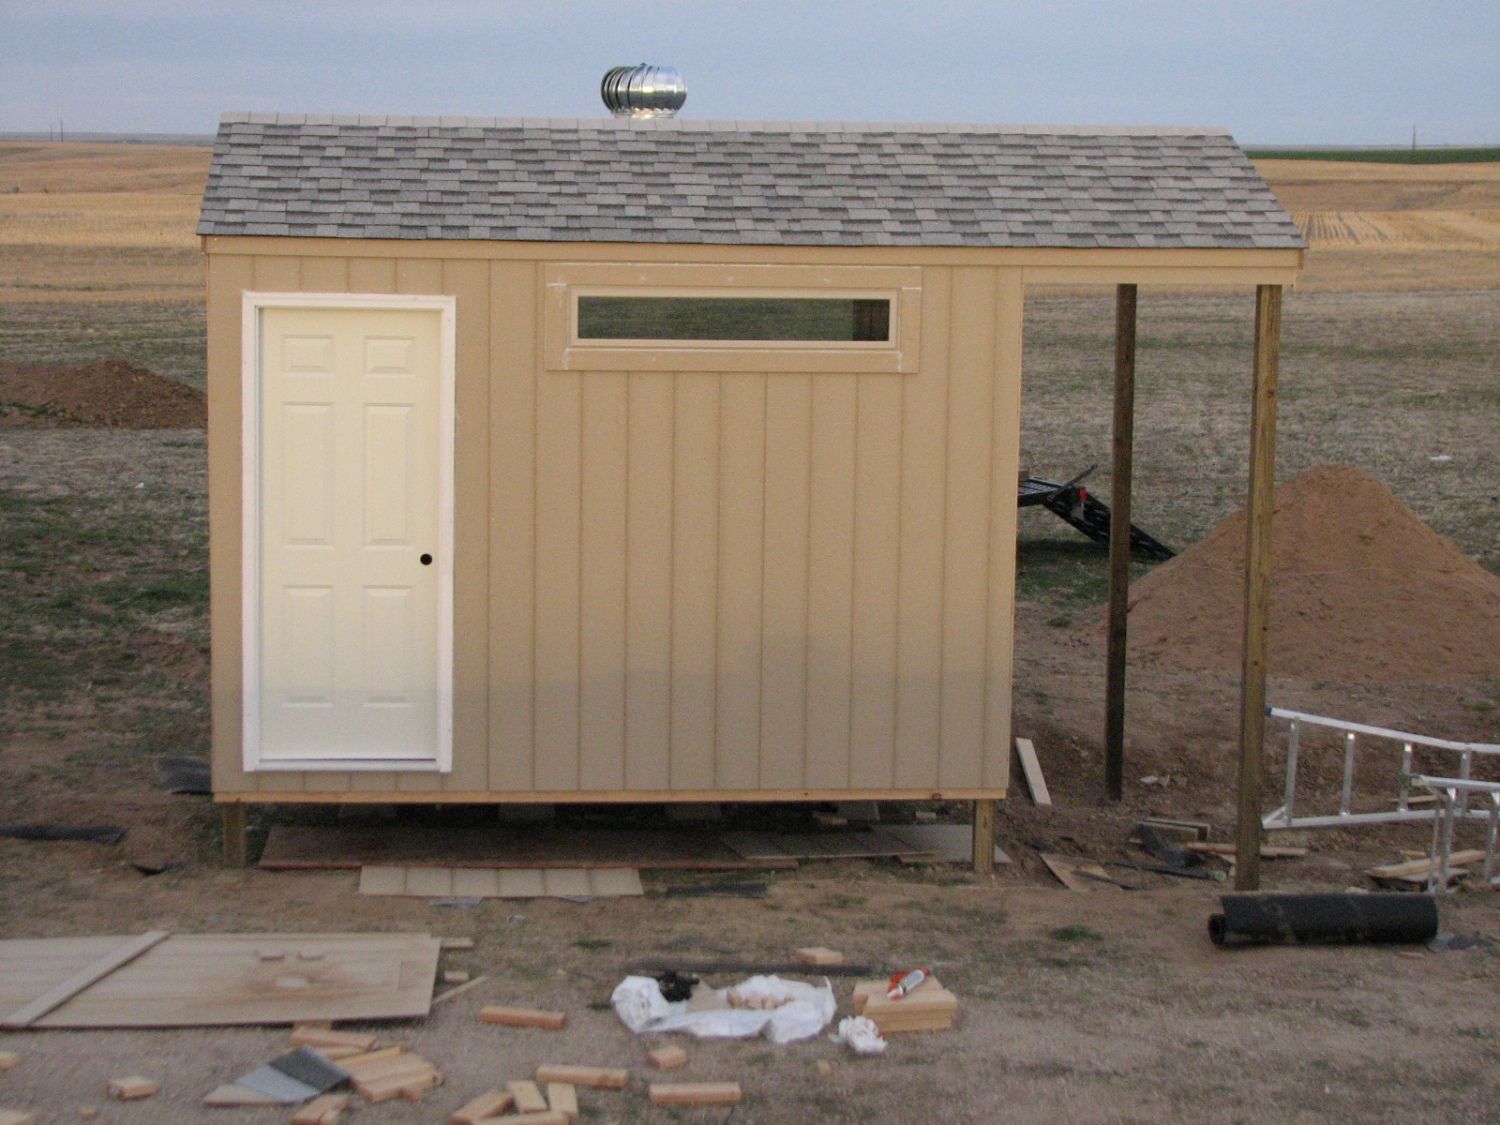
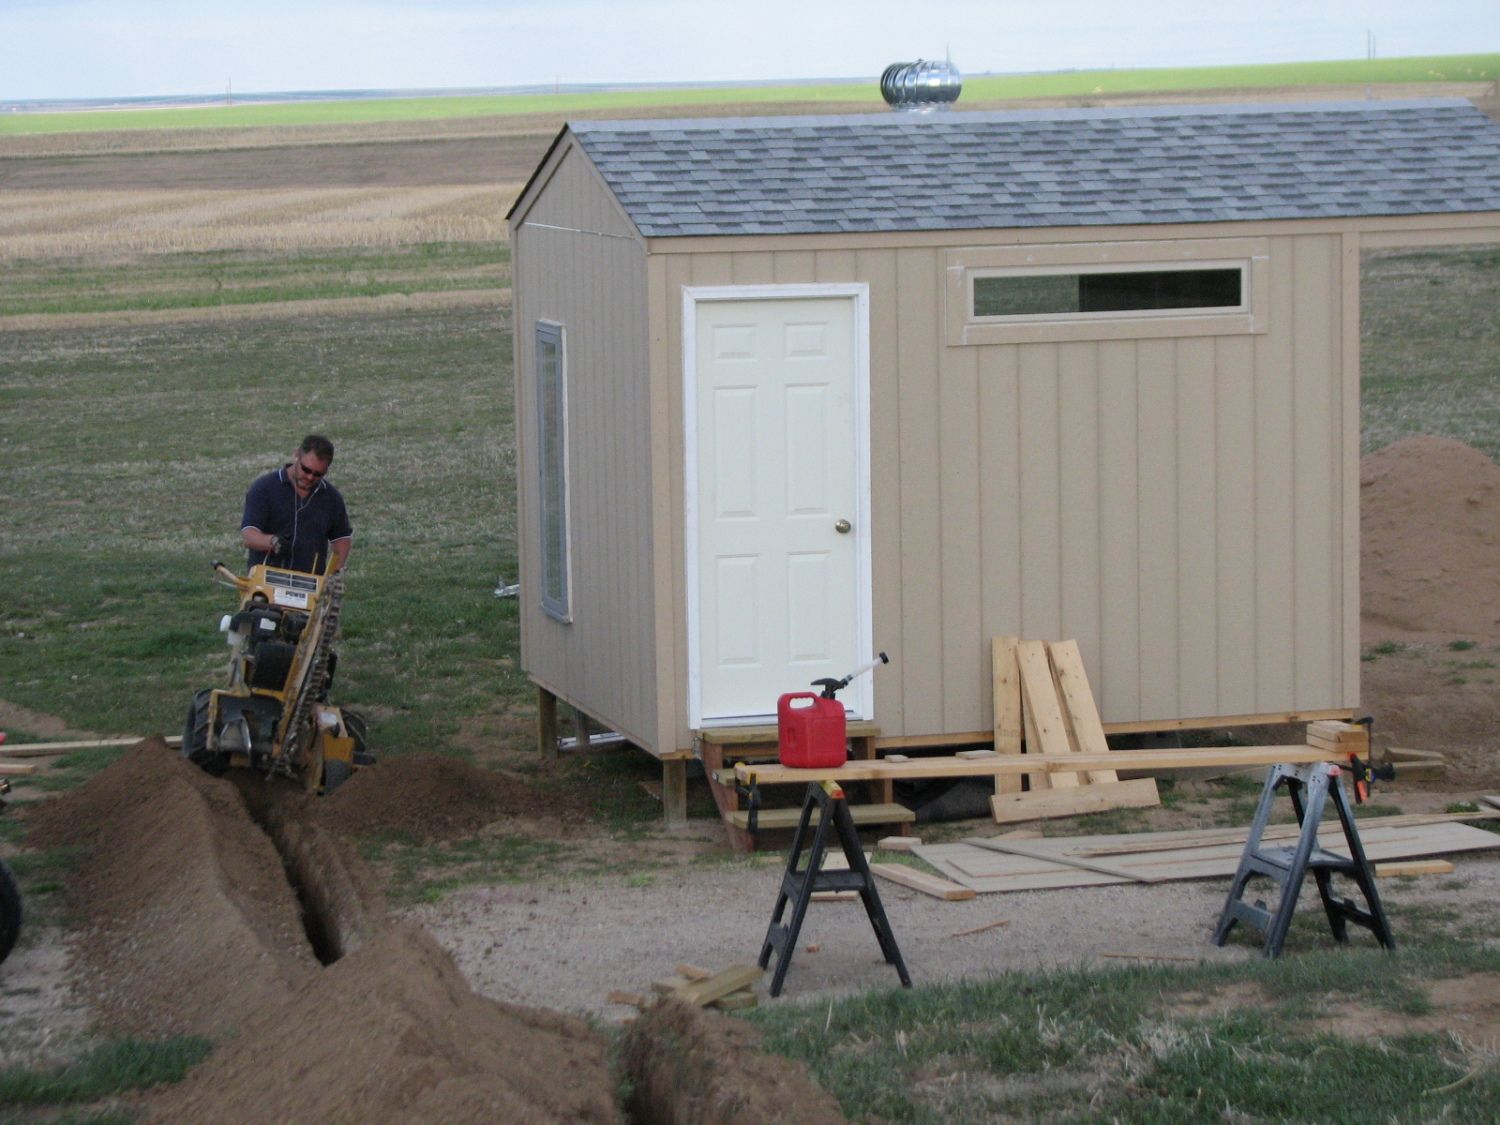
A "front" door to the coop! Finally some privacy for the ladies when they move in! You can also see our roof vent - it really moves in the summer and helps pull that hot air out. We will close it off from the inside in the winter. I will also put up a copula and a rooster weather vane later! Every coop must have one!!
A view of the inside of the coop. That hole on the very bottom will be a pine shaving sweep out door. We are going to compost so I decided to go the pine shaving route instead of the sand route. The bottom door will hinge open for clean-out, and it's width is the same width as our tractor dump bucket, so we can drive the tractor up, sweep all the pine shavings out the door and into the waiting bucket and then drive the tractor over to the compost bin and dump it! Let's hope it works as easy as all that the first time we try it!! The longer, skinner, opening above that will open like a drawer from the outside and will be the poop board under their roosts. I will "open the drawer" and scrape the poop board off into a compost bucket. Hopefully that will help keep the coop cleaner ... or at least smelling better! Not shown in the photo, we had our master electrician run power to the coop and then we insulated the walls with r-13 and then put up 1/4" OSB.
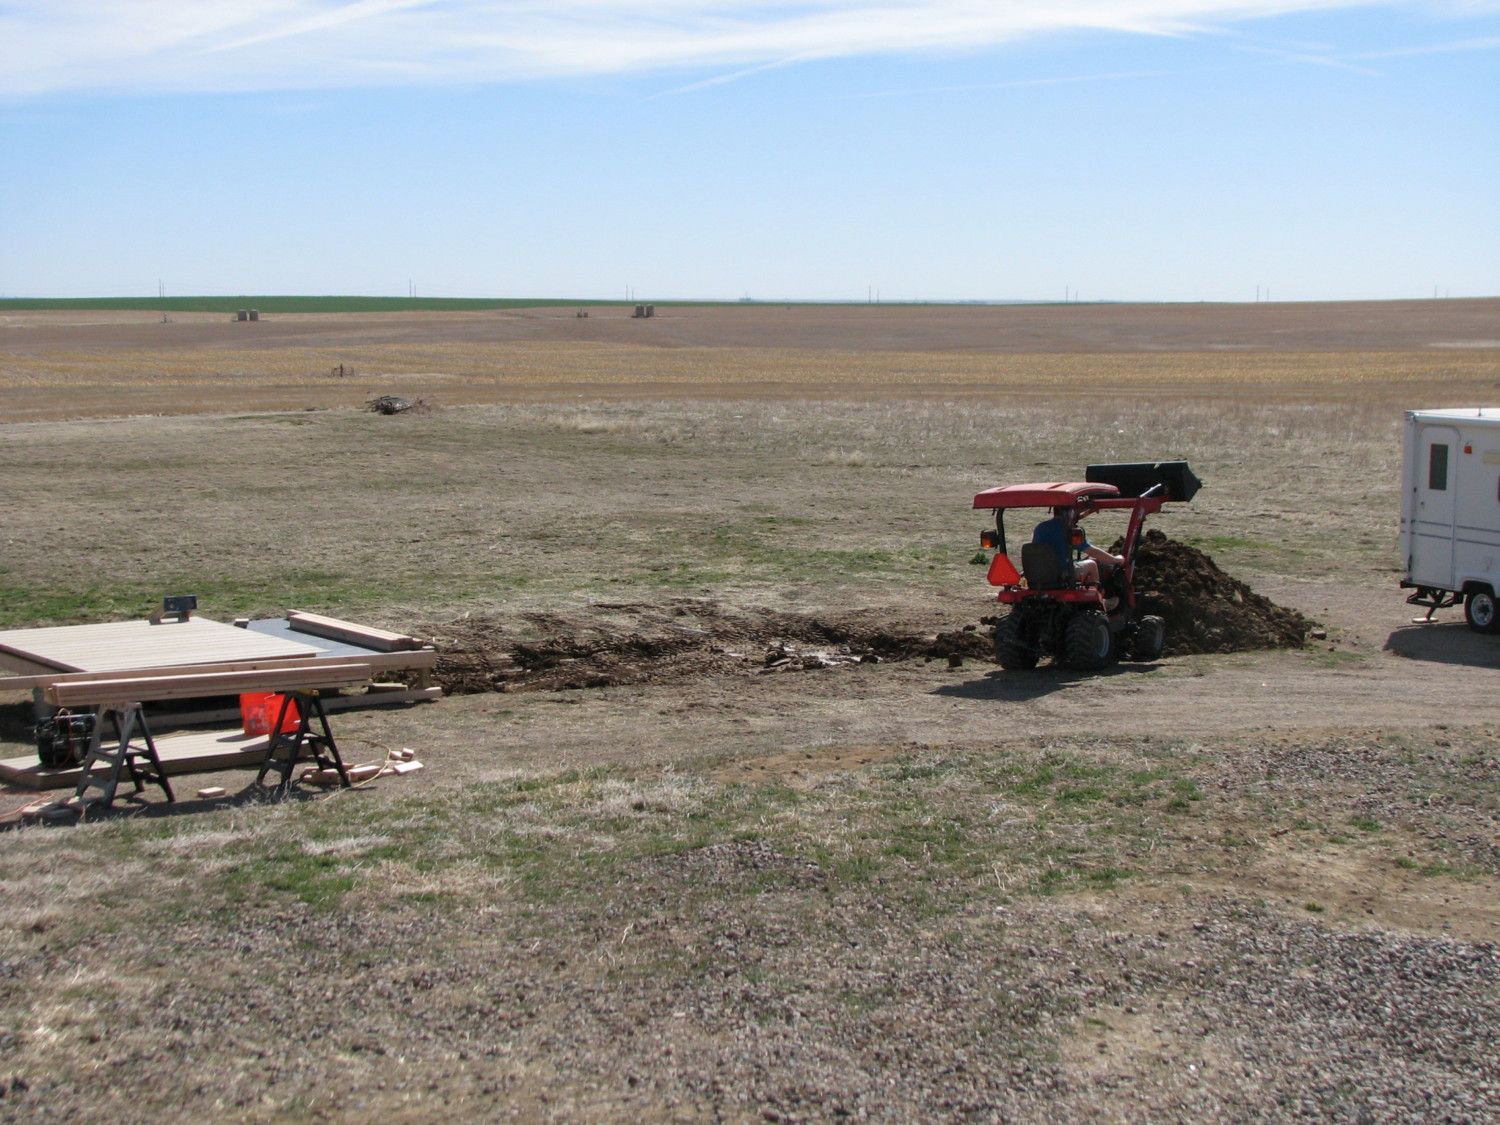
Trenching for the electrical. We rented the trencher from Home Depot, $120 for the whole day.
I decided the ladies would like to live in a green house, rye grass green to be exact! I love it - hopefully they do too!! Of course I painted the ceiling green too, and trimmed all the floor, window areas....
With the inside full of wet paint we turn our attention to the outside run. As I said the run is 10x20. We dug holes for the 4x4's, cement the 4x4's in and fill the rest of the holes back with dirt. We will line the bottom of the run with chicken wire and the sides with larger gage wire.
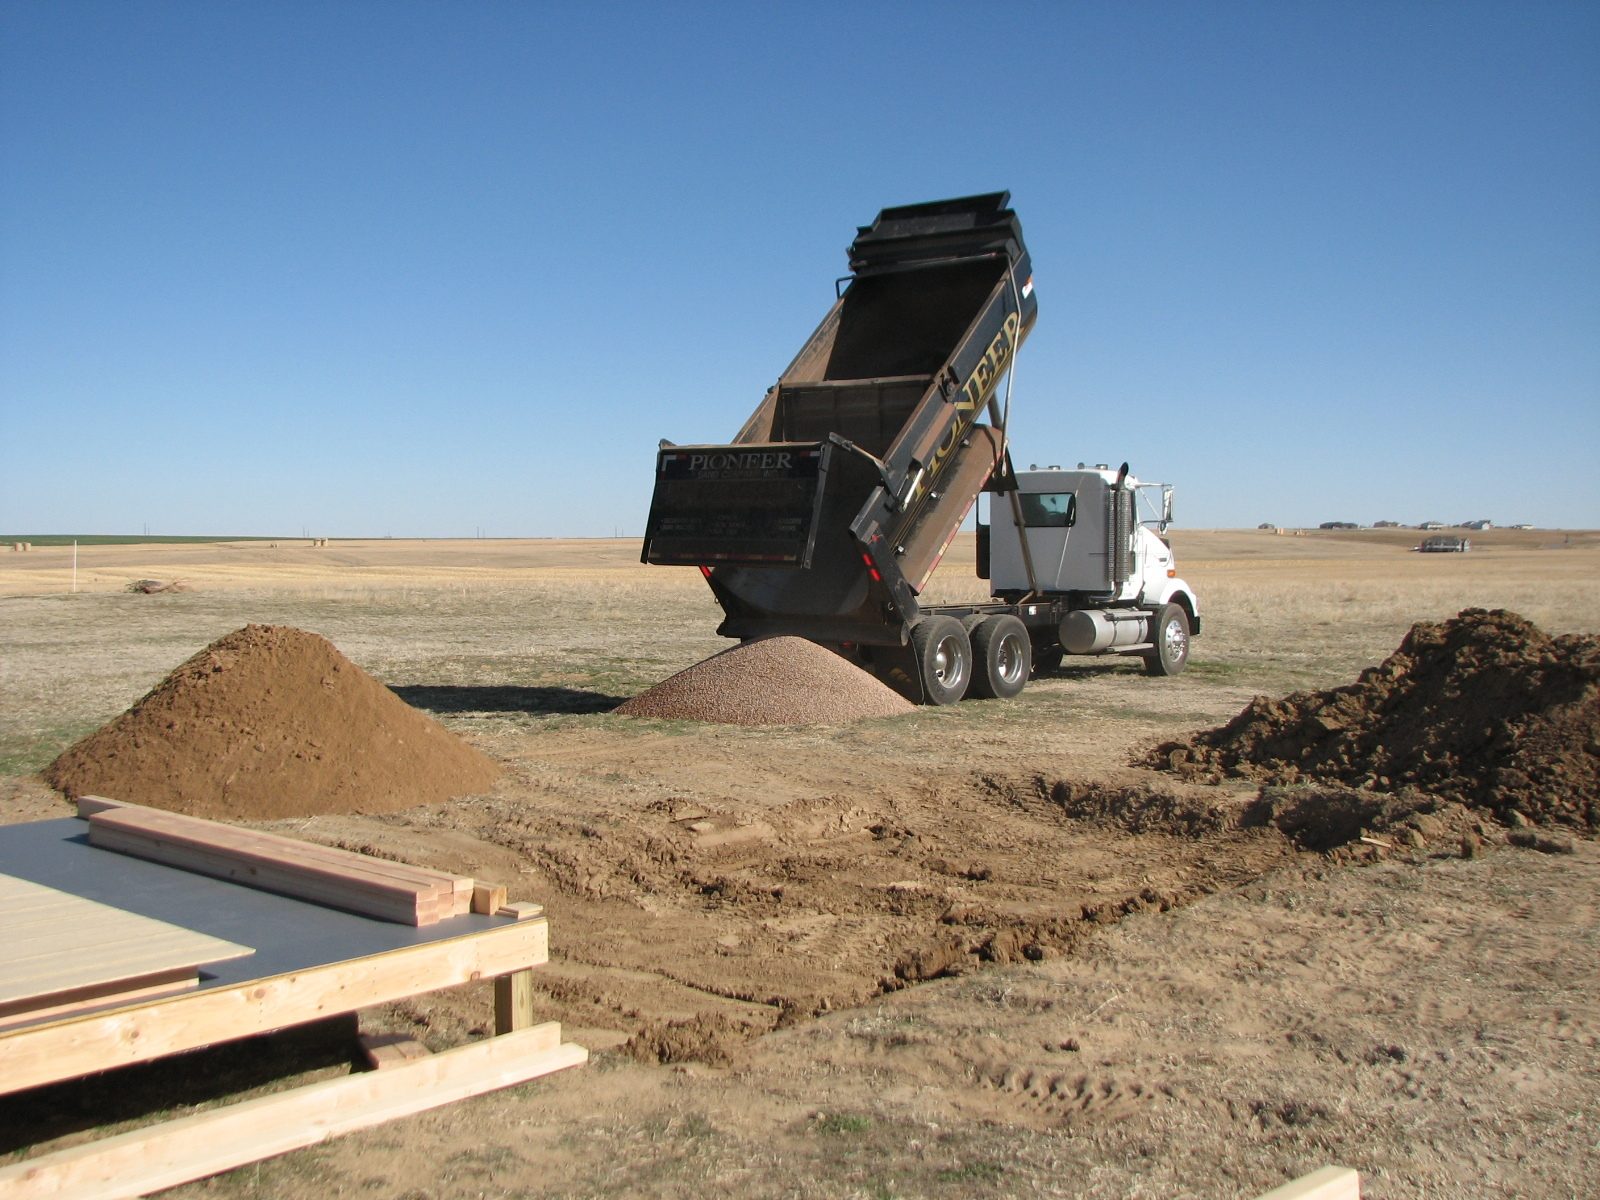
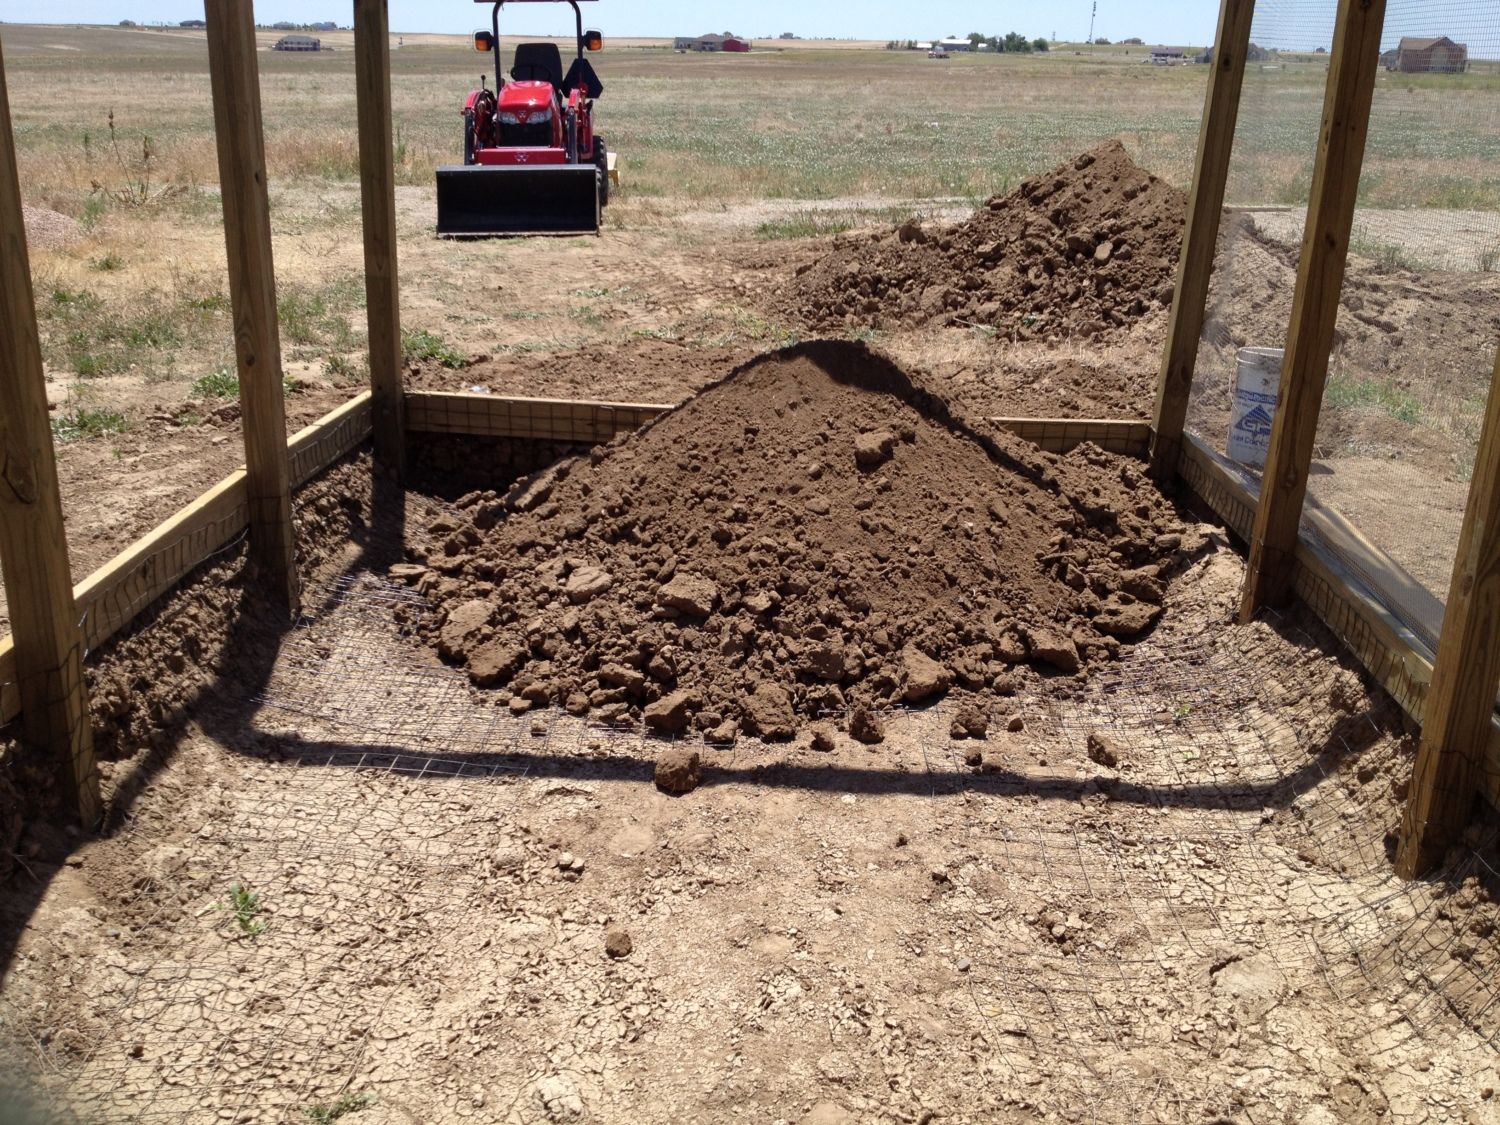
We will layer the run: chicken wire, pea gravel to help it drain (that's what the dump truck is dumping), weed guard, sand (the other pile in the pic). The weed guard is to keep the sand from settling into the pea gravel, not really to keep the weeds out. My girls love them some weeds! But the sand would settle down into the pea gravel, and from what I have read on here the pea gravel is hard to clean and hard on their feet. We live in Colorado and we have some sandy, clay-like soil that won't let things drain, so I felt like we needed the pea gravel for drainage, that's why we did it this way!
This pic shows the back side of the coop. We have a window on the north and south sides (the long, narrow opening on the left of the building), where we get most of our wind, and both open to allow for some cross ventilation. We also have a window on the east and west sides, both up high, to let some light in where the girls will roost. These don't open - they are just for light. There is also a roof vent (see the hole in the roof) to help keep it cool in the summer. In the winter months we will cover the roof vent opening from the inside to help protect the ladies from the Colorado cold! This also is an outside view of the pine shaving clean out door - which is the lower door, and the poop-board-drawer-style door. The larger hole up top is for that window I mentioned that won't open - just for light.
Next Up:
We have built the roosts and secured them to the inside under the window; we have made some progress on the run area. More pics to come later!!")
But we need to hurry it up - the girls are growing up fast and they want out of the garage!!!
I finally got some dirt moved! We put wire all along the bottom of the run to keep out digging predators, then backfilled with dirt, then pea gravel to help with drainage, then weed barrier - not to keep the weeds out so much, more to keep the sand on top of the pea gravel - then sand on top! The girls are going to love this!!
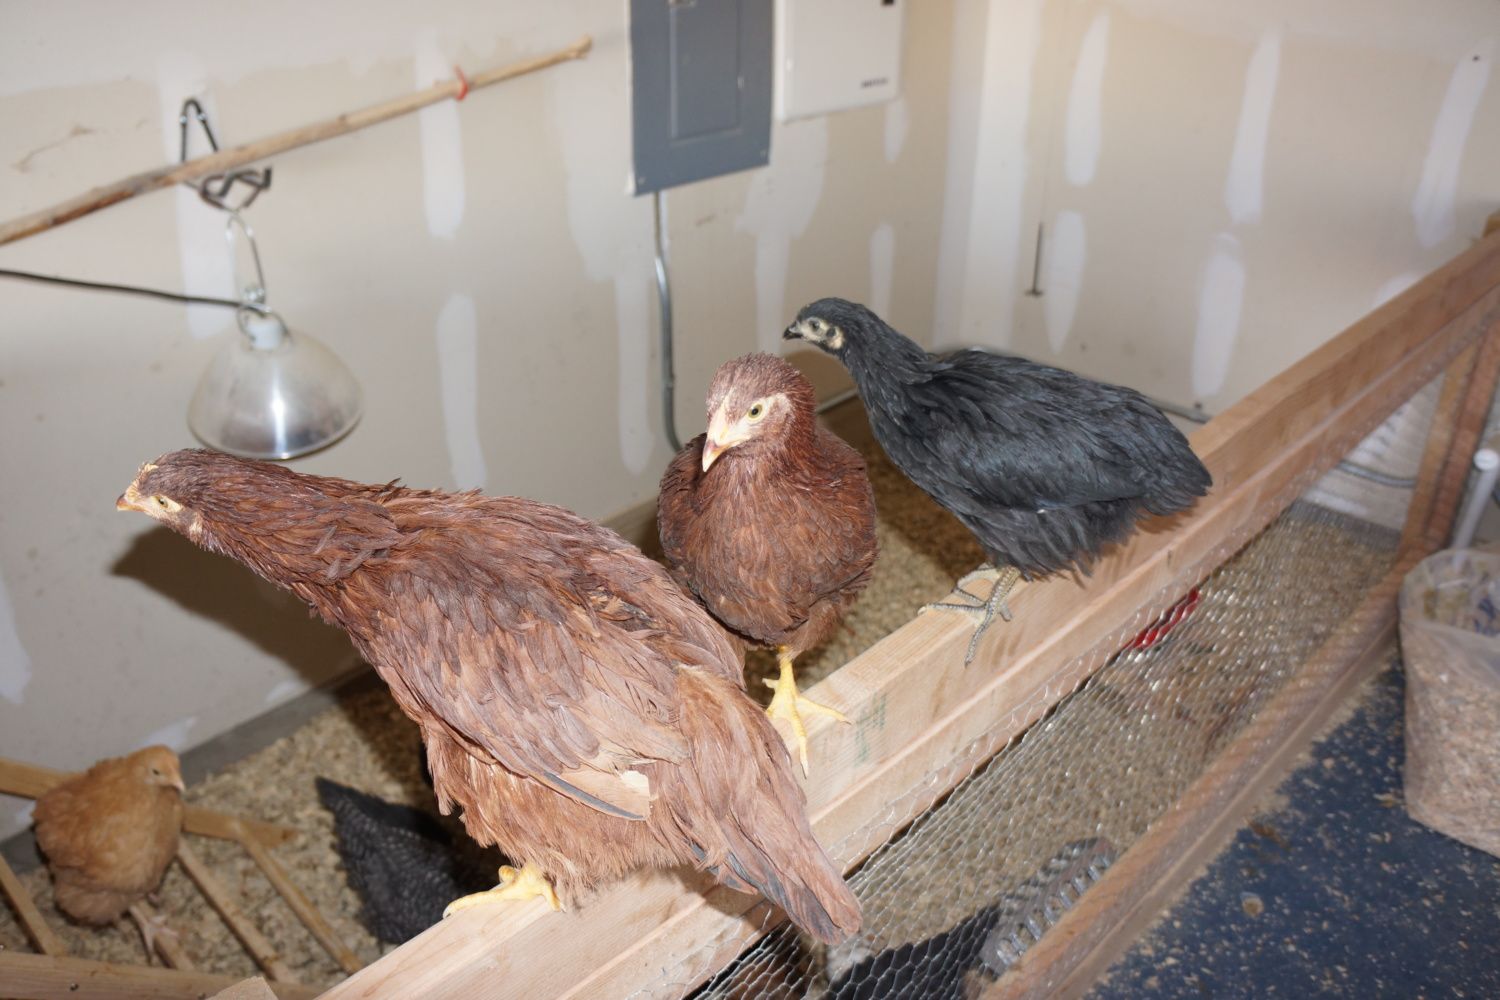
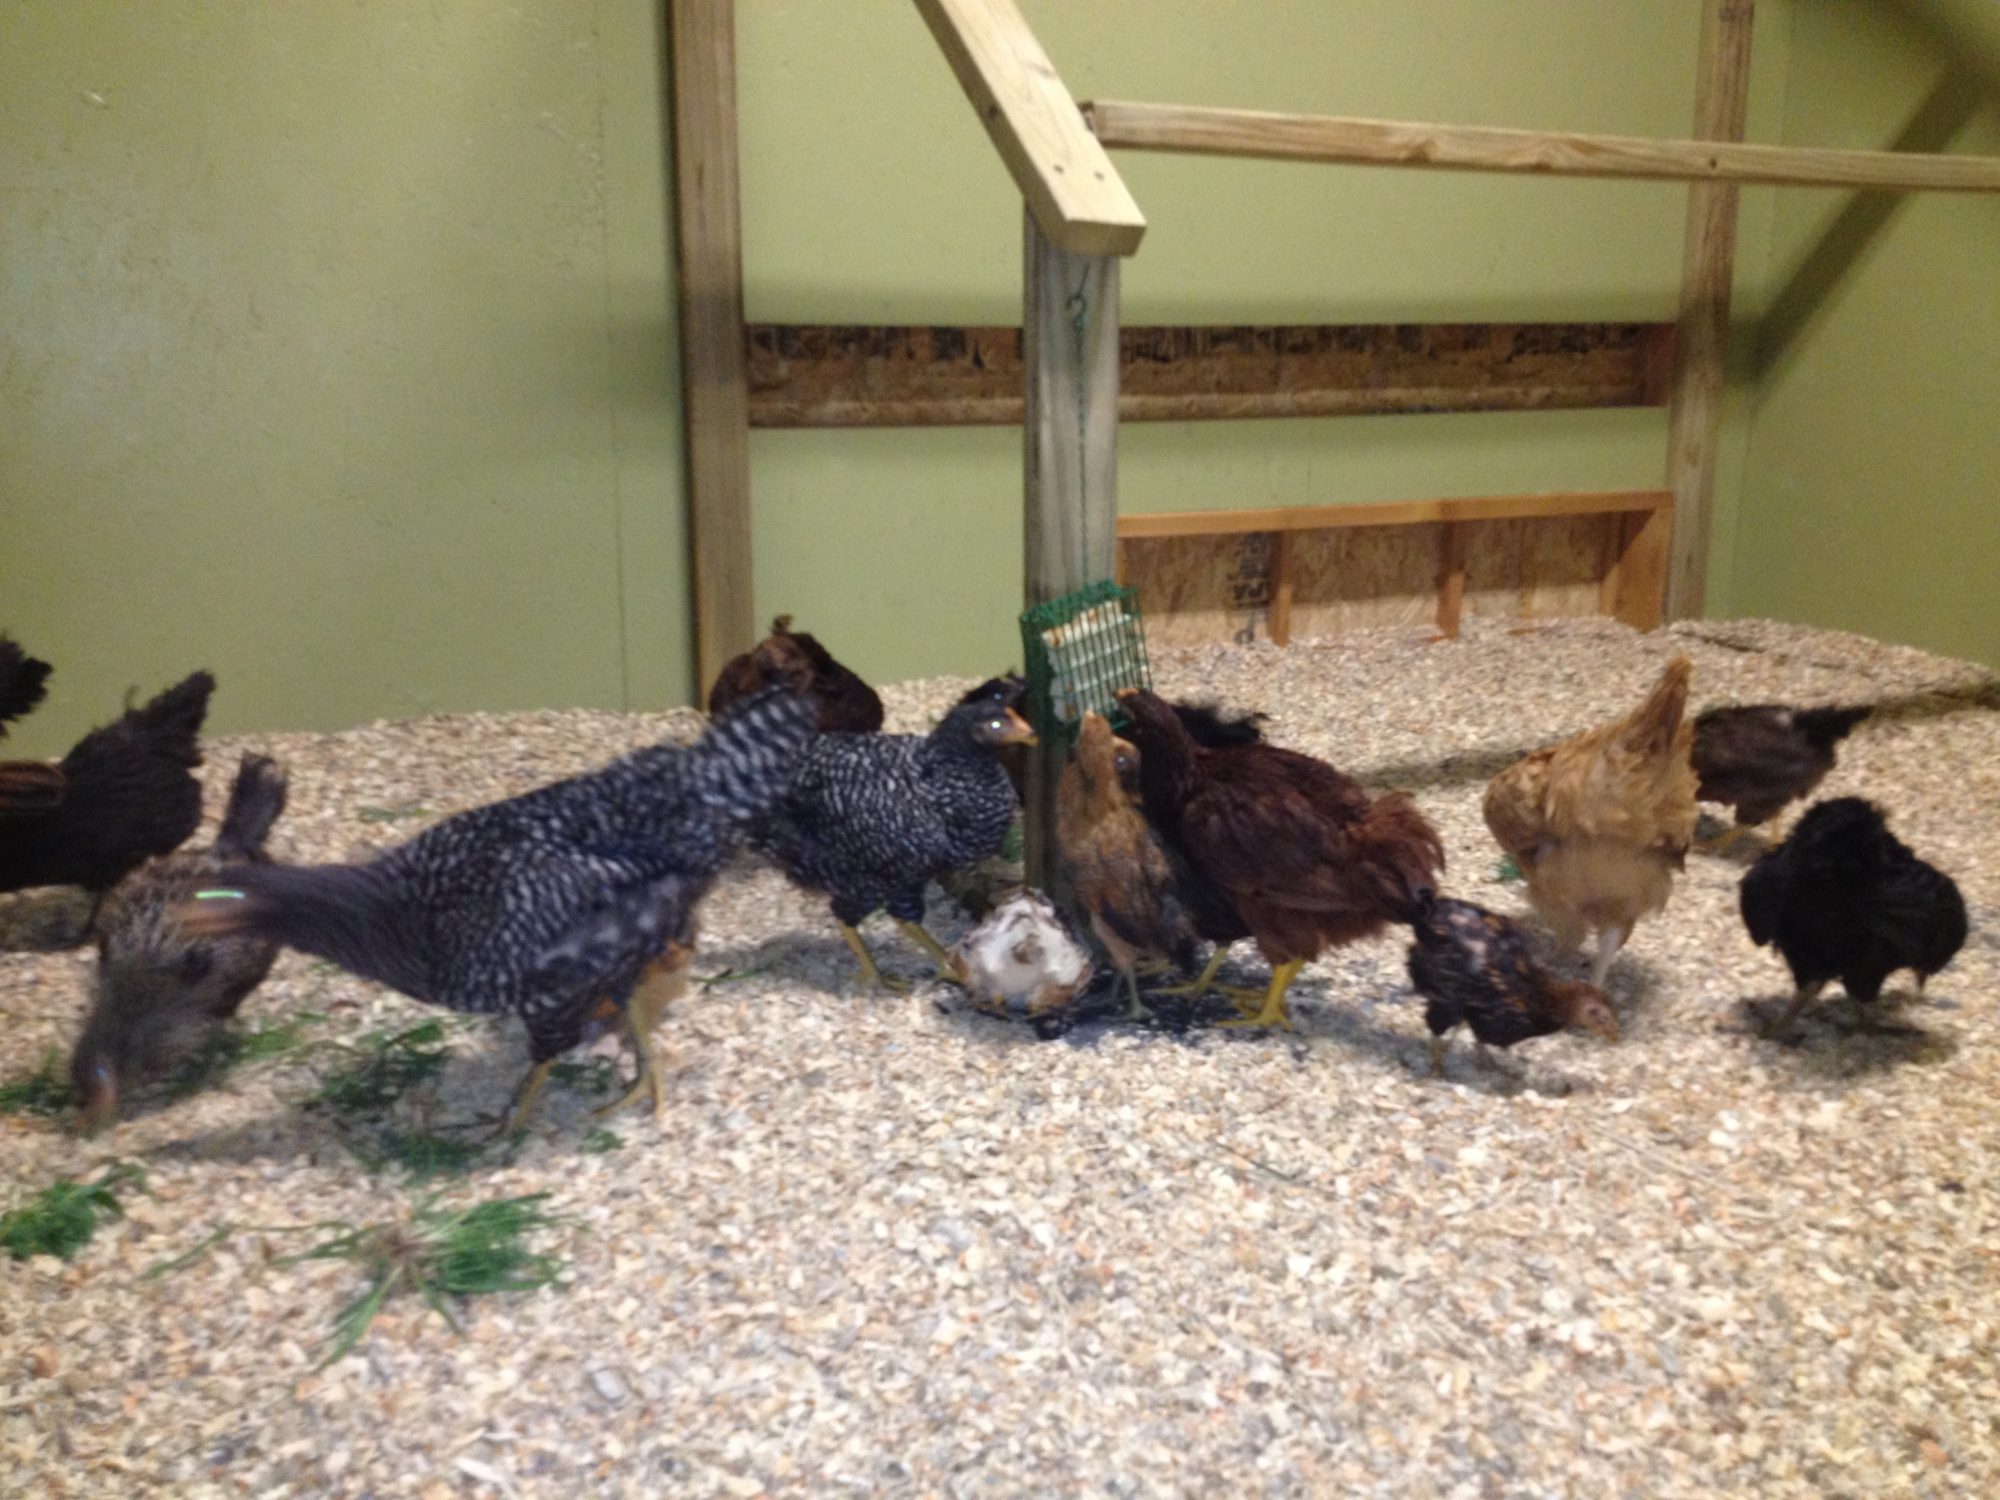
The girls are moved in! We still have some work to do: hang feeders, make water cans and hang, hang perches outside in the run, maybe cover part of the run to provide more shade. but this is a whole lot better than living in the garage!! I have hung a "treat box" used for feeding birds those wild bird cakes. In the beginning that's all I would put in there and they loved it! Slowly I started adding other foods to it with the wild bird food and now I fill it with all sorts of strange items and the girls go crazy for it! Lots of bread, bananas that have gotten too ripe, tomatoes that are too ripe, grapes, table scraps... you name it!
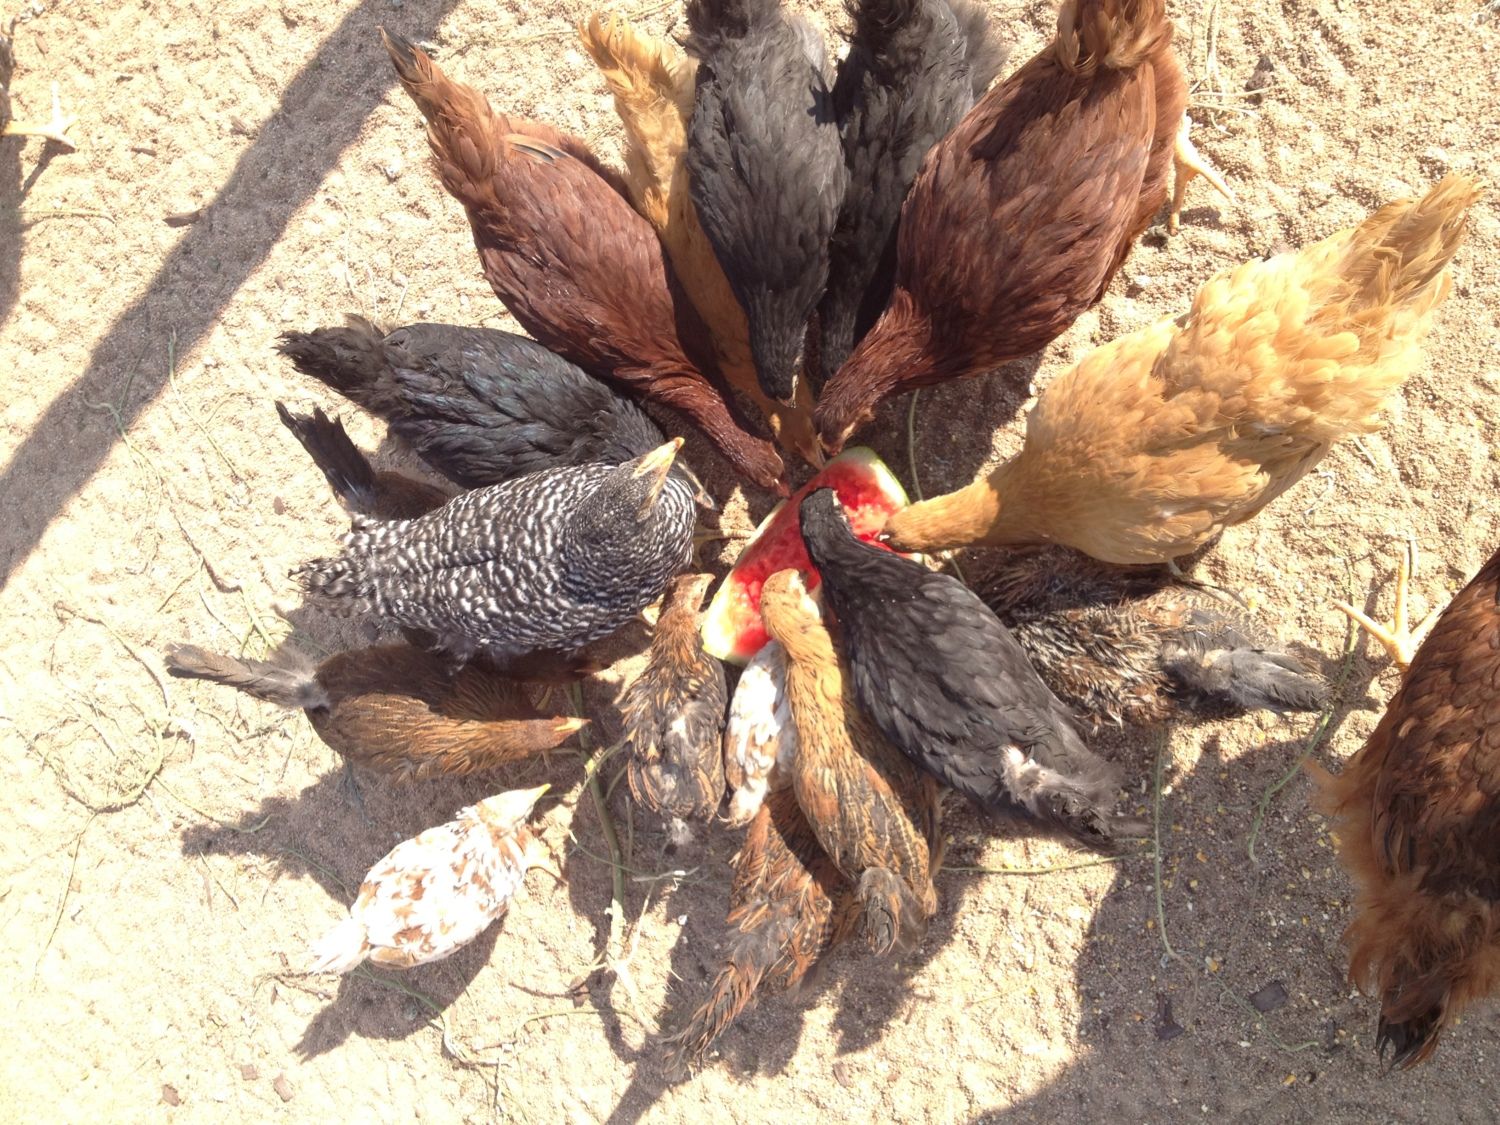
enjoying a treat of frozen watermelon outside in their run! They peck that thing down to the green of the rind!
Like most folks on here, I went out and got my chicks as soon as I had HOA approval! Yep, the chicken came WAY before the egg! Work began on a 10x12 shed, elevated for predator control. Being elevated was also going to provide some shade for the ladies, like I have seen some other designs offer. But how in the world can you clean chicken dookie from under a 10x12 shed that is enclosed with chicken wire for predator protection........? Yeah, you can't do that very well, so the ladies will get shade from some trees that I will plant later and from their overhang from the roof (shown in later pics).
I decided to use an epoxy on the floor with a clear coat over it. This is the same thing some people use on their garage floors to make oil and gas spills easier to clean up. If it works for that stuff I'm hoping it works on chicken-poo too! Cheaper then floor covering and hopefully more durable. I went to the big box stores and looked for flooring remnant pieces, as some people on here suggest. Problem: the scrap pieces only come in 10x8 and are about $50-$70. I would have to buy two pieces to cover the entire 10x12 floor, so we are talking $100 +. The epoxy was $30 and the clear coat for it was about $10. AND, I have enough left over to epoxy the roost bars for easily cleaning, and the nest boxes to make it nice and dark in there so the ladies feel safe laying their eggs in there! Win - Win I think!!
While I paint and seal the floor my hubby digs out the area for the chicken run. The run will be 10x20 and will be south-facing to give the ladies the early morning light/warmth.
The walls and the roof are up! On the left side of the coop you can see there will be a long window there that will open for ventilation. Of course there will be a people-door installed later in the largest hole. The hole up high and to the right of the people-door will be a window (not one that opens, just to provide light for the ladies!). You can also see the roof overhang that is intended to provide a little shade from the hot, high-noon sun, since the under the chicken coop idea did not pan out too well for me.
The shingles go on.
A "front" door to the coop! Finally some privacy for the ladies when they move in! You can also see our roof vent - it really moves in the summer and helps pull that hot air out. We will close it off from the inside in the winter. I will also put up a copula and a rooster weather vane later! Every coop must have one!!
A view of the inside of the coop. That hole on the very bottom will be a pine shaving sweep out door. We are going to compost so I decided to go the pine shaving route instead of the sand route. The bottom door will hinge open for clean-out, and it's width is the same width as our tractor dump bucket, so we can drive the tractor up, sweep all the pine shavings out the door and into the waiting bucket and then drive the tractor over to the compost bin and dump it! Let's hope it works as easy as all that the first time we try it!! The longer, skinner, opening above that will open like a drawer from the outside and will be the poop board under their roosts. I will "open the drawer" and scrape the poop board off into a compost bucket. Hopefully that will help keep the coop cleaner ... or at least smelling better! Not shown in the photo, we had our master electrician run power to the coop and then we insulated the walls with r-13 and then put up 1/4" OSB.
Trenching for the electrical. We rented the trencher from Home Depot, $120 for the whole day.
I decided the ladies would like to live in a green house, rye grass green to be exact! I love it - hopefully they do too!! Of course I painted the ceiling green too, and trimmed all the floor, window areas....

With the inside full of wet paint we turn our attention to the outside run. As I said the run is 10x20. We dug holes for the 4x4's, cement the 4x4's in and fill the rest of the holes back with dirt. We will line the bottom of the run with chicken wire and the sides with larger gage wire.
We will layer the run: chicken wire, pea gravel to help it drain (that's what the dump truck is dumping), weed guard, sand (the other pile in the pic). The weed guard is to keep the sand from settling into the pea gravel, not really to keep the weeds out. My girls love them some weeds! But the sand would settle down into the pea gravel, and from what I have read on here the pea gravel is hard to clean and hard on their feet. We live in Colorado and we have some sandy, clay-like soil that won't let things drain, so I felt like we needed the pea gravel for drainage, that's why we did it this way!
This pic shows the back side of the coop. We have a window on the north and south sides (the long, narrow opening on the left of the building), where we get most of our wind, and both open to allow for some cross ventilation. We also have a window on the east and west sides, both up high, to let some light in where the girls will roost. These don't open - they are just for light. There is also a roof vent (see the hole in the roof) to help keep it cool in the summer. In the winter months we will cover the roof vent opening from the inside to help protect the ladies from the Colorado cold! This also is an outside view of the pine shaving clean out door - which is the lower door, and the poop-board-drawer-style door. The larger hole up top is for that window I mentioned that won't open - just for light.
Next Up:
We have built the roosts and secured them to the inside under the window; we have made some progress on the run area. More pics to come later!!
But we need to hurry it up - the girls are growing up fast and they want out of the garage!!!
I finally got some dirt moved! We put wire all along the bottom of the run to keep out digging predators, then backfilled with dirt, then pea gravel to help with drainage, then weed barrier - not to keep the weeds out so much, more to keep the sand on top of the pea gravel - then sand on top! The girls are going to love this!!
The girls are moved in! We still have some work to do: hang feeders, make water cans and hang, hang perches outside in the run, maybe cover part of the run to provide more shade. but this is a whole lot better than living in the garage!! I have hung a "treat box" used for feeding birds those wild bird cakes. In the beginning that's all I would put in there and they loved it! Slowly I started adding other foods to it with the wild bird food and now I fill it with all sorts of strange items and the girls go crazy for it! Lots of bread, bananas that have gotten too ripe, tomatoes that are too ripe, grapes, table scraps... you name it!
enjoying a treat of frozen watermelon outside in their run! They peck that thing down to the green of the rind!