The Baker's Dozen
So one day my wife tells me the feed store has baby chickens and wouldn't it be wonderful to raise our own chickens. I gave her that look, you know the one that could pierce concrete, and remind her that we know nothing about raising chickens. She suggests that perhaps we should at least research it. That research brought us to the most concise pool of chicken information on the web, backyardchickens.com. That's when it happened... we were trapped by the romance of dozens of free eggs and a SIMPLE little project for our home schooled children to tackle. And so it began, the quest for our own Baker's Dozen.
A quick visit to the feed store found us the proud new parents of 13 day old baby chicks. We had no idea what the different kinds would do for us but we decided on two of each kind they had plus one that the lady promised us would lay green eggs. I was awestruck, I couldn't wait for my first plate of green eggs and ham. Here are the 13 lucky additions to our family.

We built our brooder out of a store shipping crate, you can see the rest.
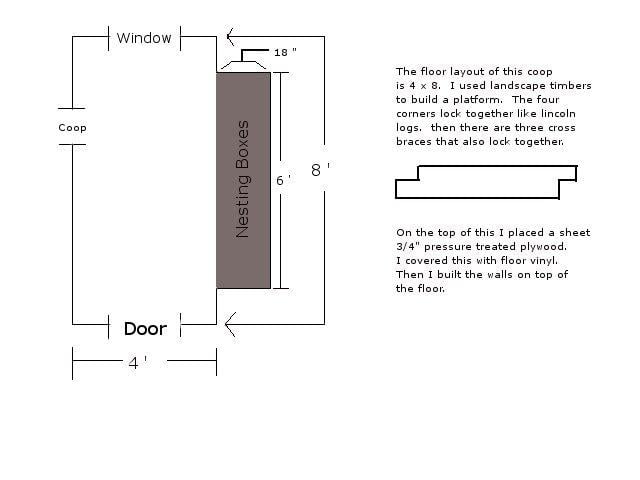
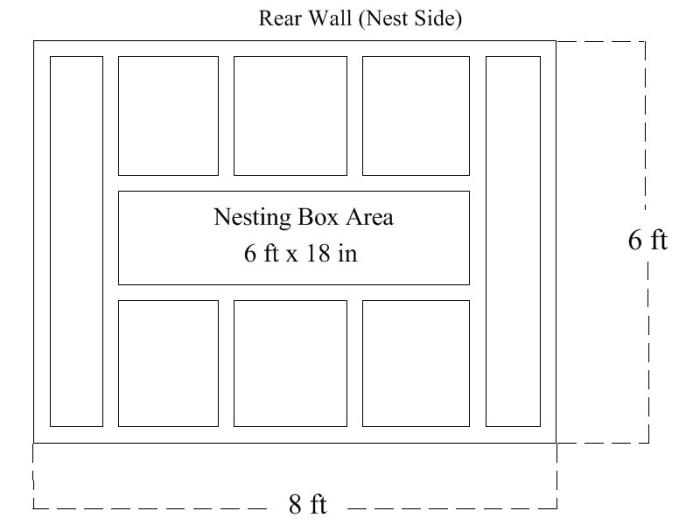
I began researching the different coop designs on the Internet and finally decided that I would just make my own. I evaluated the location I had chosen for our coop and then researched how much space would be needed for each chicken. The following design was what I settled on.
Here is the floor of our coop, the next picture shows the vinyl being installed. This of course makes for easier cleaning. Not my idea but I sure do like it.
I would like to mention that while I did have to purchase much of the wood, I also recycled anything that I could. The vinyl here is a scrap from our local Lowe's. I think it was around $8. The landscape timbers and the blocks used to level the chicken house were already sitting unused in my yard.
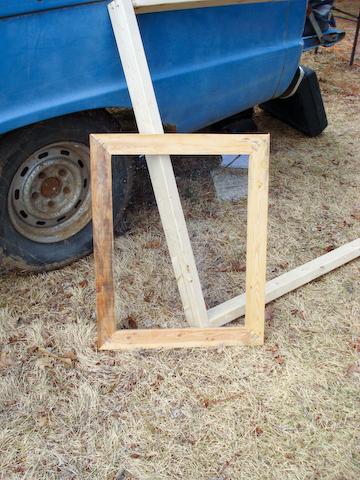
The next thing I did was to actually make a window. I did this now because I was using a piece of Plexiglas and again some recycled scrap wood I picked up at the local habitat for humanity resale shop.
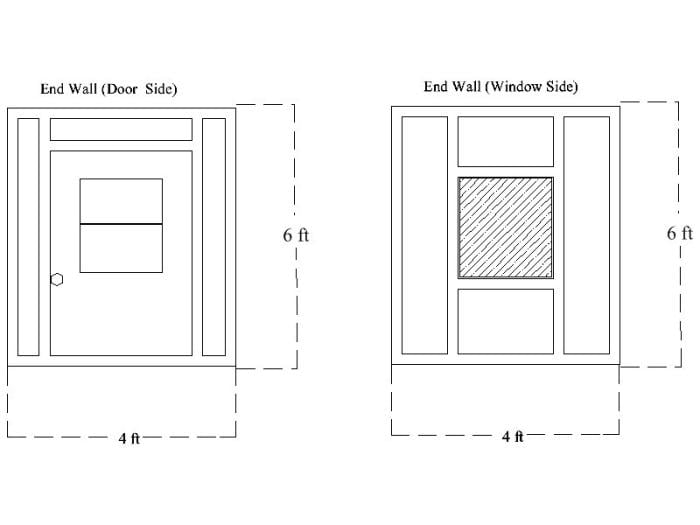
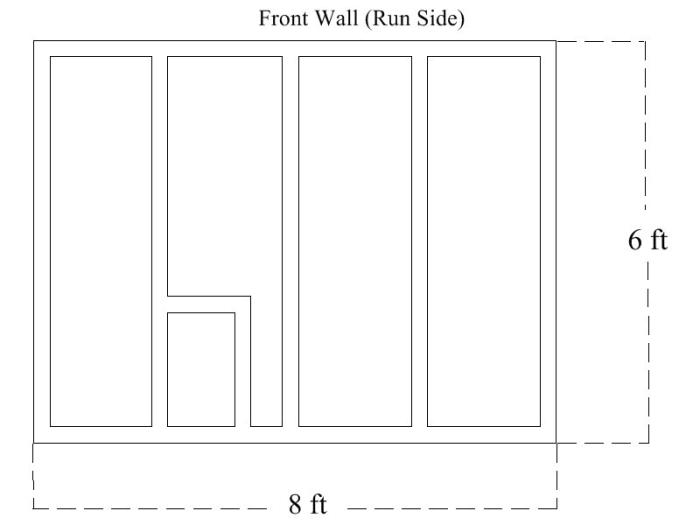
After I made the window I designed the rest of the coop. I made sure that the opening for the window fit the window I had made. If you wanted to build this coop I would recommend that you adjust accordingly to what you have available. Simply resize openings, door frames, etc to your needs.
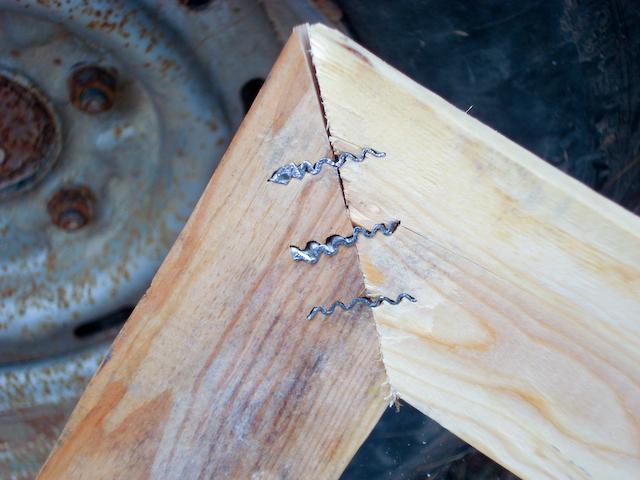
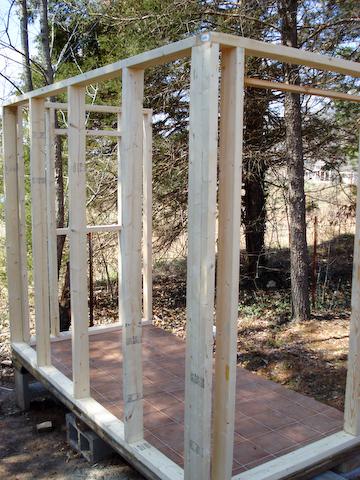
The walls were built one at a time on the ground. After we had constructed the four different walls we then raised them on the already built platform. This is the wall for the window.
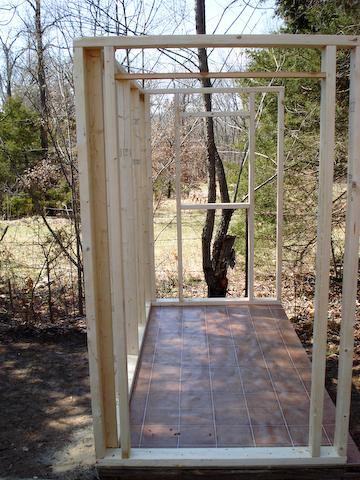
Here the walls are going up. The end to the right is where the door will go.
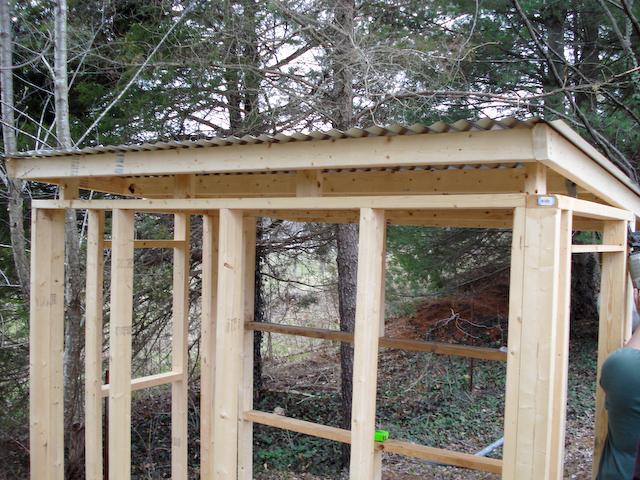
Another view of the framed coop.
My next part of this project after installing the back wall was to construct a roof. I did this by simply building an 8x8 frame, studding it in like you would a wall, and then attaching metal roofing to the frame. We lifted it up on the coop and attached with small blocks in the front to create the needed pitch for drainage and snow melt in the winter.
You'll notice the overhang in the back. This will later provide a sheltered area for gathering the eggs from the nest boxes. I attached this with metal braces I picked up at Lowe's.
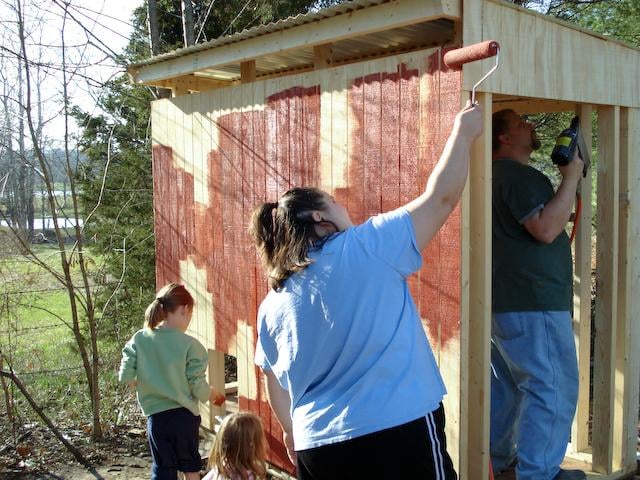
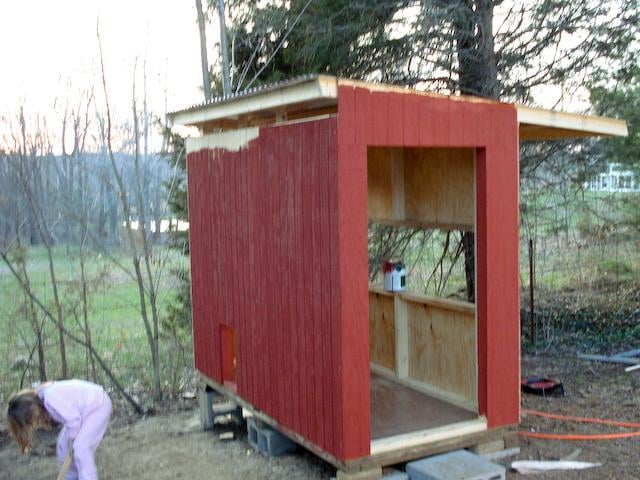
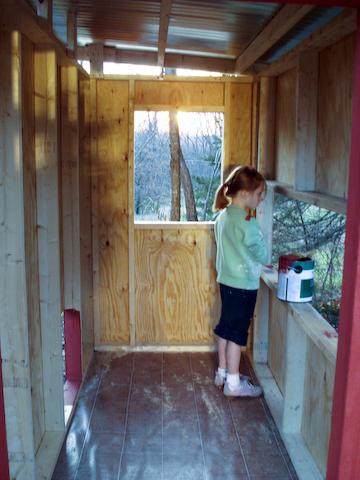
Next came the siding. We decided to begin painting as soon as I began hanging the siding mainly because the weather had been anything but cooperative for several weeks.
My children were all a big help during this project.
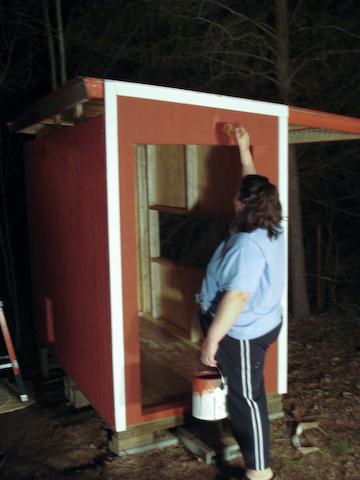
Don't want to forget my Dear Wife.... Painting into the long hours of the night.
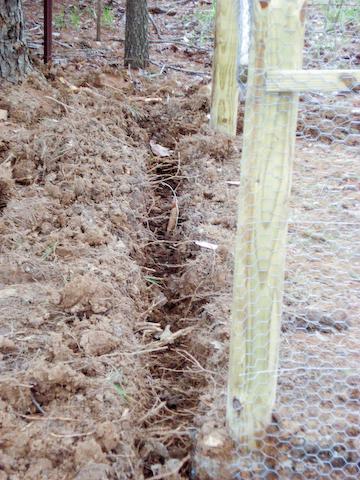
We decided to dig eight inch deep trenches all around the area that would become the chicken run.
We set the fence down into the ground and then doubled it over before burying it in an attempt to ward off predators.
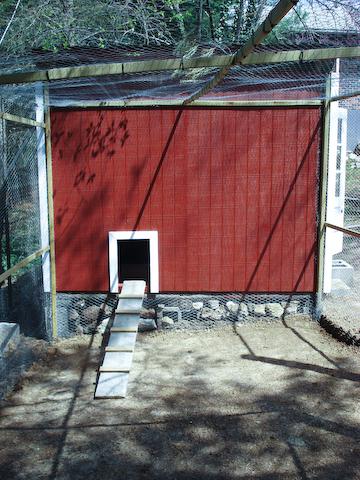
A layer of wire over the top completes the run.
The run is complete, now it's time to move back to the other side of the coop and build the nest boxes.
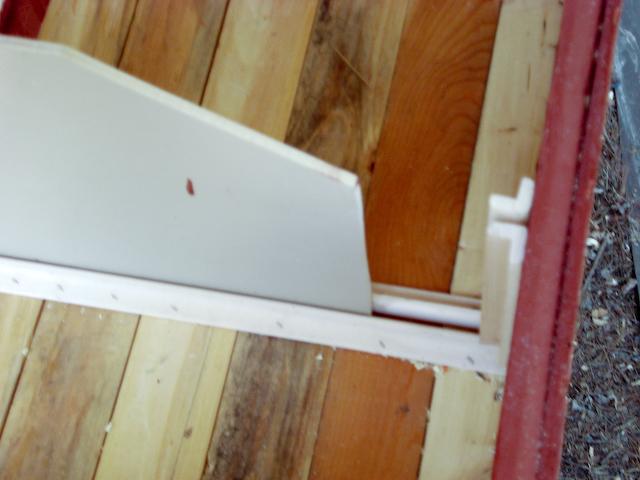
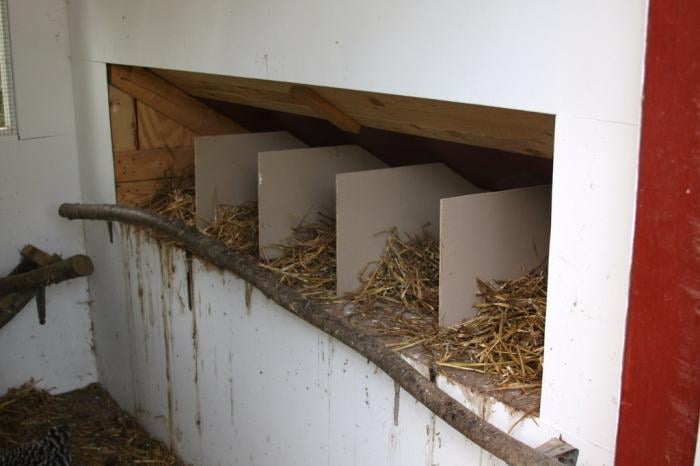
The nest box area is constructed by extending pieces of 2x4 out 18 inches and then boxing the opening in to create an extended area where the chickens can nest.
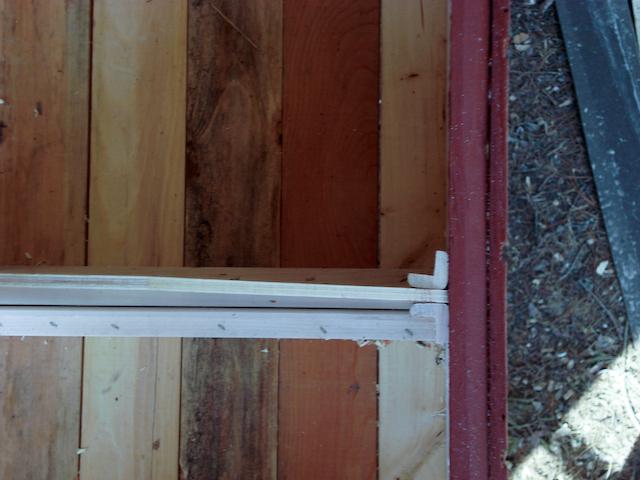
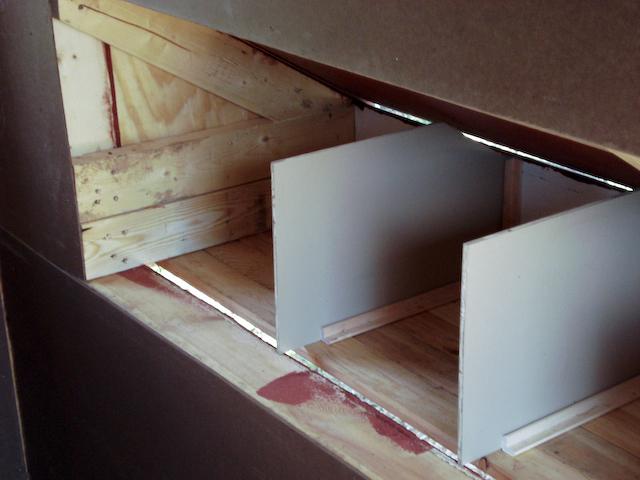
I used pieces of trim to make slots for thin wood to slide into. I did this so I can remove the dividers if needed for cleaning and also it makes it reconfigurable if necessary.
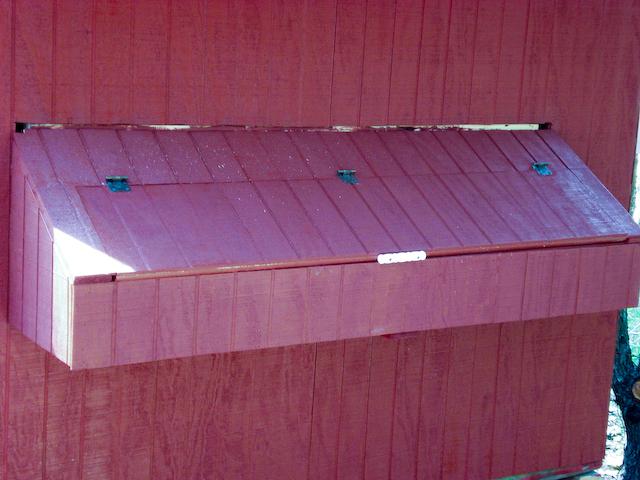
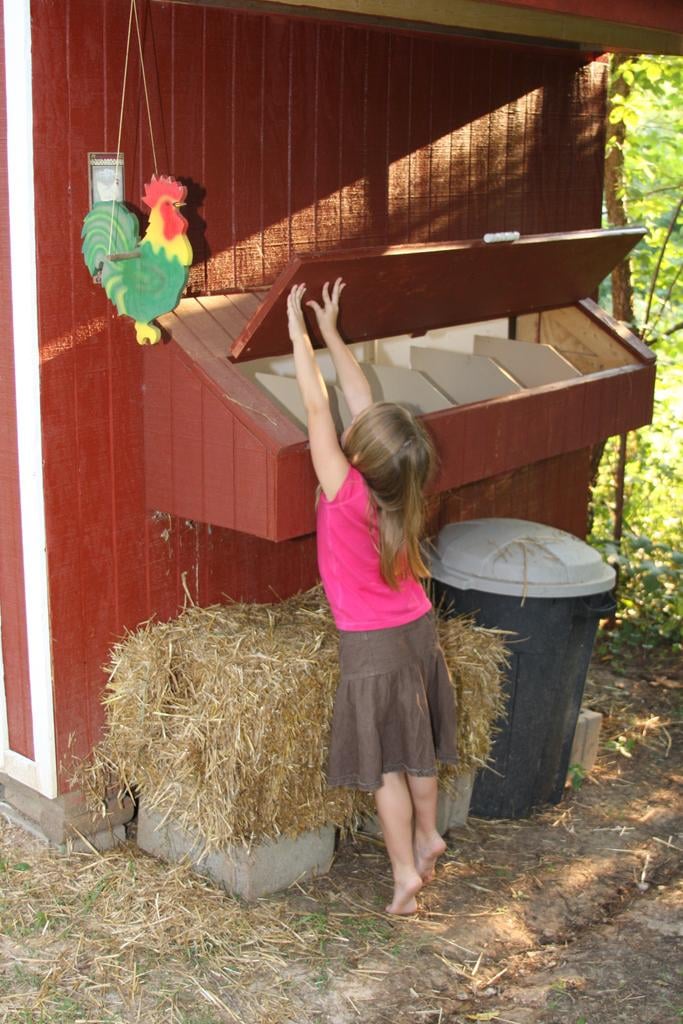
A hinged door over the nest boxes makes outside access and egg gathering easier when the time comes.
The door was a leftover one from the previous owner of our house. I cut it down to fit my six foot tall chicken house.
The window functions perfectly. It helps to keep the temperature regulated by allowing air flow into the house. The window opening is covered with 1/4 inch hardware wire as is the opening up by the roof which serves as the vent. In the winter I will close the window and stuff newspaper into the vent opening by the roof.
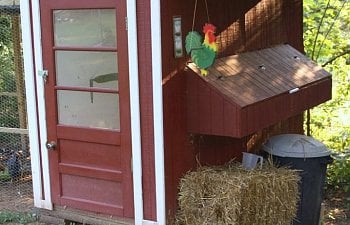
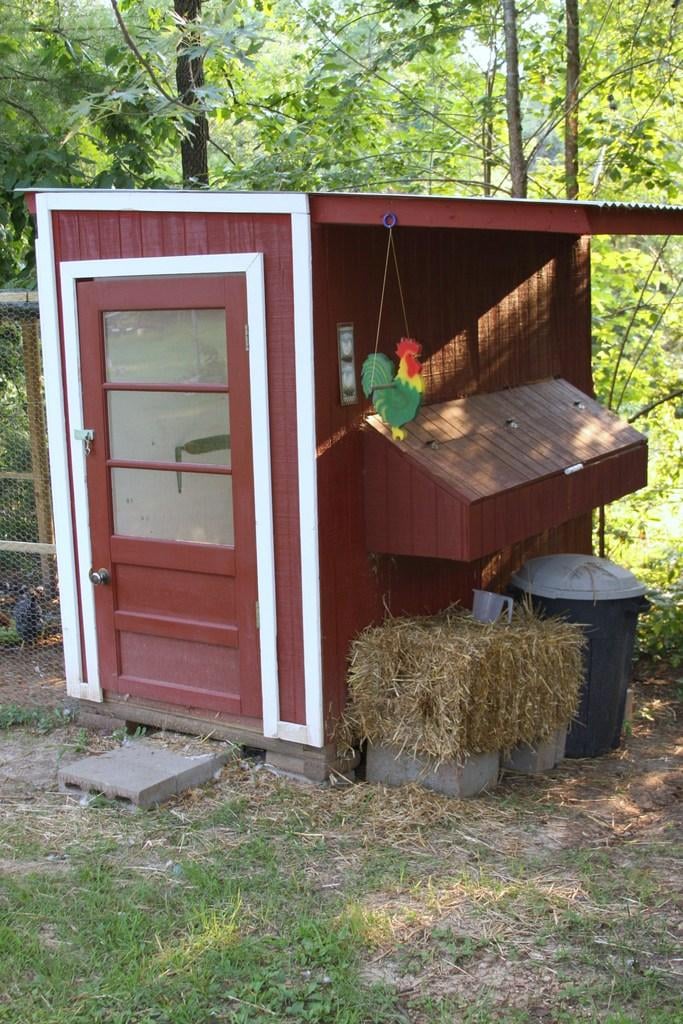
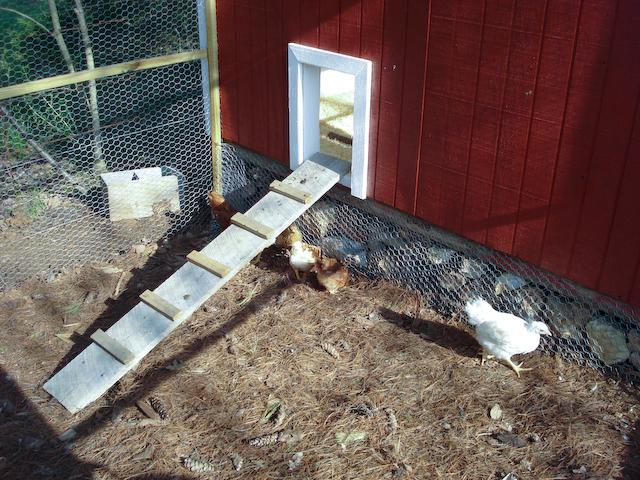
Here are some pictures of our finished coop and chickens in action.
This was my first attempt at a home made feeder. It is simply PVC pipe with a pretzel can on top. I quickly realized that the can was not enough food for these fast growing chickens.
My new and improved model.
Here is their now in use nest area...
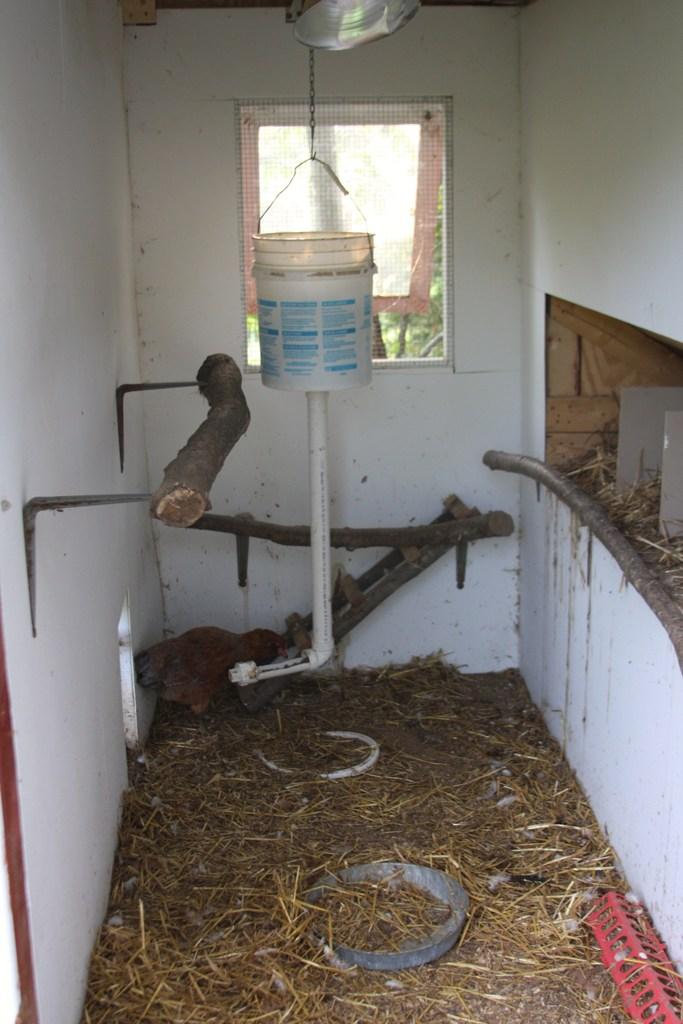
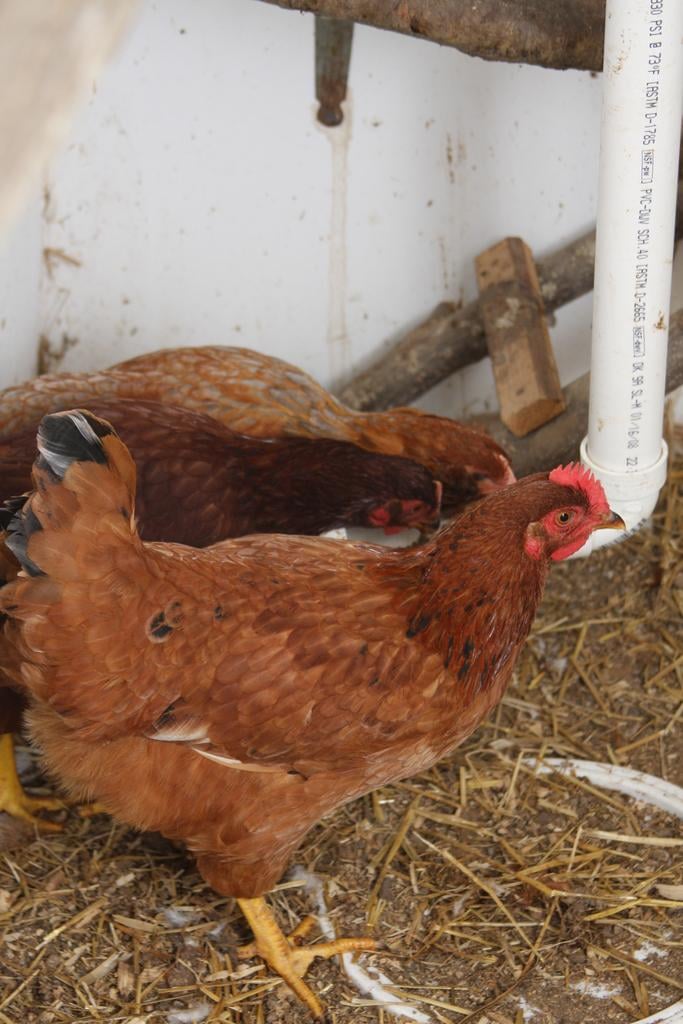
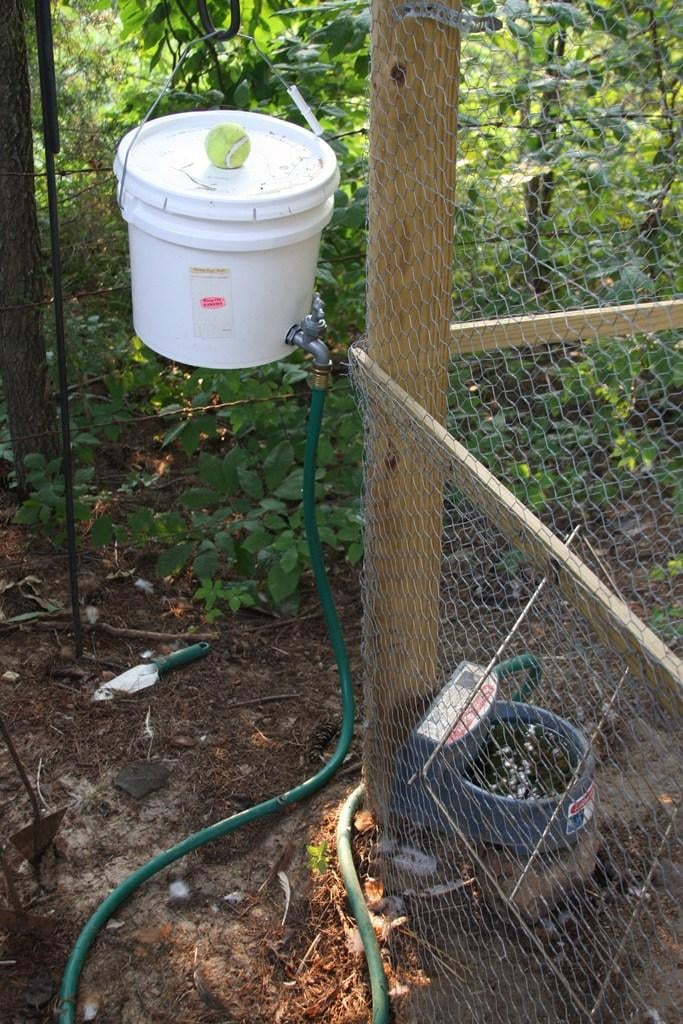
My version of the automatic waterer....auto-fill dog bowl, hooked to a bucket. There is a stove grate in front of the waterer that has all but eliminated the lady's climbing into the water bowl. The slots are big enough for their heads to go through to get a drink when they need one.
All that's left now is to gather those wonderful eggs. Thanks for visiting and stop by again soon...
I hope you have enjoyed seeing our chicken coop. Sometime in the future I plan on adding small sliding doors over the vent area near the roof. This would allow me to better regulate the temperature for the upcoming winter. After building this coop I also added a rope with a hook on it in the middle of the run. We often hang cabbages from this line. It will tickle you silly to watch the chickens playing a game of edible tether ball. I want to add a board in front of the nest boxes to keep the girls from throwing the straw out to the floor. We are using a deep litter method and I don't really want straw on the floor because I have heard it is more likely to mold and hold moisture. I will get to that pretty soon. Thanks for stopping by and visiting The Baker's Dozen.
My Nephew... The Chick Magnet. (We threw a sheet up for this picture and photoshop'd the border)
A quick visit to the feed store found us the proud new parents of 13 day old baby chicks. We had no idea what the different kinds would do for us but we decided on two of each kind they had plus one that the lady promised us would lay green eggs. I was awestruck, I couldn't wait for my first plate of green eggs and ham. Here are the 13 lucky additions to our family.

We built our brooder out of a store shipping crate, you can see the rest.
I began researching the different coop designs on the Internet and finally decided that I would just make my own. I evaluated the location I had chosen for our coop and then researched how much space would be needed for each chicken. The following design was what I settled on.
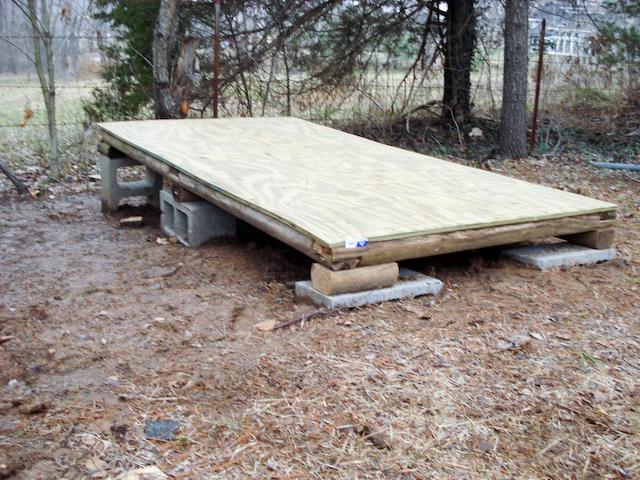
Here is the floor of our coop, the next picture shows the vinyl being installed. This of course makes for easier cleaning. Not my idea but I sure do like it.
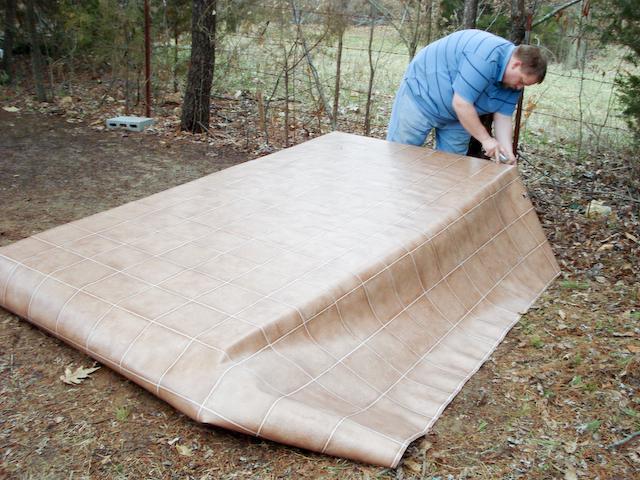
I would like to mention that while I did have to purchase much of the wood, I also recycled anything that I could. The vinyl here is a scrap from our local Lowe's. I think it was around $8. The landscape timbers and the blocks used to level the chicken house were already sitting unused in my yard.
The next thing I did was to actually make a window. I did this now because I was using a piece of Plexiglas and again some recycled scrap wood I picked up at the local habitat for humanity resale shop.
After I made the window I designed the rest of the coop. I made sure that the opening for the window fit the window I had made. If you wanted to build this coop I would recommend that you adjust accordingly to what you have available. Simply resize openings, door frames, etc to your needs.
The walls were built one at a time on the ground. After we had constructed the four different walls we then raised them on the already built platform. This is the wall for the window.

Here the walls are going up. The end to the right is where the door will go.
Another view of the framed coop.
My next part of this project after installing the back wall was to construct a roof. I did this by simply building an 8x8 frame, studding it in like you would a wall, and then attaching metal roofing to the frame. We lifted it up on the coop and attached with small blocks in the front to create the needed pitch for drainage and snow melt in the winter.
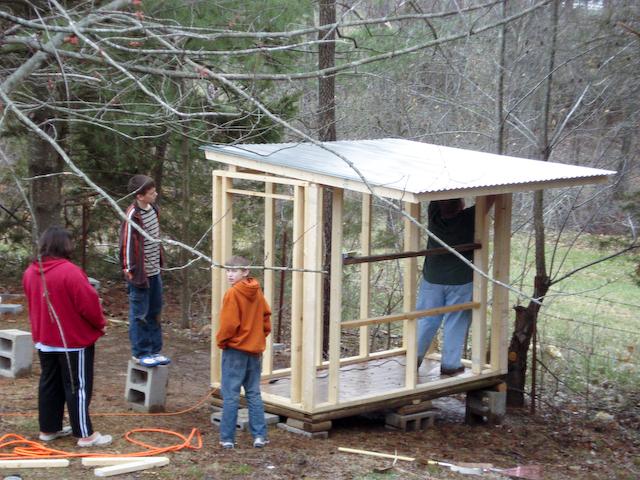
You'll notice the overhang in the back. This will later provide a sheltered area for gathering the eggs from the nest boxes. I attached this with metal braces I picked up at Lowe's.
Next came the siding. We decided to begin painting as soon as I began hanging the siding mainly because the weather had been anything but cooperative for several weeks.
My children were all a big help during this project.

Don't want to forget my Dear Wife.... Painting into the long hours of the night.
We decided to dig eight inch deep trenches all around the area that would become the chicken run.
We set the fence down into the ground and then doubled it over before burying it in an attempt to ward off predators.

A layer of wire over the top completes the run.

The run is complete, now it's time to move back to the other side of the coop and build the nest boxes.
The nest box area is constructed by extending pieces of 2x4 out 18 inches and then boxing the opening in to create an extended area where the chickens can nest.

I used pieces of trim to make slots for thin wood to slide into. I did this so I can remove the dividers if needed for cleaning and also it makes it reconfigurable if necessary.
A hinged door over the nest boxes makes outside access and egg gathering easier when the time comes.
The door was a leftover one from the previous owner of our house. I cut it down to fit my six foot tall chicken house.

The window functions perfectly. It helps to keep the temperature regulated by allowing air flow into the house. The window opening is covered with 1/4 inch hardware wire as is the opening up by the roof which serves as the vent. In the winter I will close the window and stuff newspaper into the vent opening by the roof.

Here are some pictures of our finished coop and chickens in action.
This was my first attempt at a home made feeder. It is simply PVC pipe with a pretzel can on top. I quickly realized that the can was not enough food for these fast growing chickens.

My new and improved model.
Here is their now in use nest area...
My version of the automatic waterer....auto-fill dog bowl, hooked to a bucket. There is a stove grate in front of the waterer that has all but eliminated the lady's climbing into the water bowl. The slots are big enough for their heads to go through to get a drink when they need one.
All that's left now is to gather those wonderful eggs. Thanks for visiting and stop by again soon...
I hope you have enjoyed seeing our chicken coop. Sometime in the future I plan on adding small sliding doors over the vent area near the roof. This would allow me to better regulate the temperature for the upcoming winter. After building this coop I also added a rope with a hook on it in the middle of the run. We often hang cabbages from this line. It will tickle you silly to watch the chickens playing a game of edible tether ball. I want to add a board in front of the nest boxes to keep the girls from throwing the straw out to the floor. We are using a deep litter method and I don't really want straw on the floor because I have heard it is more likely to mold and hold moisture. I will get to that pretty soon. Thanks for stopping by and visiting The Baker's Dozen.

My Nephew... The Chick Magnet. (We threw a sheet up for this picture and photoshop'd the border)