Country Charm
By: The Sproull's
By: The Sproull's
About UsWe are a young family, with four children, living in the small town of Springville in beautiful Southern Indiana where there are more cows than there are people. Anyways, the thought of raising chickens and eating fresh eggs has always been intriguing to me. So a few years ago I began feeding my spark of curiosity by researching the subject (Thanks, BYC, for being such a huge resource). The more I learned about chickens the more I wanted try it for myself. Our journey began when a box with the 2 dozen fertilized eggs I ordered was delivered to our house.
“You ordered what?” my wife questioned.
“We’re going to raise chickens, Baby”, I replied.
She wasn’t too warm to the idea initially, but she loves them now. I bought the eggs because I wanted to start from the ground up, plus I thought it would be fun for our kids to see the chicks hatch. Seven healthy chicks hatched from the eggs, and then we bought a dozen more chicks from a local farm store.
We kept the chicks in a homemade brooder in our garage while they were small. I knew it wouldn’t be long before they would outgrow the brooder and need a coop along with some space outside to scratch and roam about. So as soon as the ground thawed in the spring, I set out to build the chicks a place they could call home.
Several months prior to this point I had been busy designing the chicken coop. I don’t like to just throw things together, all options needed to be considered, blueprints drawn up, and a detailed construction process laid out (it's a curse that comes along with being a draftsman). So by the time the chicks finally hatched, I had everything planned out. Here are some of different things I considered during the design process.
Design Considerations
Aesthetics were very important to me. The coop had to look nice (I do have a little pride), and I wanted it to have an authentic, warm, country feel, not a pre-fab, plastic look. It also had to have a cool front door. Below are some pictures of chicken coops I found online that influenced my final design. I tried to in-coop-orate what I thought were the most desirable features of these coops into my coop design. Click to enlarge.


Functionality was also very important. I wanted the coop to be well designed and easy to maintain not just pretty. Some of the conveniences I wanted to integrate into the design included:
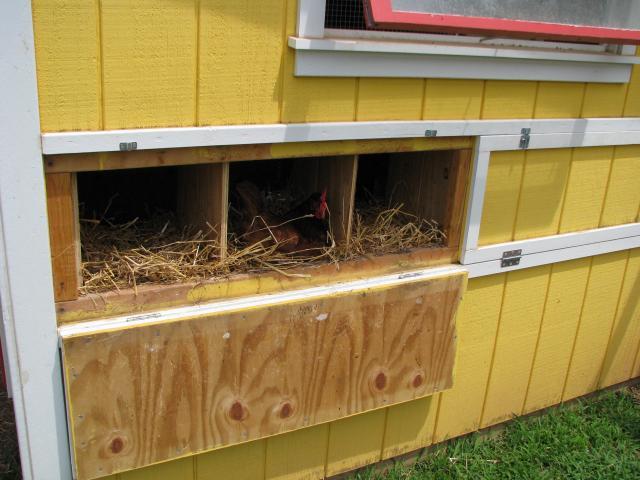
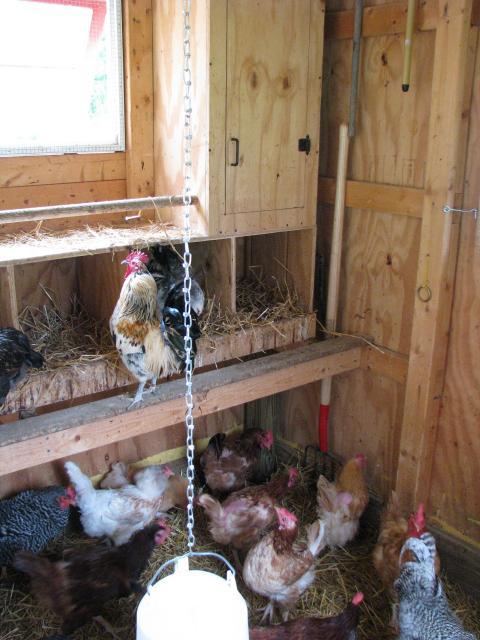
- Outside access to the nest boxes so eggs could be gathered without having to go inside the coop.
- A covered front porch to help keep mud/snow away from the front door and provide additional storage space if necessary.
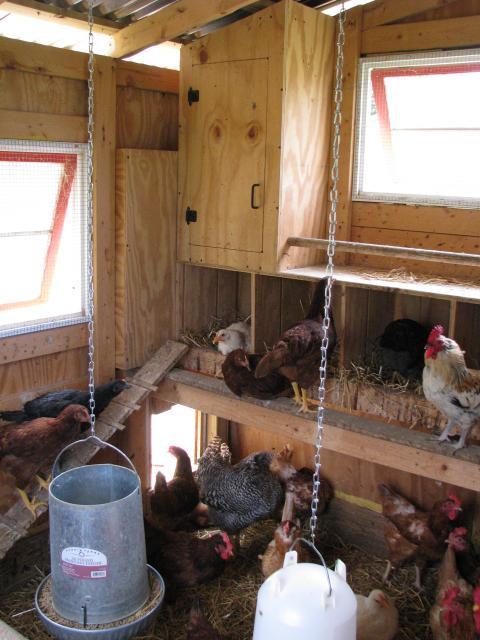
- Storage space on the inside for food supplements, straw, clippers and etc…
- The ability to open, close, and lock the chicken door from the front of the coop.
- I wanted the coop to be large enough for me to able to walk around on the inside to make cleaning easier.
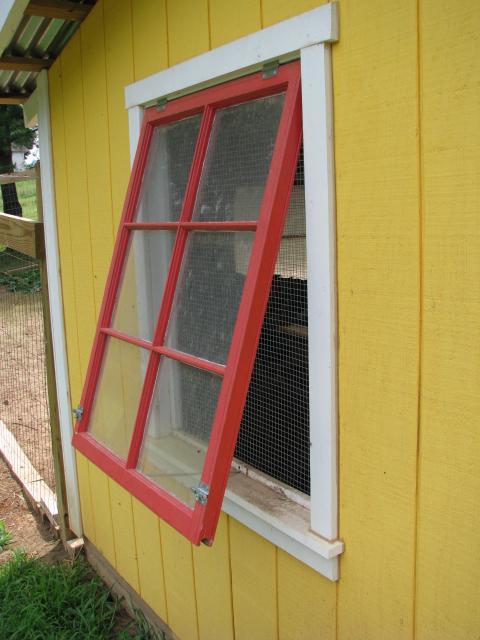
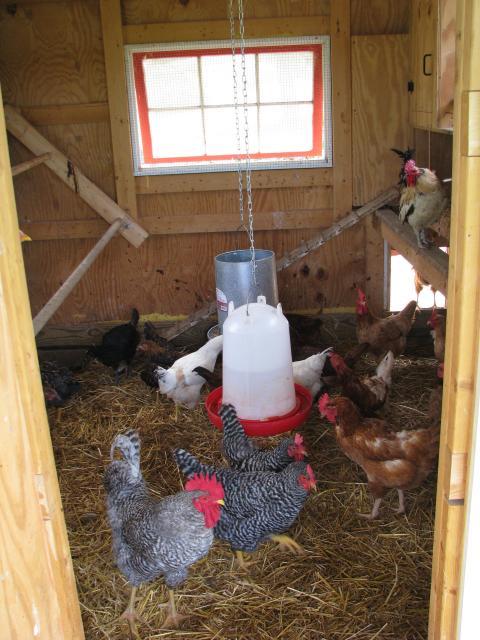
- Plenty of ventilation at the eves and fully functional windows for added ventilation during the summer months.
- A floor other than dirt to keep the litter dry and make it easier to clean out. Currently, the coop has a dirt floor with straw used as litter. I came across some scrap limestone pavers that I plan on using for the floor as soon as I get around to it.
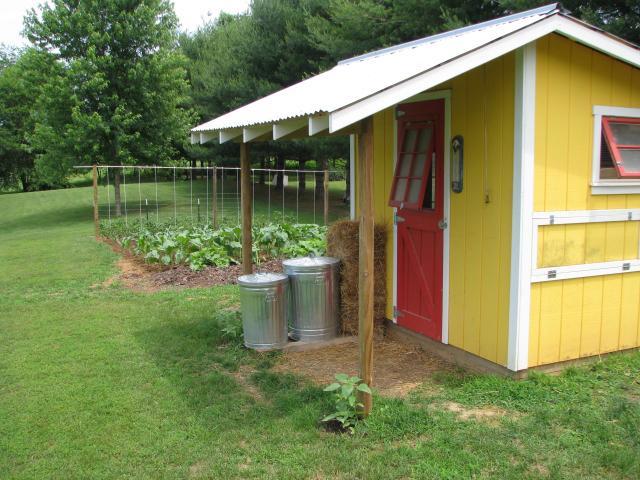
Cost wasn’t a huge concern. Keeping the total construction cost around $750 sounded reasonable to me. I didn’t keep good financial records for two reasons, 1) I didn’t want to feel bad if I went over my target, and 2) I didn’t want my wife to know how much money I was sinking into it.
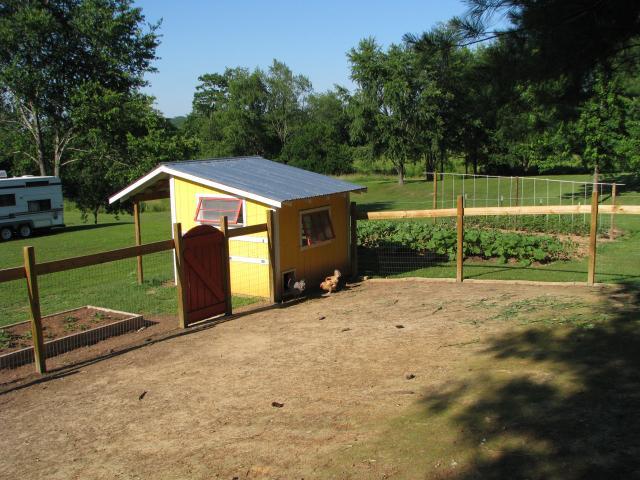
In retrospect, I wish that I would have incorporated a mobile fence design or multiple run areas so the hens could have fresh grass and bugs to forage through daily. They get plenty of leftover kitchen scraps and garden remnants, however, alternatives to permanent fencing will certainly be considered on the next go around.
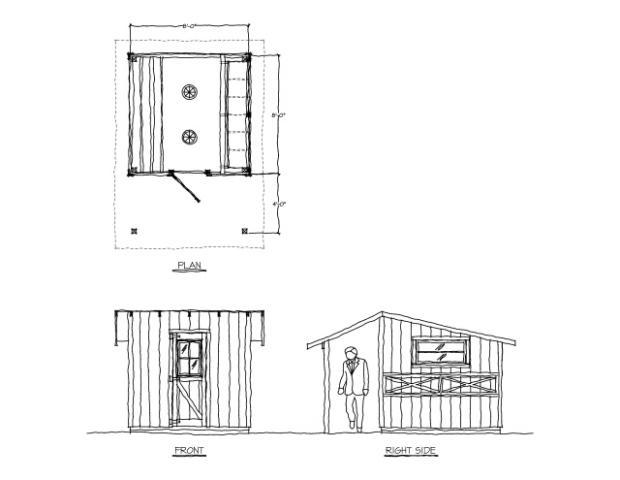
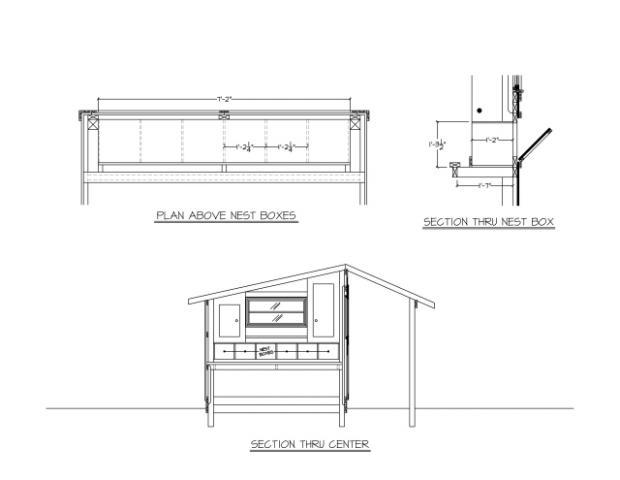
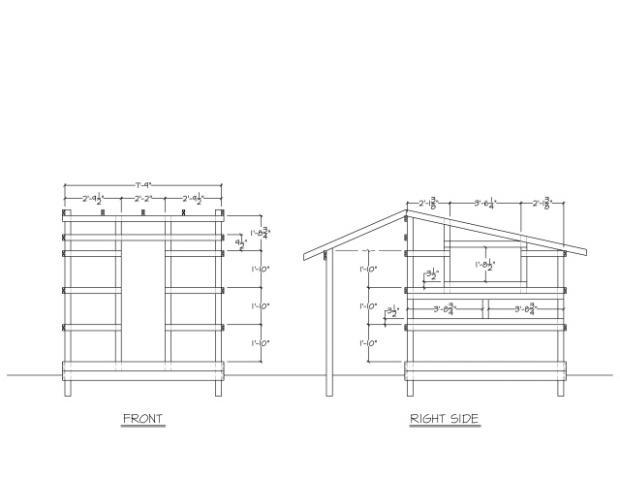
Final Design Drawings
After I decided what features I wanted and had the basic concept figured out I started putting it all together on paper. Below are some of the construction drawings I generated for the coop. Click to enlarge.


Coop Construction
Construction started early March 2010 and with the help of my kids, wife, and a neighbor boy the coop was finished by mid-April. Here are some pictures of the construction process.
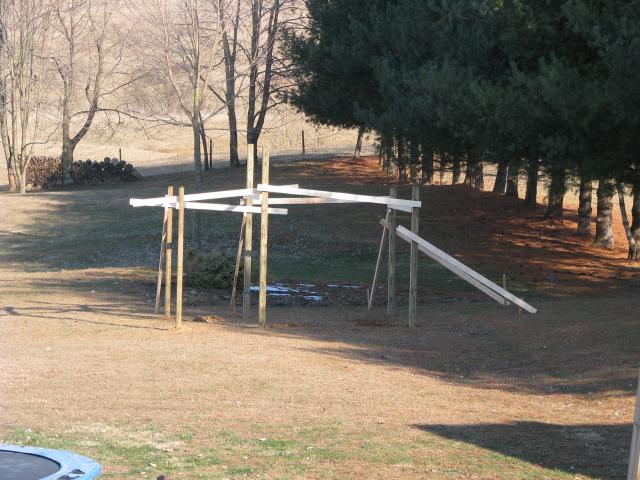
The posts set and braced.
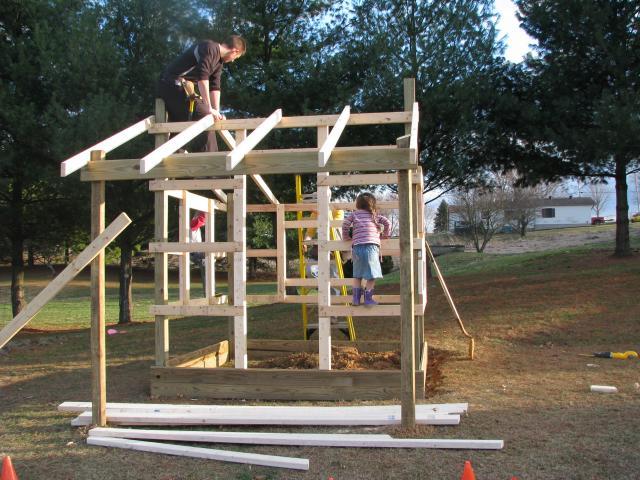
Building the frame.
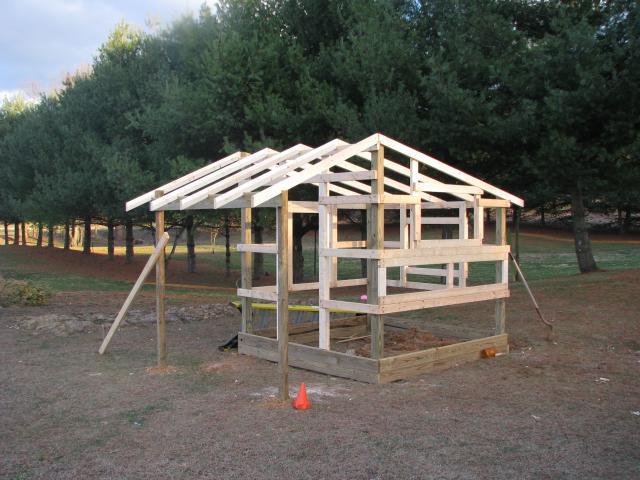
Framing complete.
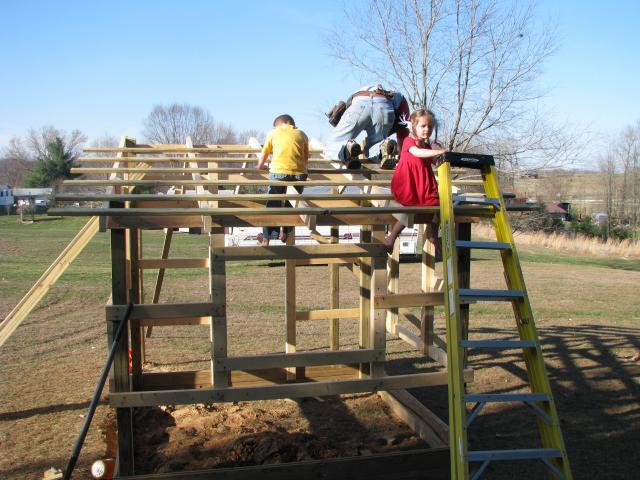
Nailing down the roof purlins.
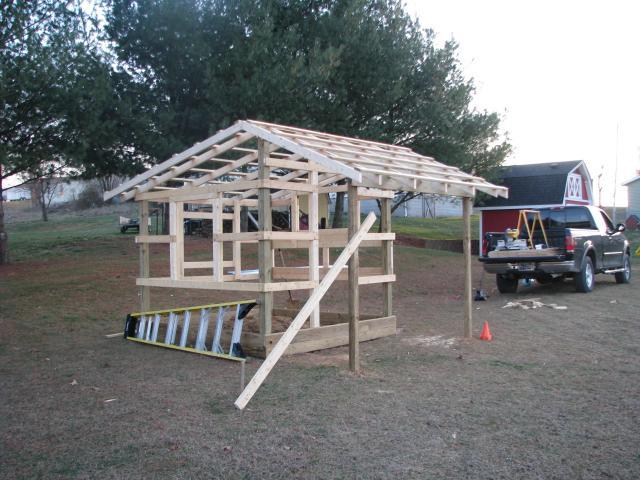
Ready for the skin.
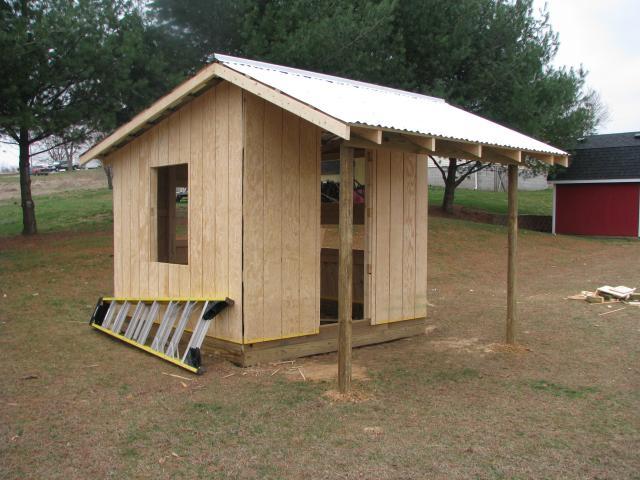
Siding and roof installed.
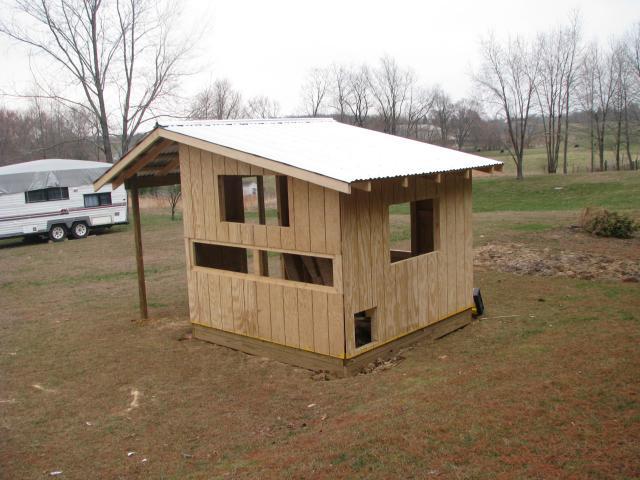
Ready for the door and windows.
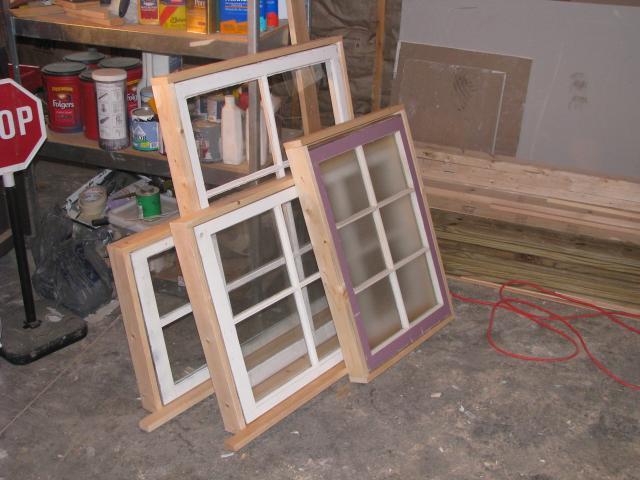
I found these old window sashes in the basement of a local antique shop. I built new frames to fit them, then added hardware and red paint. They turned out pretty nice, and really help with ventilation during the hot summer months.
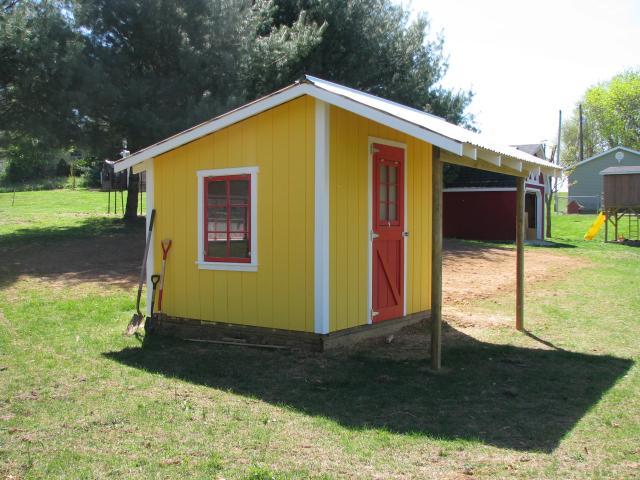
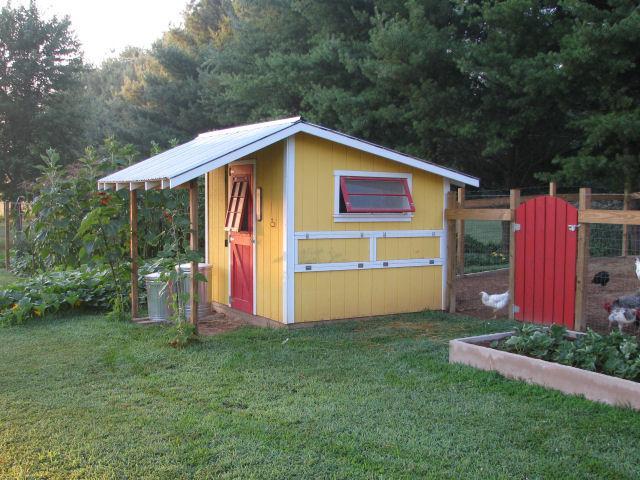
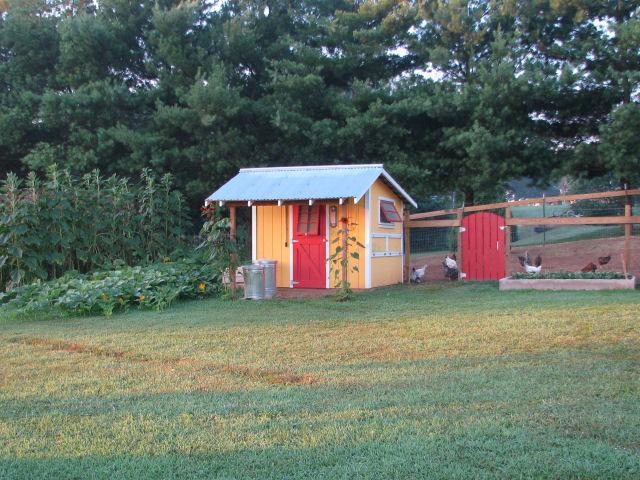
Here's the coop with the door, windows, and paint.
Done! Except for the pen.
Coop Operation
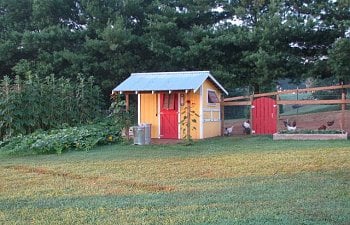
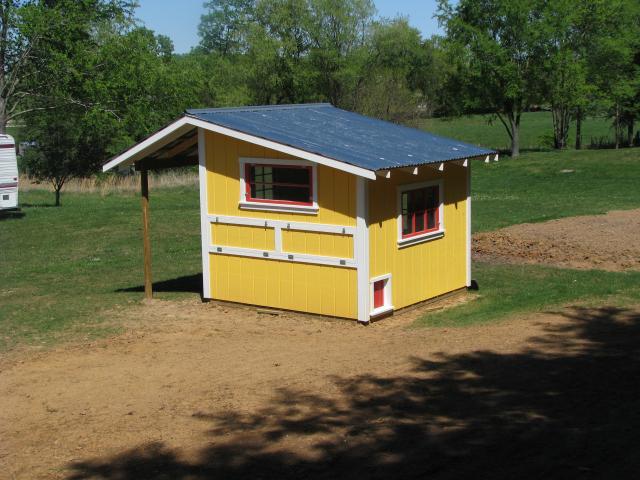
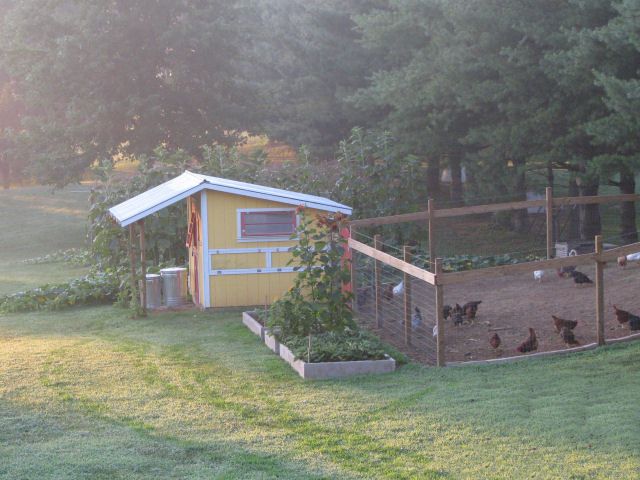
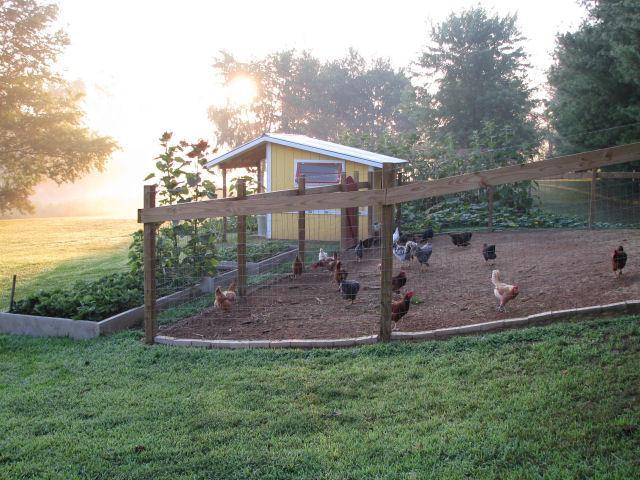
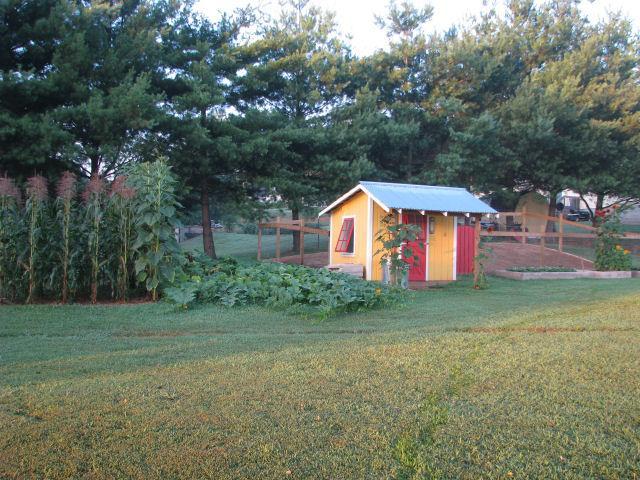
Here are some pictures of the finished coop and pen. Enjoy!
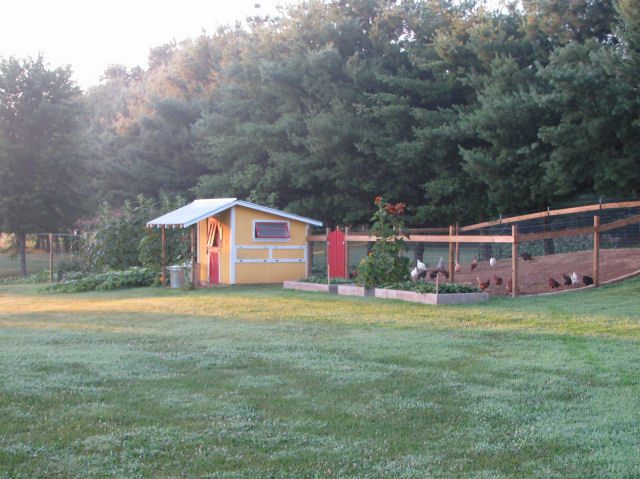
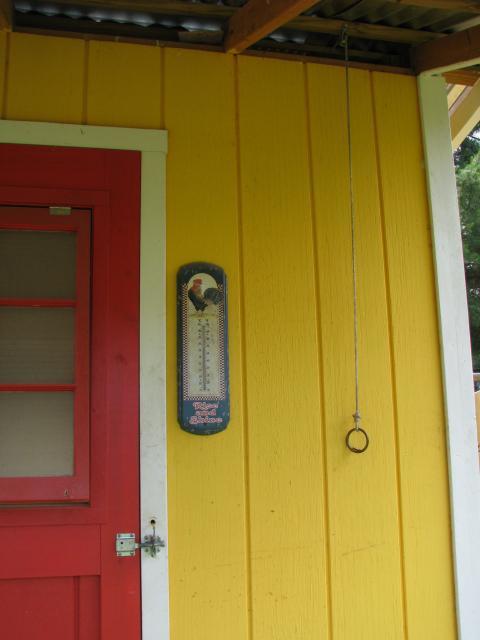
Here's a shot of rope/pulley system I rigged up to open/close and lock the small chicken door on the back of the coop. I modified a hold-down clamp, added a spring and a few other misc. items to make the locking mechinism. It works great, now the only way the chicken door can be unlocked/opened is by pulling this string. Now, if I could just get in the habit of closing the door at night we'd be in good shape.
Hope you found this narrative helpful and enjoyable. Best regards.