We finally got our coop done and in perfect timing to get the chickens out of our brooder (they were hopping up to the edge and pooping out of the brooder, lol). Here is the story about how the Dahlhouse on the Prairie (play on our last name) came to be! Being new to chickens this year I kinda jumped into the deep end and have been learning along the way. That said, BYC has been a huge resource that I am thankful to have stumbled upon!
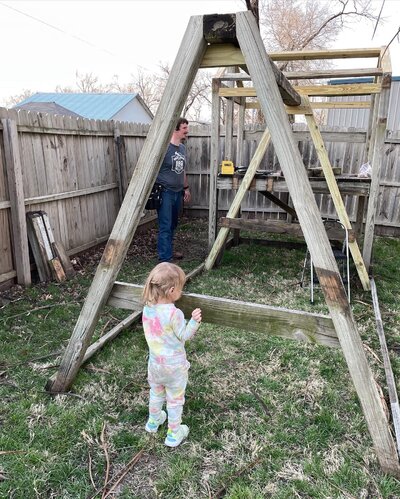
When we started, I knew I needed to have a bigger coop than what I was finding pre-fab in most places, but we didn't have the money to spend on a big enough coop for the new family members. So we improvised. Our neighbor was getting rid of an old play set and we started the conversion from there. Here is how it started:

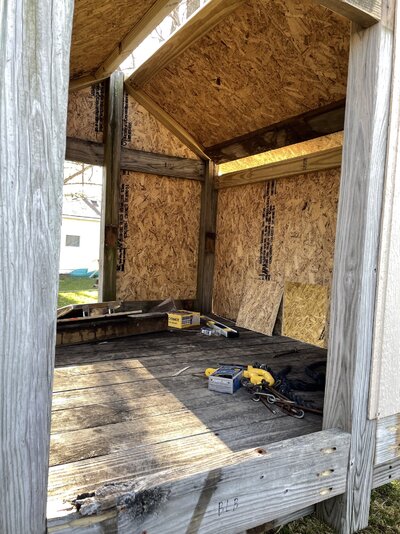
My husband did a great job taking my vision and ideas I got from here and making it a reality! After he gutted the frame, he put the roofing plywood on, and created the a-frame for the run.


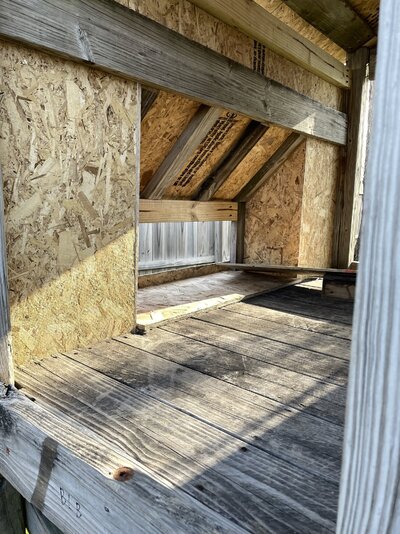
Next came the enclosing step for the coop itself and creating the nesting box:
As you can see with the A-Frame run, we created a portion that is covered so they have a way to get out of the weather that still gives them outside access.
We placed two large doors, one on each side for access to clean the coop, plus the pop door and door for the nesting boxes.
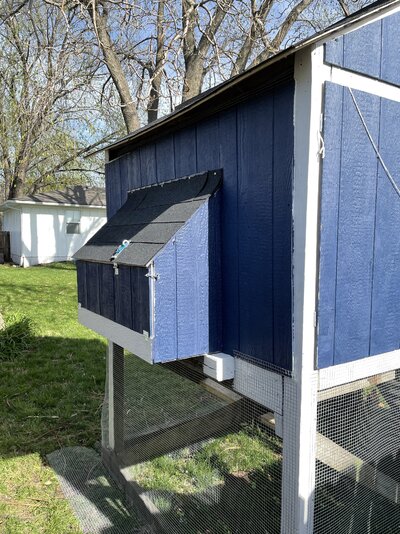
Then I started the painting aspect while he started installing hardware:
While not pictured, we did put linoleum tiles down on the floor to help with cleaning, and I painted the inside of the coop, since I had extra. Last, but not least, my husband installed a window, placed the roofing and the wire around the coop.
Here you can see the door my husband made for the run that can be walked through:
Here are the girls (and boys currently) enjoying the new space!

Overall we are pretty happy with the conversion. Eventually we will add an automatic door and a smaller door to let the chickens out that isn't so big. But it works!
Hope you enjoyed the build!
When we started, I knew I needed to have a bigger coop than what I was finding pre-fab in most places, but we didn't have the money to spend on a big enough coop for the new family members. So we improvised. Our neighbor was getting rid of an old play set and we started the conversion from there. Here is how it started:
My husband did a great job taking my vision and ideas I got from here and making it a reality! After he gutted the frame, he put the roofing plywood on, and created the a-frame for the run.
Next came the enclosing step for the coop itself and creating the nesting box:
As you can see with the A-Frame run, we created a portion that is covered so they have a way to get out of the weather that still gives them outside access.
We placed two large doors, one on each side for access to clean the coop, plus the pop door and door for the nesting boxes.
Then I started the painting aspect while he started installing hardware:
While not pictured, we did put linoleum tiles down on the floor to help with cleaning, and I painted the inside of the coop, since I had extra. Last, but not least, my husband installed a window, placed the roofing and the wire around the coop.
Here you can see the door my husband made for the run that can be walked through:
Here are the girls (and boys currently) enjoying the new space!
Overall we are pretty happy with the conversion. Eventually we will add an automatic door and a smaller door to let the chickens out that isn't so big. But it works!
Hope you enjoyed the build!