Fermenting is a simple process which involves soaking chicken feed then feeding it to your chickens. It is similar to a sourdough starter! And there are so many benefits!
The Benefits
Now you're probably thinking, "how to I get this marvelous food?" Hold your horses, I'm getting there!

How To Do It
First, gather all your suppplies. You will need:
1. Put your chicken feed in the bucket. I wouldn't dare fill the bucket any more than half-way with pellets You still have to add water, and pellets swell a lot! In my experience, grains don't swell as much.

Feed in the bucket.

Water has been added.
Add enough water that it is about an inch or two above the food, or maybe more if you are using pellets. For your first time you will want a little extra water (though not too much) so you can check for bubbles, as you will see in step 3

Loose-fitting lid on bucket. You can also see my stirring stick and scoop on top.
2. During the first day check it at least twice to make sure you have enough water. A little extra is better than not enough. After day one, feel free to experiment with water levels to see what you like best. I like mine to be pretty thick, with extra liquid but not so much that it is "liquidly." Your ferment should never be dry, as shown in the picture below.

This feed needs more water!
3. Around day 2-3 it will be ready (by "day two" I mean 24 hours after you started fermenting)! I have been told that finished ferments have a smell that is hard to describe (the best adjective somebody gave me was "sort of fruity"), but because my nose doesn't have a good sense of smell, I judge the bubbles.
When you stir normal chicken feed in water, a few bubbles are sure to come up. But when the ferment is ready, it will bubble excessively at the slightest of pushes from the stirring stick. You will know it when you see it.

A healthy ferment! Notice all the bubbles.
4. Once your ferment is ready, scoop some out into your shallow container. I drain most of the juice in the scoop back into the bucket. My chickens don't drink the juice.

Fermented feed in shallow container.
I don't have a set amount that I feed my chickens. I prefer to scoop out a little extra. They will eat the leftovers in the evening or early the next morning.
After you scoop out some chicken feed, add some dry feed into the bucket. Here is a secret: you can control how full your bucket is by how much dry feed you add every morning. If your bucket is too full, add less feed. If your bucket doesn't have enough, add more feed.

Dried chicken feed on top of the ferment, ready to be stirred in.
Check the water level. As mentioned in step 2, please experiment to find what you like best! Once you are done with this, put the lid back on and head out to the coop!
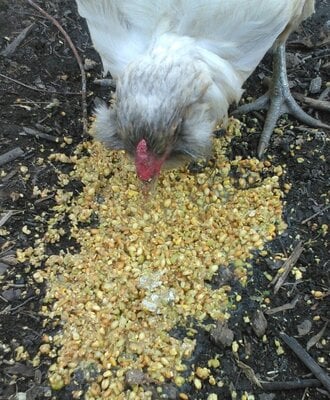
5. Once you are in the coop, let the chickens at their feed! It may take them a couple of days to get used to their strange new food, but once they do they will forever adore it! I have never met a chicken who does not like fermented feed!
It is a race to get to the feed every morning!
Sometimes the smaller birds will jump into the bin and eat. The only disadvantage is their muddy feet.
After the chickens are done eating, I take the bin and scoop and give them a quick rinse. This just makes cleaning easier in the long run.
Repeat steps 4 and 5 every morning!

Choice of Feed
I don't know a ton about feed choices, but I'll give you my best!

Whole grains from Big D Ranch!
Gains are best to ferment, because they have more nutrients than pellets. When grains are fermented, they open up to allow more nutrients They are also less sloppy and easier to manage than pellets.
Pellets (and crumbles) work, but they are not the best. Fermenting pellets is like putting greens into a smoothie; yummier, but with about the same nutrients.
Corn is not the best either. It is not as nutritious as other grains. It works, but it could be better. And of course, you wouldn't ever want a single type of grain to be the sole part of your flock's diet!
Kahm Yeast
After just a few days of fermenting, you may find a thin white film of something mold-like on top of your water. Upon discovering it, most people (including myself) think it is mold.
Don't panic! After some research and advice from friends, I found out this is Kahm Yeast. Its a yeast, not a mold. It is harmless, though I have heard that it can affect the taste a bit, and can make the ferment pretty smelly.
Kahm Yeast is white and grows like a film on top of the water. It almost always has bubbles trapped under the film. On the first day it is very thin with a few bubbles here and there. After that it rapidly gets stronger until it looks like a bunch of wrinkly, gray film.
Day one of Kahm Yeast.

Day two of Kahm Yeast.
It is not harmful, though it does smell. Some people even claim that it provides extra nutrition!
When I ferment outside I just scoop it into the container and let the chickens eat it with the rest of their feed.
When I find Kahm Yeast, I skim the majority off and throw it away. This is one reason to keep the water an inch above the feed; to make it easy to remove the Kahm.
Over time, the Kahm Yeast smell grows. When it gets to the point where my family start pestering me (every couple of months) I sometimes let my ferment die out by not adding any food and completely start over. I dump out all the old water and give my bucket and stirring stick a good scrub. This helps keep the Kahm down a little in the next batch.
Warmer temperatures help the Kahm Yeast grow faster. So by keeping your ferment in a cooler area you will be able to control the Kahm better.
Additional Notes

The Benefits
- It is easier for your chickens to digest, especially if you are feeding them pellets or crumbles. Even grains get softer after soaking.
- Your chickens will eat less. Soaking expands the food, and chickens also digest the fermented feed more thoroughly.
- It is harder to spill than dry food. But even if a bit is spilled, the chickens will gobble it up. Sometimes it takes them a while to get used to fermented feed, but once they do they love it!
- Tests have shown that chickens who eat fermented feed lay more eggs and they have thicker shells. By this I mean female chickens; roosters won't lay eggs no matter how much fermented feed you give them!
")
- Fermenting brings out probiotics that strengthen the chickens' immune system, making them less likely to get sick.
- It adds more nutrients! Good for gut health too!
- The chickens have shinier feathers, look healthier, act healthier, and are healthier. Some people even claim that they poop less and that their poo is less messy and smelly when they are fed a diet of fermented feed!
- As said before, the chickens love it!
Now you're probably thinking, "how to I get this marvelous food?" Hold your horses, I'm getting there!

How To Do It
First, gather all your suppplies. You will need:
- A bucket
- A loose-fitting lid for the bucket
- A stirring stick
- A shallow container
- A scoop
- Water & chicken feed
1. Put your chicken feed in the bucket. I wouldn't dare fill the bucket any more than half-way with pellets You still have to add water, and pellets swell a lot! In my experience, grains don't swell as much.

Feed in the bucket.

Water has been added.
Add enough water that it is about an inch or two above the food, or maybe more if you are using pellets. For your first time you will want a little extra water (though not too much) so you can check for bubbles, as you will see in step 3

Loose-fitting lid on bucket. You can also see my stirring stick and scoop on top.
2. During the first day check it at least twice to make sure you have enough water. A little extra is better than not enough. After day one, feel free to experiment with water levels to see what you like best. I like mine to be pretty thick, with extra liquid but not so much that it is "liquidly." Your ferment should never be dry, as shown in the picture below.

This feed needs more water!
3. Around day 2-3 it will be ready (by "day two" I mean 24 hours after you started fermenting)! I have been told that finished ferments have a smell that is hard to describe (the best adjective somebody gave me was "sort of fruity"), but because my nose doesn't have a good sense of smell, I judge the bubbles.
When you stir normal chicken feed in water, a few bubbles are sure to come up. But when the ferment is ready, it will bubble excessively at the slightest of pushes from the stirring stick. You will know it when you see it.

A healthy ferment! Notice all the bubbles.
4. Once your ferment is ready, scoop some out into your shallow container. I drain most of the juice in the scoop back into the bucket. My chickens don't drink the juice.

Fermented feed in shallow container.
I don't have a set amount that I feed my chickens. I prefer to scoop out a little extra. They will eat the leftovers in the evening or early the next morning.
After you scoop out some chicken feed, add some dry feed into the bucket. Here is a secret: you can control how full your bucket is by how much dry feed you add every morning. If your bucket is too full, add less feed. If your bucket doesn't have enough, add more feed.

Dried chicken feed on top of the ferment, ready to be stirred in.
Check the water level. As mentioned in step 2, please experiment to find what you like best! Once you are done with this, put the lid back on and head out to the coop!
5. Once you are in the coop, let the chickens at their feed! It may take them a couple of days to get used to their strange new food, but once they do they will forever adore it! I have never met a chicken who does not like fermented feed!

It is a race to get to the feed every morning!

Sometimes the smaller birds will jump into the bin and eat. The only disadvantage is their muddy feet.
After the chickens are done eating, I take the bin and scoop and give them a quick rinse. This just makes cleaning easier in the long run.
Repeat steps 4 and 5 every morning!

Choice of Feed
I don't know a ton about feed choices, but I'll give you my best!

Whole grains from Big D Ranch!
Gains are best to ferment, because they have more nutrients than pellets. When grains are fermented, they open up to allow more nutrients They are also less sloppy and easier to manage than pellets.
Pellets (and crumbles) work, but they are not the best. Fermenting pellets is like putting greens into a smoothie; yummier, but with about the same nutrients.
Corn is not the best either. It is not as nutritious as other grains. It works, but it could be better. And of course, you wouldn't ever want a single type of grain to be the sole part of your flock's diet!
Kahm Yeast
After just a few days of fermenting, you may find a thin white film of something mold-like on top of your water. Upon discovering it, most people (including myself) think it is mold.
Don't panic! After some research and advice from friends, I found out this is Kahm Yeast. Its a yeast, not a mold. It is harmless, though I have heard that it can affect the taste a bit, and can make the ferment pretty smelly.
Kahm Yeast is white and grows like a film on top of the water. It almost always has bubbles trapped under the film. On the first day it is very thin with a few bubbles here and there. After that it rapidly gets stronger until it looks like a bunch of wrinkly, gray film.

Day one of Kahm Yeast.

Day two of Kahm Yeast.
It is not harmful, though it does smell. Some people even claim that it provides extra nutrition!
When I ferment outside I just scoop it into the container and let the chickens eat it with the rest of their feed.
When I find Kahm Yeast, I skim the majority off and throw it away. This is one reason to keep the water an inch above the feed; to make it easy to remove the Kahm.
Over time, the Kahm Yeast smell grows. When it gets to the point where my family start pestering me (every couple of months) I sometimes let my ferment die out by not adding any food and completely start over. I dump out all the old water and give my bucket and stirring stick a good scrub. This helps keep the Kahm down a little in the next batch.
Warmer temperatures help the Kahm Yeast grow faster. So by keeping your ferment in a cooler area you will be able to control the Kahm better.
Additional Notes
- I take care of my fermented feed in the morning, because that is when I feed my chickens. I don't allow my adult chickens free-choice unless I am on vacation. If you want, you could feed your chickens twice or even three times per day; it is just personal preference.
- If I am going on a short trip, I put extra water and feed in the bucket and let it be, but if I am going on a long vacation I let my fermented feed level in the bucket drop lower and lower, then start over when I get back.
- I ferment feed outside during the summer and inside during winter. My family makes me keep it in the garage because of the smell from the Kahm Yeast.
- I have not yet dealt with mold in my ferment, but if I ever did, I would completely restart and wash my bucket very well.
- Recently my feed bin tipped over and got stuck on top of one of my pullets. The first time this happened I was near and lifted it off her. The second time I did not find her until several hours later and she suffocated. From her death, I have learned to stay near my chickens while they are eating from a tall container that is tippy. To clarify, it was not the fermented feed that killed her, it was suffocation from being stuck under the bin.
- As I mentioned before, it might take a while for the chickens to get used to fermented feed. If they refuse to eat, cut off all access to dry feed. If they are used to having access to food 24/7 it will take them a couple days to learn they should eat all they can at your one or two designated meal times. Be patient with them and don't lose hope!
- For future reading you can check out this thread: https://www.backyardchickens.com/threads/fermented-feeds-anyone-using-them.645057/post-8695537
- Remember, everybody's method is different. And that's okay! I would love to know what you do in the comments!


") Now take it up a level and put a half cup of half cooked brown rice in your FF Mix. Our ducks and chickens go crazy over the rice and it's a great source of fiber for them.
Now take it up a level and put a half cup of half cooked brown rice in your FF Mix. Our ducks and chickens go crazy over the rice and it's a great source of fiber for them.
