This is our kids swingset turned coop - was a fun/challenging project!
We are located in Florida, so we weren't worried about winterizing and took advantage of the many windows already part of the playhouse (and just screened over them) maximizing air flow in the summer.
--------------------------------------------
Phase I - Swing Set turned Coop/Run
--------------------------------------------
 Started by putting up middle support beams and stapling up chicken wire across the A-frame swing area. (Note: if we were to do it again, would use hardware cloth!!!). We did a second pass 3 foot up and 1 foot buried under (not shown)
 For the playhouse turned coop, we put plywood over all the existing "walls" and put hc on the top open area to make windows!
The door shown here is on a pully, but we have since put in a solar door to open and close at sunrise/set
 The swing set had a sandbox on the lower level (under the play house) which we split for half sand and dirt bath and closed in an area for food. Here is Beauty and Lala exploring it during building phase...
 After closing in the playhouse...we started painting, white with green trim to match the house; Added two doors (one was the ladder, one the playhouse slide)
 We strung more chicken wire under the playhouse, built a door for the eventual chunnel (Finished roll-a-way nesting box on the left)
 Final pic of the rollaway nest box (later we painted inside black, and added curtains they prefer darkness!)
 The door on the run opens only at the top to avoid them escaping when we throw in treats (here is a good shot of the sandbox split into a covered feeding area, sand and dirt bath)
 Inside the coop, we started with stick and a 2x3 roosting bar (they preferred the board -- even when I switched them they roosted on the board) the mat system has been replaced with a poop sling the can be lowered and poop rolls off into tub (cleaned weekly or more frequently as needed). The wood shavings/chips was replaced first with sand, then with linoleum, which is SOOOO much easier to clean!!!!
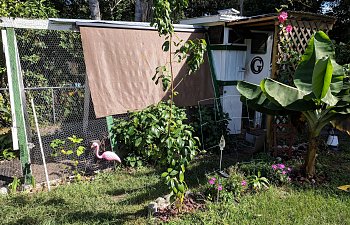
 Added a sunshade and trellis over the main door, started planting hibiscus, banana and pineapple trees as well as a cinnamon and mango tree - the back of the run has a blackberry, blueberry and raspberry vine growing.
---------------------------------------
Phase II - The Chunnel/Compost
----------------------------------------
As the chickens got to be 10 weeks, we added a couple more so had to expand!
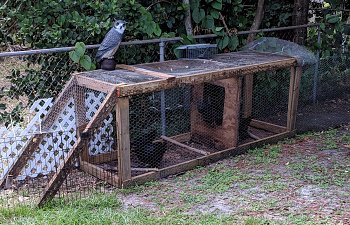
 We found a free "old coop" on offerup and used it for a chunnel to connect to the compost area, here you see them running between the main coop and compost area. The entire chunnel system is movable and 20 feet from coop to the back corner of the yard.
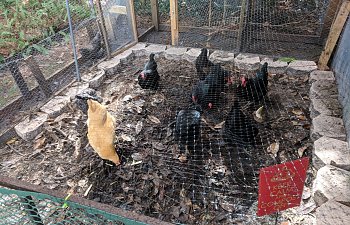
 Here is the starter compost pile, we have had three different tries at this, this one seems to work the best.
------------------------
Phase III - Day Pen
------------------------
As the summer sun is intense we noted that the girls were spending a lot of time in the back of the yard and the compost pile, so we built them a day pen!
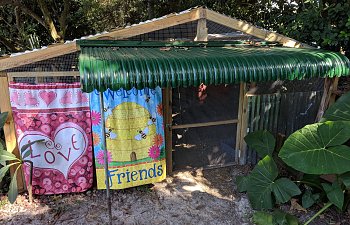
 This 12x12 enclosure is under a 30 foot magnolia tree - the temperature is usually at minimum 10 degrees cooler than the main coop during the summer this is a huge deal!
We are slowly adding roosts, logs, toys and a nesting area - more pics to come
Hope you all enjoy your coop building as much as we did!!
We are located in Florida, so we weren't worried about winterizing and took advantage of the many windows already part of the playhouse (and just screened over them) maximizing air flow in the summer.
--------------------------------------------
Phase I - Swing Set turned Coop/Run
--------------------------------------------
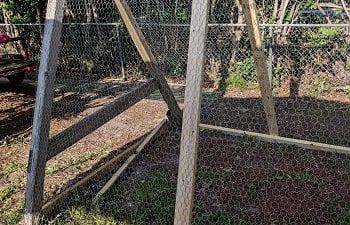 Started by putting up middle support beams and stapling up chicken wire across the A-frame swing area. (Note: if we were to do it again, would use hardware cloth!!!). We did a second pass 3 foot up and 1 foot buried under (not shown)
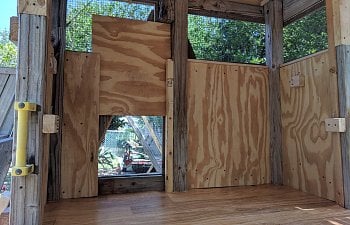 For the playhouse turned coop, we put plywood over all the existing "walls" and put hc on the top open area to make windows!
The door shown here is on a pully, but we have since put in a solar door to open and close at sunrise/set
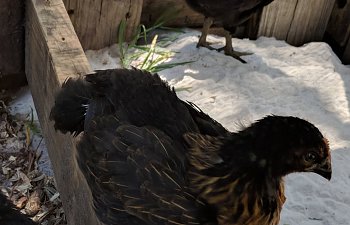 The swing set had a sandbox on the lower level (under the play house) which we split for half sand and dirt bath and closed in an area for food. Here is Beauty and Lala exploring it during building phase...
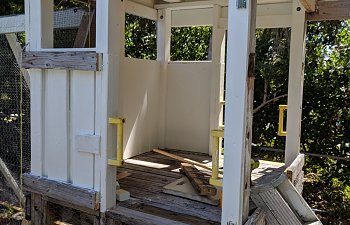 After closing in the playhouse...we started painting, white with green trim to match the house; Added two doors (one was the ladder, one the playhouse slide)
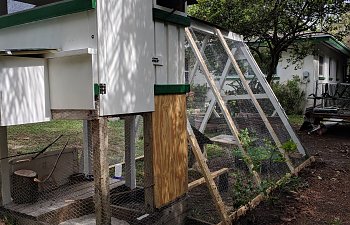 We strung more chicken wire under the playhouse, built a door for the eventual chunnel (Finished roll-a-way nesting box on the left)
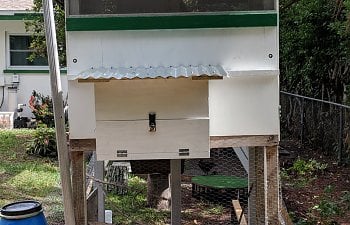 Final pic of the rollaway nest box (later we painted inside black, and added curtains they prefer darkness!)
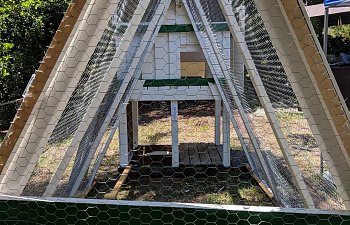 The door on the run opens only at the top to avoid them escaping when we throw in treats (here is a good shot of the sandbox split into a covered feeding area, sand and dirt bath)
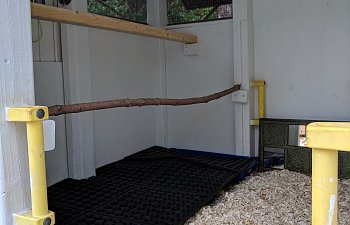 Inside the coop, we started with stick and a 2x3 roosting bar (they preferred the board -- even when I switched them they roosted on the board) the mat system has been replaced with a poop sling the can be lowered and poop rolls off into tub (cleaned weekly or more frequently as needed). The wood shavings/chips was replaced first with sand, then with linoleum, which is SOOOO much easier to clean!!!!
 Added a sunshade and trellis over the main door, started planting hibiscus, banana and pineapple trees as well as a cinnamon and mango tree - the back of the run has a blackberry, blueberry and raspberry vine growing.
---------------------------------------
Phase II - The Chunnel/Compost
----------------------------------------
As the chickens got to be 10 weeks, we added a couple more so had to expand!
 We found a free "old coop" on offerup and used it for a chunnel to connect to the compost area, here you see them running between the main coop and compost area. The entire chunnel system is movable and 20 feet from coop to the back corner of the yard.
 Here is the starter compost pile, we have had three different tries at this, this one seems to work the best.
------------------------
Phase III - Day Pen
------------------------
As the summer sun is intense we noted that the girls were spending a lot of time in the back of the yard and the compost pile, so we built them a day pen!
 This 12x12 enclosure is under a 30 foot magnolia tree - the temperature is usually at minimum 10 degrees cooler than the main coop during the summer this is a huge deal!
We are slowly adding roosts, logs, toys and a nesting area - more pics to come
Hope you all enjoy your coop building as much as we did!!
