Now we will take a small leap forward in time, because the rectangular frame sat in the garage until weather and a free weekend allowed us to get back around to it.
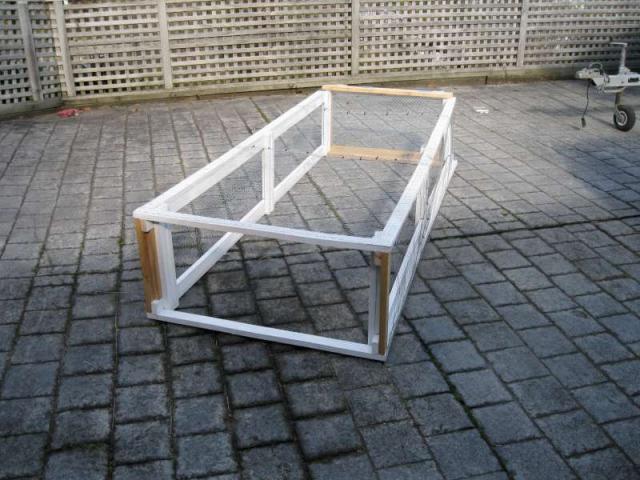
First we shored up those corners for some additional strength. We painted white because we had half a can of white paint in the garage. I'm not sure white would have been our first choice, but so be it. A lot of people will have extra paint sitting around. If you don't, your neighbor does.
But now we come to our first, I think, stretch in our quest for building with purely found materials. You are going to need chicken wire to pull this off, and it ain't free. In our case, it so happens, our youngest has a guinea pig and we had built a small outdoor enclosure for the pig to run around. To do this we bought a roll of chicken wire. I would put that at $25, and we still had the vast majority of it under the house. So out comes the guinea pig - now chicken wire, which we used to essentially wrap the big rectangular box we had built.
I'm not sure you couldn't find a way to come by some chicken wire, but since we already had it, we didn't have to put our mind to this. I'd probably have gone over to the local dump/recycling center and seen if there was any laying around or able to be pulled off of preexisting fencing or cages. I don't know. Call the SPCA, vets or catteries, and see if they've got any left over from building kennels/cages. The more I think about it, I bet there's a spool of half-used chicken wire out there somewhere, just waiting for you to ask for it.
BTW, those little black spots running in a line across the top are cable ties spaced every so often, cinching the seam together where two bands of chicken wire meet. I wasn't sure cable ties would be adequate, but they are.

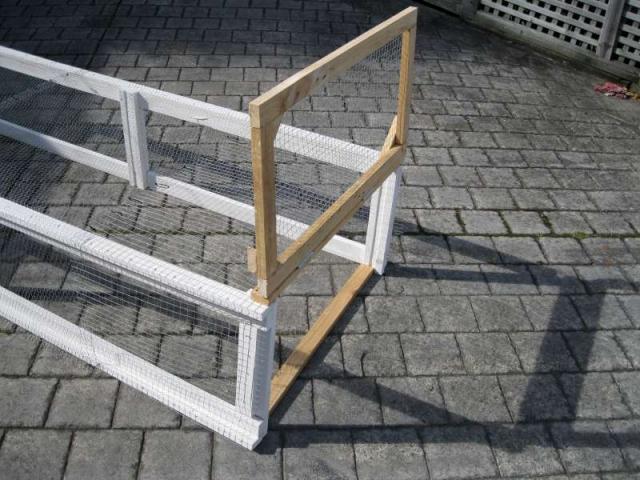
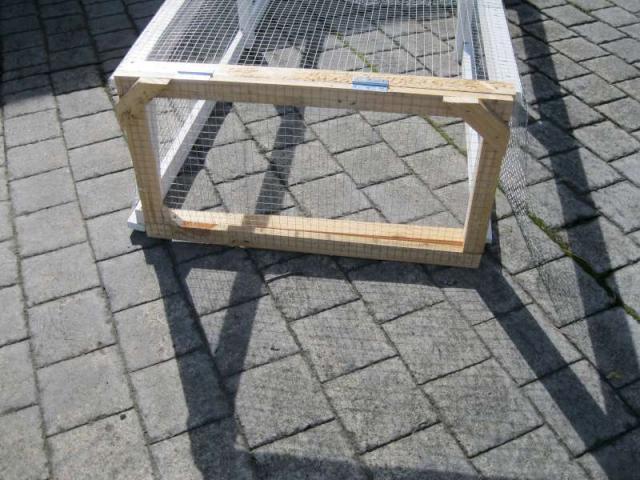
We built a hatch at one end out of scrap.
It works! That's the run and the nesting box, and we're in for about $15.
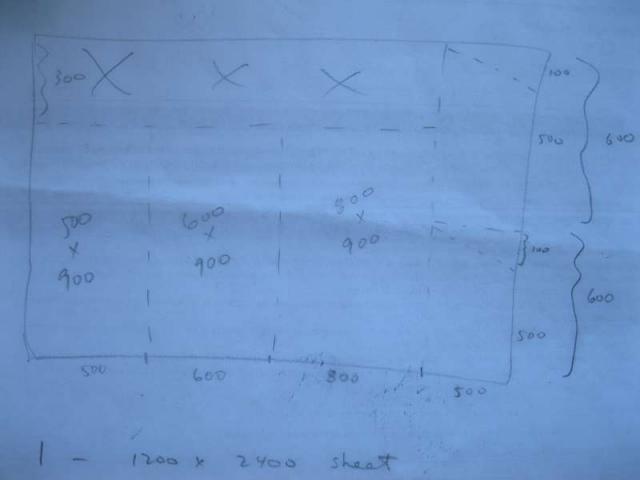
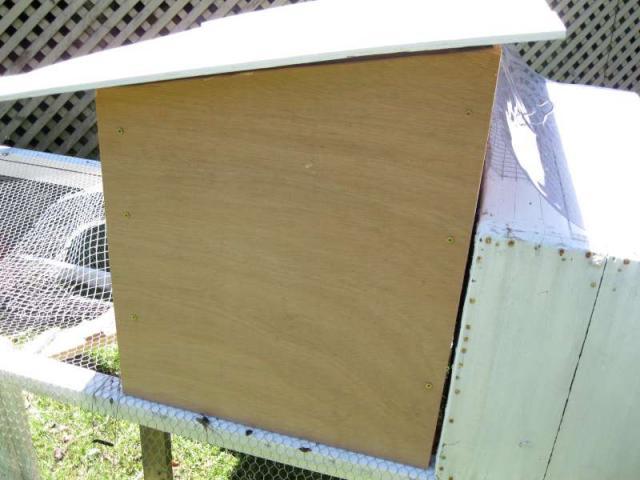
And so we get to the living quarters, which is where we intend to splash out. We are going to buy one sheet of high-grade plywood. It will be untreated, and we are not so concerned about the knottiness of it, but more about the thickness and the glue used. All faces of the sleeping house will come out of one 1200 X 2400 sheet.
This is the most we were able to execute according to plan, albeit from the back of a napkin sketch.
Considerations:
We want a slope on the roof, and we want a roof that opens (thank you BYC designers). We want a nice overhang in the front. A front porch, if you will, to keep the rain out of the front door. We do not anticipate ever closing the front door. It's not cold enough in winter. The width front and back will be 900mm, same as the width of the run. The front will be 500mm and the back wall 600mm. The sides will therefore need a sloping cut from 500 in front to 600 in back. The roof will be 800, allowing for a nice overhang for the front porch, and in back, where we plan a long narrow vent. (thank you BYC designers! Did I say that already?)
Part of the plan is also to have the lumberyard cut it for us ;-) They have a big wall mounted saw thingy - like a giant table saw on its side - so they can punch in the width and give you a perfect cut. We are certain our own results would not have been quite so... precise.
This piece of plywood will cost us $35. Cut up and reassembled, it will look something like this:
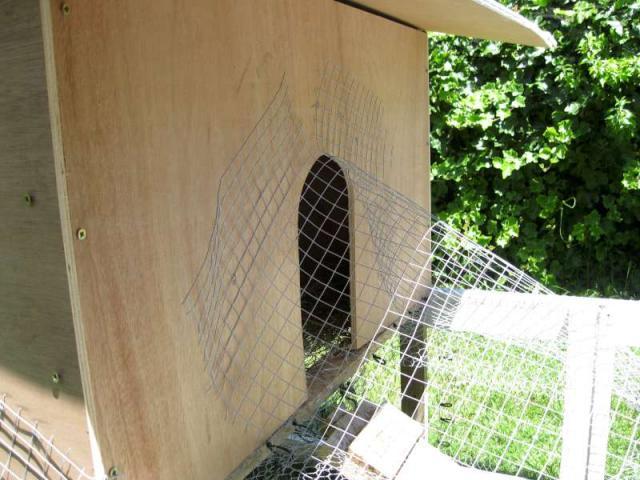
Now this project begins to really take shape. You can see how our "sleeping quarters" butt up against the nesting box we screwed onto the frame earlier. An interior hole/door connects the two. We stick a dowel across the entire width of the sleeping quarters. A last design consideration is that we are going to leave the floor of the sleeping quarters as the wrapped chicken wire to make cleaning easier. We open a hole in the chicken wire for our gangplank and form what amounts to a tunnel up to the front door.
We are ready for the birds!
Next sections:
Just add chickens
First we shored up those corners for some additional strength. We painted white because we had half a can of white paint in the garage. I'm not sure white would have been our first choice, but so be it. A lot of people will have extra paint sitting around. If you don't, your neighbor does.
But now we come to our first, I think, stretch in our quest for building with purely found materials. You are going to need chicken wire to pull this off, and it ain't free. In our case, it so happens, our youngest has a guinea pig and we had built a small outdoor enclosure for the pig to run around. To do this we bought a roll of chicken wire. I would put that at $25, and we still had the vast majority of it under the house. So out comes the guinea pig - now chicken wire, which we used to essentially wrap the big rectangular box we had built.
I'm not sure you couldn't find a way to come by some chicken wire, but since we already had it, we didn't have to put our mind to this. I'd probably have gone over to the local dump/recycling center and seen if there was any laying around or able to be pulled off of preexisting fencing or cages. I don't know. Call the SPCA, vets or catteries, and see if they've got any left over from building kennels/cages. The more I think about it, I bet there's a spool of half-used chicken wire out there somewhere, just waiting for you to ask for it.
BTW, those little black spots running in a line across the top are cable ties spaced every so often, cinching the seam together where two bands of chicken wire meet. I wasn't sure cable ties would be adequate, but they are.
We built a hatch at one end out of scrap.
It works! That's the run and the nesting box, and we're in for about $15.
And so we get to the living quarters, which is where we intend to splash out. We are going to buy one sheet of high-grade plywood. It will be untreated, and we are not so concerned about the knottiness of it, but more about the thickness and the glue used. All faces of the sleeping house will come out of one 1200 X 2400 sheet.
This is the most we were able to execute according to plan, albeit from the back of a napkin sketch.
Considerations:
We want a slope on the roof, and we want a roof that opens (thank you BYC designers). We want a nice overhang in the front. A front porch, if you will, to keep the rain out of the front door. We do not anticipate ever closing the front door. It's not cold enough in winter. The width front and back will be 900mm, same as the width of the run. The front will be 500mm and the back wall 600mm. The sides will therefore need a sloping cut from 500 in front to 600 in back. The roof will be 800, allowing for a nice overhang for the front porch, and in back, where we plan a long narrow vent. (thank you BYC designers! Did I say that already?)
Part of the plan is also to have the lumberyard cut it for us ;-) They have a big wall mounted saw thingy - like a giant table saw on its side - so they can punch in the width and give you a perfect cut. We are certain our own results would not have been quite so... precise.
This piece of plywood will cost us $35. Cut up and reassembled, it will look something like this:
Now this project begins to really take shape. You can see how our "sleeping quarters" butt up against the nesting box we screwed onto the frame earlier. An interior hole/door connects the two. We stick a dowel across the entire width of the sleeping quarters. A last design consideration is that we are going to leave the floor of the sleeping quarters as the wrapped chicken wire to make cleaning easier. We open a hole in the chicken wire for our gangplank and form what amounts to a tunnel up to the front door.
We are ready for the birds!
Next sections:
Just add chickens