Fox's Log Cabin Chicken Coop

Greetings from the country! We (me, my wife, our 11 year old Maine Coon cat Olliver, and our six hens Ginger, Marry Ann, Babbs, Edwina, Lucy, and Madge) live on a small 9.25 acre piece of tree covered land in the midlands of South Carolina . We always dreamed of owning a log home and after retiring from the Air Force, we bought the land and built the cabin. We both grew up on farms and so after 22 years of living in cities and apartments, we are starting to dabble in light/hobby farming. After seeing how so many people have begun to keep chickens, I was excited to do so myself. The BYC website was an inspiration and seeing the many different coop designs really got me excited. Well, since we live in a log home, I wanted to house my chickens likewise in a log coop. However, I could not find any log chicken coops designs, or for that matter, any evidence of log coops at all. So, with tons of examples of coops on the BYC site, and a little creativity of my own, I figured I'd make my own and I would like to share it with you all. What follows is a a pictoral tour of the log coop building process. I will tell you I only have about $400 in this structure (nails, screws, some plywood, roofing panels, chicken wire, and a screen door kit. Everything else was left over from our cabin's construction, other projects, or taken from the property i.e. logs. 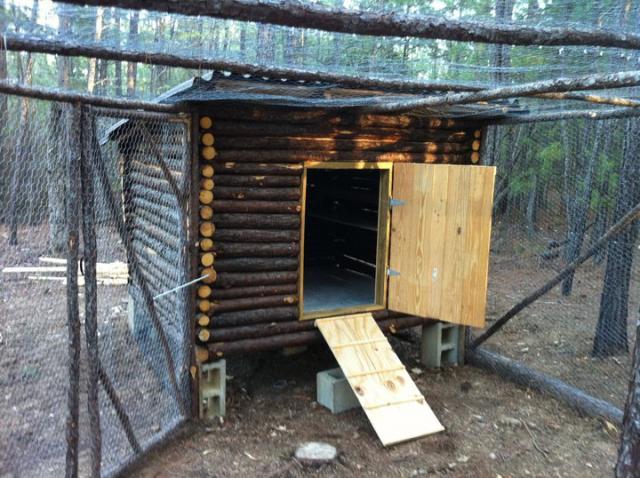
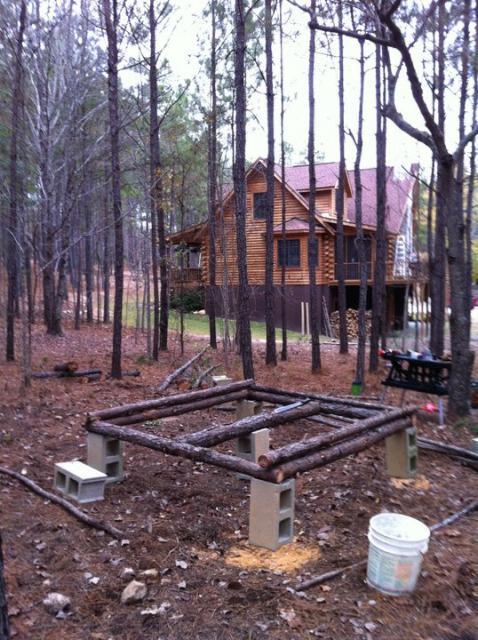
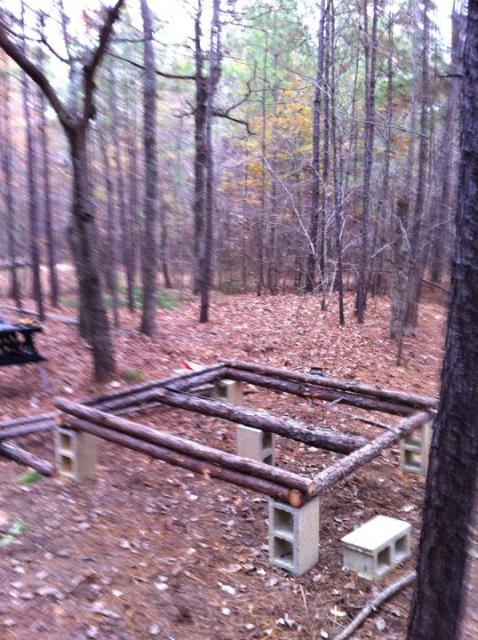
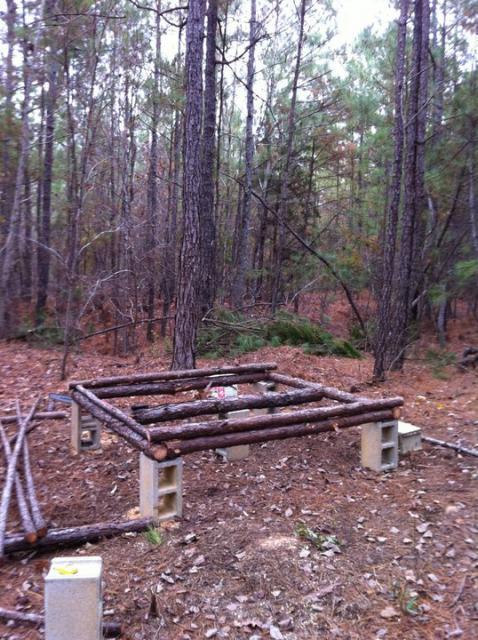
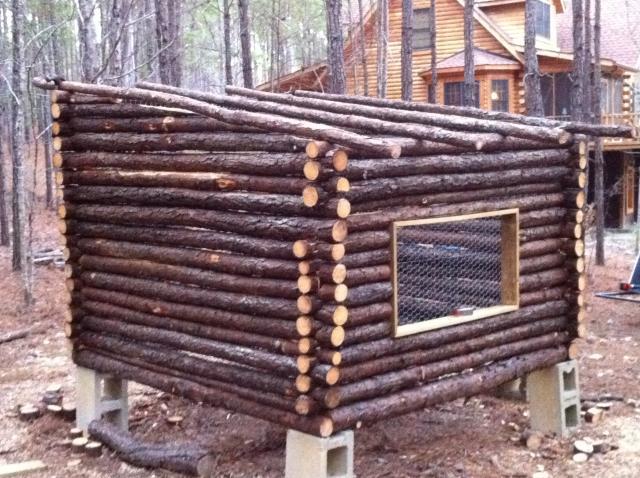
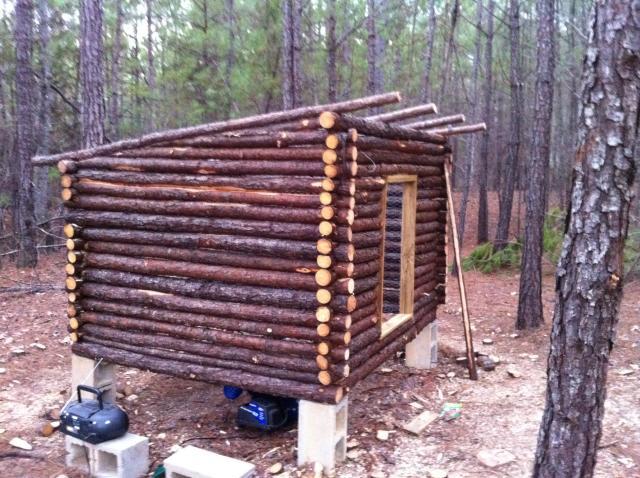
Here are three shots of the foundation layout (you get a nice shot of our log home and the inspiration for having a log coop). I wanted the girls to be able to go under the coop so I set it up on some concrete blocks I have had laying around for years. Later, you'll see I wire this in with chicken wire for protection. I should say that there is very little percision in this coop, but the foundation is level (more or less). BTW, the basic dimensions of the foundation is 6' X 6'

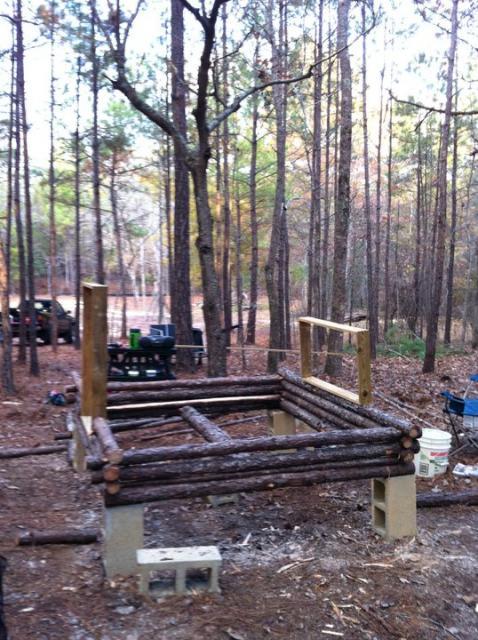

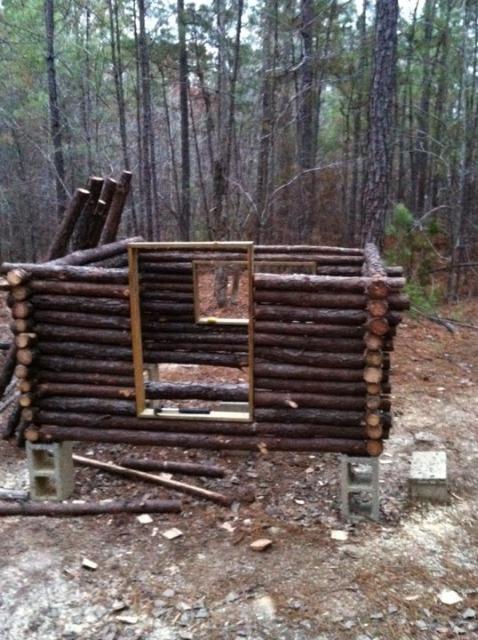
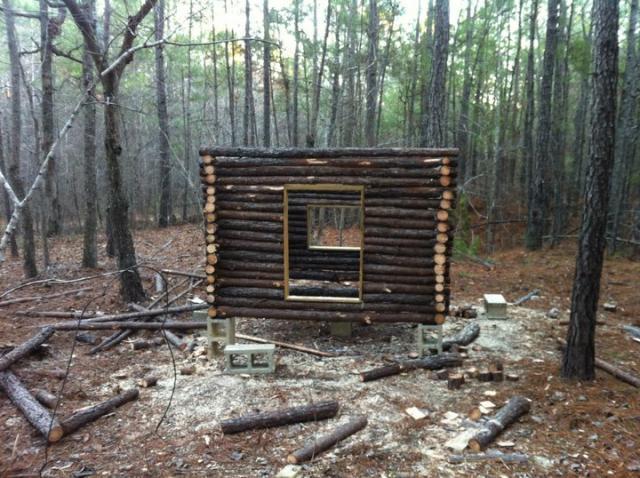
After stacking about a foot of logs, I framed in the front door and the egg box access door using treated 1" X 3". From left to right is a front view, side view and rear view. Stacked logs are secured to the layer below it by 3" deck screws and 3" nails on the notched ends. The basic dimensions of the doors are front: 3' H X 2' W and egg box access: 1.5' H X 3' W.
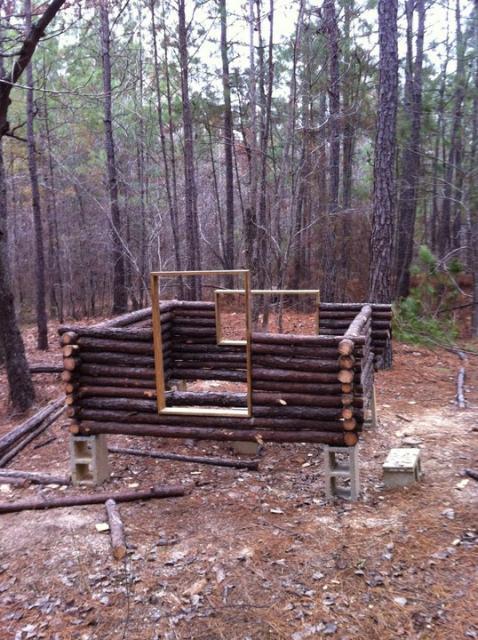
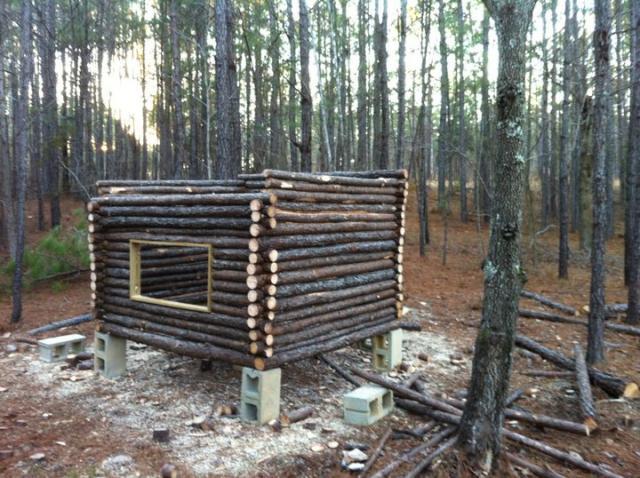
With doors framed in, it's time to stack logs. Logs are between 2.5" to 3.5" diameter. They're all fitted individually (cut, notched, and secured). I guess I can call it custom made then, but trust me that it is way fanicer soundng than it is. All these trees being used for this coop were coming down anyway as I am clearing the very thick wooded area the coop is located in. You could barely see the house from the coop location before I began the clearing.
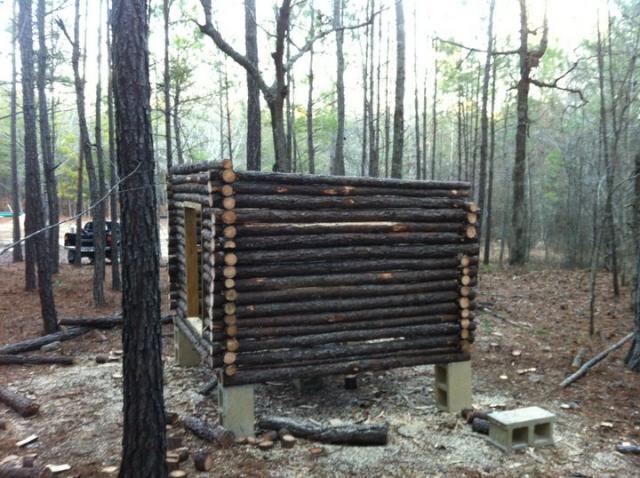
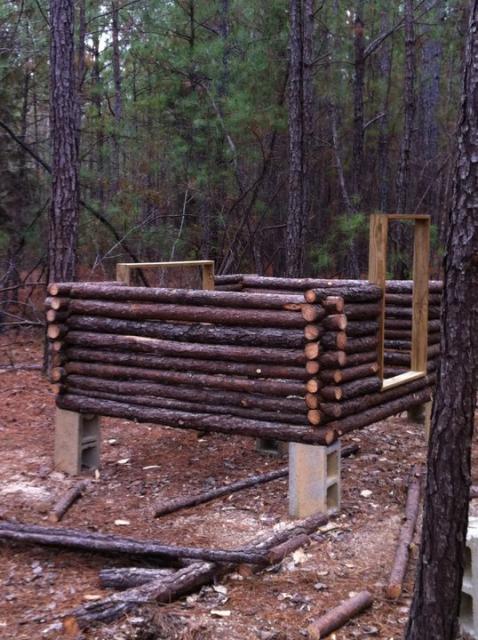
Logs are stacked at this point and it is time to taper the top a bit before putting the log purlins in place for the roof. I don't have a picture specifically showing the taper, but you'll see later when the roof is being put on. Essentially I snapped a chalkline from front to back to get a slight bit more pitch and then used the chainsaw to make the cut. This last bit was a bit cumbersome (notice the messy state of my work area).
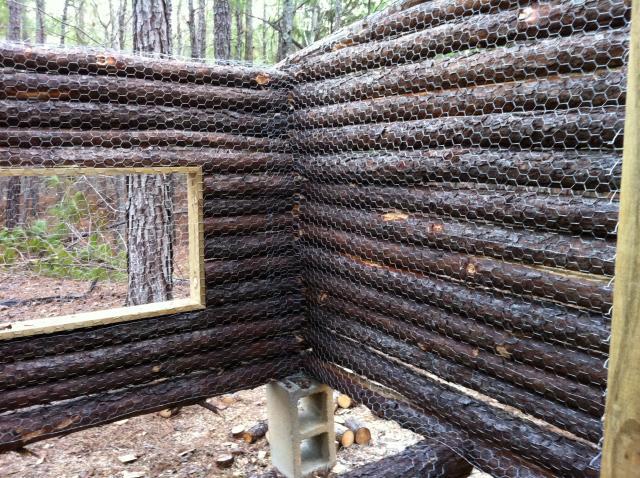
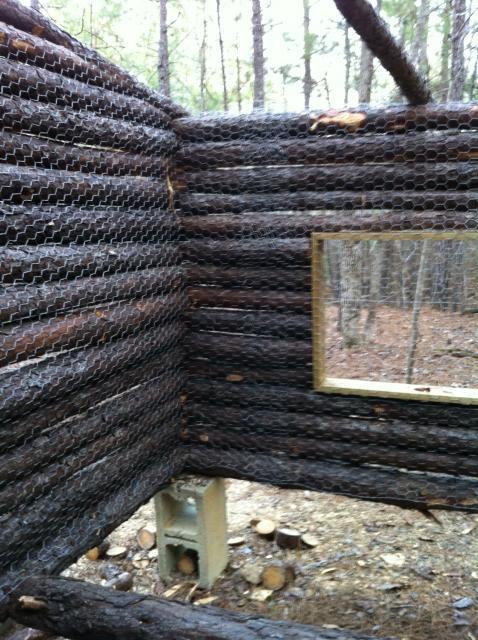
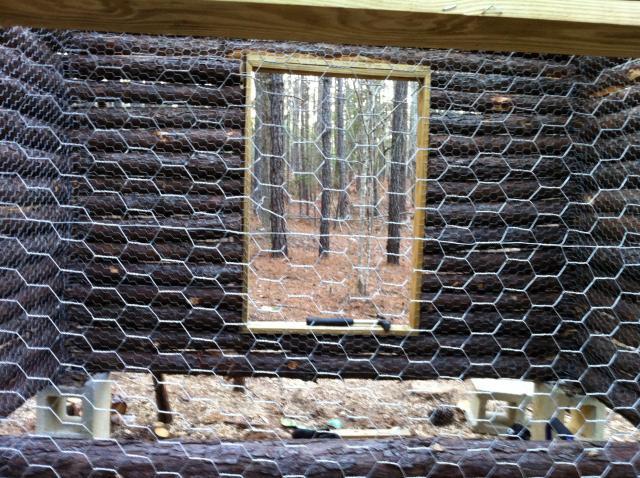
OK, I am going to tell you up front I am obsessed about keeping the girls safe from predators. We live in the woods and we have seen foxes, coyotes (albeit dead on the road), hawks, owls, and dogs roaming through the area. So, having said that, this thing is wired inside and out as complete as I could get it. Using my trusty air staple gun, I stapled this wire in about every 1-2 square inches. I have close to 4,000 total staples in the coop and run combined.When the floor is installed, it sets down on the wire with overlap and the wire is then stapled to the floor from the bottom. I also wired over the purlins before putting the plywood roof on. There is no unwired gaps or access in the coop.
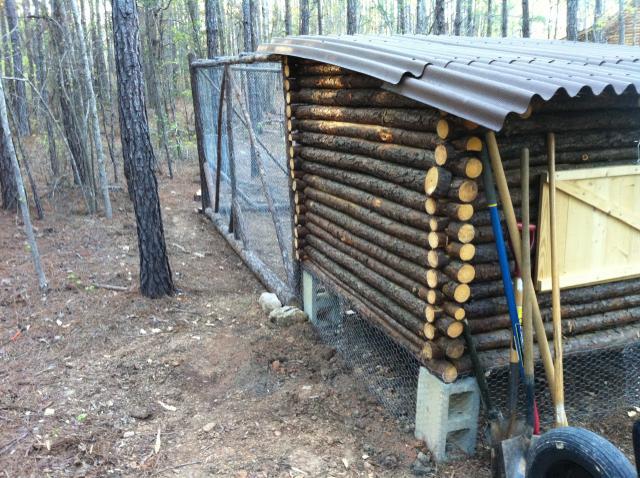
I used pine logs for roof purlins (what else?). There is about a 12" overhang front and back. The plywood panels are secured on top of the purlins with screws (after they're covered in chicken wire).
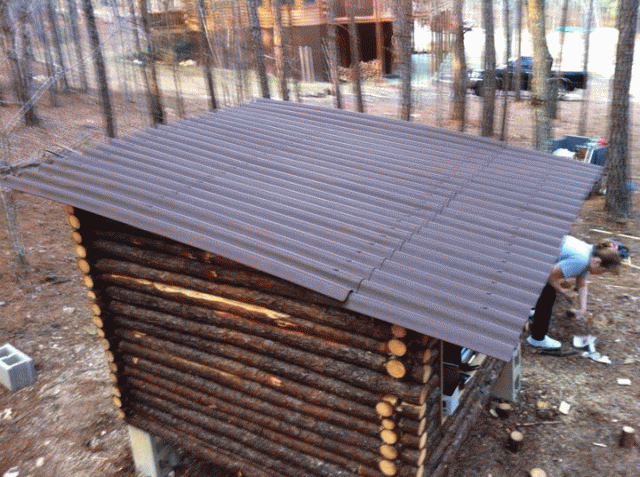
I used Ondura 79" Brown Corrugated Roof Panels that I got from Lowe's. Very easy to work with (cuts with a circular saw) and should last years without corrosion.
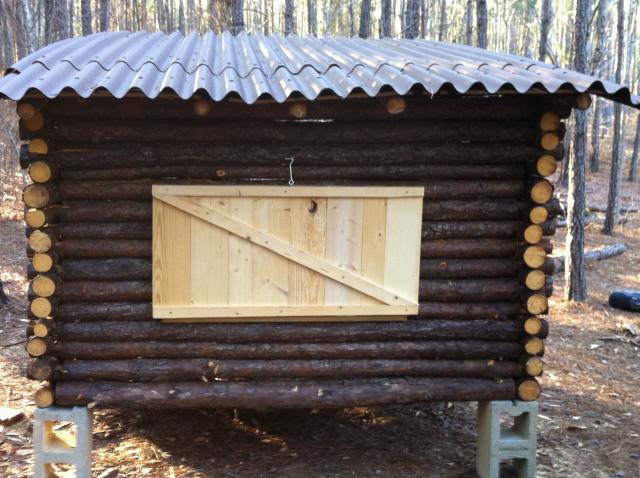
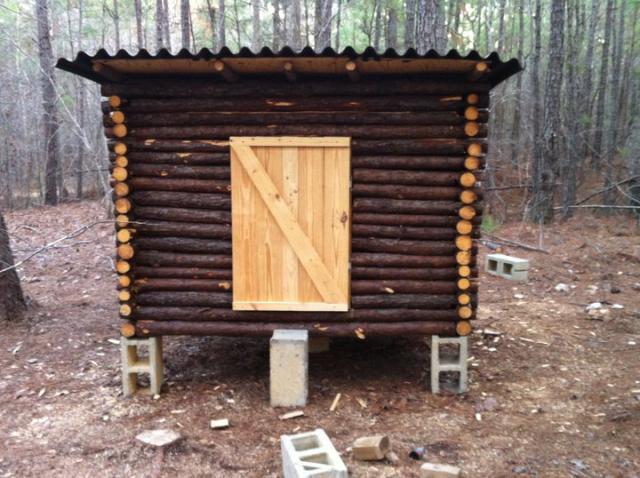
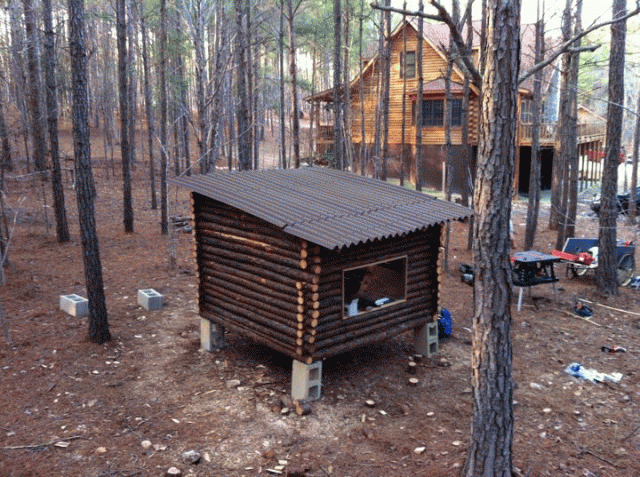
I built my own doors from leftover wood from the construction of our home. This was really necessary as I didn't pick the door dimensions based on doors being available in those sizes. I sprayed the whole coop and run down liberally with Thompson's Water Seal Clear Wood Protector.
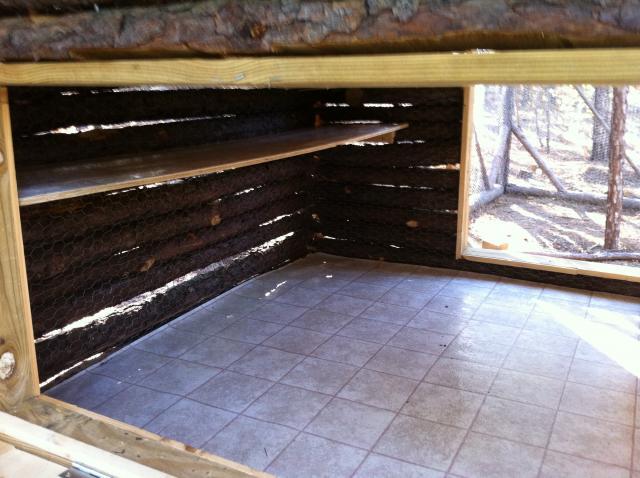
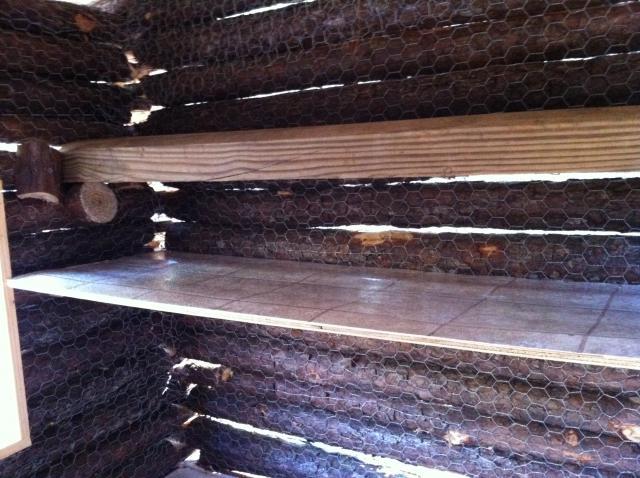
A look at the inside shows my linoleum covered floor and I have also covered the poop boards in linoleum too. I used left over deck rails for roosts and there are roosts and poop boards on both sides of the coop. Poop boards are removable for cleaning. I figure I can put at least a dozen chickens in here comfortably if I want to expand the flock. Oh, lest I forget, the nesting boxes will go in when they get closer to egg laying age, say about 15 weeks from now. I will also upgrade the water system to a no mess water cup and the feeder will upgraded to a secure weight activated model.
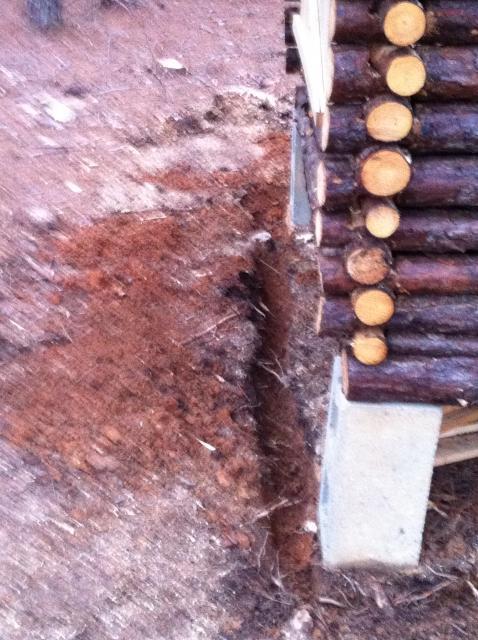
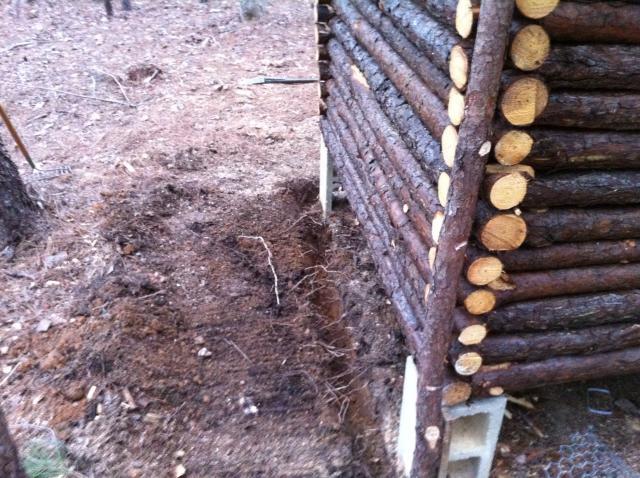
As I mentioned earlier, I am really concerned about keeping the girls safe from predators. I have trenched around the coop foundation as well as the perimeter of the run to a depth of 6"-8". The chicken wire in then staked tight into the trench and then back-filled with rocks and clay. Also, I have purchased four Slolar Nite Eyes to place around the coop to frighten away predators. Check those out at http://www.solarniteeyes.com/.
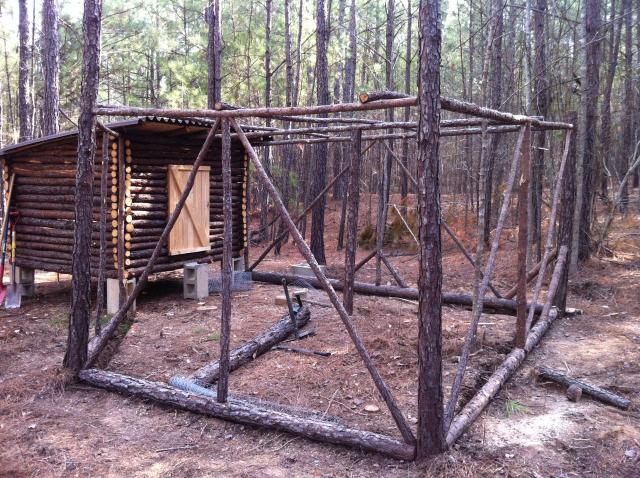
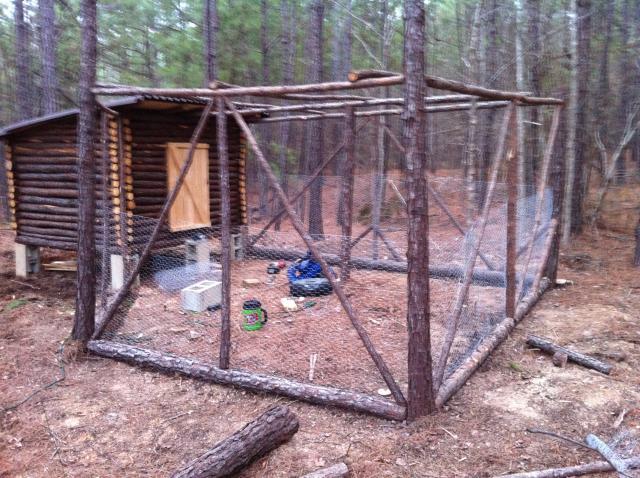
I framed the run using two live trees and what else? Logs. The run is over 6' high so no squatting when you go in and I covered the top so no hawk or owl issues.
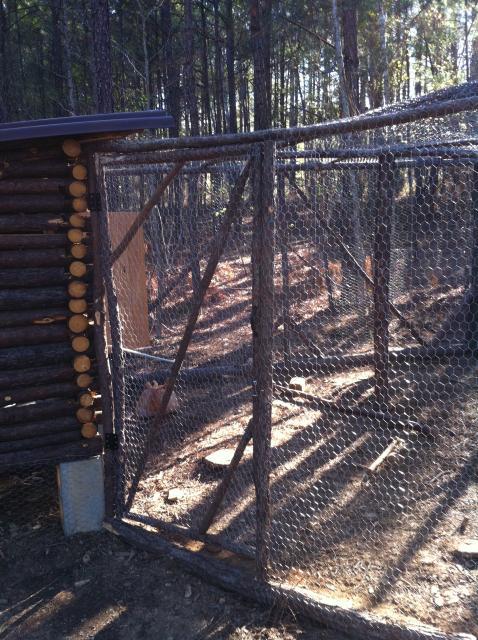

I must tell you framing a door from small pine trees is difficult. I used a $8.00 screen door hardware kit from Lowes to hinge and secure it.
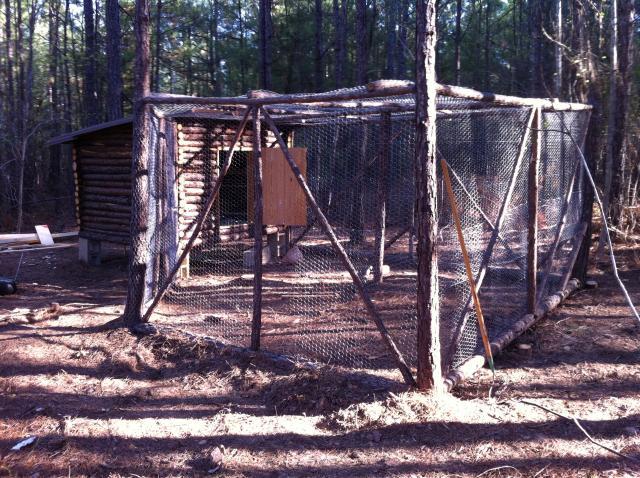
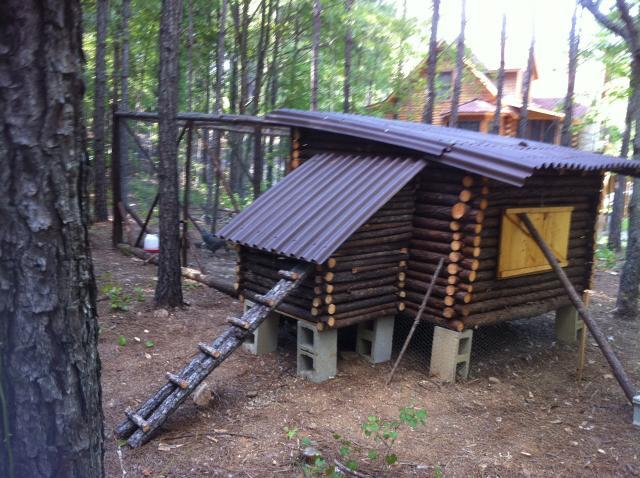
On the left is a view from the back that shows you wired in foundation below the coop and the side of the run. The photo on the right is just the finished view from the front. The run is about 12' X 15' and again a little over 6' high.
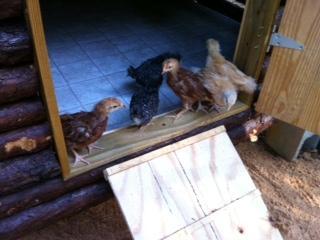
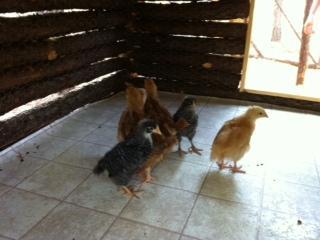
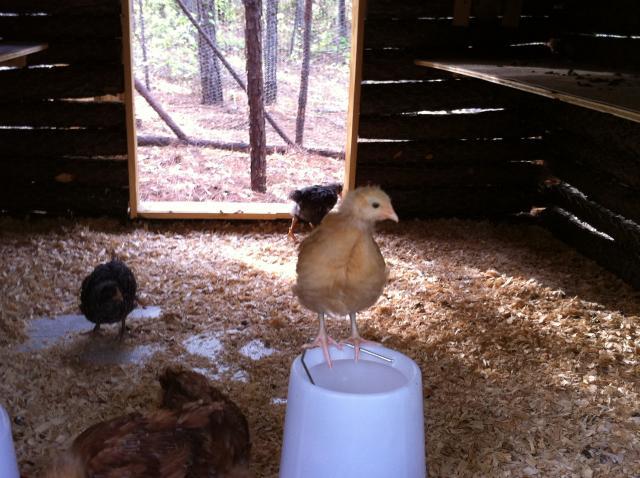
With the coop complete, it was time to get some chicks. We went to the Circle T Farm in Blythe, GA to get our beautiful little hens. They were 6 weeks old and just off the lamp whe we got them. Blythe, GA is about an hour and a half drive for us, but unless we wanted to order de-beaked hybrids, very young chicks or adult chickens, the drive was necessary. We selected 3 heritage breeds and got two of each: Barred Rocks, Buff Orpingtons, and Rhoade Island Reds. We also recently picked up two Easter Eggers from Rebel Rooster at Rush Lane Poultry in Camden, SC. We love them all very much and they are so cute! Hours of entertainment just watching them play and grow.
As I reflect on building this coop I really like that we have been able to stick to the log cabin theme, as we live in a log home. I am very happy that I was able to use my own logs too as they were going to be thinned out and burned. I hate to waste anything. At least many of the logs in this area were used for a noble cause like housing some really cute chicks. At this point there isn't much I would change about it. It is working well. The log door was difficult to construct, and I almost bought a screen door instead, but I'm glad I did the log door frame and covered it in chicken wire. I guess if I had to change something, I'd have run electricity out there so I could have a light for them. Now that I think about it though, I'm thinking solar power. Yeah!
While it is complete and functional for the girls there are a few things I want to add. I will put the nesting boxes in just before they begin to lay. I want to add a water cup or chicken nipple type waterer as it keeps things clean for the girls. I also want to get or build a feeder that opens for them and closes when not in use. I hate rodents and do not want to invite any through chicken feed being left around to entice them. I am thinking of modifying the big door to to have a pop door built into it. That away when the rain is coming down as it does frequently in the southeast, it has a smaller area to hit to get the coop wet, but still give the girls the option of getting out if they want. Oh , and I have some leftover lattice from the front porch of our house that I will probably skirt the coop in.
Thanks for visiting our BYC page. Have a great day, enjoy our chicks pics, and God Bless you!
Vince, Jan, Ollie, Ginger, Mary Ann,
P.S. So as you can see from the names, at least two of our girls turned out to be boys and that is not really working so well. We love the boys though and dig the early morning rooster crowing a lot, but the agressive "mating behavior" is a no-go not to mention we don't want the eggs to be fertilized. So it's time to add a FROG (For Roosters Only Grotto) to the coop, or as I call it the "Roo Cave." Here are the first photos of the expansion project:
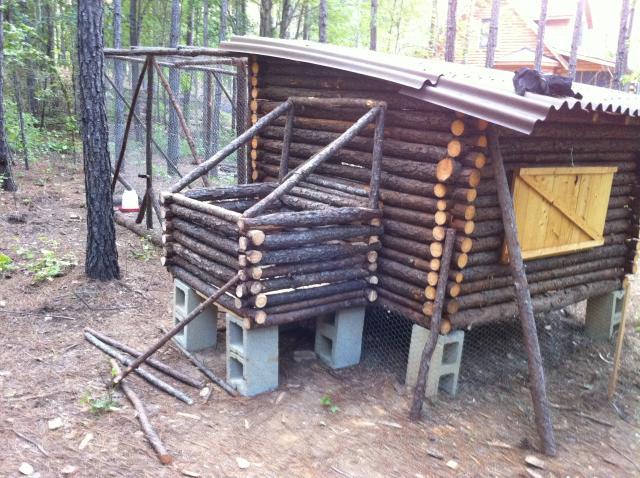
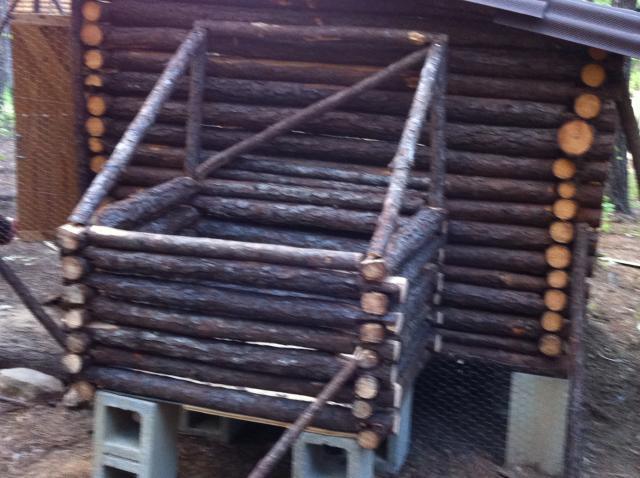
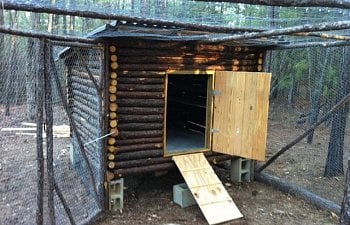
This design is an "on-the-fly" model. It is roughly 36" wide X 32" deep X 24" high (log courses) and has a roughly 30 degree slanted roof that will lift up for access to the roosting section. When complete it will have a floor access to a small run so the boys can stretch if we're away or slow to get outside to let them out. Unlike the hens, these fellows will free range during the day and hit the roo cave for a safe sleeping experience. I will add more pics as construction is completed.
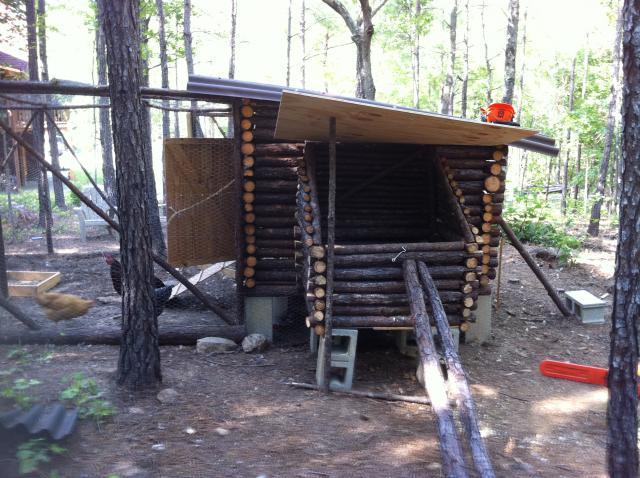
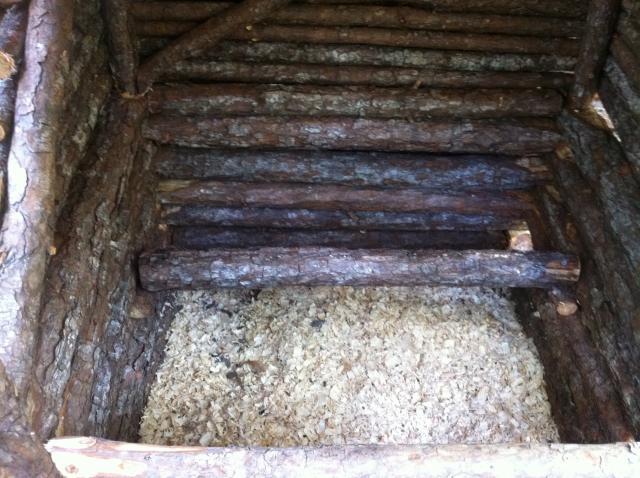
Ok, the siding is on the roof frame (the 30 degree and pack portion). The roof is a sheet of plywood hinged on the top crossbar. I will pick up a Ondura Brown Corrugated Roof panel from Lowe's today and it is easy to put on the plywood. The picture on the right is a shot of the inside of the Roo Cave. It is a simple log roost (what else eh?) that should accomodate 2-3 roosters comfortably. You may be thinking 3 roosters? I have a couple of easter eggers that are a few weeks younger than the others and the jury is out as to wether Betty is really going to become Archie. They look the same except Betty has a much more prominent tail and does that flapping thing a lot. We'll see.
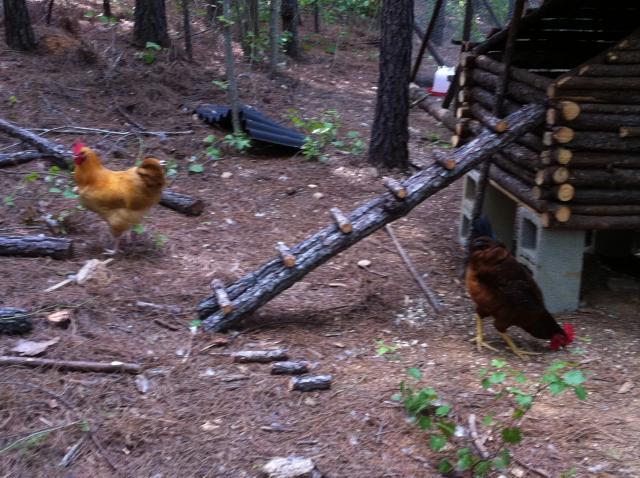
I made the boys a ramp to help them get in easier. They are not exactly putting themselves to bed yet, but it's only been a few nights. They're getting better though and the ramp is a must. This a pretty good picture of our roos too. Bob is the Buff Orpington and Lenny is the Rhode Island Red. They have taken to following me around like a faithful puppy. If you're feeling down, nothing picks you up like two roos running through the woods to greet you!
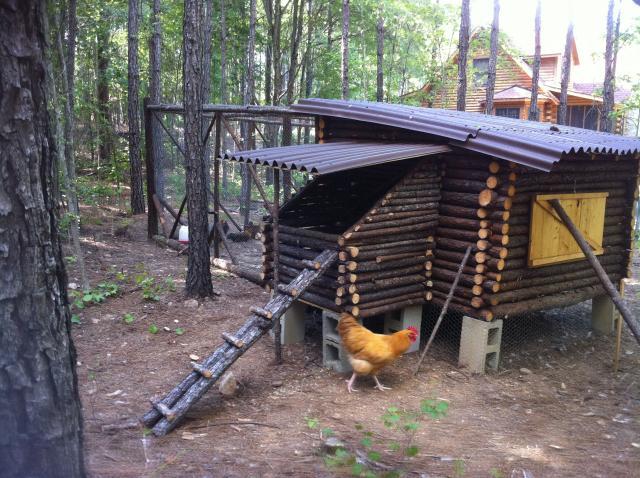
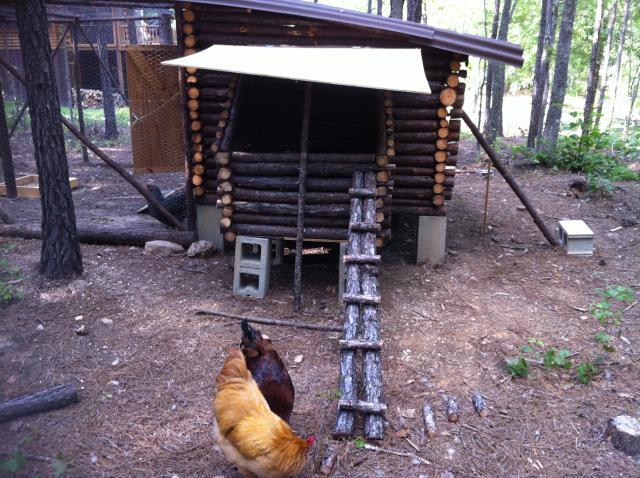
I have installed the Ondura Brown Corrugated Roof Panel from Lowe's and that completes the new FROG addition to the Log Coop. The boys are guardedly excited. They have freedom to roam by day and a safe male-only crash pad to come home to every night. Bob is quite a ham and is always looking for a way into the pics.
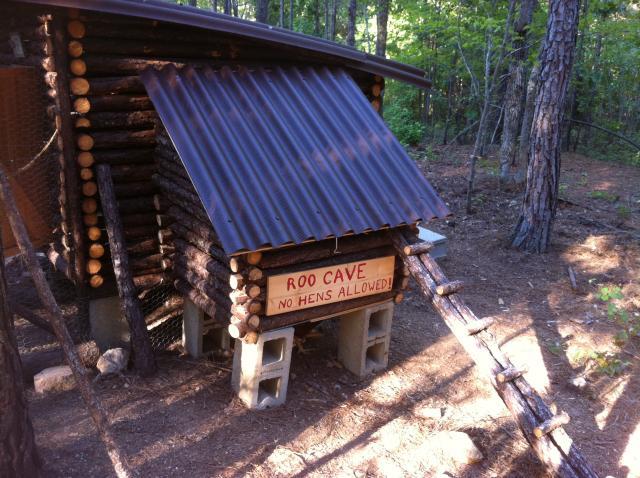
The boys have really taking a shine to this place and want to ensure its exclusivity is clearly posted so the girls don't encroach. We hope you find the FROG, or Roo Cave as pleasing as our log coop. It's a pretty simple design, has no exact measurements at all, and is very green as we cut our own logs and use them in the FROG. The only newly purchased items in the FROG was the roof panel and the plywood on the roof. Everything else was cut fresh or recycled. Their mini-run will be installed in a few weeks, but other "Honey Do" projects have superceded that in priority. Have a blessed day!