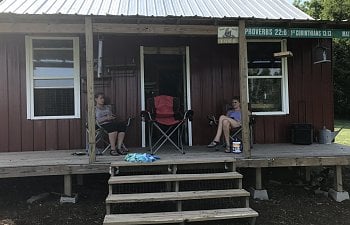
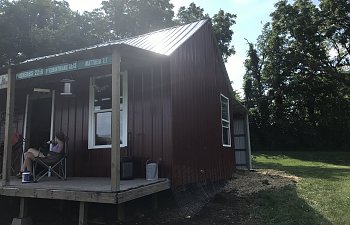
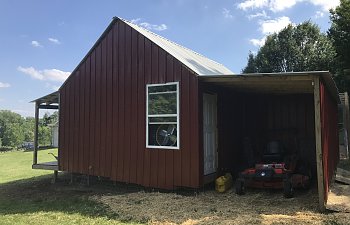
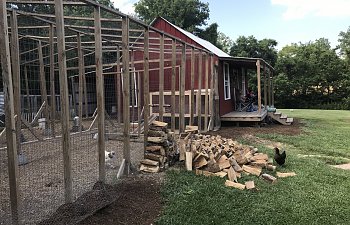
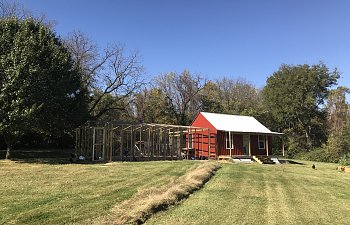
As with all backyard chicken stories, we started with 6 chickens and a small roost and it quickly turned into a lot more. No, this is not the front porch of our house, it's the coop.

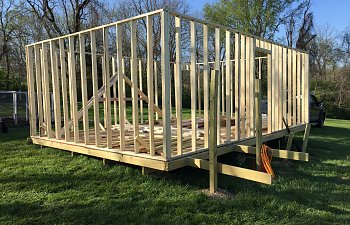
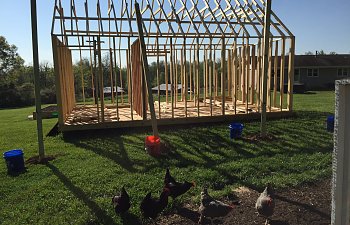
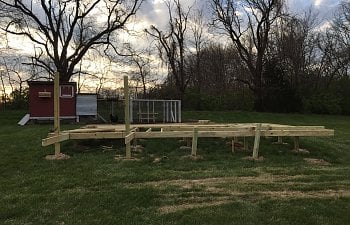
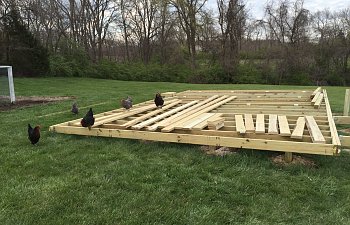
To get to this, was like everyone else, planning, time, and money. To support the coop 25 post holes were dug so the coop would be off the ground and give the chickens cool shade and dirt during the summer months.
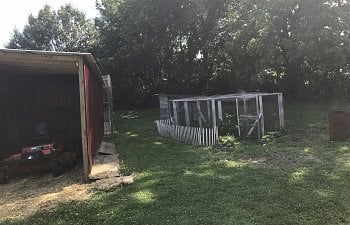
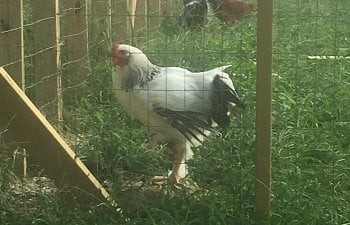
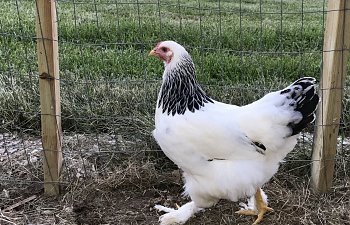
The original six inspecting the new area.
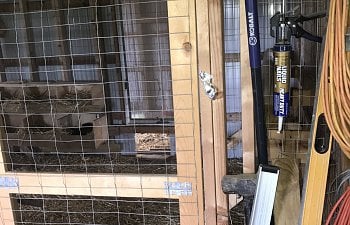
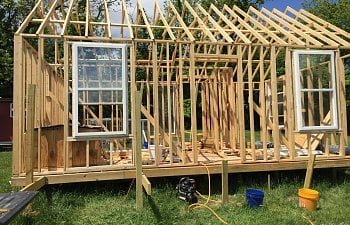
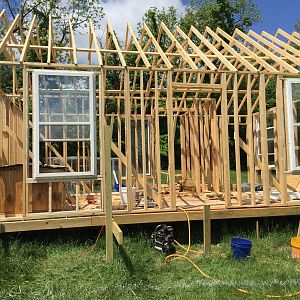
The windows came from the local used building materials store. There are two in the front and then one on each of the other sides. The rear window will be opening to a partially covered shelter of the run for the chickens to be able to get outside during the winter months and rainy days. This window will also remain open all summer for sufficient air flow. The inside of the windows are covered with chicken netting and other scrap pieces of fencing to allow the windows to be open without fear of predators.
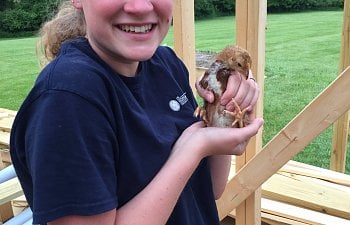
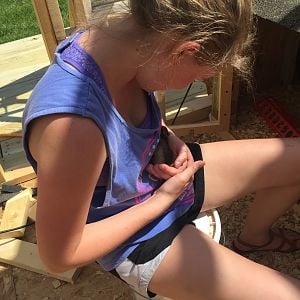
Before the new coop was completed we went and picked up 20 chicks, so had to quickly build a brooder. Also, who can resist pics of chicks?
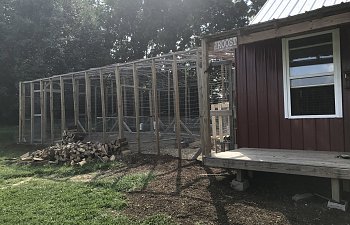
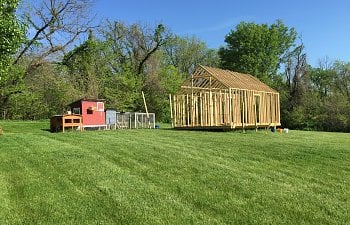
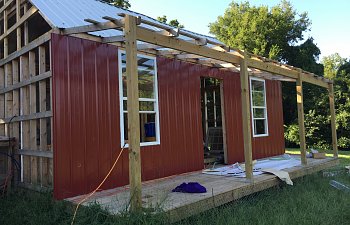
The small coop and rabbit coop next to the new coop. The smaller coop is 6ft x 8 ft. The new coop is 16ft x 24ft with a run that is 25ft x 40ft. A porch was added later in the build by request. What a comparison in size. While the old coop went to mom and dad, the run is now used to support grape vines and a hideaway haven for the chicks.
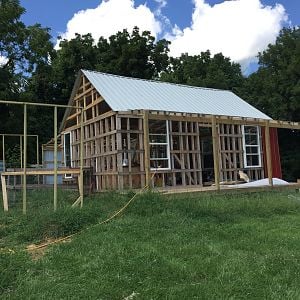
Time for the roof to go on. I have to admit, this thing was a little scary at first, but once I got used to the jerky movement and the bounce, it was actually really fun.
Time to trench for hot and cold water and 60 amps of power. This trencher was also kind of fun, a little slow going, but well worth it. This was also used to dig a two foot trench around the entire coop and run where fencing was buried to keep fox and coyote from digging. The trench around the coop and run was back filled with one inch minus rock. This has proven itself to be a worthwhile effort with the amount of wildlife in our area. It's amazing how smart and determined some predators are.
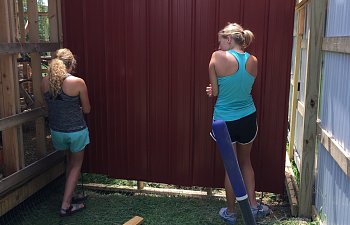
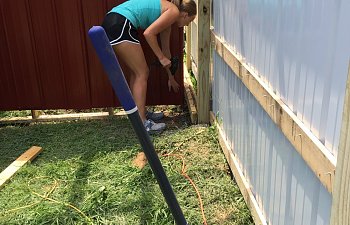
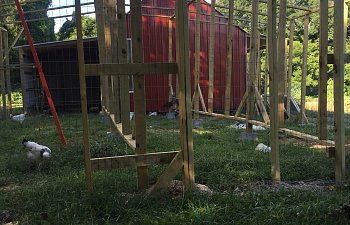
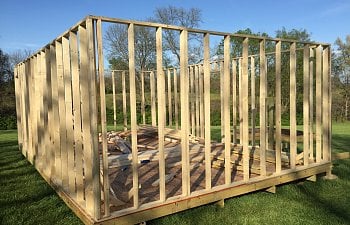
Time for walls to go up. I had a bit of help this day.
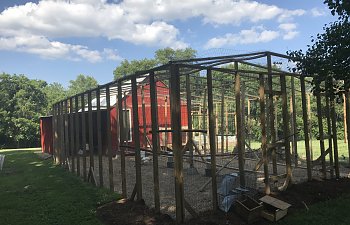
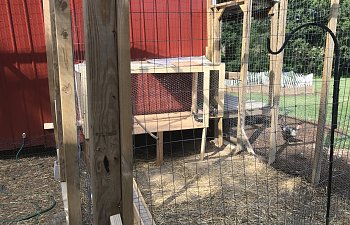
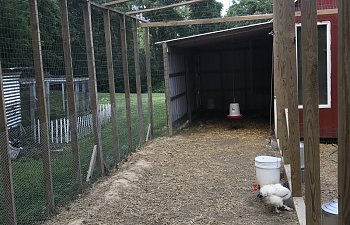
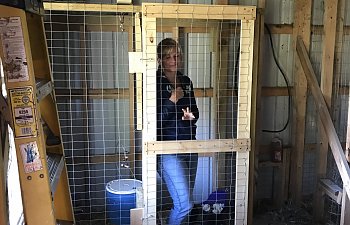
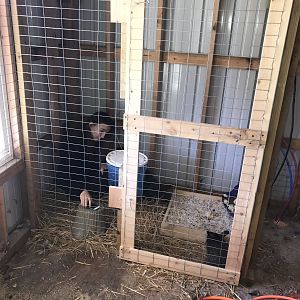
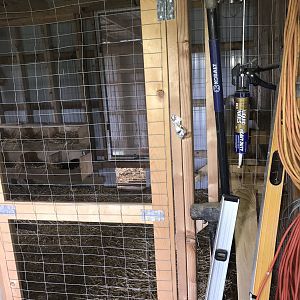
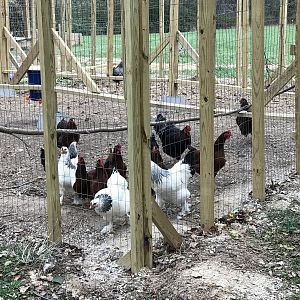
This is the side of the coop with the run. There is a 6ft x 8ft covered section to the right where the entrance to the coop is. The run itself is 25ft x 40ft and 10 ft high, completely fenced in. There are 5 - 5 gallon watering stations and two 25 pound feeders. For what ever reason the chicks wanted the water out from the covered area in the open run and the feeders to be in the covered area. To the left would be stages two and three of new chicks being introduced to the flock. The framed box has netting all around it and has tin over the top for shade. This box has a small entrance to the inner coop for the chicks to have 100% shelter and some exposure to the outside. The framed box also opens up to allow the chicks to be able get to ground level and scratch and dust and do other chick stuff. It did not take but a couple of months for the chickens to destroy the grass in the run. No worries since they are let out every day to free range.
I have tried a number of watering systems, the one I like the most is the 5 gallon tin watering container with lid. As long as it's level, it's great. With other systems and using the nipple types, I found that I was replacing the nipples or something would hold it open and the water would drain out. From watching the chickens while I was filling the buckets or after a rain, they seemed to prefer to just be able to drink straight from a puddle, this is why I switched to the tin buckets.
This would be the non run side where the tractor is stored during the mowing season. Also you are able to see the large fan in the window that pulls air through during the summer months. The fans also help in directing the smell.
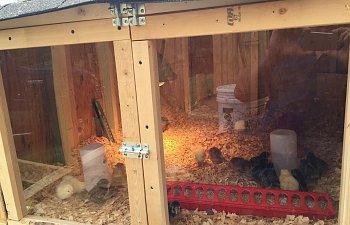
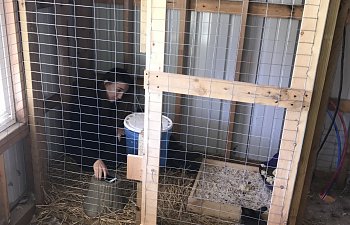
Inside this is the brooder, as you can see, there is a chick in it (yep, once she reads this, I am gonna die). The brooder will soon be expanded to take up about the same amount of space as the roosting/nesting area.
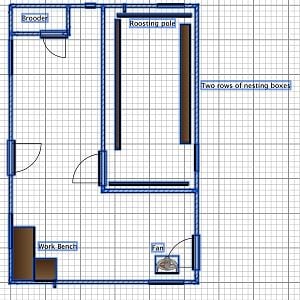
Hard to tell from this view, but the roosting part is 8ft x 16ft with 16 nesting boxes and a window that allows air to be pulled in from the fan.
April 2016 layout

New layout as of 07-30-2017
The water was very easy to run out to the coop with the trencher and that I have a pex water system installed in the house. The pex running outside the house and inside the coop is wrapped with aluminum duct tape, heat tape on top of that and then aluminum tape to hold the heat tape in place. This has been a blessing in the winter to not have to carry 5 gallon water buckets back and forth. Also in the winter I shut off the cold water running to the coop leaving on the hot water to fill the watering buckets. The watering buckets themselves are also heated to prevent freezing (this is where having the electricity in the coop is awesome, the lighting is nice too).
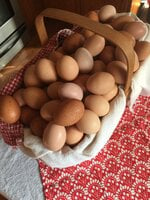
The coop is constantly getting modifications. Currently it acts as a partial tool shed/work space. The plans for next summer is to expand the inner brooder into sections to allow broody hens to do what they do best and let them be phased into the rest of the flock. Expand the large inner roosting area to be able to accommodate up to 60 or chickens and not so much of a tool shed. We really enjoy the chicks and being able to give our eggs away. We have a steady client base that enjoy the free fresh eggs.
Since the old coop was built on stilts like the new one, we were able to recycle it by giving it to Mom & Dad plus four chickens for them to start their own little chicken farm. Since giving them the coop, they had a hen go broody and are now the proud owners of 6 new little chicks plus the original four.
Tips that I would have for any noob getting into raising chickens would be, NEVER underestimate the ingenuity of the predators.
To get to this, was like everyone else, planning, time, and money. To support the coop 25 post holes were dug so the coop would be off the ground and give the chickens cool shade and dirt during the summer months.

The original six inspecting the new area.
The windows came from the local used building materials store. There are two in the front and then one on each of the other sides. The rear window will be opening to a partially covered shelter of the run for the chickens to be able to get outside during the winter months and rainy days. This window will also remain open all summer for sufficient air flow. The inside of the windows are covered with chicken netting and other scrap pieces of fencing to allow the windows to be open without fear of predators.
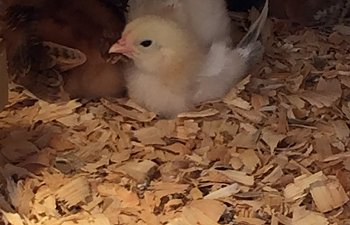

Before the new coop was completed we went and picked up 20 chicks, so had to quickly build a brooder. Also, who can resist pics of chicks?
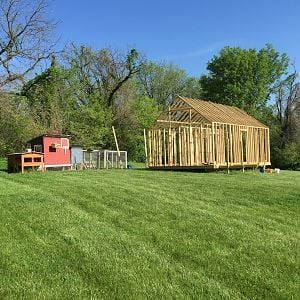
The small coop and rabbit coop next to the new coop. The smaller coop is 6ft x 8 ft. The new coop is 16ft x 24ft with a run that is 25ft x 40ft. A porch was added later in the build by request. What a comparison in size. While the old coop went to mom and dad, the run is now used to support grape vines and a hideaway haven for the chicks.

Time for the roof to go on. I have to admit, this thing was a little scary at first, but once I got used to the jerky movement and the bounce, it was actually really fun.
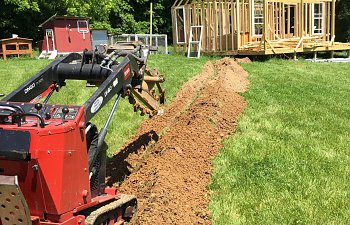
Time to trench for hot and cold water and 60 amps of power. This trencher was also kind of fun, a little slow going, but well worth it. This was also used to dig a two foot trench around the entire coop and run where fencing was buried to keep fox and coyote from digging. The trench around the coop and run was back filled with one inch minus rock. This has proven itself to be a worthwhile effort with the amount of wildlife in our area. It's amazing how smart and determined some predators are.
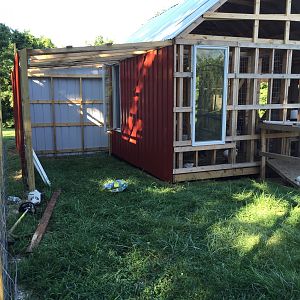
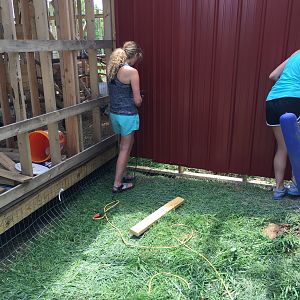
Time for walls to go up. I had a bit of help this day.
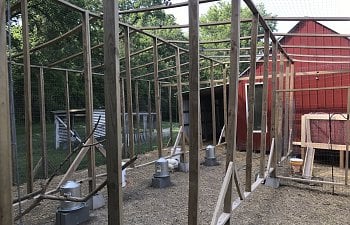
This is the side of the coop with the run. There is a 6ft x 8ft covered section to the right where the entrance to the coop is. The run itself is 25ft x 40ft and 10 ft high, completely fenced in. There are 5 - 5 gallon watering stations and two 25 pound feeders. For what ever reason the chicks wanted the water out from the covered area in the open run and the feeders to be in the covered area. To the left would be stages two and three of new chicks being introduced to the flock. The framed box has netting all around it and has tin over the top for shade. This box has a small entrance to the inner coop for the chicks to have 100% shelter and some exposure to the outside. The framed box also opens up to allow the chicks to be able get to ground level and scratch and dust and do other chick stuff. It did not take but a couple of months for the chickens to destroy the grass in the run. No worries since they are let out every day to free range.
I have tried a number of watering systems, the one I like the most is the 5 gallon tin watering container with lid. As long as it's level, it's great. With other systems and using the nipple types, I found that I was replacing the nipples or something would hold it open and the water would drain out. From watching the chickens while I was filling the buckets or after a rain, they seemed to prefer to just be able to drink straight from a puddle, this is why I switched to the tin buckets.
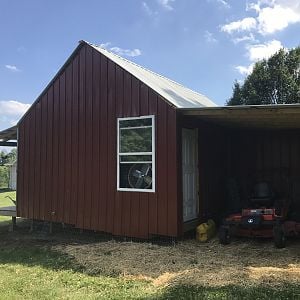
This would be the non run side where the tractor is stored during the mowing season. Also you are able to see the large fan in the window that pulls air through during the summer months. The fans also help in directing the smell.
Inside this is the brooder, as you can see, there is a chick in it (yep, once she reads this, I am gonna die). The brooder will soon be expanded to take up about the same amount of space as the roosting/nesting area.
Hard to tell from this view, but the roosting part is 8ft x 16ft with 16 nesting boxes and a window that allows air to be pulled in from the fan.
April 2016 layout
New layout as of 07-30-2017
The water was very easy to run out to the coop with the trencher and that I have a pex water system installed in the house. The pex running outside the house and inside the coop is wrapped with aluminum duct tape, heat tape on top of that and then aluminum tape to hold the heat tape in place. This has been a blessing in the winter to not have to carry 5 gallon water buckets back and forth. Also in the winter I shut off the cold water running to the coop leaving on the hot water to fill the watering buckets. The watering buckets themselves are also heated to prevent freezing (this is where having the electricity in the coop is awesome, the lighting is nice too).
The coop is constantly getting modifications. Currently it acts as a partial tool shed/work space. The plans for next summer is to expand the inner brooder into sections to allow broody hens to do what they do best and let them be phased into the rest of the flock. Expand the large inner roosting area to be able to accommodate up to 60 or chickens and not so much of a tool shed. We really enjoy the chicks and being able to give our eggs away. We have a steady client base that enjoy the free fresh eggs.
Since the old coop was built on stilts like the new one, we were able to recycle it by giving it to Mom & Dad plus four chickens for them to start their own little chicken farm. Since giving them the coop, they had a hen go broody and are now the proud owners of 6 new little chicks plus the original four.
Tips that I would have for any noob getting into raising chickens would be, NEVER underestimate the ingenuity of the predators.