2024, Front of Coop/Run

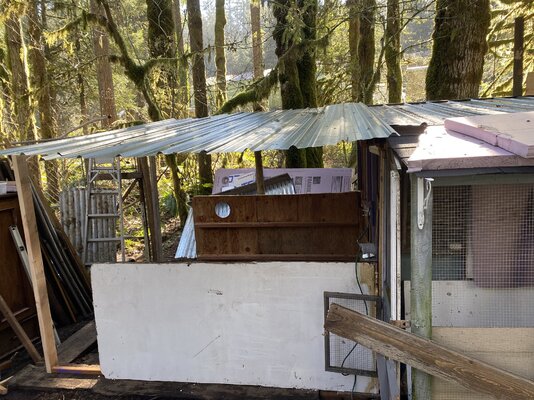
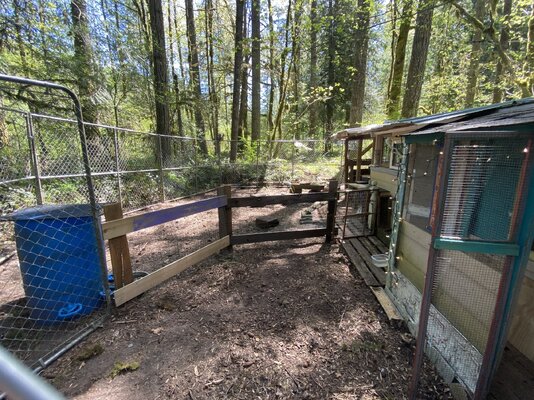
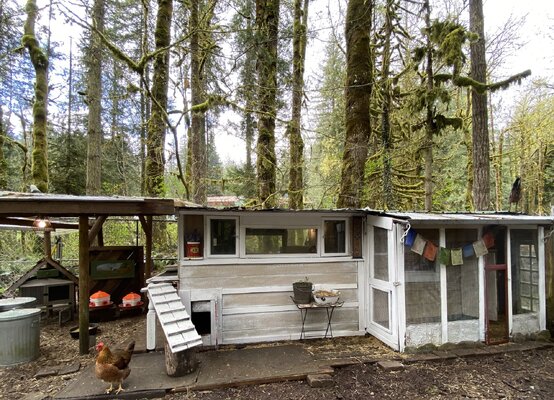
My 3rd expansion is complete. I have 1 big 112 sq ft. coop with 2 interior rooms, roosting and nest boxes in one room, storage and baby chick to integration age in 2nd room., Chain Link Run approx. 500 sq ft; 2 fenced acres; Garden, River frontage and Mt. Hood National Forest.

This is my Coop 2022. It started as a dog house in 2007 (see my dog house page.) I've expanded the dog house (twice,) as I've learned what is important to me and necessary. Important to me: ability to walk inside and do chores comfortably; clean nest boxes; easy poop clean up. Necessary: plenty of roost space; plenty of windows and ventilation; well insulated; predator proof. Expansion 1 = more room; Expansion 2 = 2 rooms; Expansion 3 = more room in room #1 (roost space.)
It started with the dog house (see Coop Evolution page.)
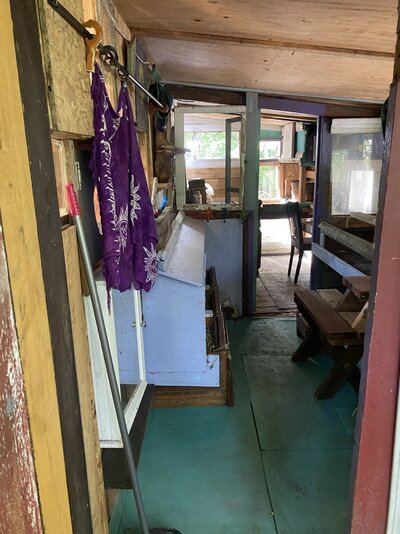
Thanks to expanding length not width, it's a long building, 2 separate rooms and a covered food area inside a large chain link run, mostly uncovered.


I'm from Alaska, now living in Oregon on the Sandy River. I love to garden. My soil is almost pure sand, so I value chicken poo! My coop is designed with many things in mind but for sure poo collection and composting is one of them!
Rodent Control: Feral cat's in my garden
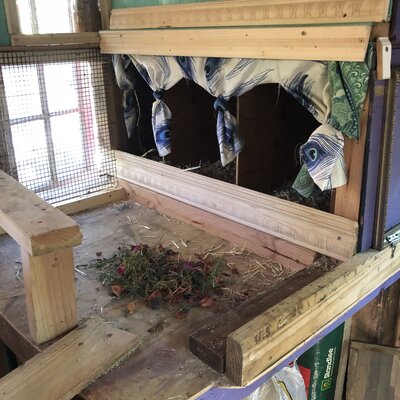
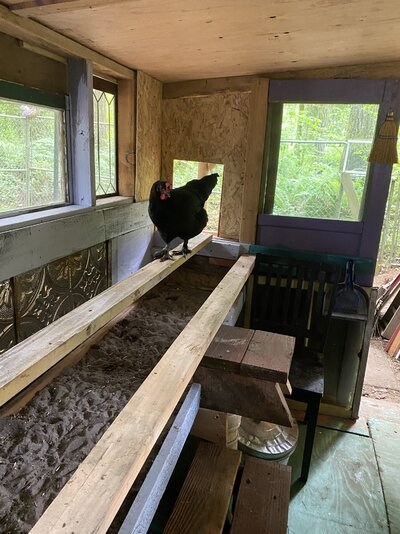
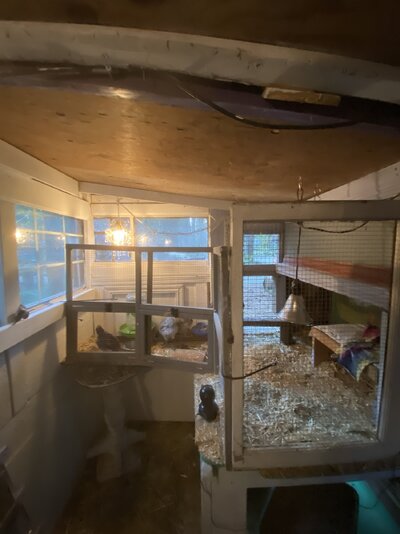
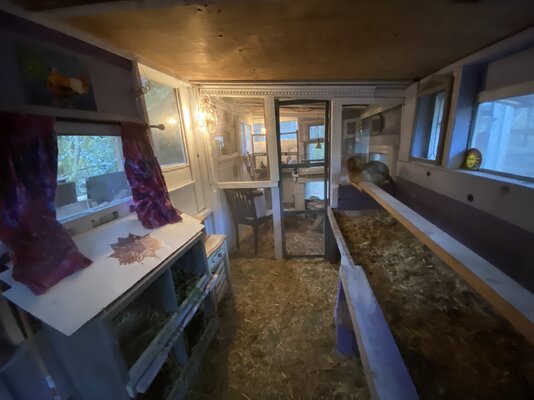
Accomplished 2 separate rooms for 1)brooder/storage; 2)Roost's/Nestboxes
And Poop Boards!!! Poop boards changed my life. WHY oh WHY did I not do this years ago?!
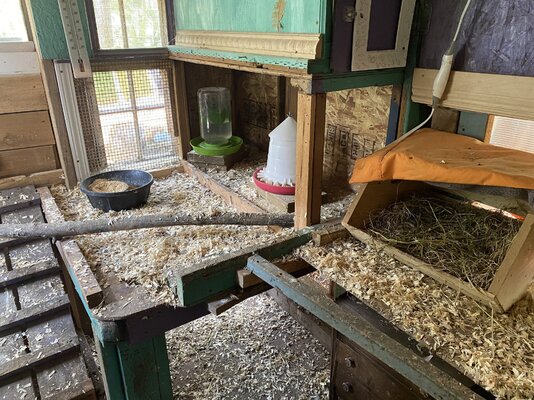
Initially I intentially left the flooring under the roost bars bare. But the "dirt/sand" floor was always wet. I finally figured out why poop boards are all the rage and read some very informative threads with pics on here/BYC and went for it (I'm going to go back and give credit where due to whom I think invented poop boards! For sure JT is the first that I saw and then DobieLover.) I filled in the open floor with foam board thick insulation in between treated 2x6 joists and laid plywood over. So now the floor is half tongue n groove in brooder side 1, painted plywood side 2, and it stays CLEAN!! I use sand and PDZ or Stall Fresh; Scoop poo daily into a bucket with a kitty litter rake and dump weekly in compost or directly into garden, under trees and bushes. This is now my #1 recommendation!
More Ventilation... Ventilation on all 4 sides.....

Brooder Room. Believe it or not THIS is the old Dog House......
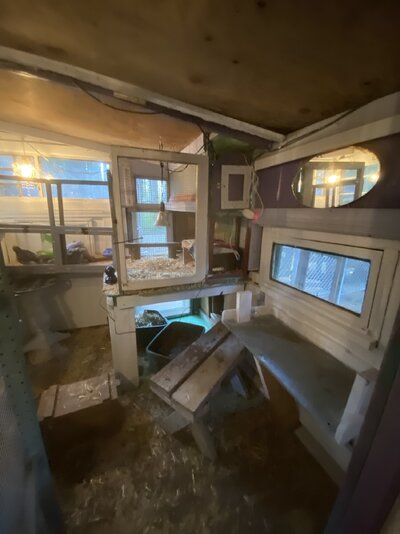
I added this little side door and outside ramp as option 2 for getting off roosts when I noticed my oldest, biggest hen having issues with the internal bench to floor system.
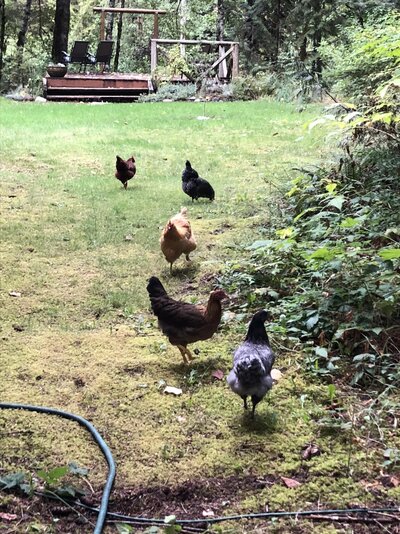
My chickens have a very large chain link kennel for summer time when I don't want them scratching up my garden. Then in fall, they free range every day through winter.
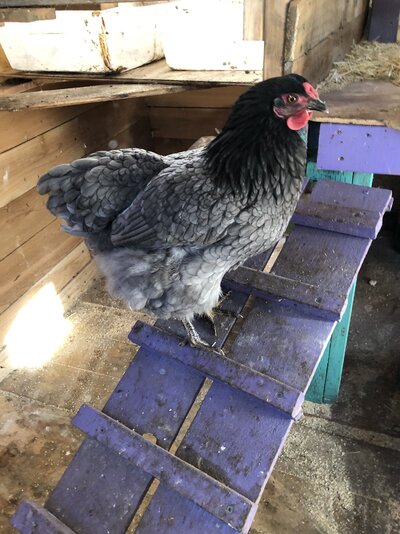
Lavender Orpington Pullet and Cockerel
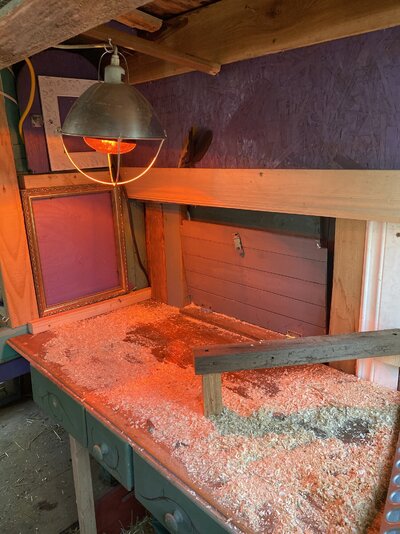
In my brooder room enclosed with glass window and hardware cloth and I've ditched the heat lamp for a Mommy Hut (MHP, credit to Blooie!) And Credit to Azygous for amazing article on brooding happy chicks.

Moose, my Ragdoll.....
Some property pics.... Free-Ranging is Fall to Spring....
Catch ya Later!!
My 3rd expansion is complete. I have 1 big 112 sq ft. coop with 2 interior rooms, roosting and nest boxes in one room, storage and baby chick to integration age in 2nd room., Chain Link Run approx. 500 sq ft; 2 fenced acres; Garden, River frontage and Mt. Hood National Forest.
This is my Coop 2022. It started as a dog house in 2007 (see my dog house page.) I've expanded the dog house (twice,) as I've learned what is important to me and necessary. Important to me: ability to walk inside and do chores comfortably; clean nest boxes; easy poop clean up. Necessary: plenty of roost space; plenty of windows and ventilation; well insulated; predator proof. Expansion 1 = more room; Expansion 2 = 2 rooms; Expansion 3 = more room in room #1 (roost space.)
It started with the dog house (see Coop Evolution page.)
Thanks to expanding length not width, it's a long building, 2 separate rooms and a covered food area inside a large chain link run, mostly uncovered.
I'm from Alaska, now living in Oregon on the Sandy River. I love to garden. My soil is almost pure sand, so I value chicken poo! My coop is designed with many things in mind but for sure poo collection and composting is one of them!
Rodent Control: Feral cat's in my garden
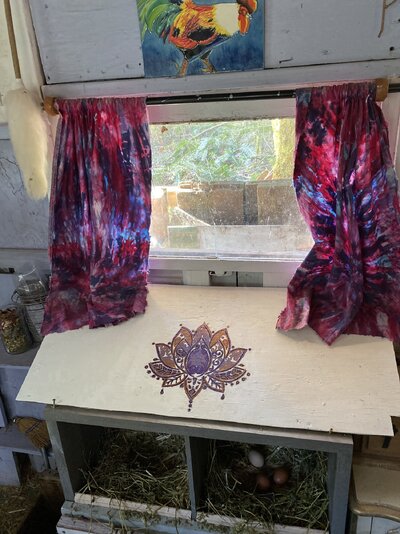
Accomplished 2 separate rooms for 1)brooder/storage; 2)Roost's/Nestboxes
And Poop Boards!!! Poop boards changed my life. WHY oh WHY did I not do this years ago?!
Initially I intentially left the flooring under the roost bars bare. But the "dirt/sand" floor was always wet. I finally figured out why poop boards are all the rage and read some very informative threads with pics on here/BYC and went for it (I'm going to go back and give credit where due to whom I think invented poop boards! For sure JT is the first that I saw and then DobieLover.) I filled in the open floor with foam board thick insulation in between treated 2x6 joists and laid plywood over. So now the floor is half tongue n groove in brooder side 1, painted plywood side 2, and it stays CLEAN!! I use sand and PDZ or Stall Fresh; Scoop poo daily into a bucket with a kitty litter rake and dump weekly in compost or directly into garden, under trees and bushes. This is now my #1 recommendation!
More Ventilation... Ventilation on all 4 sides.....
Brooder Room. Believe it or not THIS is the old Dog House......
I added this little side door and outside ramp as option 2 for getting off roosts when I noticed my oldest, biggest hen having issues with the internal bench to floor system.
My chickens have a very large chain link kennel for summer time when I don't want them scratching up my garden. Then in fall, they free range every day through winter.
Lavender Orpington Pullet and Cockerel
In my brooder room enclosed with glass window and hardware cloth and I've ditched the heat lamp for a Mommy Hut (MHP, credit to Blooie!) And Credit to Azygous for amazing article on brooding happy chicks.
Moose, my Ragdoll.....
Some property pics.... Free-Ranging is Fall to Spring....
Catch ya Later!!
Coop Evolution: from this, to this, to this, to this - how the dog house turned into 112sq. ft. Coop
Coop Upgrades

It started as a dog house in 2009. I've expanded the dog house (twice,) as I've learned what is important to me and necessary. Important to me: ability to walk inside and do chores comfortably; clean nest boxes; easy poop clean up. Necessary: plenty of roost space; plenty of windows and ventilation; well insulated; predator proof. Expansion 1 = more room; Expansion 2 = 2 rooms; Expansion 3 = more room in room #1 (roost space.)
Expansion 3: The 3rd expansion made my coop overall size a little more than twice the size of expansion 2, it's close to 112sq ft. / approx. 14x8. It's way to hard to list out materials, dimensions and cost because this has been a 10year evolution. I can't be the only one who just keeps expanding coop size due to expanding flock, so I think you get it. I can just say that every time I've expanded, I re-used materials that we already had. I rarely find myself at home depot and if I do it's the purple (75% off,) wood pile. Chickens don't care how perfect it is and as long as it looks okay from the front, I don't care either. It fits nicely into the grand scheme of our 2acre property and keeps me out of the mall (it's a joke, I'm not really a mall-goer.) I read a cool signature recently: "Gardens and chickens are cheap therapy." Exactly "coop building," is fun/therapy for me as well....
Expansion 3 Construction: Expansion 3 made the interior look like one long building with an interior door between rooms. In 3, we used railroad ties again for foundation, covering the floor with plywood, but leaving area under roost bars as "open sand pit," for poo. I made a big door to enter that room and a good sized poop door to rake sand and poo into my wheelbarrow for my compost bins. The hubs helped this time so it's a bit more "dimensionally accurate."
Expansion 3: The 3rd expansion made my coop overall size a little more than twice the size of expansion 2, it's close to 112sq
I used railroad ties with Hardware cloth attached under them for a foundation. About 4 inches of sand brought the area under the roost bars up to level with the railroad ties and wood flooring. Wall frames rested on, attached to railroad ties foundation.
Framed up walls materials from a mini house construction project we had left over insulation, siding, metal roofing. Then I found some old windows.
All I did was put our leftover/found on our property scraps to good use. There are no blueprints or plans and only 1 trip to the hardware store for hinges and 2 sheets of plywood for roof. I just winged it as accurate as possible. With all of the tools and supplies I need, I make it up as I go along. My best friend is "trim." Wherever it's ugly or weird I'm known for "just putting a piece of trim over it."
End Result, Accomplished 2 separate rooms for 1)brooder/storage; 2)Roost's/Nestboxes


")


