- May 8, 2008
- 224
- 6
- 144
Another entry in the "make your own" category.
I started with a 20gal aquarium. I cut 1" styrofoam insulation board to cover the sides and bottom. An extra piece was cut to insulate part of the cover to reduce heat loss.
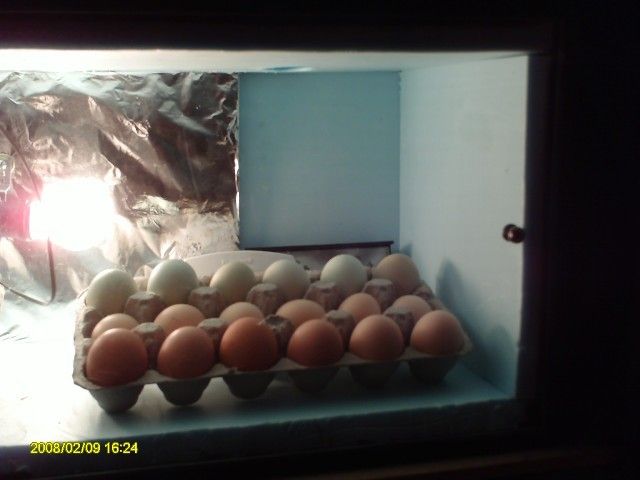
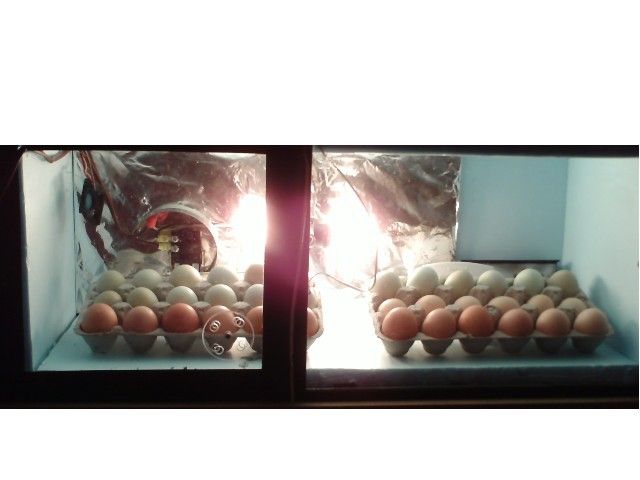
Then a piece of plexiglas was cut to cover the top completely. It was cut into two pieces, I chose to put the hinge, and thus the cut, well to one side to make it easier to get in and reach the controls. The smaller, wall side was taped to the door side using duct tape. Remember to leave a small gap between the pieces to make the hinge work better. Then I taped the wall piece to the tank top. I mounted a small knob to the door for easier opening.
I cut an extra piece of plexi about 2 1/2" square, drilled a small hole in the center, and tightened a bolt through the hole. The bolt was chucked in a drill and the plexi spun against a belt sander until I had a circle. Drill a hole in the plexi top the same size as the one through the disk. I chose to put it in the wall section, but now i think the door would have been a better choice. If I had put it in the door then I would have more insulation in the wall area. Make sure you keep the disk well away from edges, but toward the bottom of the door. Placing the disks edge about where the insulation is is a good idea because the vents you drill in it will be right at the base of the incubator. Then bolt the disk to the plexi and drill a few 3/8 holes through the disk and the plexi. You can rotate the disk to adjust air flow. It is counter balanced will a few small holes drilled in the door to make the top vent.
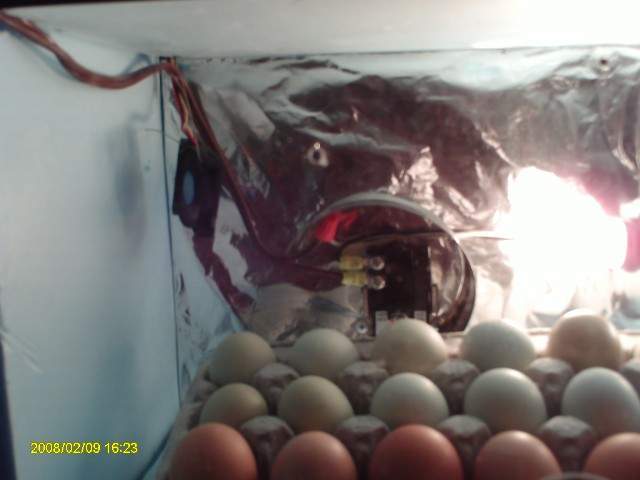
There needs to be a board to mount the electricals to. I cut a piece of 1/4" plywood to snugly fit the bottom of the tank, which will be the back when finished. I wrapped it in aluminum foil, not a necessary step, but it makes cleaning easier. I used a thermostat from menards, the same model as others on here have chosen. For the lamp holder I used the working parts of an old 2 lamp ceiling fixture. A tin can, with the bottom cut off and tabs cut in to mount it,was split and used to shield the thermostat from the direct light. The cord was passed into the tank through a hole drilled in the wall section of the plexi. Afterwards, I found my glass drill. Next time I will put the hole through the tank wall instead to keep it on the back of the incubator. I put a 40mm computer fan in supported on piano wire stuck in the foam to move the air. It's powered by a 12vdc phone charger transformer.
The rest is all basic. A water wiggler made from a radioshack thermometer in an aloe filled egg. A 2 function thermo/humido meter that needs upgrading. I use a cup of water placed in the machine to provide humidity. It doesn't lose much humidity here because of its placement. We usually run a dehumidifier in the room its placed in to keep things below 70% anyway. I had the water in a small metal cup, but it was catching the heat and driving humidity so high there was condensation between the insulation and glass. Switching to a clear cup fixed that. Turn the whole thing on it's side and begin regulating.
I started with a 20gal aquarium. I cut 1" styrofoam insulation board to cover the sides and bottom. An extra piece was cut to insulate part of the cover to reduce heat loss.
Then a piece of plexiglas was cut to cover the top completely. It was cut into two pieces, I chose to put the hinge, and thus the cut, well to one side to make it easier to get in and reach the controls. The smaller, wall side was taped to the door side using duct tape. Remember to leave a small gap between the pieces to make the hinge work better. Then I taped the wall piece to the tank top. I mounted a small knob to the door for easier opening.
I cut an extra piece of plexi about 2 1/2" square, drilled a small hole in the center, and tightened a bolt through the hole. The bolt was chucked in a drill and the plexi spun against a belt sander until I had a circle. Drill a hole in the plexi top the same size as the one through the disk. I chose to put it in the wall section, but now i think the door would have been a better choice. If I had put it in the door then I would have more insulation in the wall area. Make sure you keep the disk well away from edges, but toward the bottom of the door. Placing the disks edge about where the insulation is is a good idea because the vents you drill in it will be right at the base of the incubator. Then bolt the disk to the plexi and drill a few 3/8 holes through the disk and the plexi. You can rotate the disk to adjust air flow. It is counter balanced will a few small holes drilled in the door to make the top vent.
There needs to be a board to mount the electricals to. I cut a piece of 1/4" plywood to snugly fit the bottom of the tank, which will be the back when finished. I wrapped it in aluminum foil, not a necessary step, but it makes cleaning easier. I used a thermostat from menards, the same model as others on here have chosen. For the lamp holder I used the working parts of an old 2 lamp ceiling fixture. A tin can, with the bottom cut off and tabs cut in to mount it,was split and used to shield the thermostat from the direct light. The cord was passed into the tank through a hole drilled in the wall section of the plexi. Afterwards, I found my glass drill. Next time I will put the hole through the tank wall instead to keep it on the back of the incubator. I put a 40mm computer fan in supported on piano wire stuck in the foam to move the air. It's powered by a 12vdc phone charger transformer.
The rest is all basic. A water wiggler made from a radioshack thermometer in an aloe filled egg. A 2 function thermo/humido meter that needs upgrading. I use a cup of water placed in the machine to provide humidity. It doesn't lose much humidity here because of its placement. We usually run a dehumidifier in the room its placed in to keep things below 70% anyway. I had the water in a small metal cup, but it was catching the heat and driving humidity so high there was condensation between the insulation and glass. Switching to a clear cup fixed that. Turn the whole thing on it's side and begin regulating.
Last edited:


