Arizona Coop & Run on a budget.....TIGHT budget ;-)

tfwall

In the Brooder
Oct 28, 2015
38
1
32
Hello my fellow fine feathered flockers.

I was asked by folks in the new member section to post pix of the progress of my coop/run.

I will do that here, and update throughout the build.


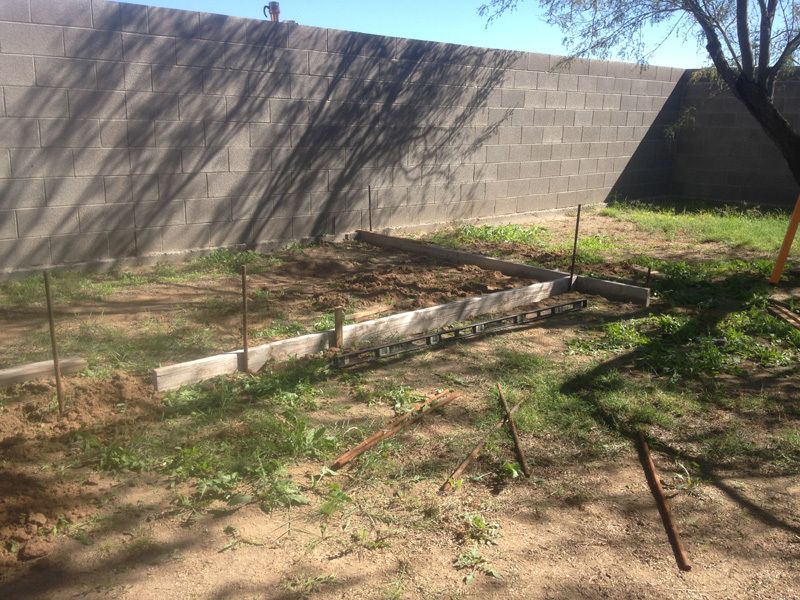
Here's my designated area. In the back yard, beneath the mesquite trees for some summer shade.
The plot I am laying out is 8' X 20' and will utilize the existing cinder block wall for the east facing wall of the run. The coop will be a solid complete structure.


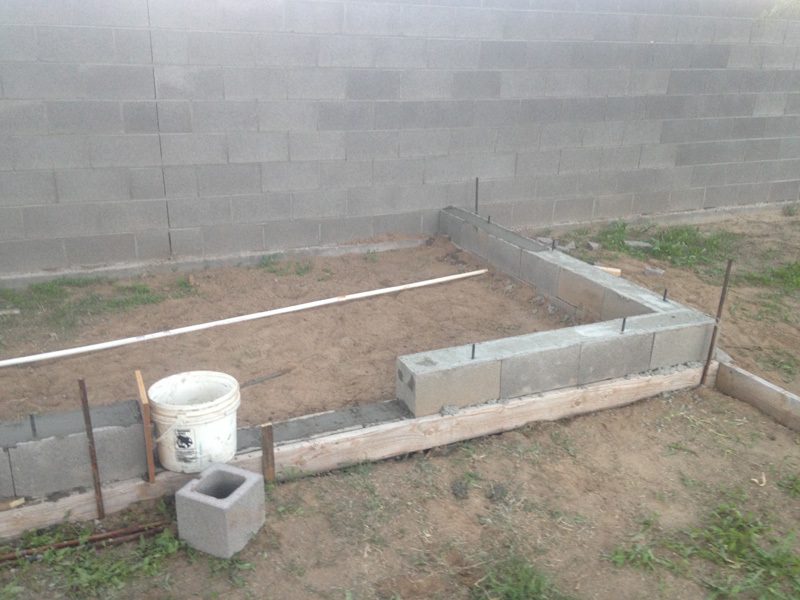
I set cinder blocks in the ground, and for the section where the coop will be, I ran a second row of bond beam blocks, and filled them with ready mix, and set my anchor bolts. I plan to have the floor of the coop set at about knee high, and will the floor will slope from back to front about 2" so we can clean it easier. (If we need to wash it out, it'll flow downhill to the wheelbarrow.)


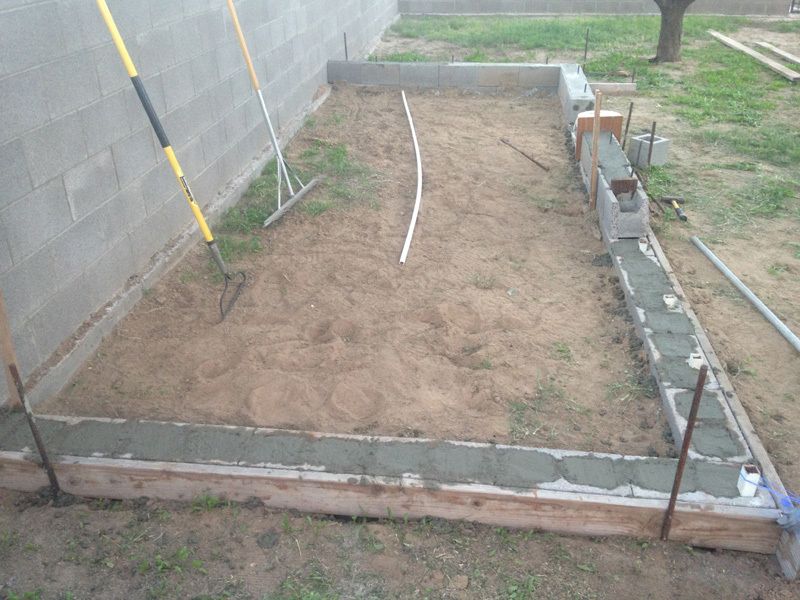
The single row blocks are just filled with ready mix. There is no structural support here as I won't need it.
The roof over the coop will be 12-ish feet long, and that structure will be supported by the dual row of blocks.


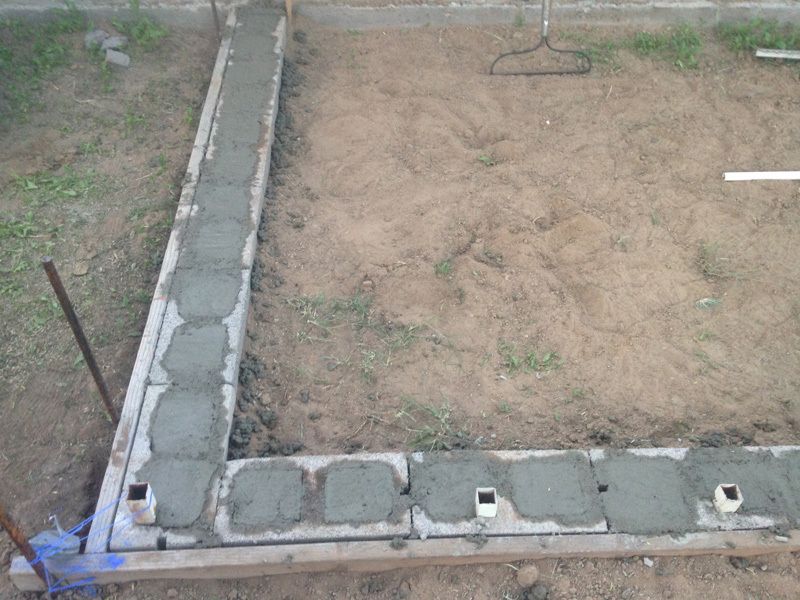
The square tube risers you see are driven into the ground and cemented in the cells. On this end of the run, the girls will have full sun if wanted. I plan to attach 3/4 pvc to the top of my existing wall, and do like a greenhouse bow into these pockets. The cover it all with 2x4 wire mesh. Kind of a mini half of a bio dome lol. It's hard to explain, but when I get it together it will become clear as mud I hope ;-) Ok, enough for tonight, time for this old rooster to hit the sack.
 
Wow that's quite a construction job.
I got a free camper given to me. I took out the appliances and put straw for laying boxes in their places. Made roosts by wedging 2x2's between the window frames. Total cost was less than 10 dollars. Mind you the chain link compound cost about $300.
 
Wow that's quite a construction job.
I got a free camper given to me. I took out the appliances and put straw for laying boxes in their places. Made roosts by wedging 2x2's between the window frames. Total cost was less than 10 dollars. Mind you the chain link compound cost about $300.
That works! So far I am out the coin for 20 bags of ready mix, and 1 masonry blade for my grinder. Just under a hundred bucks. The block were left overs from the fence and the 2x6 forming boards are loaners from a buddy. Unfortunately, the rest of the supplies will have to be bought. I've used up all my stash
th.gif
 
Ok, so budget has been exceeded, but I found some wriggle room lol. Mama, has said she wants the birds safe and happy, and I concur.

The day after the concrete pour, I was looking around and formulating my plan of attack when I noticed 2 things that didnt make me happy.

A snake hole, right in the center of my run area, and a gopher hole, in the corner of the footer.....no question about wire in the floor after that ;-)

I have some pix, I will try and get posted by weekend, just been super busy. BTW the girls are 3 weeks old as of today...timeline is fast approaching the deadline .
 

Progress is being made well. Starting to rain some, so it's time to go have coffee and stay dry for a while ;-)

A shot of the nest boxes on the swinging door. Rough box dimensions are 14" deep, 13" wide (Each nest) and 14" tall

Here I have the basic lid installed on the nests, along with 2 vent windows. For some reason the trim on the top of the door looks like a sow belly, but it's straight. Must have been the camera angle. Now I have to get my hands on some rubber to seal the hinge gap, and I can install the roof material on the nest lid.
 
Last edited:
My God, I need to get off my butt and get some more pics!

I have been so busy building, I forget to shoot some.

Hopefully this weekend, I will pull my head outta somewhere, and get some more for those who are interested.
 
Oh, and one rule I knew, but TOTALLY forgot, always measure your lumber.

After, I say AFTER, I got the roof on, I found out that 2 of my 12 foot 2x4's were about 1-1/2 inches longer. That makes a mess outta my profile ;-( My only alternative is to pull the R-panels, rip up the OSB (I used ring nails) and trim the boards. Unfortunately, thats NOT gonna happen.

Remember, MEASURE every piece you buy, and don't assume the lumber yard got it right!!!
Most lumber is typically produced over length.
Yes, always check lengths.
 
Ok, as promised......here are some update pics. I took a couple of days off work so I could try and get caught up. Christmas in coming and Mama (DW) says the girls are getting evicted before company comes. They are currently kicking it in the spare bedroom ;-)

Here the girls are enjoying their second day outside. Even tho the temp was in the low 60's they still didn't care for the Arizona sun. Had to give em a lil extra shade
They seem to like the feeder I threw together that morning. The feeder will go into the hen house during their "homing".

view from the front, the hen house is about 95%, I still need to install water and light, and order my sand. My goal this week is to get the hen house ready for move in, then I can work on getting the run wrapped up.

ventilation door on the south end. Here you can see where I utilized the block wall to help cut costs.

same door, just a close up. We have prevailing winds and storms from the south, so I installed a drip edge, and this wall has very little else. I used small chain for the vent adjustments, and if I need to close one off, each of the doors have a hook and eye for securing. Each window/vent has a hardware cloth screen for critter prevention.

bond beam footing and coop stilts. I am 6 foot tall, and so I set the hen house floor around knee high to me.

west end. Full door for access, 2 vent doors, nest boxes This is the business end of the hen house ;-)
I did this so I could easily pull the bedding out for cleaning. I plan to use sand, and I will build a screen for my wheel barrow so I can clean and reuse the sand easier.

Nest boxes...still storing supplies here ;-) I used an inner tube to seal the gap between the door and the lid so the nest boxes should stay dry in inclement weather.

Along the front side of the run, you can see the pvc bows at the far end. They are tall enough for me to work under without a lot of stooping.

The bows will be covered with 1/2" hardware cloth. I decided to try this method, again, to cut costs. Eliminated a lot of stick framing!!

I will then tie the bow coverings, the end panel and the transition between the stick structure and the bows together with tie wire.

Sewing with wire can be a booger hahaha.

I also will lay 1/2" hardware cloth in the floor, and tie into the foundation with mortar cement, then cover it all with sand.
Hopefully this will keep the submarine attacks at bay.

Last vent door and here you can also see the pulley/rope system to operate the hen door.

Hen door and roost bar access door. Hope this helps with clean up ;-)
The hen door is 3/4 plywood attached to a pair of drawer slides to make up/down smoother

just a shot of the foundation and stilts, and the door to the run.

another shot of the pvc bows. Simply slid into the square pockets. Once I start wrapping the wire, it will be wrapped around a piece om EMT steel conduit, tied, and then the conduit will be anchored to the foundation.

This SHOULD keep any predators at bay. Doubt it will keep a mountain lion out no matter what, BUT fortunately, I have never seen or heard of one in this area. There is very little that will keep out that beast when it's determined to get in ;-(

Along the roof edge, I still have the gaps under the ridges on the R-Panel tin. Anyone ever have issues with critters getting under that? The roof has at least 12" overhang from the wall, and the soffit area is covered. Thoughts? Ideas?
 
Last edited:
Well, I remember that I said I took a couple of days off work, so I could get caught up.

Yeah, well that went out the window. Woke up this morning to rain. Dang it ;-}

Lets hope it clears up, so I can get back to work.

Hope everyone else's day turns out better!
 

New posts New threads Active threads

Back
Top Bottom