• giveaway ENDS SOON! Cutest Baby Fowl Photo Contest: Win a Brinsea Maxi 24 EX Connect CLICK HERE!

BROODER thread! Post pics of your brooders!

it was a rake :) and I was hoping no one would notice as I replaced it already I just didnt have the board in place for the photo shoot lol. Also good suggestions on the food/waterer....what you are seeing there is two quail waterers I have the food more in the center so there is no fight over it!
 
I've made two brooders out of old console stereos. You have to tear the guts out, replace the old fabric in front with screen, add the linoleum to the floor and attached a heatlamp at one end. They are great and really look like a piece of furniture in the house. I also had some leftover background for behind a fish tank, this what you can see on the back wall, and it's waterproof and easy to wipe down. The cost is less than $30, mainly for the light and linoleum. The top is already hinged, others might slide open. It is time consuming to remove the guts, but it's a good use to an old piece of furniture.

You can always find them free on Craigslist or the Freecycle in your area.

I'm currently working on converting a free baby crib to a brooder.


beautiful! what kind of bulb is that you're using? I need to get mine set up before the 20th and I'm wondering if a standard bulb will do. Thanks for the great idea!
 
Here is our brooder. We upcycled an old kitchen base cabinet and some saw horses. The light bar across the top is functional, cheap and easy to make. It is heavy and solid!

400

400

400
[/IMG]
 
Hello everyone!

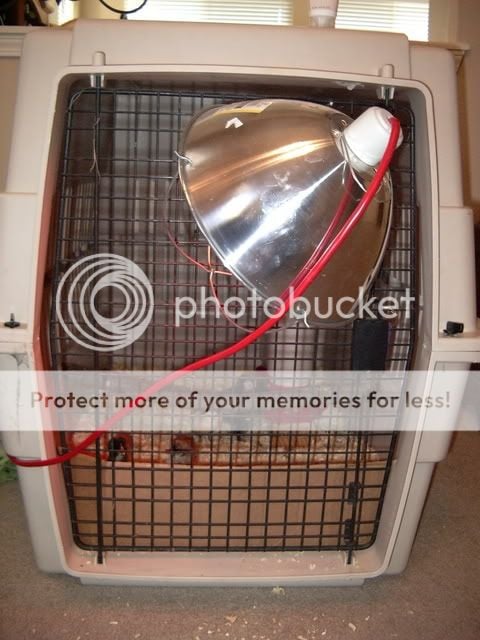
I had several ideas about what to do for a brooder, then read someone's post about how they might use a dog crate ..... *ding!*..... we had a huge one in our garage I was about to list on craigslist!  (FYI, it is 27" x 40" and we have 6 chicks)   This was perfect for us, to protect the babies from our house dog and the two kids.  I thought it might be useful for others to see how some of us have made a brooder and get some ideas, so I will start it out!


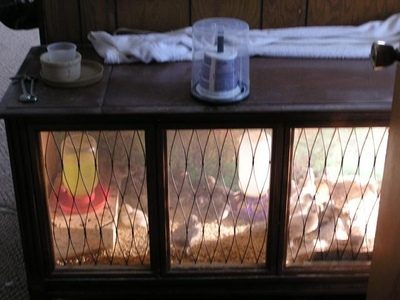
Here it is from the outside..... it is in our living room with the light mounted on the outside.  As they have needed less heat I have slowly turned it to the left, lowering the temp each week.
IMGP0931.jpg


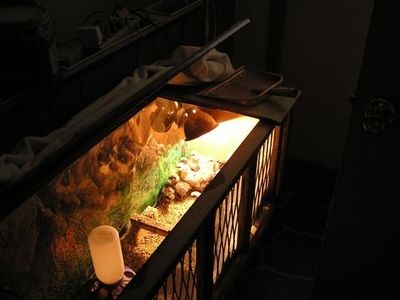
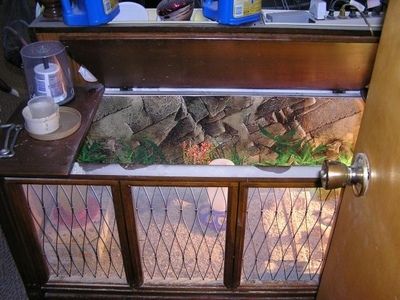
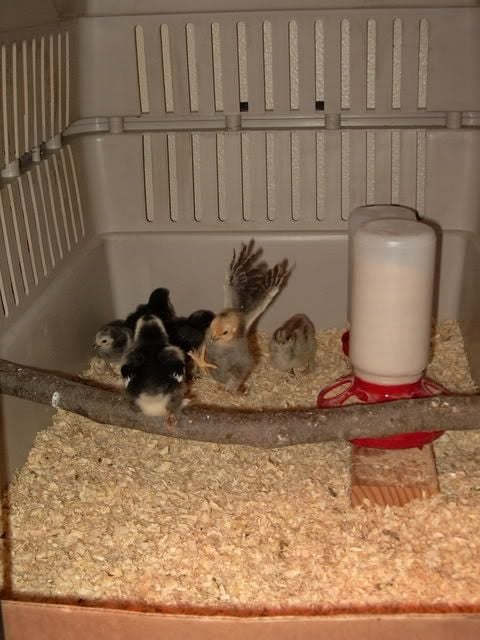
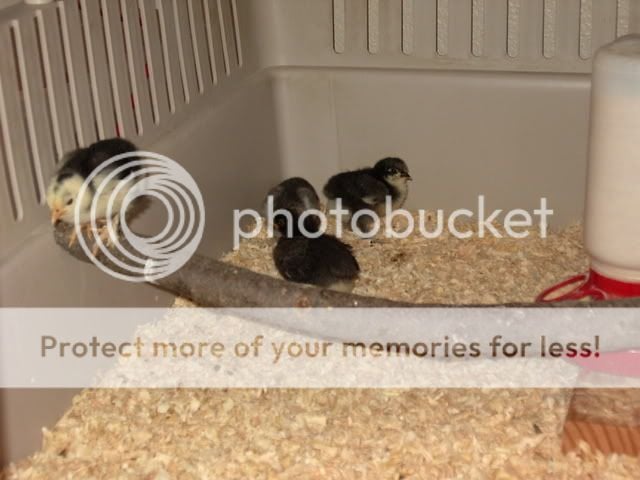
Here is the inside.  Thermometer is on the left (not in photo though!).  Food and water are on a 4x4 post scrap to get it up a bit so they dont poop in it, or get shavings in it.  We still wash out the water every day.  It is also in the back so it stays cooler.   I screwed in screws to hang the oak branch in there and they love it.  The chick flapping is one of the two who are competing for the Queen of the Pecking Order.  They fight for who is on the roost, and she is clearly telling the other one to get off!  We use the deep litter method, and so need the bit of cardboard in the front to prevent shavings from coming out the front!  We also stir it up everyday.
IMGP0933.jpg


IMGP0935.jpg


And here is our huge Lab protecting the babies.........actually, he is scared of them and backs away when we get them close to him, but he wants to look at them!
IMGP0936.jpg


Can't wait to see everyone else's ideas!


Our GSD loves it when we have babies. I was watching a chick video on my phone last week and she came running over because she could hear the peeping lol
 
I converted an old rabbit hutch to a brooder. Its nice to get a second use out of that old hutch. The top is hinged and the lamp is wired to the hardware cloth. I also added a dimmer control to the lamp to help regulate the brooder temperature. Now to start building a coop. Thanks to everyone on this site for giving me great ideas to start our coop.


We ordered 28 chicks. They sent 36. I'm glad I had the foresight to build a brooder large enough for the lot of them.
Five days in and haven't lost a single one.
Primary components:
Two 4' x 4' (general footprint), 30" tall cardboard "Produce" box from local grocery store.
Hole cut between the two (but closed off for now) to allow chicks to roam to second compartment when they get feathered out.
Lid with a hole cut into top to accommodate the 250W heat lamp.
6"+ of pine shavings.
Feeder and waterer emptied, cleaned, and refilled as needed (generally 3x daily).
Small perch which they are just now beginning to use (I removed the cardboard box inside the brooder because a chick got stuck behind it).
Wireless security cam for monitoring.
Wireless thermometer to monitor temperature.
I'll be adding a lid to the second half, and covering the hole in the first half (where the chicks are now) with 1/2" wire to make sure chicks can't fly out.


What is the temp under the light, and at the side of the box? By the position of the chicks, I wonder if the temp is too high. I recommend opening access to the second box now rather than later so they can get away from the heat. They will be better able to self regulate, and will feather out faster. Mama broody does not heat all the space around her. But warms the chicks as they run in and out from under her. Chicks are much more "weather tolerant" than we give them credit for, and actually thrive when allowed to "cool down". Pretty assortment of chicks. You'll have plenty roos to pick from, if you decide to keep a rooster!
 
I built a secondary brooder for older chicks that are almost ready to run with the adults, but still need a heat lamp in the mild California winters.

I laid a large piece of plywood on top of a pallet as the base to keep if off the ground should it rain. Then I took a wire mesh pen with top (that I used for a littler of puppets a few years ago) and I lined it with chicken wire.
This actually works great because it had a door. The top flips up and you can a heat lamp from it. I cover it with a tarp to keep drafts and wind out. So far it has been a great set up and adult transition area. Not to mention it costs less than $100, you don't have to build anything and it's portable.

https://www.backyardchickens.com/content/type/61/id/7260041/width/200/height/400

[IMG]https://www.backyardchickens.com/content/type/61/id/7260048/width/200/height/400
 
What is the temp under the light, and at the side of the box? By the position of the chicks, I wonder if the temp is too high. I recommend opening access to the second box now rather than later so they can get away from the heat. They will be better able to self regulate, and will feather out faster. Mama broody does not heat all the space around her. But warms the chicks as they run in and out from under her. Chicks are much more "weather tolerant" than we give them credit for, and actually thrive when allowed to "cool down". Pretty assortment of chicks. You'll have plenty roos to pick from, if you decide to keep a rooster!

Thanks for your reply.

When I open the lid, they all run to the back, as the photograph demonstrates. When the lid is down, through monitoring on the security camera, I can see they move from underneath the heat lamp to other places quite frequently. The first week I kept it at 97*F; we're now on week two and it is being kept between 88*F - 90*F directly under the lamp.

On the outside perimeter of the brooder, the temps vary between 70* - 75*F.

It is difficult to maintain a constant temperature, as this is in our garage, where the temperature in the garage is about 55* - 60*F; unless it gets really cold outside, like it did the first week. I woke up at 2:00 AM on day three and it was 102*F directly under the lamp; and I believe that may have contributed to some pasty butt, which has since been cleared up.
 

New posts New threads Active threads

Back
Top Bottom