Of course I just post a story, and a few pics on my brooder on a different thread, then find this one! New Egg - that's a freebie for me!! Oh well, here it is again!
I was inspired to build this based on a design I found here on BYC. The original builder made his a bit smaller, probably a lot squarer, and for $50 more than mine. Mine is 60"l x 36"w x 24"d. His was 60 x 34 x 14. My inner frame is 48" tall, and I added an upper deck to it with a piece of leftover OSB. I sketched out my design using only his photographs, and narrative as a guide.
The BYC brooder page I found the design on is right here. The original is on the top left of the page.
https://www.backyardchickens.com/chicken-coop-brooder.html
I used 7/16" OSB instead of exterior plywood, 1" hex chicken wire on the back and sides, and standard 2x2s for the frame. The top and door is covered in 1" x 1/2" welded wire because the chicken wire came in a 24" roll, and I needed almost 30" for the door. I plan on adding some treated 2x4s on the bottom when/if I move it outside. I was thinking how easy it would be to add a trap door on the bottom front for a removeable poop tray, and may add one later. It took me four days to build it considering work, and a day off to see the dentist, but could have easily done it in a weekend. I could easily make this again, and much squarer! (I really learned a lot on this build!)
Am I going to start a chicken farm, and reuse this for years? Probably not, but an ad in the paper, or a note on a couple well-placed bulletin boards might get it sold for, oh, I don't know. $75-$100 range? A coat of paint, or some T1-11 veneer on the box might even up the price for someone who fancies more detail.
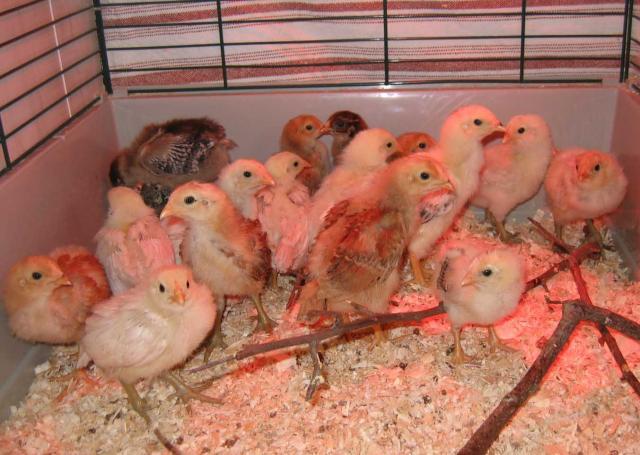
Here are the pics. One in progress, one exterior shot, and one interior shot.
Mark
Edit: Gosh, I completely forgot to add the temps! I added four j-hooks on the top of the frame (you can see the forward ones), and by using the clamp, or the wire on the lamp I have been able to easily adjust the temp to between 80-95 degrees on the side of the lamp. I haven't measured the "cold" side, but the coldest it got in the garage in the past two weeks has been in the mid-50s. I moved the chicks in this brooder when they were a week old. They've been there just under one week now.

I was inspired to build this based on a design I found here on BYC. The original builder made his a bit smaller, probably a lot squarer, and for $50 more than mine. Mine is 60"l x 36"w x 24"d. His was 60 x 34 x 14. My inner frame is 48" tall, and I added an upper deck to it with a piece of leftover OSB. I sketched out my design using only his photographs, and narrative as a guide.
The BYC brooder page I found the design on is right here. The original is on the top left of the page.
https://www.backyardchickens.com/chicken-coop-brooder.html
I used 7/16" OSB instead of exterior plywood, 1" hex chicken wire on the back and sides, and standard 2x2s for the frame. The top and door is covered in 1" x 1/2" welded wire because the chicken wire came in a 24" roll, and I needed almost 30" for the door. I plan on adding some treated 2x4s on the bottom when/if I move it outside. I was thinking how easy it would be to add a trap door on the bottom front for a removeable poop tray, and may add one later. It took me four days to build it considering work, and a day off to see the dentist, but could have easily done it in a weekend. I could easily make this again, and much squarer! (I really learned a lot on this build!)
Am I going to start a chicken farm, and reuse this for years? Probably not, but an ad in the paper, or a note on a couple well-placed bulletin boards might get it sold for, oh, I don't know. $75-$100 range? A coat of paint, or some T1-11 veneer on the box might even up the price for someone who fancies more detail.
Here are the pics. One in progress, one exterior shot, and one interior shot.
Mark
Edit: Gosh, I completely forgot to add the temps! I added four j-hooks on the top of the frame (you can see the forward ones), and by using the clamp, or the wire on the lamp I have been able to easily adjust the temp to between 80-95 degrees on the side of the lamp. I haven't measured the "cold" side, but the coldest it got in the garage in the past two weeks has been in the mid-50s. I moved the chicks in this brooder when they were a week old. They've been there just under one week now.