Katanahamon
Songster
- Jun 25, 2021
- 590
- 1,432
- 186
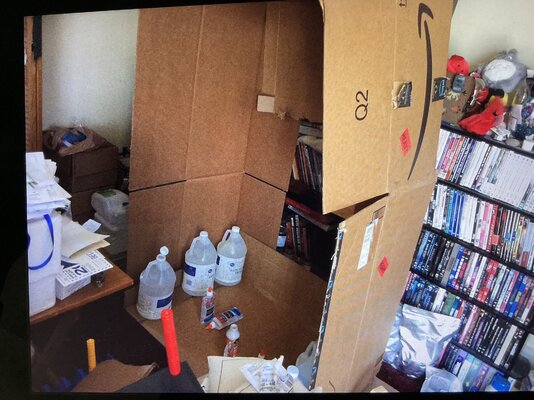
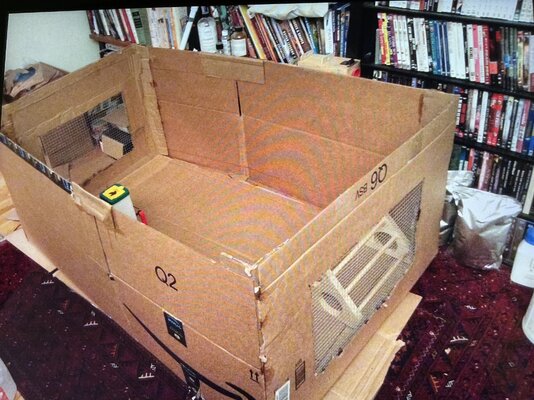
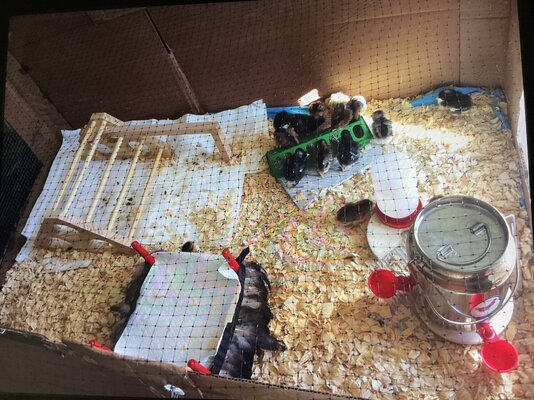
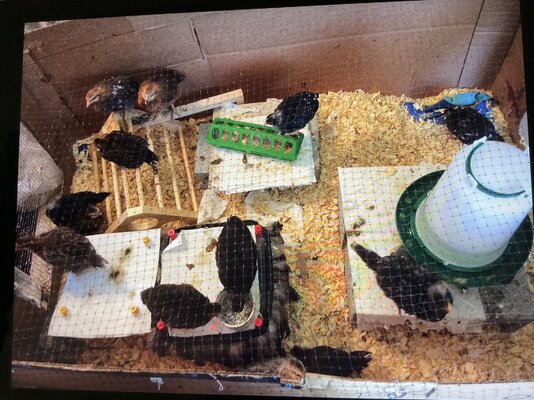
I built a brooder complete with hardware cloth windows out of spare cardboard and plain old Elmers glue! Design it, use cans or water jugs as weights, and glue your seams. Cut out picture frames of cardboard to put over the edges of hardware cloth, or chicken wire would suffice for chicks, and use a lot of glue and weights to make cut out windows. Use stuck on upside down Command hooks to secure netting over the top. Presto! As big as you want, inexpensive brooder! I put a waterproof cloth down, spread shavings, added and subtracted pavers or cinder blocks as necessary, it all worked great! My girls are 17 weeks this week..these pics were from April..edit..I cut the walls and folded it up and stored it in the garage. To play with them I had cut a large door and secured it with a couple command hooks and rubber bands on the outside..I’d never put rubber bands on the inside, bad combo! For electrical cords, just cut as small a hole as possible for the plug, place cords underneath your waterproof cloth or shavings..so easy! Probably best to locate cords so they have as little length as possible under shavings to eliminate the possibility of overheating, although, that’s just being overly cautious as the brooder heat plates have extremely low wattage.
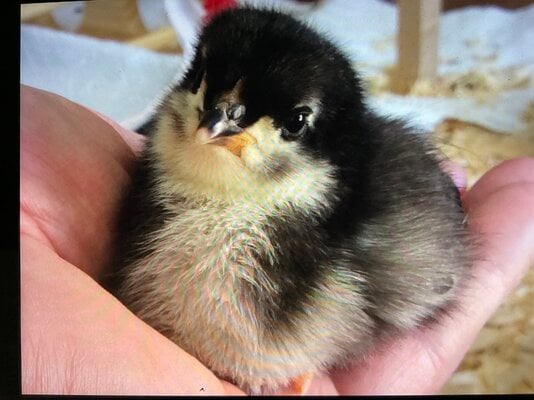
another edit..looking back at these photos, please, spend as much time with your babies as you can..they grow up so, so,..SO fast you won’t believe it! Couldn’t resist a baby pic of Black Australorp..!)
another edit..looking back at these photos, please, spend as much time with your babies as you can..they grow up so, so,..SO fast you won’t believe it! Couldn’t resist a baby pic of Black Australorp..!)
Attachments

Last edited:
 .
. ) or I'll reuse some old bins used for carrying fruits and vegetables during the harvesting. I think I'll put the chicks in the basement instead of my bedroom (maybe they will be in my bedroom just the first days to better keep an eye on them), too much dust, this year I had to vacuuming and dusting everyday or more
 ) made the waterers to fall from the block, so the waterer spilled all the water on the sharvings, on the wood of the brooder and on the floor (made of wood)

