Enclosed Run PICS?!?!?

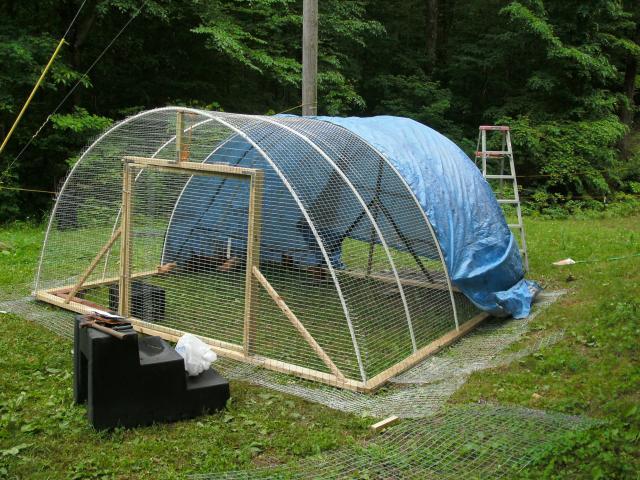
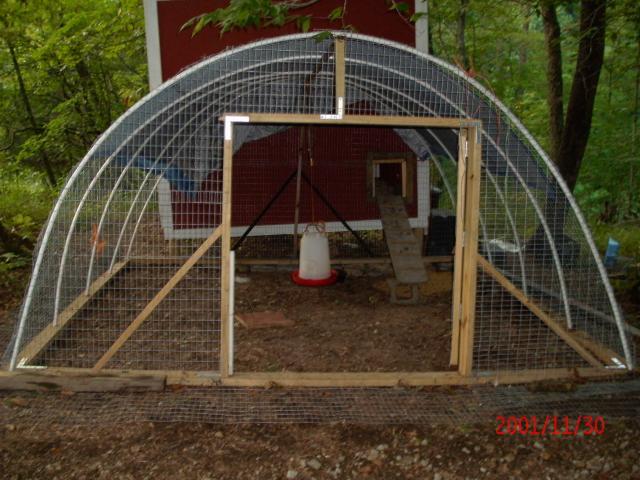
That is actually plastic netting and what you are seeing is the edge of the plastic netting where it gets thick. I questioned the plastic netting, but have a freind who uses it and has been happy with it. I close the ramp/door at night so they are safe in the coop area. The netting goes up one side and down the other, the netting is 36" I ran my studs at 33" and overlapped one side as I went.
I also plan to add synthetic deck board under the 2x4 in the near future to prevent the boards from rotting near the ground, I did not use any treated wood on the build.
The electric wire that I need to get ran around it is just to insure that coons and other critters don't tear up the netting. From what a freind said after they touch the wire a couple of times they just stay away, I have had them in there for atleast a week now though and have not had any sighns of an attempted break in.
We have also trapped and relocated every coon that we could as precation and have not seen but 1 in several months.
 
Last edited:
Here is my pvc run. You can make it as wider and longer than mine (10' x 10') depending on how many birds you want. You can also put 2x4 braces under the ridge board for extra stability or for snow.
56972_20100520_56.jpg

Here it is attached to my coop. It is light weight enough to move with 4 people. I just laid wire down around the outside and staked it down with metal tent stakes from Walmart.
56972_20100820_12.jpg
 
"How did you mount the PVC to the frame"

With Brace Rail Clamps (found in the chain link fencing section of our local Lowes)...they're pretty inexpensive ($1.38 each) and we used 12 on our 15 1/2 foot run. Although they state they fit a 1 3/8" rail which is standard for many chain link fences, we found the bolts included in the pack were not long enough...which meant another trip to Lowes for 2 inch carriage bolts (also check to make sure to get the same diameter so the nuts in the Brace Rail Clamp will fit).

We were checking into using 1 inch PVC pipe but decided on 3/4" because, well, it was 1/3rd the cost and was easier to bend into the clamps. Once in it was very steady even before we attached the hardware cloth. Since we were using 3 foot wide hardware cloth the hoops were place 3 feet apart. Attaching the end panel was a bit of a challenge but Bill determined that attaching the last piece to the bottom rail first, then to the last hoop, then trimming lessened the chances of folds and he was right.

84140_img_0830.jpg


The run is 7 feet wide. At first we were going to cut the PVC in to 8 inch lengths but that seemed to make the entire run so high (i.e., more hardware cloth needed) since the kennel was already 6 feet high. We ended up cutting the pipe to 7 1/2 foot lengths. That also worked out great as it turned out we had just enough hardware cloth on our 100 foot roll to do the bottom covering and the roof.

Hope this makes sense..

Gail
 
Thanks everyone for all there great posts. I've got some great ideas now, It'll be a few weeks but I'll post up my finished design when complete. Still quite a few things needing to be done to the coop. But thanks again and feel free to keep on posting, love seeing that I'm not the only one chicken crazy!!!
wee.gif
ya.gif
 
Quote:
I think the blocks you're asking about (the ones in the grassy boxes) are to keep the screen from sagging when the chickens walk on it. These grass boxes work very well. They provide greens for the chickens to eat while protecting the grass from "total devastation" that chickens are so famous for. The tips of the blades of grass grow up through the screen and the chickens can eat it when its long enough. Try it.
 
Not big enough for 12.. or even 20, but this is what we came up with after I lost wayyyy too many chickens last year(Dogs, Coyotes, Fox, Chicken-feed loving bear families!).

It started as an 8x8x8 coop... DBF built it without my 'supervision' and it didnt keep ANY water out, and just didn't work.

So we started to tear it down to recycle some of the materials and POOF! this popped into my head.

IMG_0398.jpg


We're getting ready to put some nesting boxes in.
IMG_0403.jpg


View of the 'roosts'.
IMG_0402.jpg


Waiting for more treats! The ladder was very ineffective (a poop collector actually!) and they just fly up there.
IMG_0461.jpg


Oh and were still planning on adding a slanted roof by next winter!
 

New posts New threads Active threads

Back
Top Bottom