- Thread starter
- #11
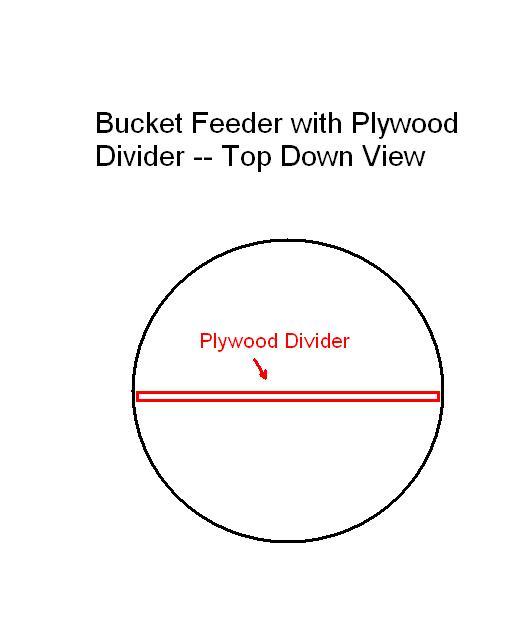
FEED BUCKET (( PICTURE)) $0.00
- Thread starter Omran
- Start date


New posts New threads Active threads
-
Latest threads
-
 Large air cell on internally pipped chick under broody
- Started by Weetamoo93
- Replies: 1
-
 Ol' Grey Mare's Project 365 (er, 295....)
- Started by Ol Grey Mare
- Replies: 0
-
 Wolf Branch Homestead's Project 365
- Started by HomesteaderWife
- Replies: 1
-
 Mermaid of the Farm's Project 365
- Started by mermaid_of_the_farm
- Replies: 0
-

-
-
Threads with more replies in the last 15 days
-

-
 FOOD: what are you having?
- Started by The Coop-D-etat
- Replies: 87
-
 BYC's 52-week Photography Challenge. Week 9: (Mar 2 - Mar 8, 2026) Theme: Frame within a Frame
- Started by thecatumbrella
- Replies: 85
-

-

-