I have 33 laying hens and a dozen growing ducks with the appetite of 33 laying hens. I'm going out of town and wanted a heavy duty feeder to make one less thing the house sitter has to worry about. I found a design for a container with a 90° pvc flange but it was for a small container, like 10 gallons. So here is my spin on the idea using a 32 gallon trash can and a regular pvc elbow instead of a flange ($3 vs. $17) that holds two 50 pound bags of feed easily.
Materials:
BIG plastic trash can (I used the 32 gallon from Walmart for $9.95).
90° angle 4" pvc fitting ($2.95 at Home Depot, get the sewer fitting not the high pressure fitting, much cheaper)
1/4" machine screws (its important that they do not have pointy tips like wood screws)
Jigsaw, drill, 1/16" drill bit, ducktape
Assembly:
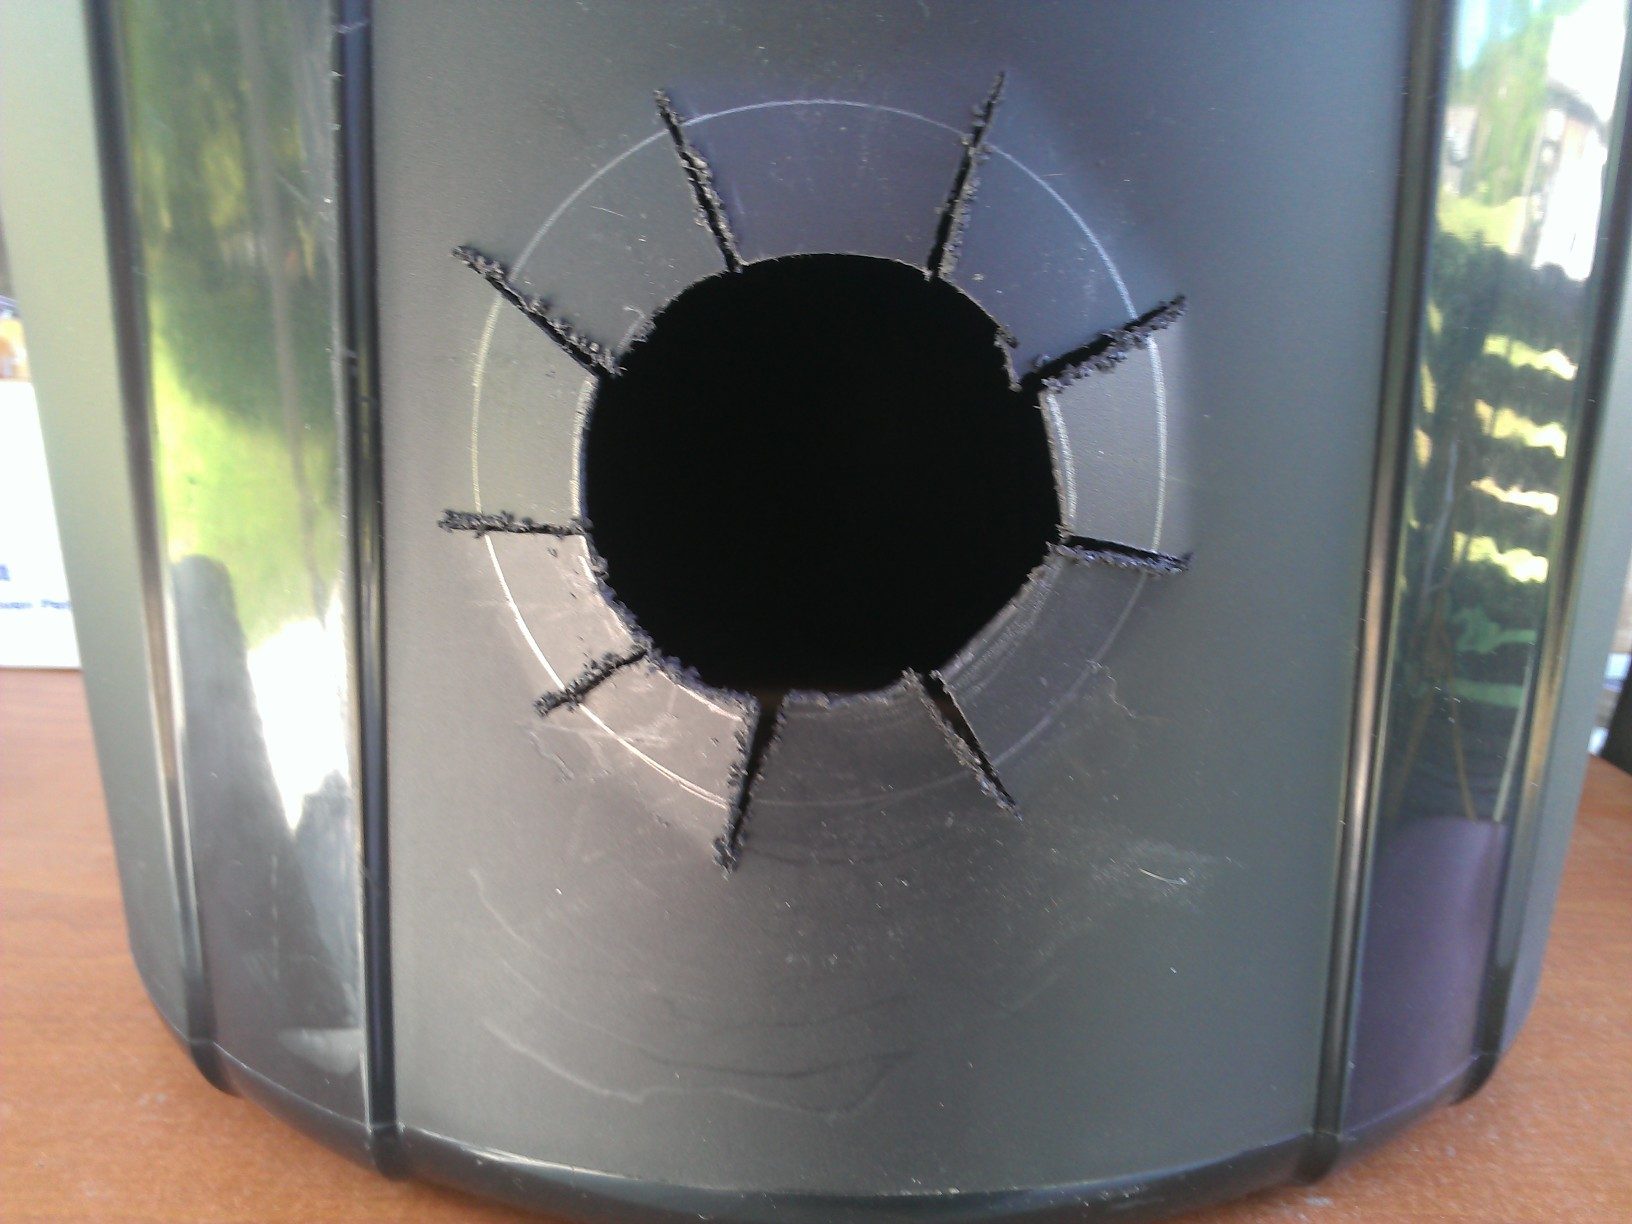
Step 1: Trace your fitting onto trash can so that the top of the traced circle is about 8 inches from the bottom of the can. This allows for an inch or two of feed to collect under the fitting.
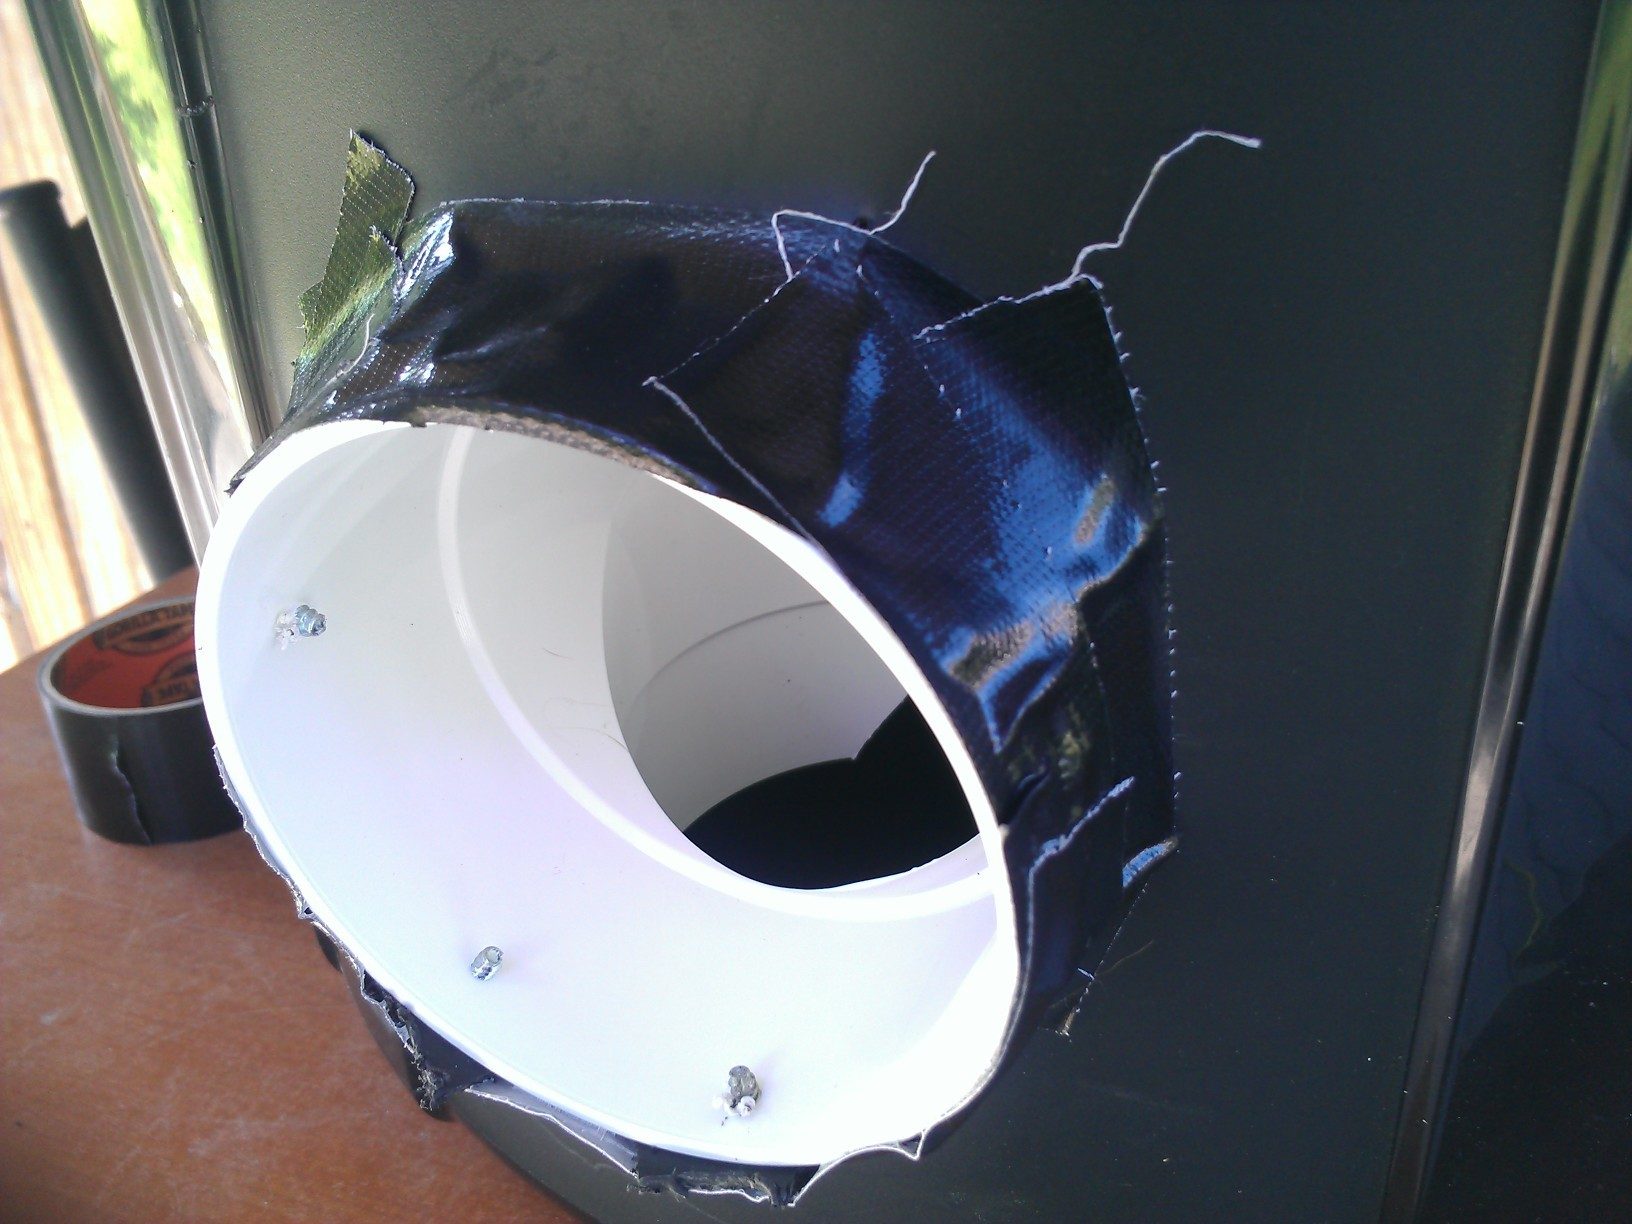
Step 2: Trace a 2.5 inch circle inside the bigger circle and cut it out using the jigsaw (I used a pill bottle to trace). Then cut "spokes" from the cut-out to the bigger traced circle and about a quarter to half inch beyond (see picture, its hard to describe).
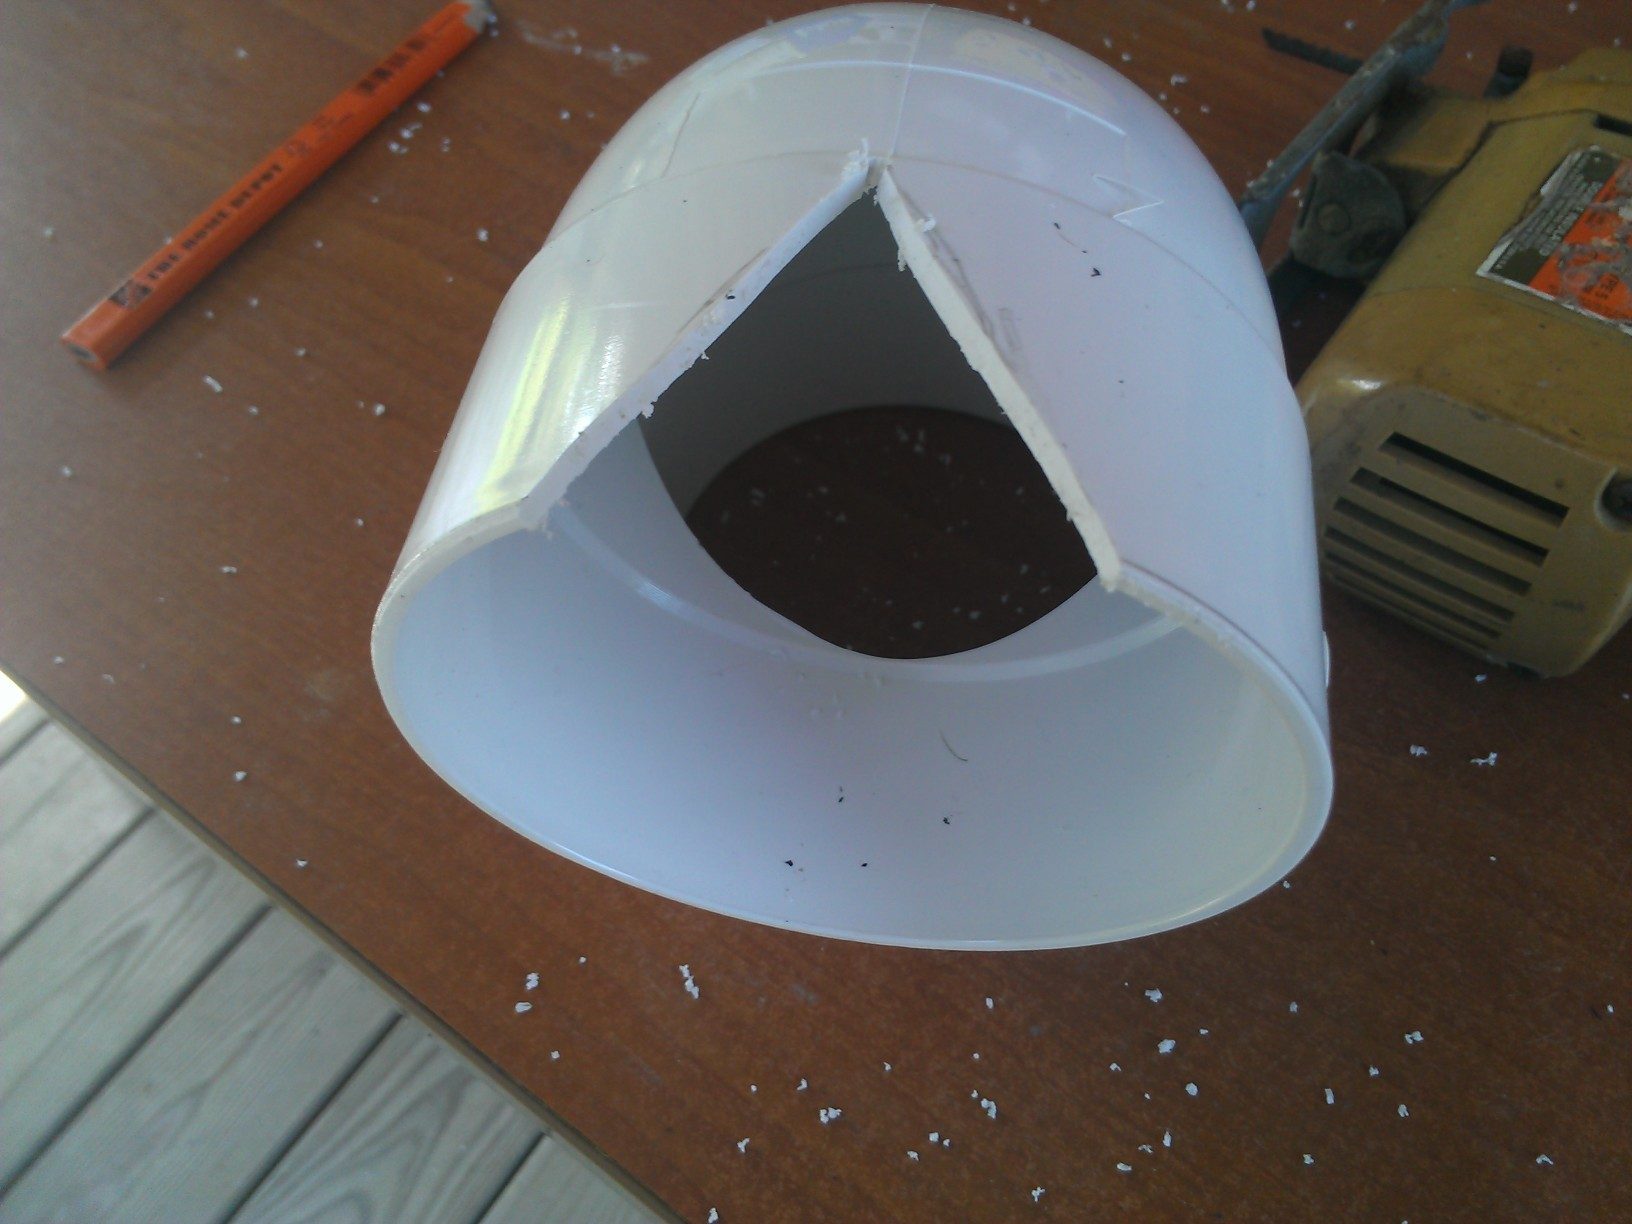
Step 3: Cut a notch out of your pvc fitting as shown. This allows a little extra feed to come in from the sides instead of just from underneath. Tip: If feeding crumbles, you can skip this step. If feeding pellets, you can make it bigger or smaller depending on the size of the pellets from your mill.
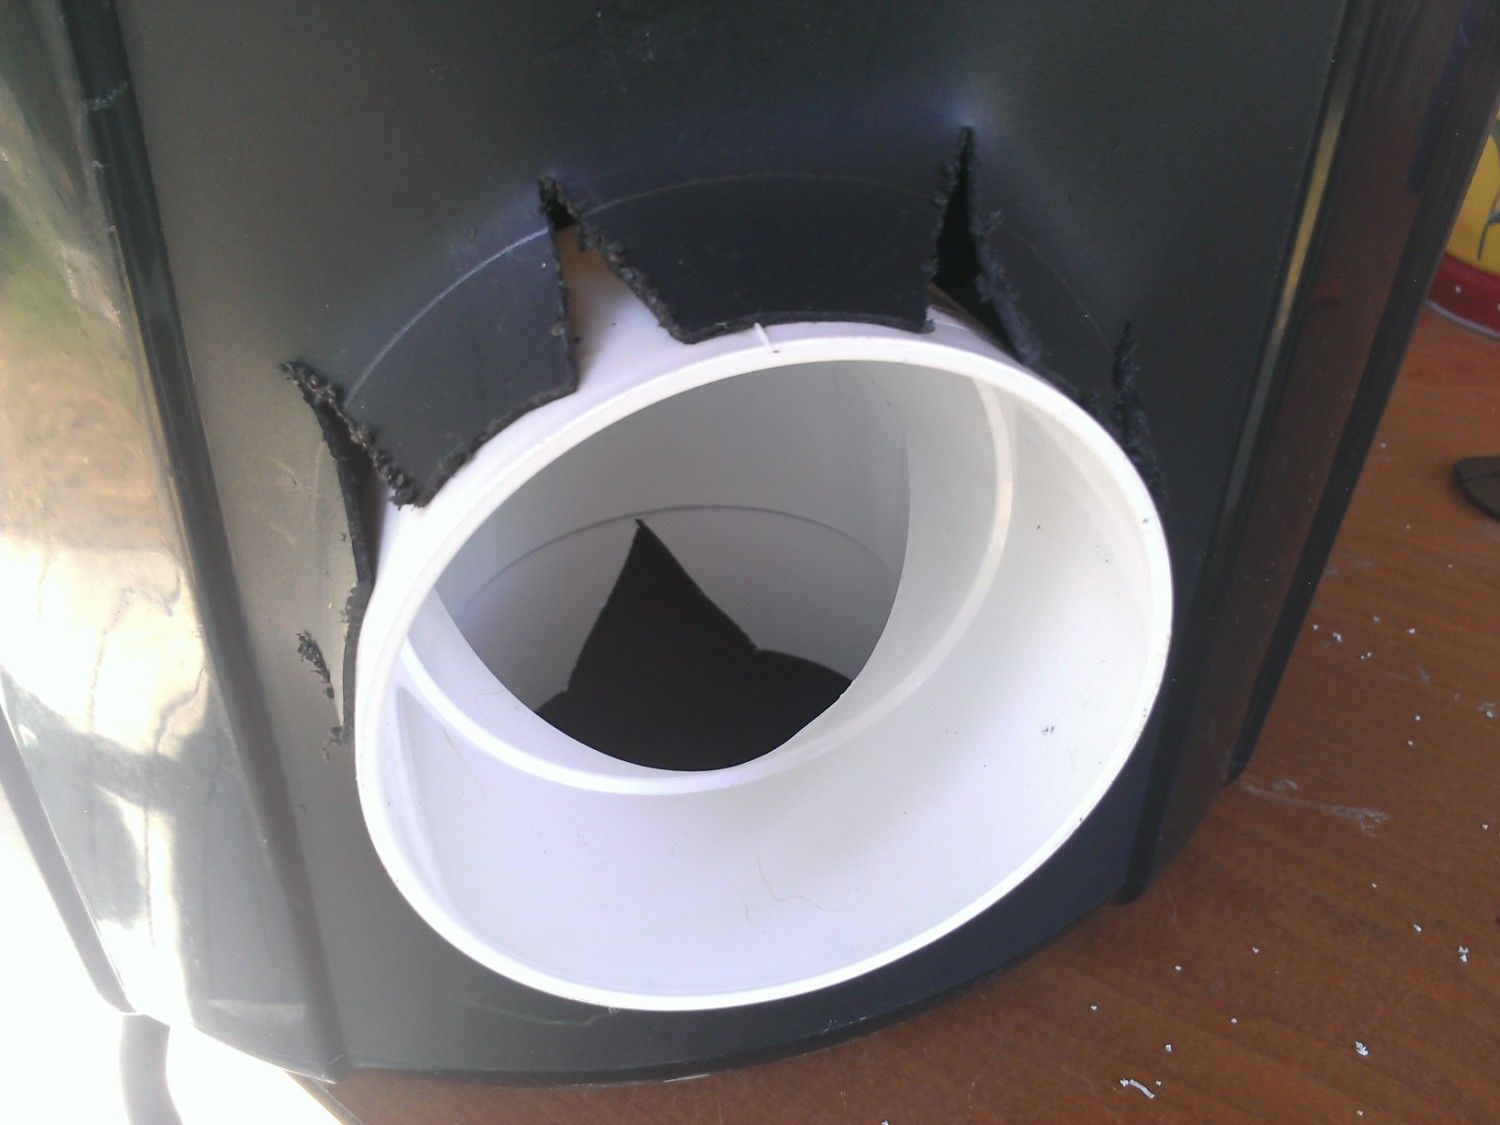
Step 4: Insert fitting into hole. If it is too tight, use your jigsaw to lengthen the slits in the trash can and bend the tabs to work them loose.
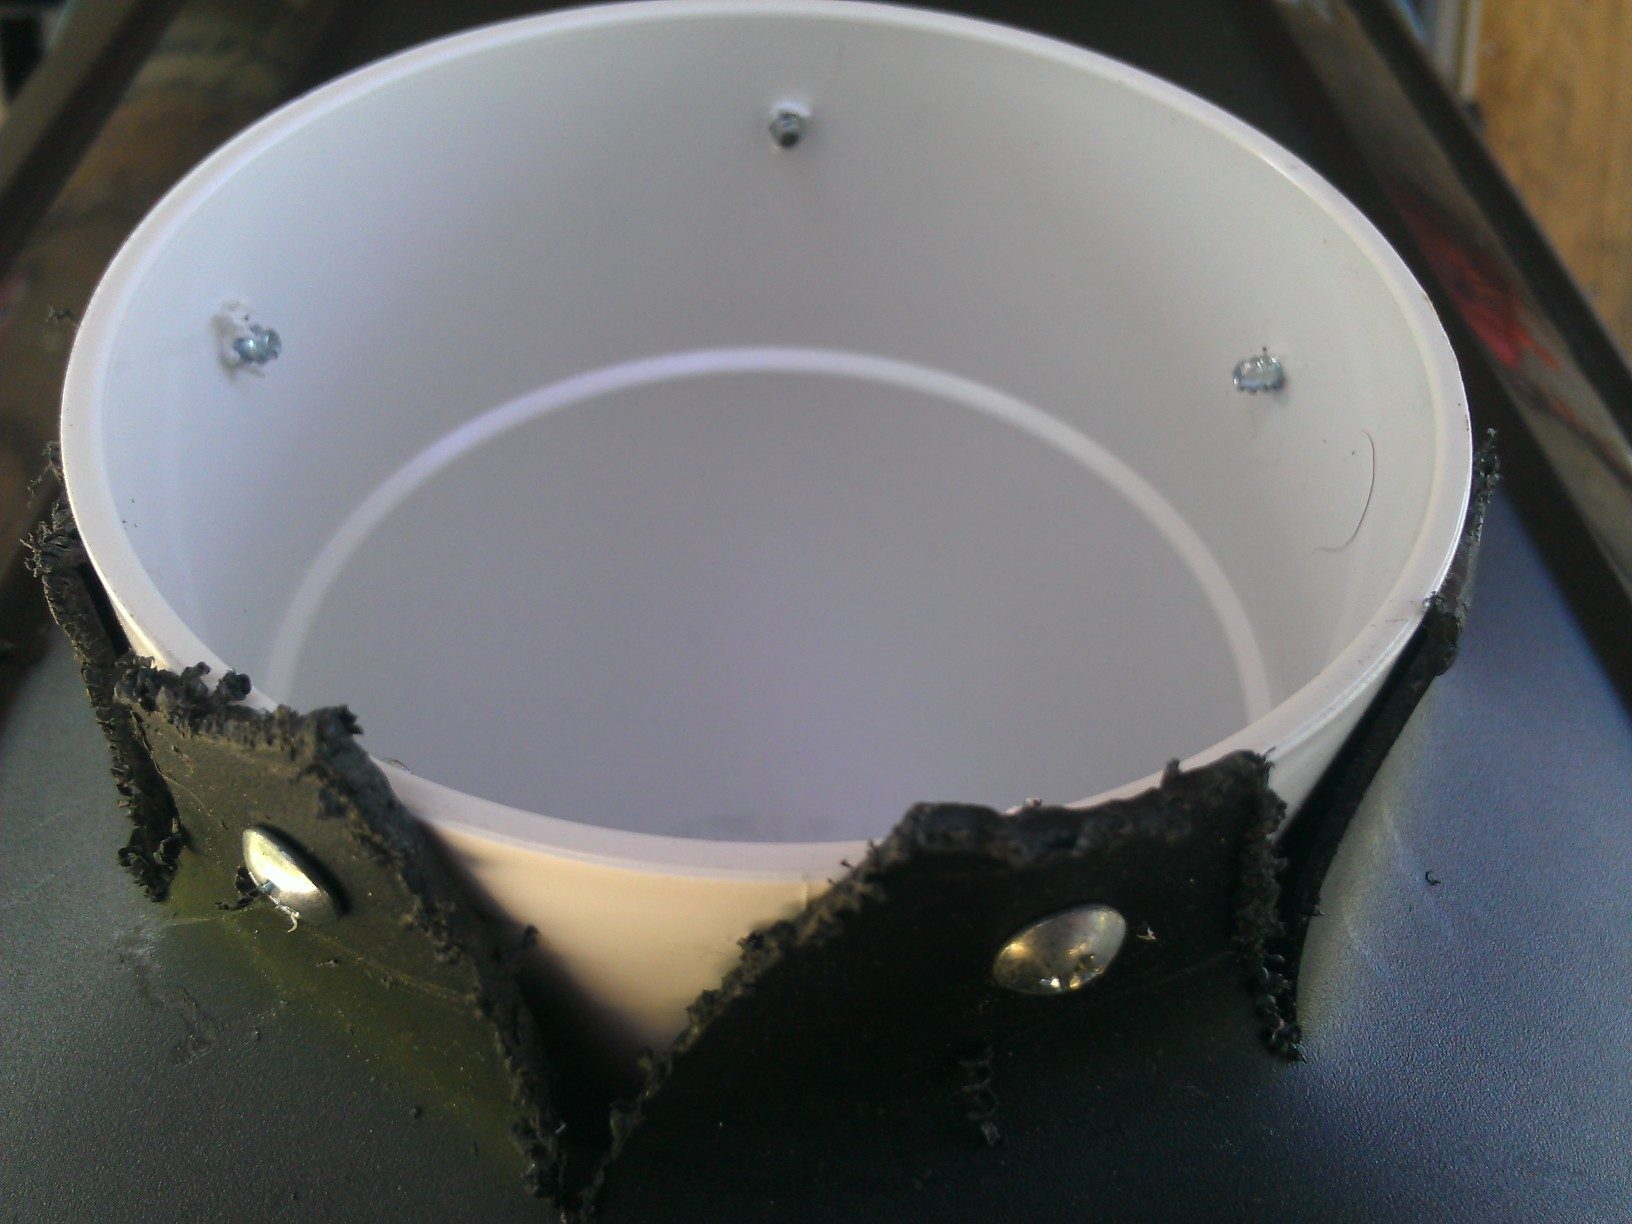
Step 5: Drill pilot holes through the tabs and fitting, then screw in the screws to attach the fitting to the trash can (you'll see now why you don't want to use wood screws with pointy ends, this is where they stick their heads in to get the feed!).
Step 6: Wrap with ducktape (I use Gorilla tape, feels more weather-proof and durable) to prevent leaking at the sides.
Step 7: Fill it up and enjoy!
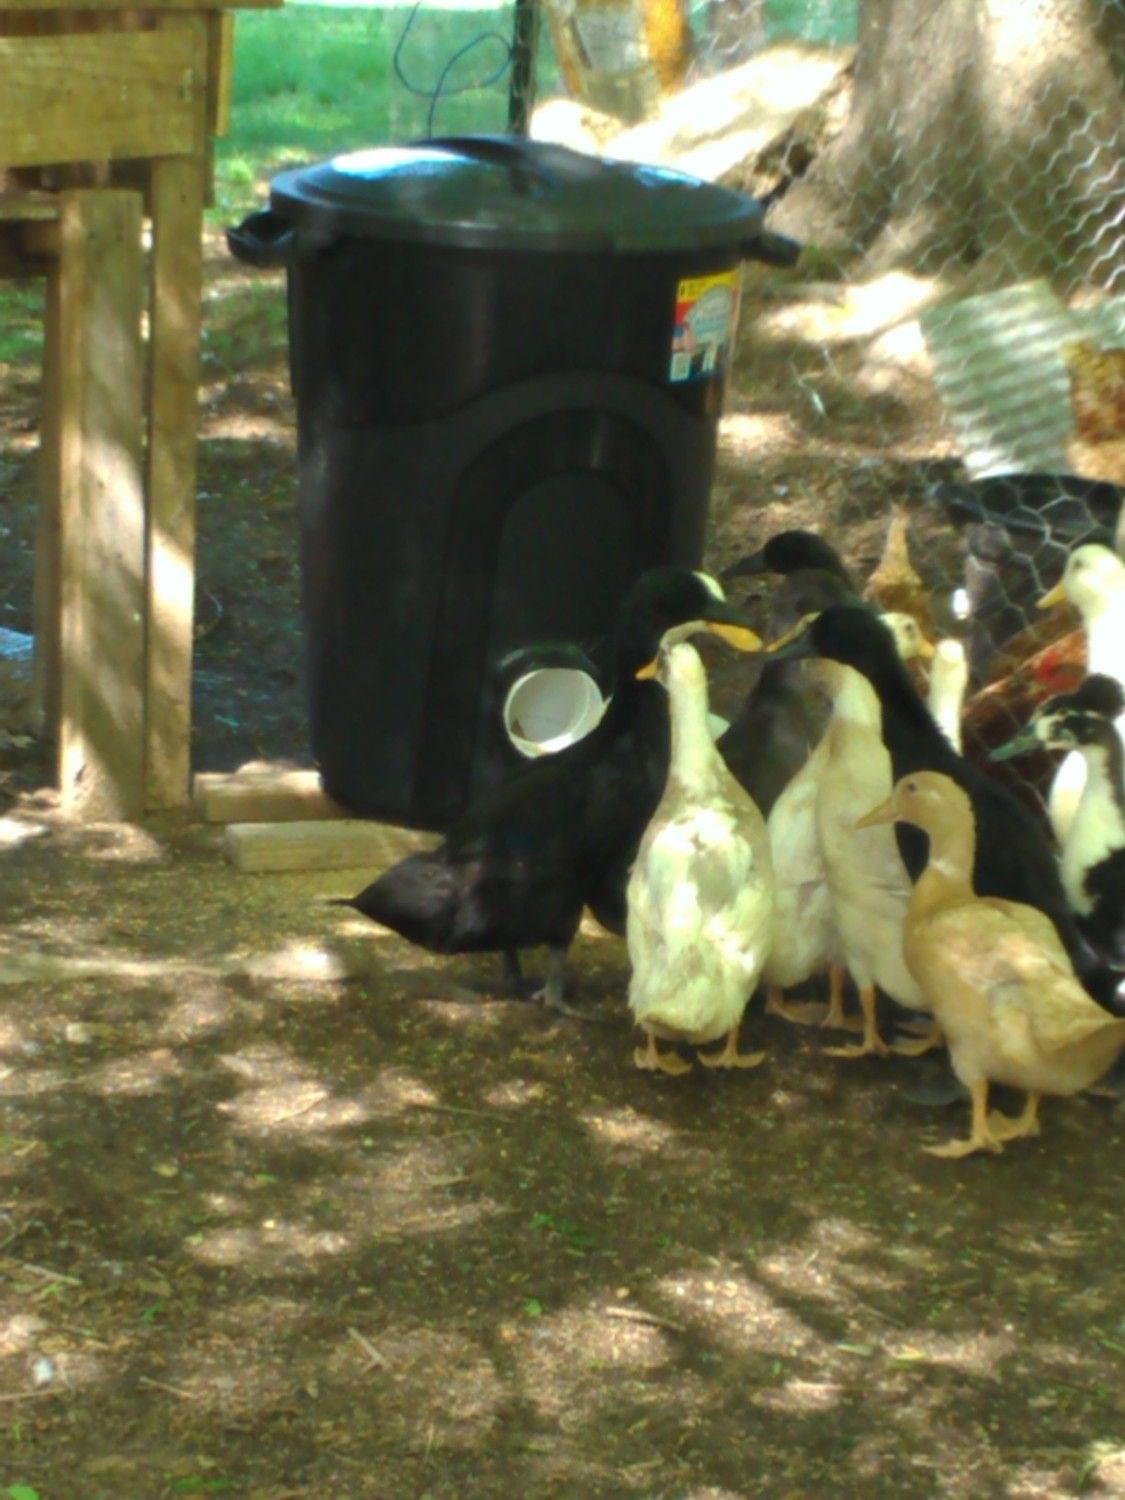
Tip: You can set it up as high as you need to so that the chooks can reach in and get food but not reach in and pull out food all over the ground. Also, towards the end you'll have to tilt the feeder so that the last bit of feed goes toward the opening before refilling so that the food stays fresh. And obviously it is not waterproof, so keep it in the coop or under a covered run.
Thanks to the BYC community for sharing all your ideas!
Materials:
BIG plastic trash can (I used the 32 gallon from Walmart for $9.95).
90° angle 4" pvc fitting ($2.95 at Home Depot, get the sewer fitting not the high pressure fitting, much cheaper)
1/4" machine screws (its important that they do not have pointy tips like wood screws)
Jigsaw, drill, 1/16" drill bit, ducktape
Assembly:
Step 1: Trace your fitting onto trash can so that the top of the traced circle is about 8 inches from the bottom of the can. This allows for an inch or two of feed to collect under the fitting.
Step 2: Trace a 2.5 inch circle inside the bigger circle and cut it out using the jigsaw (I used a pill bottle to trace). Then cut "spokes" from the cut-out to the bigger traced circle and about a quarter to half inch beyond (see picture, its hard to describe).
Step 3: Cut a notch out of your pvc fitting as shown. This allows a little extra feed to come in from the sides instead of just from underneath. Tip: If feeding crumbles, you can skip this step. If feeding pellets, you can make it bigger or smaller depending on the size of the pellets from your mill.
Step 4: Insert fitting into hole. If it is too tight, use your jigsaw to lengthen the slits in the trash can and bend the tabs to work them loose.
Step 5: Drill pilot holes through the tabs and fitting, then screw in the screws to attach the fitting to the trash can (you'll see now why you don't want to use wood screws with pointy ends, this is where they stick their heads in to get the feed!).
Step 6: Wrap with ducktape (I use Gorilla tape, feels more weather-proof and durable) to prevent leaking at the sides.
Step 7: Fill it up and enjoy!
Tip: You can set it up as high as you need to so that the chooks can reach in and get food but not reach in and pull out food all over the ground. Also, towards the end you'll have to tilt the feeder so that the last bit of feed goes toward the opening before refilling so that the food stays fresh. And obviously it is not waterproof, so keep it in the coop or under a covered run.
Thanks to the BYC community for sharing all your ideas!


