From Civilian to Chicken Rancher timeline.

March 19

During lunch I stopped at the local provider of man tools and picked up the electrical "stuff" to run power to the coop.

Wife took her mother shopping so I have the whole evening to play.


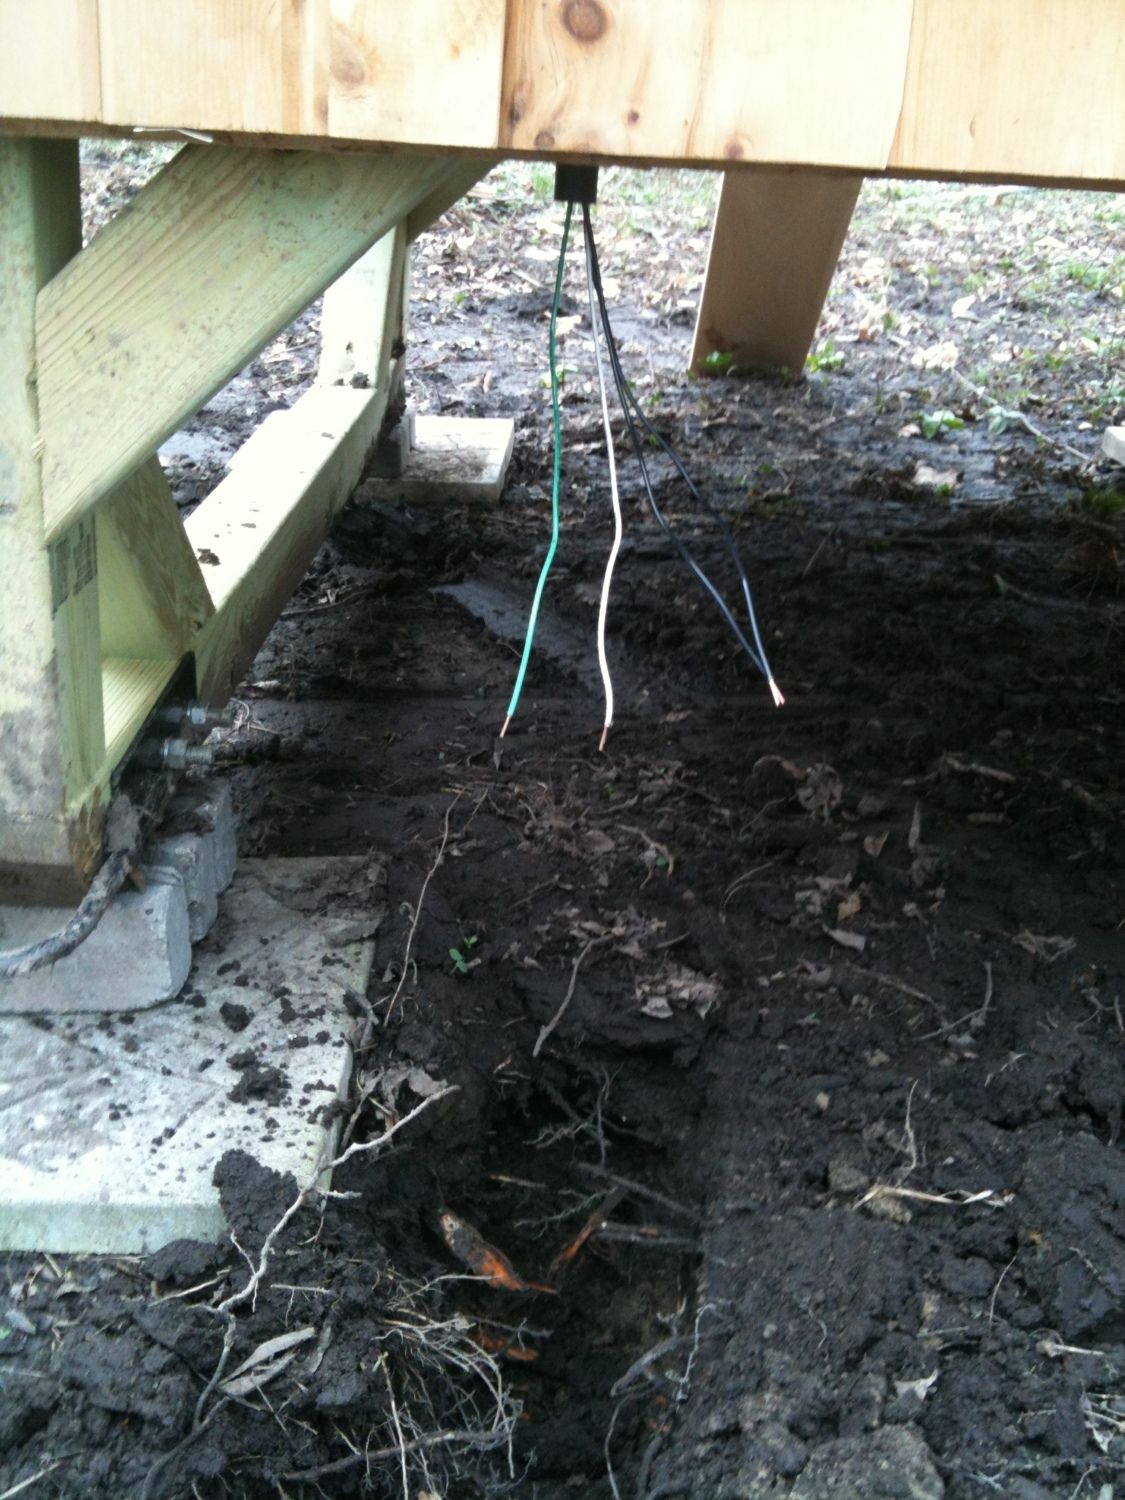
I had previously wired the coop and stub out a 1/2" conduit.


And in the previous post I mentioned I was lucky for living in a woods, well lucky until I tried to dig a trench in the wet clay through all the tree roots. But I had only 15' to dig and being a bit on the stubborn side helped.


Got the trench dug. Since the distance between the coop and my shop is only 15' I directed buried the electrical cable. Depth of the cable should be below the frost level. Ran 14 gage (with ground) cable into the coop conduit and glued the fittings together and connected the wires.


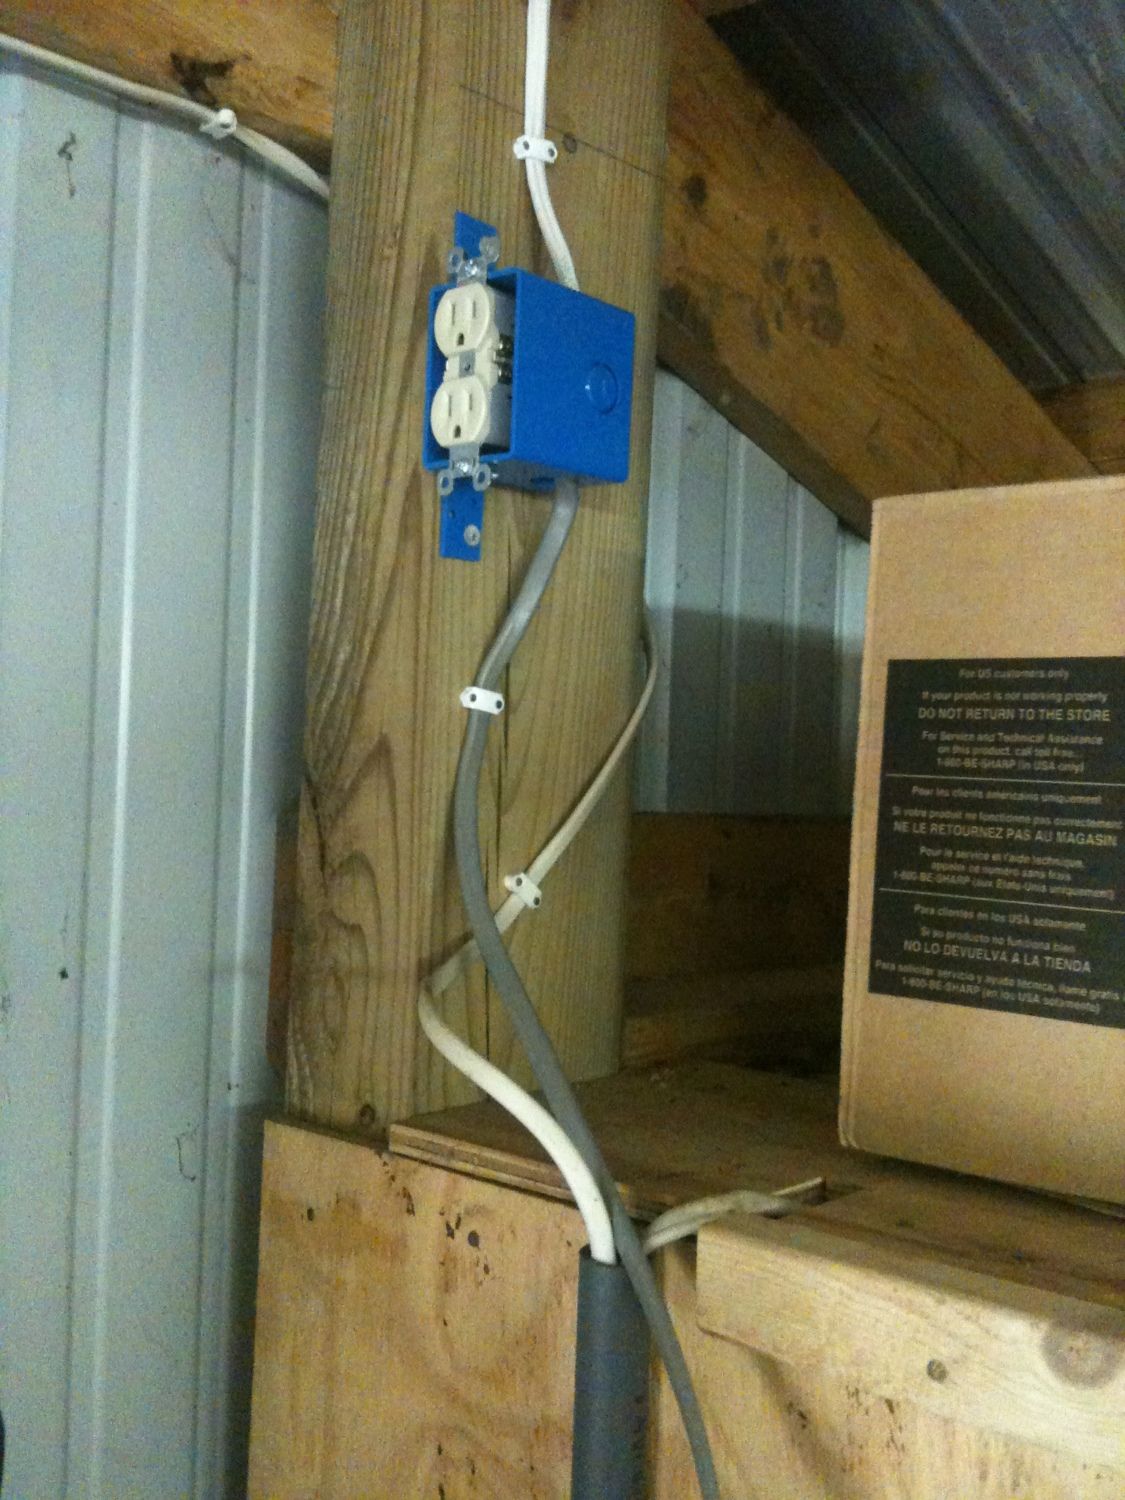
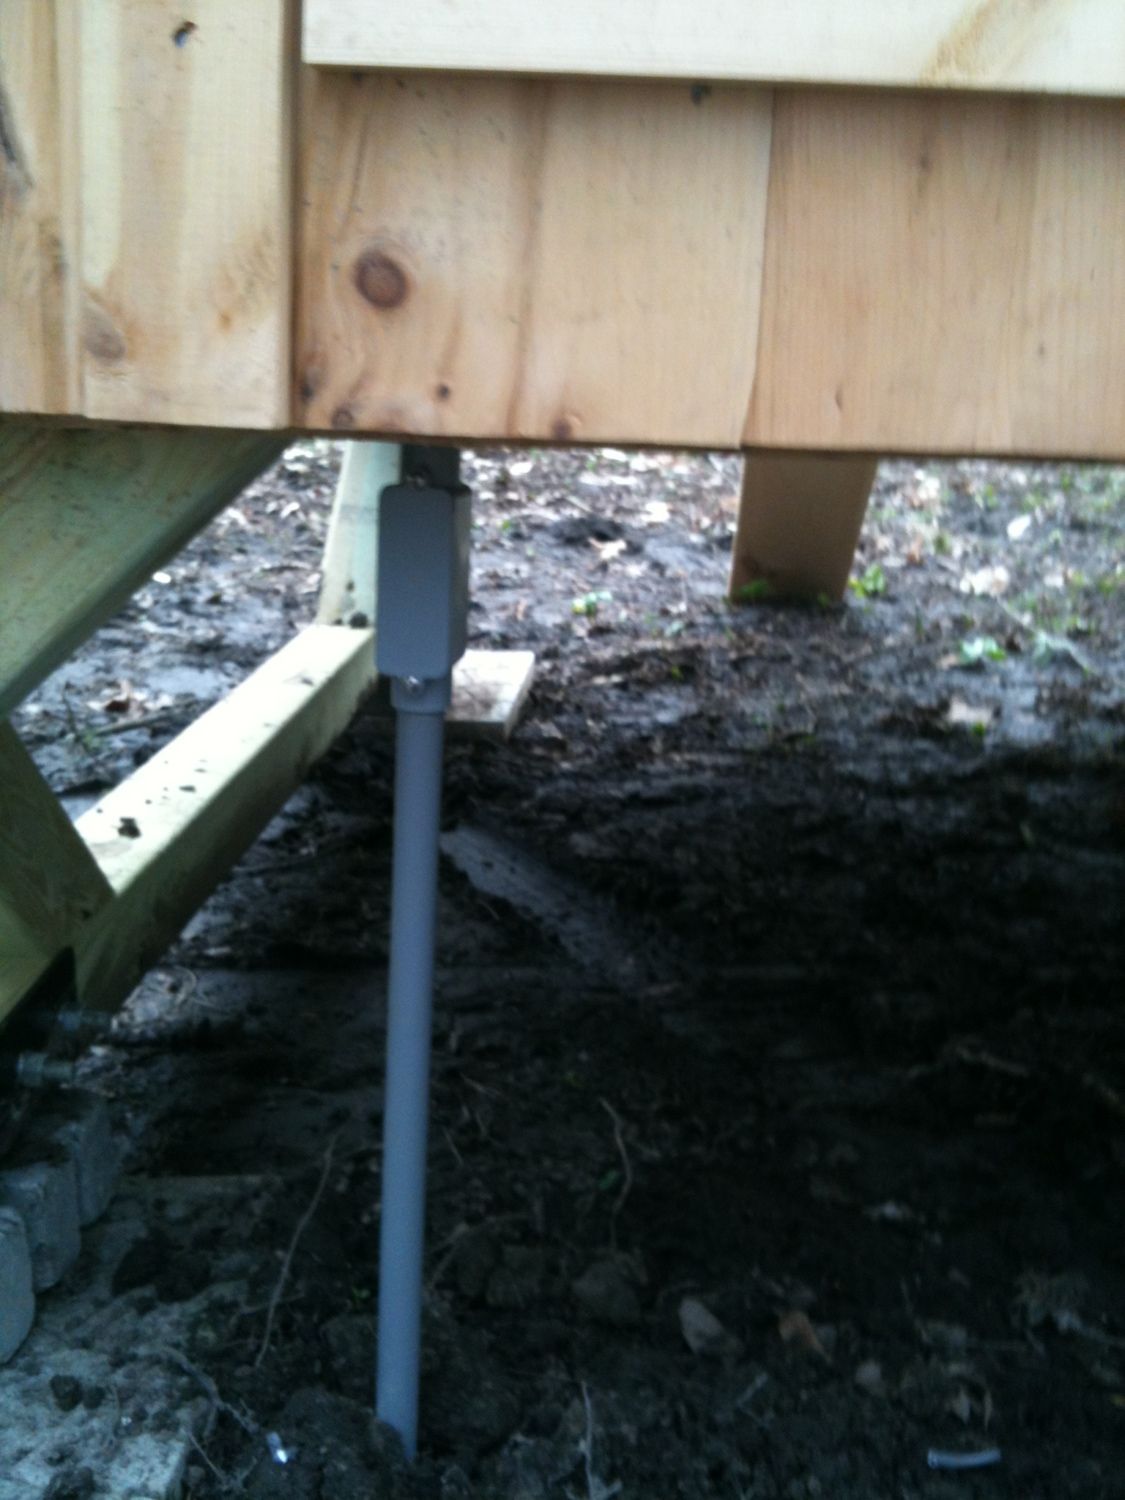
Lay the cable in the trench and covered. Then ran conduit up the shop porch post on the backside (coop side) so it can't be seen from the house side of the post.


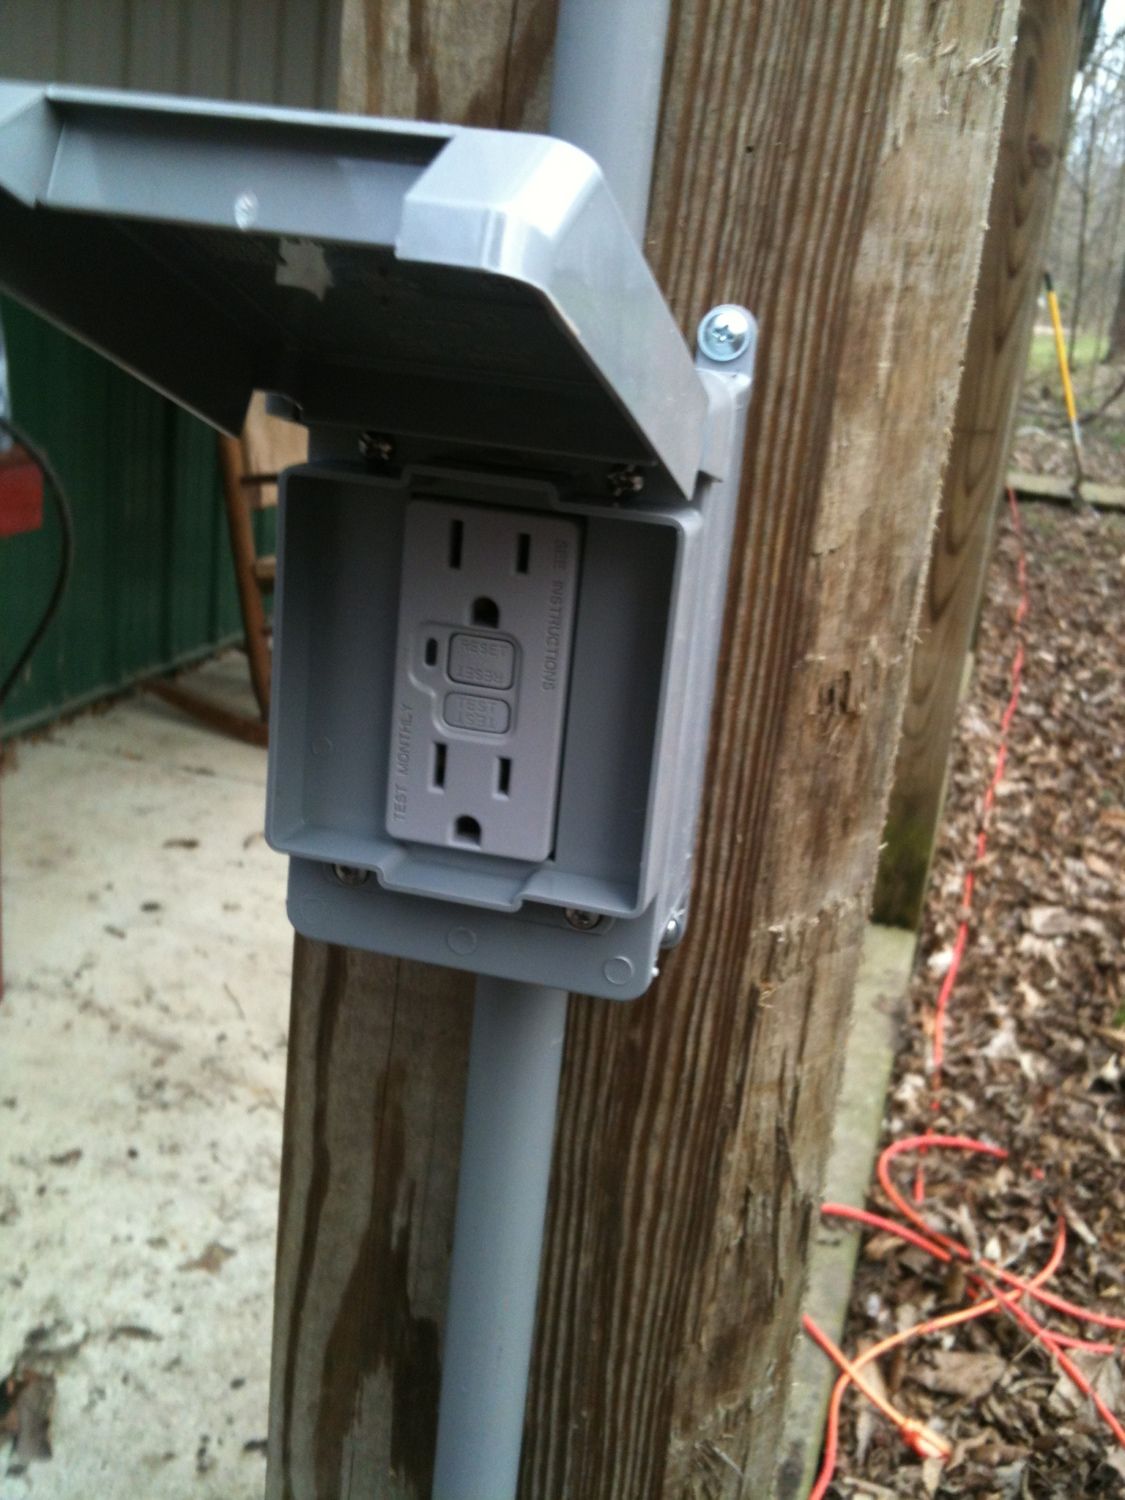
Now was a good time to provide for a electrical receipt that will come in handy when I build the secured chicken run. At this electrical receipt location is where I made the transition from buried electrical cable to interior cable.


VERY VERY IMPORTANT. For the receipt use a GFI. Think about it. A waterer sitting on top of a electrical water heater. Or a Nut with the bright idea of using a power saw to cut tree roots while standing in wet clay. It would be bad to have Kentucky fried chickens, it would be worse to 120 volts cursing thru your body as your life flashes (literally) before you.


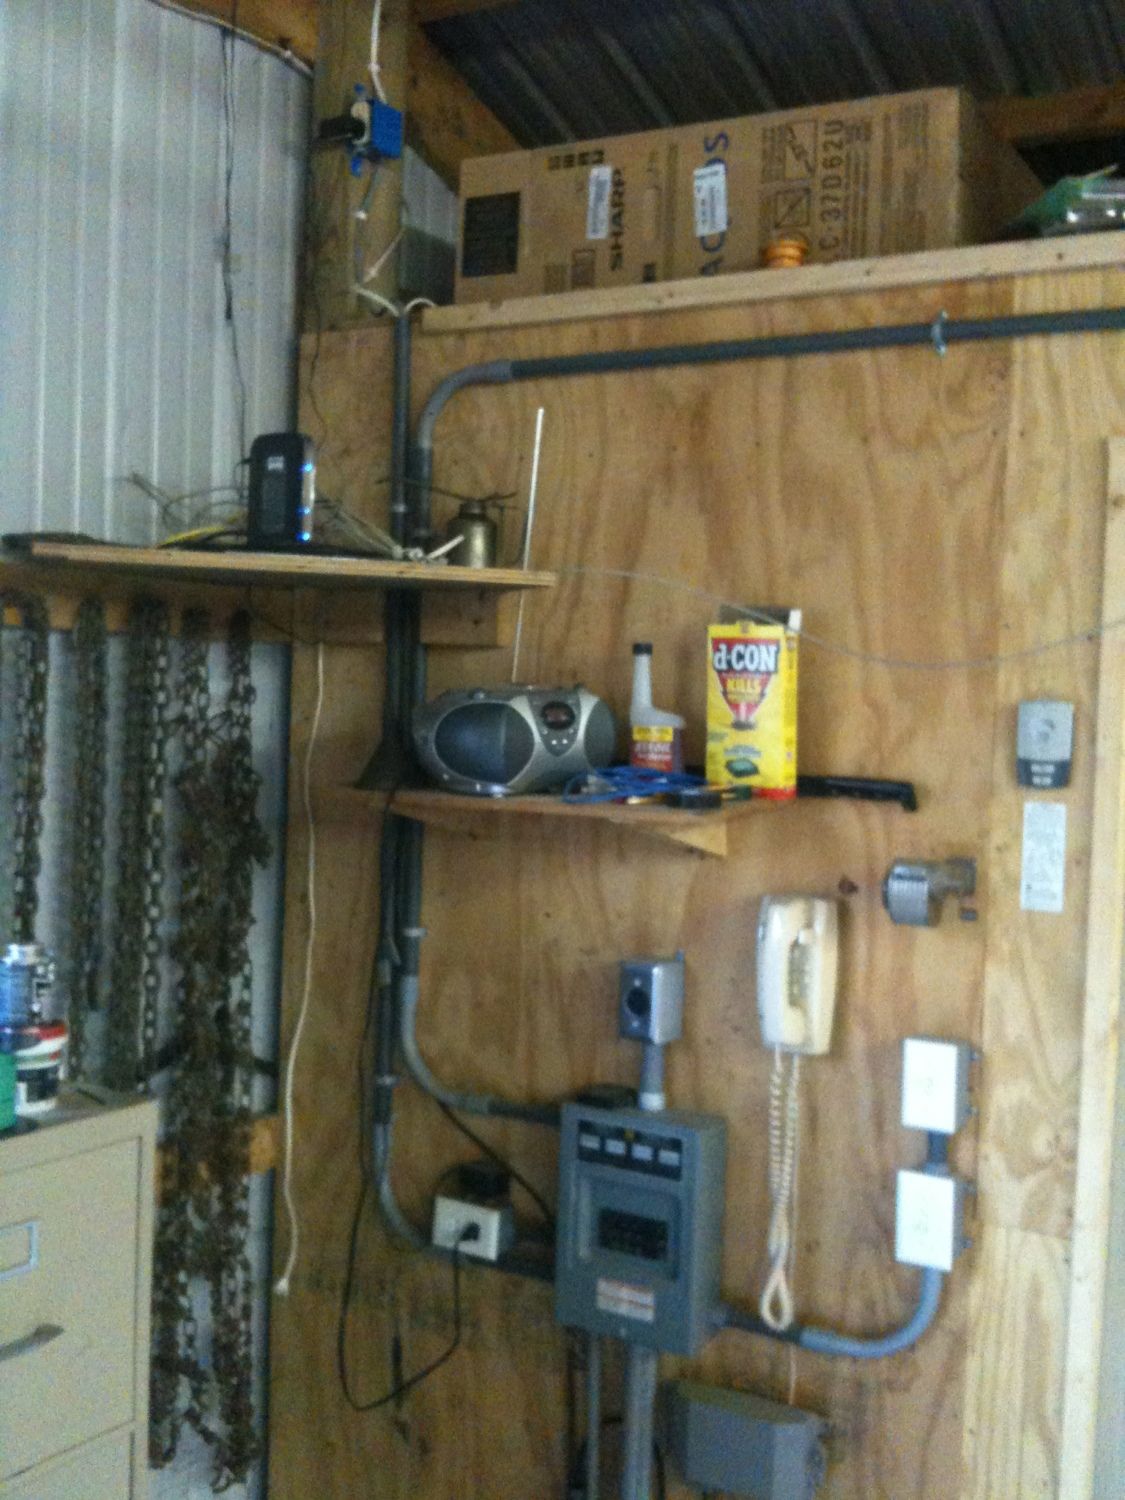
Shop is 20' x 30' (NO IT WOULD NOT MAKE A GOOD COOP!). So I had purchased 50' of 14/2 electrical cable to go from the GFI receipt to the shop's circuit breaker panel. I was 2' too short. So on to Plan B which to installed electrical receipt inside the shop above the circuit breaker box. Tomorrow's lunch hour I'll walk up to the local hardware and see if I can buy 10' of 14/2.

Better idea! Anyone know where I can rent a cable stretcher?
 
Last edited:
L,

Some suggestions from seeing the latest photos.

I use a 1-gal waterer and it holds enough for 9 birds for at least a day. The widest diameter is about 8 inches and may fit through your hatch.

The chickens will be kicking up bedding material. Elevate the waterer and feeder to keep them clean. They can go as high as chicken shoulder.

When drinking, chickens will shake and scatter water droplets. Some distance between the waterer and feeder would be prudent. A wall mount PVC pipe or wooden trough feeder on the far wall from the nests and the waterer next to the nests should be sufficient space.

My oringianl plan was to hang both the feeder and waterer in the coop. Then the former nesting box area idea came up.

The secured coop will have a roof and the back wall covered and the other 3 walls 1/4" fabric cloth. I could hang the feeder out there and put a smaller waterer (as you suggested) in the coop so water could be kept thawed as needed.
 
Quote:
lau.gif
gig.gif
 
March 20

Local hardware had a scrap piece of 14/2!

Here's the receipt where I ran out of cable. New receipt will eliminate a extension cord I had used for extending wireless Internet out into the shop and for the future wall clock.


All I have to is pull the gray wire into the conduit down to the circuit breaker box, connect to the 15 AMP breaker and the electrical to the coop project is done!

Shoved the wire down from the top. It makes to the 90 degree bend and stops.

Pull the wire out, trim the end so it pointed and try again. Stops at the bend.

Pull the wire back out, shove it into the conduit at a different spot. Stops at the bend.

OK. Scratch the 5 minute project and bring in the big guns.

Run a fish tape in the the conduit from the circuit breaker box end. Connect fish tape to the center conductor on the electrical cable. Tape real good. Pull carefully so the metal fish tape doesn't touch anything "hot" in the breaker box. Cable gets almost thru the bend and...SNAP! Center conductor breaks off of the fish tape!

OK this is stupid. They make a special "soap" for lubricating electrical cable to help pulling cable into conduit, I don't have any. But the Wife has left for a hen (the other type of hen) party, I "borrow" her bottle of dish washing soap. (Disclaimer. I'm not a Electrician. I have NOT slept in any hotel lately and I think the year is 1868).

I push the fish tape back thru. Reattach the electrical cable to fish tape. I pour some dish washing soap into the conduit by the new receipt. Pull a foot of the fish tape back out, pour more dish washing soap, pull tape, dish washing soap, repeat until cable pops into the breaker box!

Connect the cable to the ground, neutral and to the 15 AMP breaker....it worked! Now have permanent power out to the coop.

I even remember to wipe down the dish washing soap bottle and return it before the wife misses it!


Next project will be the secured coop.
 
Last edited:
March 23

During lunch I picked up 50 2 x 4 x 8' treated.

March 24

I went to Mom's. Took off the snow blower, rolled her lawn, sharpen the mower blades and mounted the mower deck on the tractor. Did her taxes.

Then I used Dad's radial arm saw and cut 12 of the 2 x 4 x 8' in half for wall studs for the secured chicken run. Got home and unloaded the lumber. Too late to start building
sad.png
 
March 26

After supper I got the front wall of the secured chicken run done.

Front wall and both end walls studs are on 16" centers and will be covered with 1/2" hardware cloth. Took a 2" x 4" x 8' and cut in in the middle for the vertical studs, overall height just under 4' 3". Horizontal pieces are two, 2" x 4" x 8' and one half of a 2" x 4" x 8' for a overall length just under 20'. No scraps!

Back wall will be covered with steel installed horizontally so I figured studs on 24" centers will be adequate.

Used 3 3/4" deck screws to fasten it together. Then if when I make a mistake or later want to reuse the lumber it will be easier to take apart.


A closer detail view of the design. The 2" x 4" turn on edge is to give rigidity, keep the litter in the run and provide more support for the roof.

 
Last edited:
March 31

I got the North 20' chicken run wall up. Studs are on 24" centers and will covered horizontally with steel roofing.


End wall (West) 6' with studs on 16" centers. Design change, I was going put the people door in this wall. Then I thought why walk all the way down to the far in to enter the coop, why not put the door on the East end? I will add two chicken doors on this wall at a later date for open ranging.


And then the South wall, also with studs on 16" centers. Did have to break out the chainsaw to encourage a tree to move out of the way. The two boards across the top are temporary and support the front and back walls until I get the roof on.


With the help of scrap treated lumber and 8" cement blocks, got the walls level and square. Then the fun part of trying to figure out the roof slopes. Coop roof has a 5/12 pitched roof (every 12" horizontally the roof slopes down 5").

Start building the East wall (also with studs on 16" centers). North slop matches perfectly with the coop! South slope is way off! I'm going to have do a rethink on this.


The relocated people door is on the left. It's 24" wide and almost 72" tall. I need to do a rethink on this too.


April 1

I'm investing way too much money and time in this for only 8 + 1 chickens. I get the screw gun out and start taking the run apart and drag the coop out to the front yard and put a For Sale in the window...........................................................April Fools!

As I'm sleeping thru the Sunday afternoon's NBA game, I'm doing my rethinks and redesigns.

1. Instead of roofing the entire run I'll do the first 8'. That still provides weather protection and allows me to hang the feeder in the run.
2. Raising 12" of the front (South) wall will correct my roof slop and provide for a larger people door.
 
Last edited:

New posts New threads Active threads

Back
Top Bottom