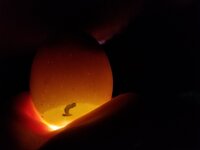
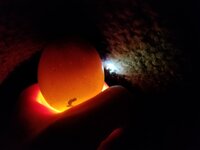
Harris Farms Nurture Right 360 Incubator is AMAZING!

Pics
Hey guys, so I contacted Mannapro about how to calibrate the nurture right, and they sent me back these instructions. I’ll post them here in case it’ll be helpful to any of you.
To recalibrate the thermometer inside the incubator please follow the instructions below:


TEMPERATURE READING CALIBRATION

1) Press and hold the three buttons “MNUE” “+” and “-“ simultaneously for 5 seconds to enter temperature calibration mode. Upon entering temperature calibration mode, the red “C 0.0” on the incubator’s screen will blink. If temperature calibration is not required, skip to step 2 to for humidity calibration mode.

Secondary Thermometer Displays a Higher Temperature
a) If the incubator’s temperature reading is higher than the actual temperature inside the incubator, i.e. incubator’s screen displays 99.5°F, but your thermometer displays 98.5°F, then press the “-“ button to decrease the temperature reading. Each press of the “-“ button will decrease the temperature reading by 0.5°F. For example, after pressing the “-“ button twice, the incubator will show “C - 1.0”, with the “1.0” referring to a decrease in the temperature reading by 1.0°F. Continue to press the “-“ button until the incubator’s temperature reading matches the temperature reading of the thermometer. Note the “-“ on the incubator’s screen between “C" and “1.0” indicates that the temperature reading is being decreased.

Secondary Thermometer Displays a Lower Temperature
b) If the incubator’s temperature reading is lower than the actual temperature inside the incubator, i.e. incubator’s screen displays 99.5°F, but your thermometer displays 100.5°F, then press the “+“ button to increase the temperature reading. Each press of the “+“ button will increase the temperature reading by 0.5°F. For example, after pressing the “+“ button twice, the incubator will show “C 1.0”, with the “1.0” referring to an increase in the temperature reading by 1.0°F. Continue to press the “+“ button until the incubator’s temperature reading matches the temperature reading of the thermometer. Note the lack of a “-“ (blank space) on the incubator’s screen between “C" and “1.0” indicates that the temperature reading is being increased.

2) The maximum temperature calibration adjustment is +/- 2.5°F. After completing the temperature calibration press the “MENU” once to finish temperature calibration and to enter humidity calibration mode. Upon entering humidity calibration mode, the green humidity reading on the incubator’s screen will blink.

HUMIDITY READING CALIBRATION

3) Similar to the process for calibrating the temperature reading, the “+” or “-“ buttons can be used to adjust the humidity reading. If humidity calibration is not required, skip to step 4 to exit calibration mode.

Secondary Humidity Sensor Displays a Higher Humidity
a) If the incubator’s humidity reading is lower than the actual humidity inside the incubator, i.e. the incubator’s humidity reading shows 55% but the humidity sensor shows 60%, then press the “+” button to decrease the reading from 55 to 50%. Continue to press the “+“ button until the incubator’s humidity reading matches the humidity reading of the humidity sensor.


Secondary Humidity Sensor Displays a Lower Humidity
b) If the incubator’s humidity reading is higher than the actual humidity inside the incubator, i.e. the incubator’s humidity reading shows 55% but the humidity sensor shows 50%, then press the “-” button to decrease the reading from 55 to 50%. Continue to press the “-“ button until the incubator’s humidity reading matches the humidity reading of the humidity sensor.

4) The max humidity reading calibration adjustment is +/- 9%. After completing the humidity calibration, press the “MENU” button once to exit calibration mode. The calibration process is now complete.

NOTES

Selecting a Secondary Thermometer for Calibration
• Liquid thermometers are recommended for temperature calibration
• Larger size digital thermometers may cause errors during the temperature calibration process. They may measure a lower temperature than the actual temperature inside the incubator. This is due to the following factors:
o The larger size of the digital thermometer will affect or block the airflow inside the incubator
o The temperature sensor of a digital thermometer is located inside a plastic housing and not directly exposed to the warm air inside the incubator

Positioning a Secondary Thermometer Inside the Incubator
• A liquid thermometer cannot be placed directly on the gray egg tray. A liquid thermometer needs to be elevated to the height of the top of the egg.
• The secondary thermometer cannot be placed near the clear window or directly touching the clear window, as this may skew the reading
• The secondary thermometer cannot be placed in the center of the incubator directly under the fat inlet as this will affect the airflow and may skew the reading
• The recommended location for a secondary thermometer is between the outer and inner circle of eggs
• It is not recommended to leave the secondary thermometer inside the incubator for the duration of the incubation process
 
Hey guys, so I contacted Mannapro about how to calibrate the nurture right, and they sent me back these instructions. I’ll post them here in case it’ll be helpful to any of you.

Awesome! That really is helpful.

I wonder if a factory reset to reset the egg turner deletes these settings?

I've tried to contact them 4x now about issues, with no response.

Bleh.
 
Yeah they seem to be pretty bad at responding. This is the second issue I’ve contacted them about and haven’t heard anything about the first one. I emailed them on Saturday and got this response back this morning, so it didn’t take forever, but still.
 
Got my GoVee today, but my candling light is delayed. It may arrive today or tomorrow, who knows. I'm candling tonight regardless, so when I went to TSC this morning I got this:
20200609_161544.jpg
It claims 520 lumens, and it's better than what I've been using. I tried to take pictures in action, but the difference isn't very noticeable in them. In person it's clearer than you see here.

Little Giant candler:
20200609_162233.jpg

Firepoint X clearance light:
20200609_162351.jpg

That's a Jersey egg that bowed out at the first candling a while ago. I didn't realize I hadn't eggtopsied them...
 
I made a little paper hood from black construction paper for the top of the 360 and it's helped block the extra light coming through the plastic quite well. I made the light hole a tab bit smaller than the candler light hole which helps focus the light a little better into the egg.
No other flashlights I have around the house come close to the candler and other than a few heavy pigmented speckled eggs I've been able to see pretty well. All my eggs are blue or medium brown.
I want to do a white egg just to be able to see the differences in clarity.
 
Where are you guys keeping the humidity at for hatching? I got mine up to 71% fairly easily, but had forgotten to measure how much the outer rings hold when I measured the inner ring.
Doh! 🤦‍♀️
After about 9oz I thought I might flood it, but nope...it kept taking the water....I lost count because my squeezy thing only holds about 1oz at a time, but I think I stopped somewhere near 13 oz.
 

New posts New threads Active threads

Back
Top Bottom