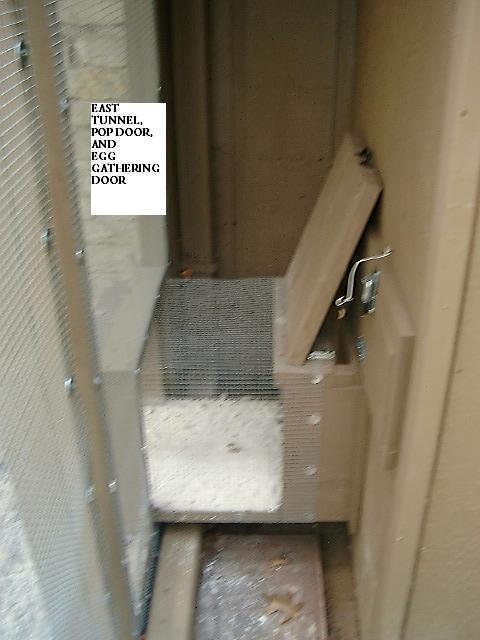
I just did two of these and of course did I take any pix, no
 but I know that people have asked how to do this, and the process I used (which is pretty simple and nontechnical) is fresh in my mind right now, so here is a brain dump:
SETTING UP:
Decide where you want your pophole (preferably not somewhere that a gutterless roof will dump water everytime it rains). Seriously consider putting it 6-16" above the coop floor, so there is a sill to keep litter from getting tracked out.
Locate yer studs, because the track on either side of the popdoor REALLY oughta be screwed into studs not just plywood. If necessary you can add a piece of 2x4, well screwed into your plywood with some number of screws, as a 'false stud' to give you something to screw into in the absence of a convenient stud. Or, make the pophole extra wide to span between existing studs.
Mark on the wall where you want the pophole to be cut, but DO NOT CUT IT YET (to allow for later correction of any accidents that may occur
 . Leave a 1" space between the edge of the hole and each stud (instead of cutting the edge of the pophole right up against the edge of the stud).
Cut a piece of plywood - I recommend 1/2" - to use as the door. It needs to be it a 2-3 inches wider, and at least 6" taller, than the pophole outline you just drew on the wall. Make sure you mark and cut the door very straight and square.
Hold it up against the wall, covering the outline of the pophole as if the door were in place and closed. Use your level to get it vertical, and use your eyeballs to center it so there is an equal overlap beyond the pophole outline to the left and to the right. Mark its left and right edges on the wall (run a pencil or marker down the edge of 'em to trace their outline onto the wall).
MAKING THE TRACK:
Now cut your wood for the track. You will need 1x2 and 1x3 (or for a stronger product, use 1x3 and 1x4; or substitute scrap strips of 3/4" plywood [not thinnner!] of appropriate widths). For each of the two widths of material, you will need two pieces equal to 1 1/2 to 2 times your door's height. For instance, if your pophole opening will be 14" high, thus the door itself will be 20" high, thus you need 30-36" lengths (two of the narrower wood, and two of the wider, all the same length).
The narrower wood makes the spacer that provides a channel in which the door runs. The bottom of the spacer should be about 4" below the bottom edge of the pophole opening. Screw the spacer pieces onto the wall ONE QUARTER TO ONE HALF INCH OUTSIDE OF the door-edge lines you drew. It's important to leave that extra slack so the door will run freely.
Now that you've got the two spacers screwed onto the wall, take the plywood door you cut and hold it up between the spacers. Make sure it will run freely but not outrageously loosely, all the way up and down. NOW is the time to correct any mistakes!
The wider wood provides the 'lip' that keeps the door in place in the track. Put each piece on so it is flush with the outer edge of the spacer you just applied -- this means it will protrude about 1" further towards the center of the pophole. The bottom of this strip should be flush with the bottom of the spacer strip. Hold the piece firmly in place and screw it on, screwing right thru the spacer and into the stud, using four to six screws at least 3" long. Be serious about the length and accuracy into the stud of these screws - they are what holds your track together and your door in place.
Voila, you now have tracks for your door. Now you can cut the actual pophole in the wall, confident that it will match where your door is
 Also now you can add pulleys, latches, catches, whatever else you need.
(Note: alternatively, you can use steel or strong aluminum J-molding as the tracks. It is slightly simpler, but not as much as you might think. I've done this for one pen but am not overly impressed with its apparent strength, also the correct molding can be difficult to find.)
Hope this maybe helps someone,
Pat
SETTING UP:
Decide where you want your pophole (preferably not somewhere that a gutterless roof will dump water everytime it rains). Seriously consider putting it 6-16" above the coop floor, so there is a sill to keep litter from getting tracked out.
Locate yer studs, because the track on either side of the popdoor REALLY oughta be screwed into studs not just plywood. If necessary you can add a piece of 2x4, well screwed into your plywood with some number of screws, as a 'false stud' to give you something to screw into in the absence of a convenient stud. Or, make the pophole extra wide to span between existing studs.
Mark on the wall where you want the pophole to be cut, but DO NOT CUT IT YET (to allow for later correction of any accidents that may occur
Cut a piece of plywood - I recommend 1/2" - to use as the door. It needs to be it a 2-3 inches wider, and at least 6" taller, than the pophole outline you just drew on the wall. Make sure you mark and cut the door very straight and square.
Hold it up against the wall, covering the outline of the pophole as if the door were in place and closed. Use your level to get it vertical, and use your eyeballs to center it so there is an equal overlap beyond the pophole outline to the left and to the right. Mark its left and right edges on the wall (run a pencil or marker down the edge of 'em to trace their outline onto the wall).
MAKING THE TRACK:
Now cut your wood for the track. You will need 1x2 and 1x3 (or for a stronger product, use 1x3 and 1x4; or substitute scrap strips of 3/4" plywood [not thinnner!] of appropriate widths). For each of the two widths of material, you will need two pieces equal to 1 1/2 to 2 times your door's height. For instance, if your pophole opening will be 14" high, thus the door itself will be 20" high, thus you need 30-36" lengths (two of the narrower wood, and two of the wider, all the same length).
The narrower wood makes the spacer that provides a channel in which the door runs. The bottom of the spacer should be about 4" below the bottom edge of the pophole opening. Screw the spacer pieces onto the wall ONE QUARTER TO ONE HALF INCH OUTSIDE OF the door-edge lines you drew. It's important to leave that extra slack so the door will run freely.
Now that you've got the two spacers screwed onto the wall, take the plywood door you cut and hold it up between the spacers. Make sure it will run freely but not outrageously loosely, all the way up and down. NOW is the time to correct any mistakes!
The wider wood provides the 'lip' that keeps the door in place in the track. Put each piece on so it is flush with the outer edge of the spacer you just applied -- this means it will protrude about 1" further towards the center of the pophole. The bottom of this strip should be flush with the bottom of the spacer strip. Hold the piece firmly in place and screw it on, screwing right thru the spacer and into the stud, using four to six screws at least 3" long. Be serious about the length and accuracy into the stud of these screws - they are what holds your track together and your door in place.
Voila, you now have tracks for your door. Now you can cut the actual pophole in the wall, confident that it will match where your door is
(Note: alternatively, you can use steel or strong aluminum J-molding as the tracks. It is slightly simpler, but not as much as you might think. I've done this for one pen but am not overly impressed with its apparent strength, also the correct molding can be difficult to find.)
Hope this maybe helps someone,
Pat
Last edited: