started with 24 down to 6. they have plent of room good temps water and food. What could be the problem what should i medicate with m22 sulmet? i have a 100 in the bator now cant afford to lose them. PLEASE HELP!!!!
Ok Rocky, lay out what your set up, what your raise'n, where, what you got'em in, the whole deal... Can't really help with out all the details... Be as detailed as you can and we will try to help... Bill
Ok i have a 55 gallon rudermaid style tote. I have a 65 watt flood light as that was the biggest watt i could find without going over the 100 watt limit on my clamp light i had 2 clamps but only need one to maintain a good temp. I painted the bulb green to help pervent pecking. i was hoping to brood these quail out side in my shed but daytime heat in the shed gets to be around 110. i have 2 mason jar screw on waters and i put salt in one to help controll pecking i started using news papers for the floor but am now using paper towels. i started losing quail about a week in and they never stoped i now have my last 3 on a wire floor in hopes of saving them. when they die the get real still and the head slowly falls and feet go out stright and they just die. I never thought quail would be these hard to brooder i thought as long as i keep thing cleans temps good and food and water clean i would be ok but man was i wrong. I order some m22 sulmet from cuttler to hopfully save my next batch. i have a old shipping create that is about 4 by 5 ft that i hope to brood this next batch and was thinking about installing a wire floor. i had high hopes for hatching some quail but i am being to feel like i have failed.
Hey. Sorry to hear about your losses. These guys are pretty easy to raise up.
Why are you so concerned with them pecking? I've never had to take any special precautions. Who told you to put salt in their water?? Stop doing that. Just give them straight up, fresh water like you would your dog or your chickens or yourself. There's absolutely no need to salt it.
Is there any way you can get your hands on a proper bulb? If you live anywhere near a Petsmart, Petco, Walmart or most Agways, you can find a reptile bulb that should fit your lamp. If it's a lower wattage lamp, it would take one of those red heat bulbs that's in the reptile section. They have all different sizes. I use three different size lamps/bulb set ups in my brooding room. Two of those lamps are for reptiles because I happened to have them on hand.
What did you paint the bulb with? I'm also wondering if that's a fire hazard, or if it's leeching any toxic fumes when it heats up? Birds have very sensitive respiratory systems.
Rocky are you raise'n bobs here? They are more prone to pecking issues and need red lights. I use the totes set up like this one for everything, cots, bobs, chukar, chickens and turkey...
I only use regular 60 watt bulbs thou, no need for heat or flood light bulbs inside.... I'm with itsy on the salt, dont use it never have.... PURINA GAME BIRD STARTENA , 30 % protein is all I feed.... Thats what is sprinkled all over the floor of this brooder. These are Bobs here. I would also wonder if the painted bulb is cause'n fumes to be trapped when heated as Itsy mentioned. I set up a wafer thermostat meant for incubator control to turn my brooders on and off as the temp rises in my shop on hot days.... Just cut it into a cheap cord from dollar gen. I only use the heat bulbs in the shop and cold weather. Bill
Nice pic!!! Thank you for the tips!! my setup is close to that minus the wire top and bulb. Yes mine are bobs. what are you using for litter how ofter do you change it? I was using news papers. I would think that if it was the bulb killing them it would have done so the first week when fumes were at there peak but i got a red bulb to day and plan to use a timer as temps are well high enough during the day. How do you wire in the therm. i would like to see about doing that
Nice pic!!! Thank you for the tips!! my setup is close to that minus the wire top and bulb. Yes mine are bobs. what are you using for litter how ofter do you change it? I was using news papers. I would think that if it was the bulb killing them it would have done so the first week when fumes were at there peak but i got a red bulb to day and plan to use a timer as temps are well high enough during the day. How do you wire in the therm. i would like to see about doing that
Hey Rocky,
I run the pine horse pellets that come in 50 lb bags. Pellets not chips or shavings, they are killer for moisture and odor control. Just enough to cover the bottom of the brooder. I cover them with a layer of paper towels the first week or so. New chicks hate the pellets at first so I easy them into the deal with the paper towels. If I keep the birds to a modest number. say 12 to 15 , per brooder, I can go almost a week on the paper towels. Watch for poo balls on the feet of bird on paper towels! Then I throw the towels away and run the straight pellets. That will last for another week, maybe more depending on the number of "water fount incidents" I may have encountered... Your nose will tell you when its time for new pellets.They turn to saw dust as they soak up moisture.After that they go to wire pens in the shop with the lights wired thru the thermostats I mentioned earlier...I also run the pellets in the pans under my cages in the shop... I'll try to get some pix of the thermo-light set up later this evening as I can.... BTW, Sometimes birds just die, you never know why and the next batch may do just fine....Bill
Nice pic!!! Thank you for the tips!! my setup is close to that minus the wire top and bulb. Yes mine are bobs. what are you using for litter how ofter do you change it? I was using news papers. I would think that if it was the bulb killing them it would have done so the first week when fumes were at there peak but i got a red bulb to day and plan to use a timer as temps are well high enough during the day. How do you wire in the therm. i would like to see about doing that
Ok Rocky, you asked about wiring of the thermo of the pens in the shop. They wire just like any switch, because if you think about it, Thats all they are... I buy a cheap Dollar General, 2 wire extension cord Thats about 8 ft long. I then cut just one wire of this cord, close to the middle of the cord. It makes no difference which wire.... Then I wire one of the ends to each wire or post on one of these wafer style thermostats..... There are only 2 and it makes no difference which you use..
Here is a link where I get them but you can find them from many vendors with a google search.
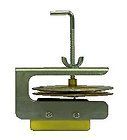
Some come with pig tails of 6" wire, some dont..... makes no difference really. Then I screw the thermo to s solid surface usually a 1"x4" block with a hole drilled for the adjustment screw to pass thru. If its just one pen I want to set up I do it like this....
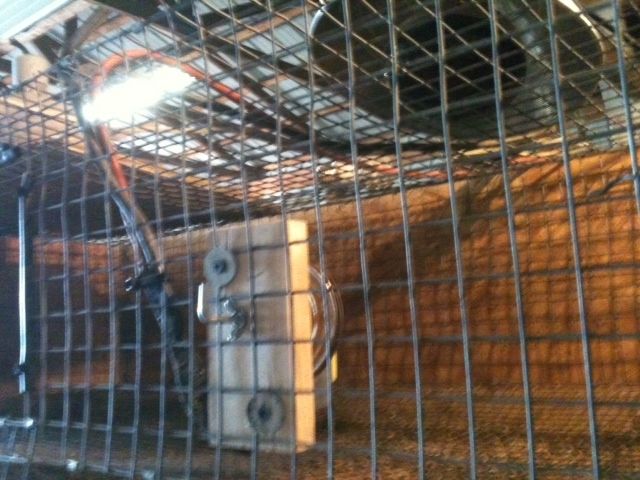
Notice the extension cord zip tied to the cage wire to the side of the pen, run'n up to the top. Up there its plugged in to a power strip. I plug two 250 watt, red heat lamps into the power strip and just sit them on top of the wire. The trick is to have your thremo located at "bird level" in your pen, and have one of the lamps pointing directly on the thermo. This will allow the lamps to cycle on and off as needed, to what ever temp you set the thermo at... You can also set up multiple pens in the same area, and control all of the pens with just the one thermo. Do this by just plugging the heat lamps in to the same power strip, fed by your thermo.
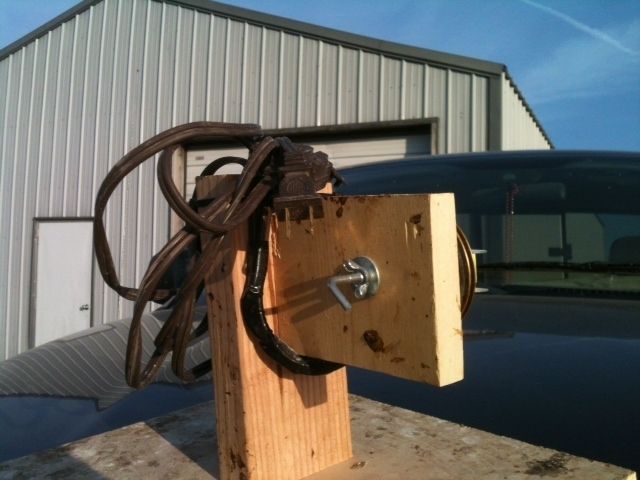
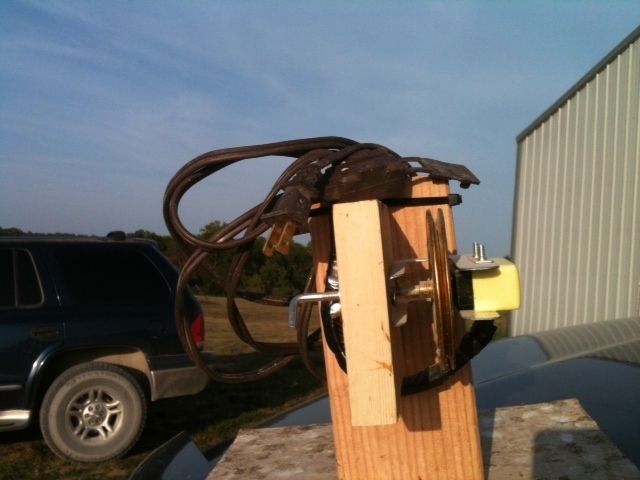
I also made up a free standing one that I can move from pen to pen. I us it in a old stock tank for brooding chickens too. But the light still has to point on the thermo...
Hope this helps, Good luck with your birds. Bill
Edit to add: In the last 2 pix I just rolled to wire up and set it on top of the unit to show the extension cord...