farmerinKC,
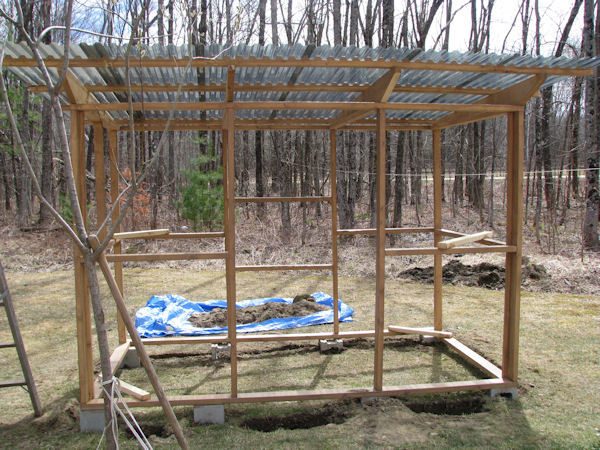
The plans I bought were so great. The Garden Coop, very versitile plans with very detailed material lists and step by step instructions that even I could follow. I think they were about $25.00 and you can download them immediately. Here is a rough idea of the process...
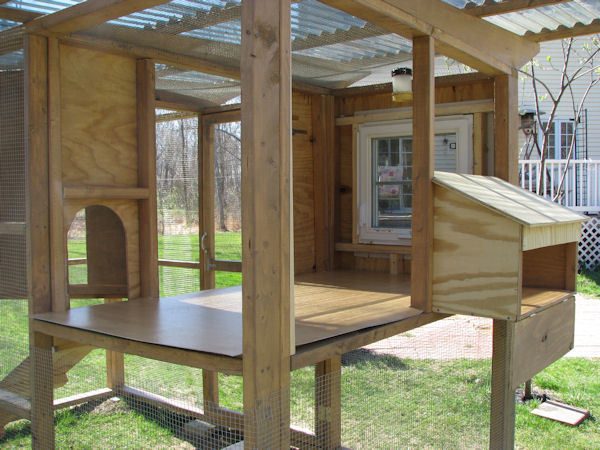
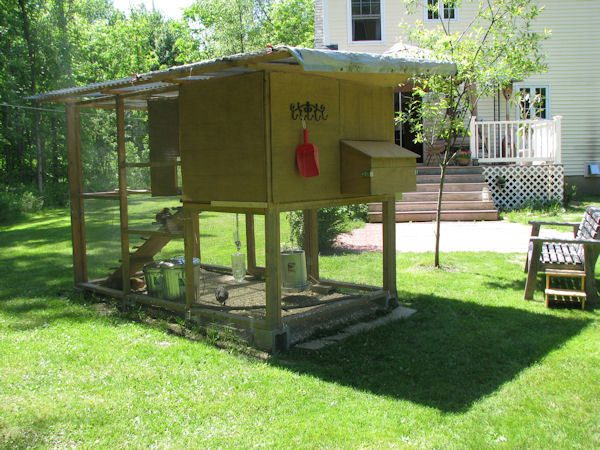
The frame was easy to make. I set it on cinder block "piers". Now the roof...
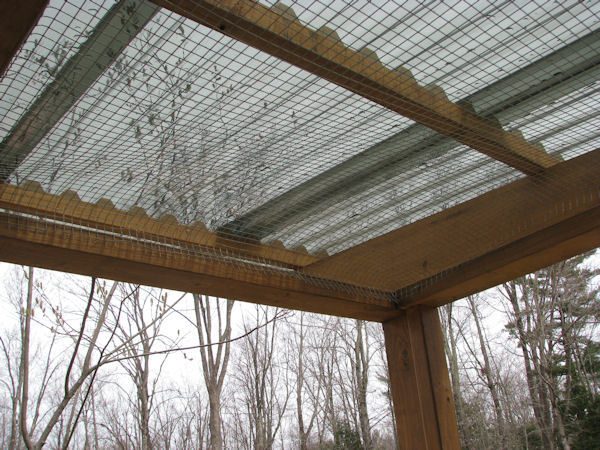
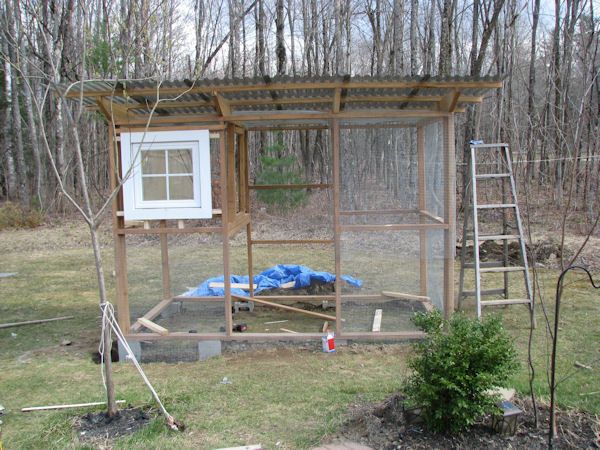
This is the open roof design. I added this window and changed the general "hen house" part.
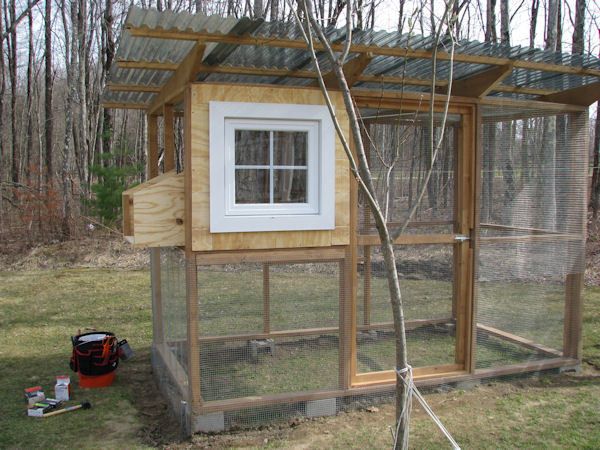
I opted to use T1-11 for the exterior walls and Luan for the interior walls. To save money really. There is a air pocket between the two walls that I will fill with insulation this fall. I also used 2x3s on everything but the main frame which saved me a lot.
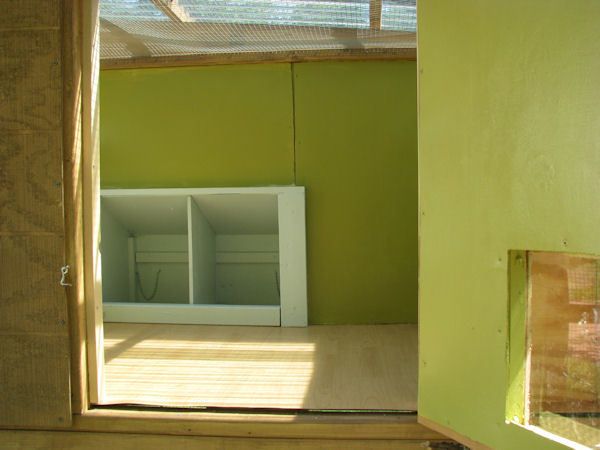
The exterior nesting box is optional. The plan for it was also on the Garden Coop website and was free. I put some linoleum on the floor which has turned out great now that I am experiencing the cleaning process, so easy. One great thing about the solar gray (clear) roof is that (1) there is more light in the coop (good for egg laying) and (2) you can attach a solar powered light for a dim night light. It works great.
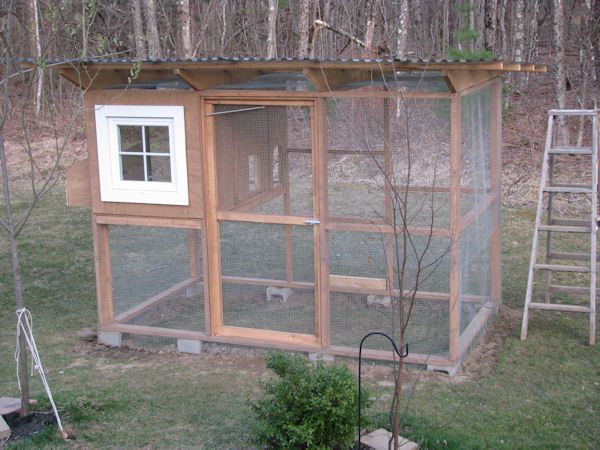
The whole entire pen is so secure. The hardware cloth is buried in the ground so I don't have to worry about predators digging. Cause we have every predator you can think of here in the Maine woods.
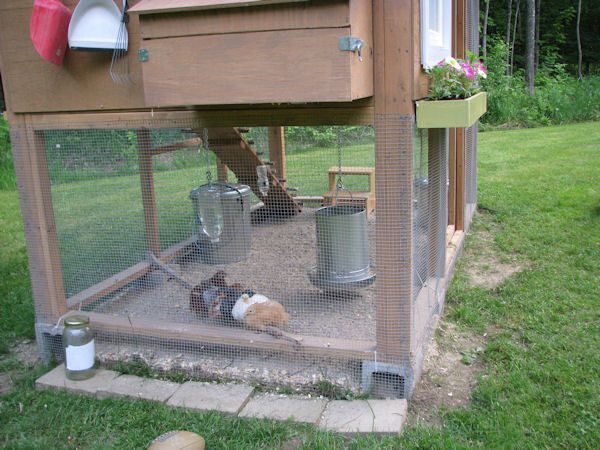
I added this little plexi glass window to the access door (lower right on the green door) which has turned out to be one of my favorite things in the design. It is soo cute to see all six girls faces in this little window. They look out of it a lot and seem to like it.
I put a couple of latches so that I can keep the access door open on nice days. (The picture above is before I added the roost and pine shavings) You can see it fully open in this picture below. I added sand to the run. I like it. I was worried that I had picked a spot too close to my house for the coop and may not have considered the smell. The sand coats all the poops and is easy to rake. No smell yet.
What a conversation piece it has been. I finished it in time for the Memorial Day cook out. It was a hit! I sit on the deck stairs and watch the chickens for hours. I can't help it. I'm fascinated with the little world I created.
I have to mention:
The "chicken nipple" waterers are the best. I don't know why anyone would want the poopy / dirty waterers any more. I have one in the hen house and two in the run. I have read some threads where people have had trouble with them not working and chickens being soooo thirsty. No where in my directions that came with the chicken nipples did it even mention drilling or cutting an air flow hole at the top to prevent suction. It is absolutely imperative to have the air hole for proper water flow!!
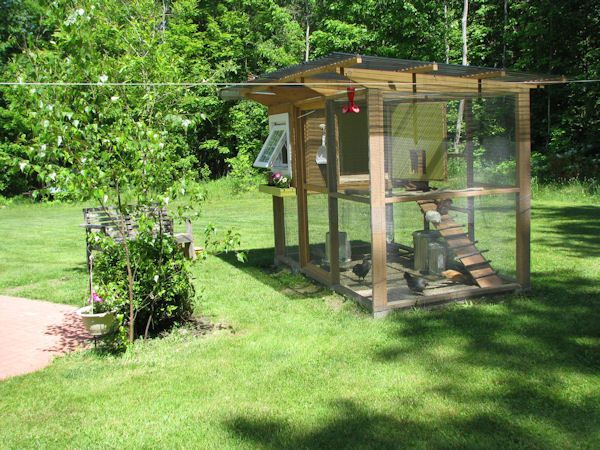
The chickens love the roosts at all heights. They also LOVE and I mean LOVE dried mealworms. You can buy them at Tractor Supply and other places.
I am planning to do some patio bricks around the sides and front. The ones above are temporary. Maybe an nice walkway to connect to my patio. I might also put a bit of edging around the bottom of the coop up to the wood frame so that I can fill the run in deeper with sand.
Good luck with your coop! I am happy to answer any questions (now that I'm a pro )
Priceless but curious if it cost a lot, I like that style? Aside from the window and metal I would think roofing cost a couple bucks.etc. would you say under.400$?
Did you buy the window already hung or make it? I have 4 window panes that I want to mount with hinges at the top and I would LOVE to see how you did yours.
Outlawfarmer, when I got the original estimate from Home Depot it was something like $989 for everything on the materials list provided. BUT that would have been a deal breaker for me, so I took the estimate home and started crossing things out. The cedar wood siding (in the material list) was kind of pricey (here in Maine). Anyway after making all the cuts I could, my new total material list came to $607.06. Using 2x3s saved me a lot and it is plenty strong. I cut out most of the hardware it called for and used what we had around the house, dump, and such.
I have bought a few things since, nothing major though. I had the window so that was a nice FREE addition but not necessary. One thing I did was talk to a Home Depot manager after getting a detailed price list. They can give you a contractors discount on orders over $500. I got 15% but you may even be able to get 20%. that was huge!
Canesisters, I had the window, luckily it fit. But your idea will work too an it will look nicer with the window I think. You will need to put hardware cloth on the inside if you are going to have it open, which does make it a little harder to see in. You will have to look at how the access door was made and attach your windows that way. With hinges and then put door stops around the inside of the window to stop the window from pushing in and to block out drafts.
The plexiglas glass was surprisingly easy to work with too. You need to predrill holes around the edges of the plexiglas, then use screws with washers to attach it to a frame. So easy and was cheap. I think I paid a couple of dollars for the plexiglas , had the screws and washers are cheap. Maybe $5 to $10 at most for a single thickness window or way under $20 for a double paned. You could even put moulding over the top to make it look fancier for dollars.
Love, love, love this coop!!! I'm curious though, you said the clear roof was good for egg laying. I've read that chickens like dark places to lay. Mine won't start until the end of August, but I was just wondering about that. I would love my husband to transform ours to this, but I think he would kill me, after all the hard work he put into ours!!


") )
)") great job!
great job!


 Large air cell on internally pipped chick under broody
 Ol' Grey Mare's Project 365 (er, 295....)
 Wolf Branch Homestead's Project 365
 Mermaid of the Farm's Project 365

 FOOD: what are you having?
 BYC's 52-week Photography Challenge. Week 9: (Mar 2 - Mar 8, 2026) Theme: Frame within a Frame
