- Jan 5, 2009
- 37
- 0
- 32
Well since I have a rain delay (actually thunder and lightning) I thought I'd share some pictures of my work in progress.
I wanted a small coop with shelter underneath that could use the deep litter method. It also had to be aesthetically pleasing to look at.
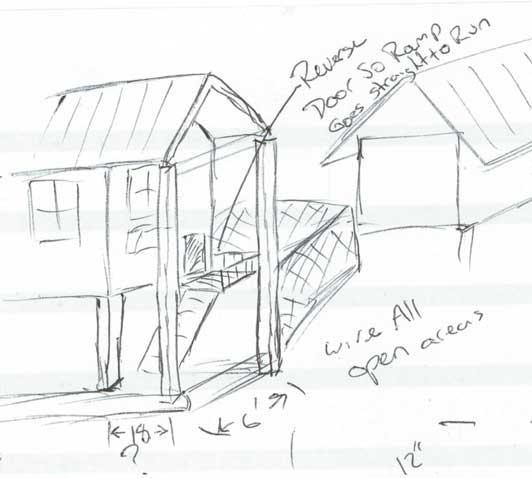
Here's my sketch of what I was looking for. I decided to reverse the location of the coop door. Also in this drawing I didn't have the nesting box location decided. Ignore the building in the background, that was to see how it looked with the roof turned 90 degrees.
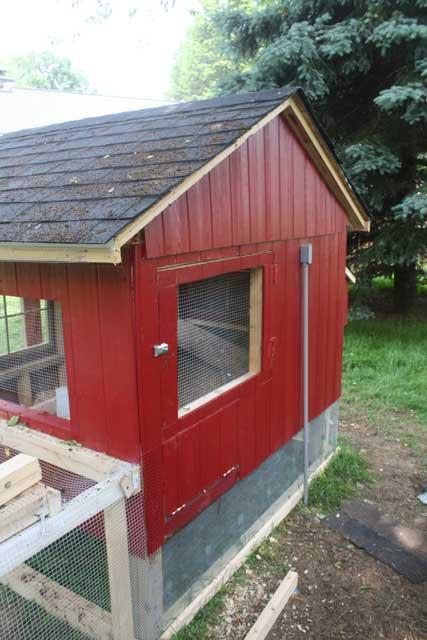
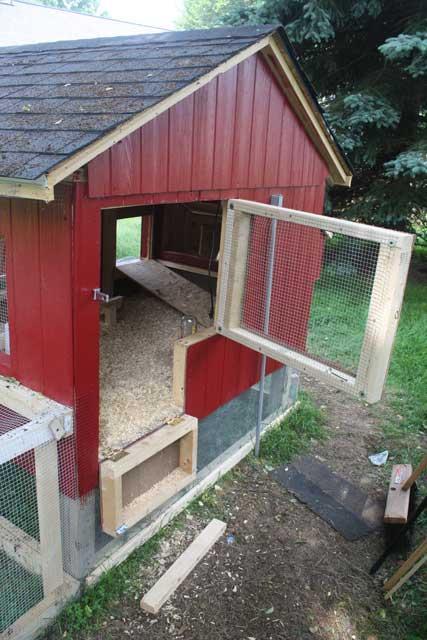
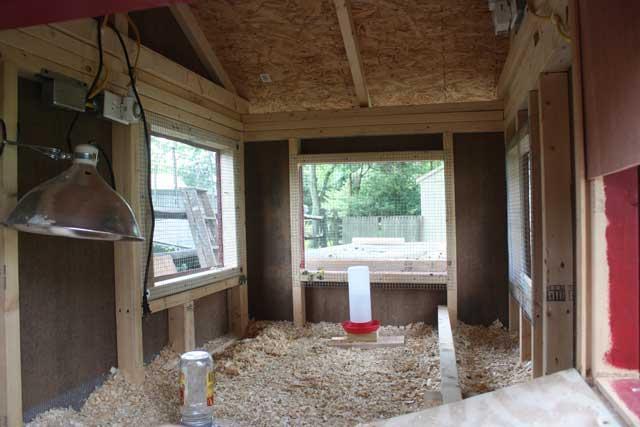
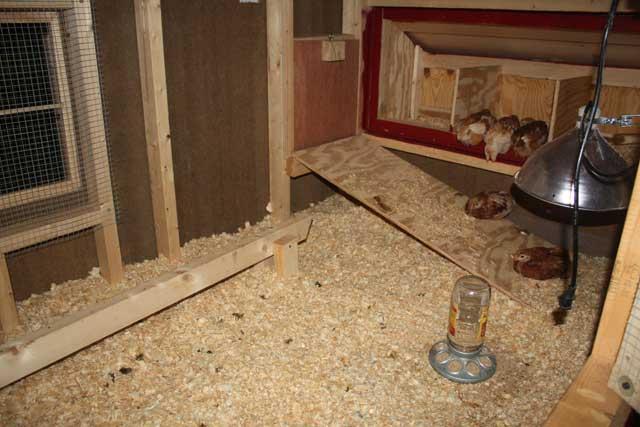
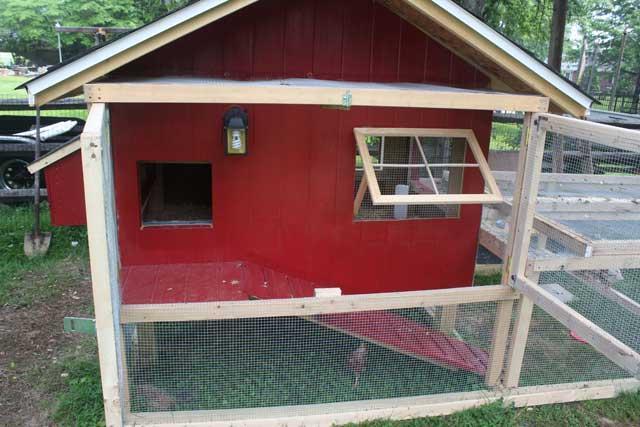
The coop sits approximately 18" off the ground and has 12" of room inside for litter. There are two doors on the left-rear side of the coop. The upper door is going to house an 18x24 window and will swing out and will be used for normal access to the inside of the coop. The lower door will swing down like a tailgate and will be used for cleaning out the coop. I plan to put a rubbermaid tote under it and just rake the litter out. There will also be windows on the left side and the left side of the front of the coop. They will all be top hinged and I'll use some chain to hold them open.
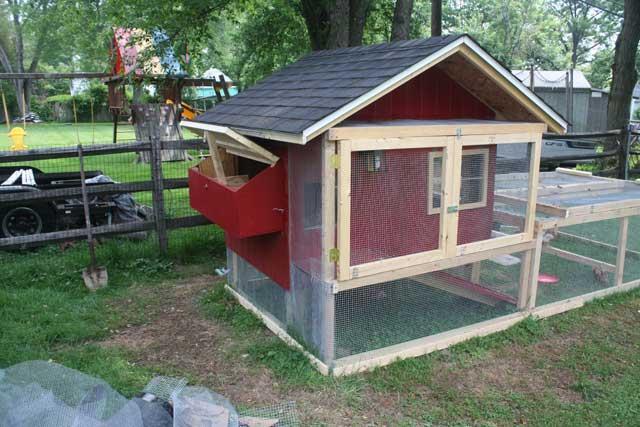
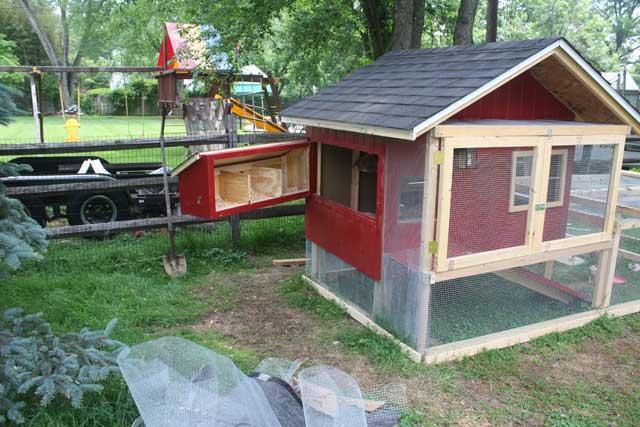
The nesting box will be on the right side and will have 3-12" nesting boxes. It will mount in a hinged door to provide access to the inside of the coop to aid in cleaning. It will open at the front of the coop and swing rearward. I may also add an access door to the right rear of the coop depending on how I orient the food, water and roosts.
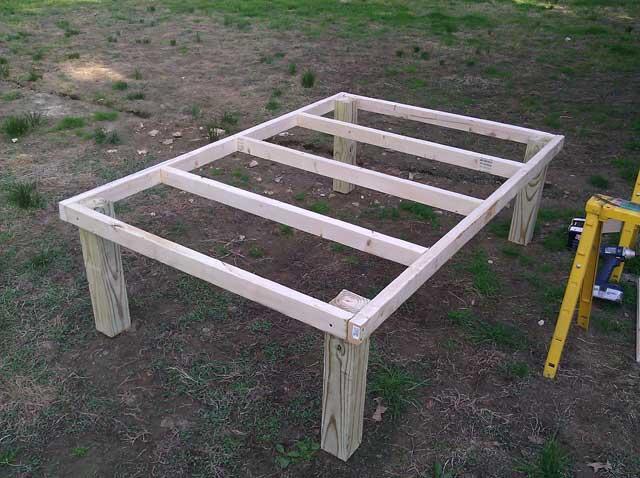
Here is the base.
I framed each wall and temporarily attached it to the base.
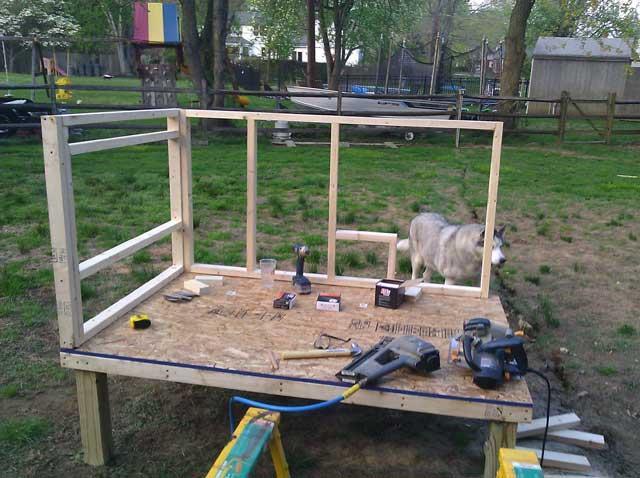
Once all 4 walls were framed I removed them and moved the base to it's permanent location. I then installed the walls.
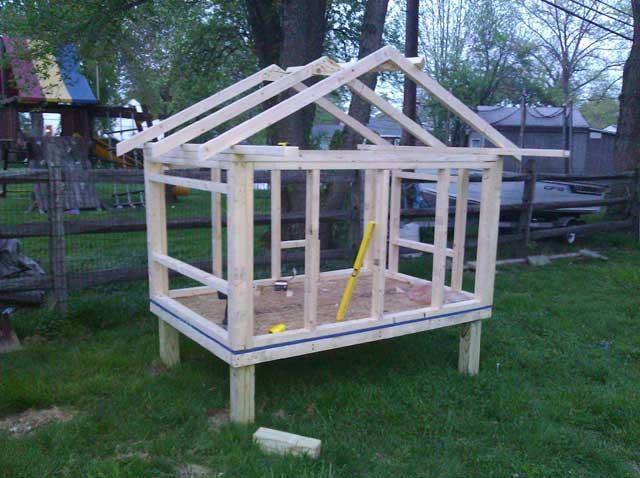
After the walls were up I started working on the roof. Part of the reason I chose the 6 foot width was so I could use full width (4ft) plywood for sheeting and have an approximate 6" overhang. The roof is removable so that I can assemble and shingle it on the ground. Then 2 people can lift it on and it will be permanently attached. I did forget to add a window into the front.
Here's the start of the roof; it's got a 6/12 pitch.
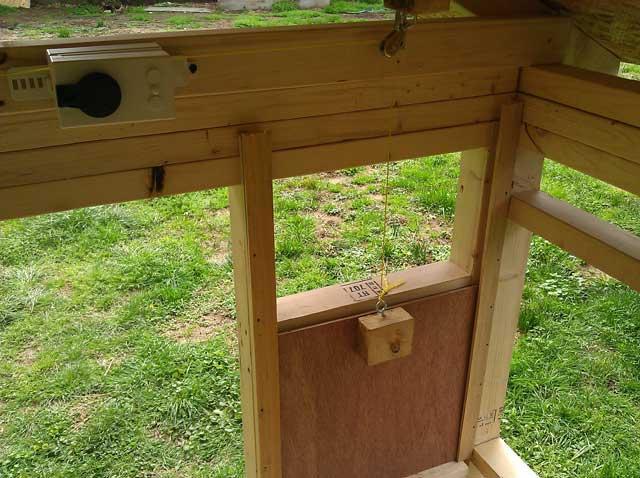
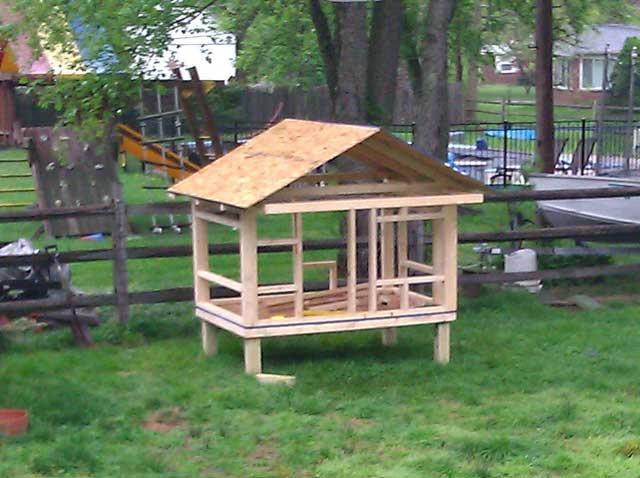
And here's where I got to before the rain delay. I sheeted the roof on the ground and was able to lift it on the coop myself. It's still missing the first rafter. I'm going to finish framing then it will come down to be shingled. Then I'll need a second pair of hands to put it back on top as it's pretty heavy right now (100lbs or so). You can also see that I added the window and top and bottom supports for the coop door opening.
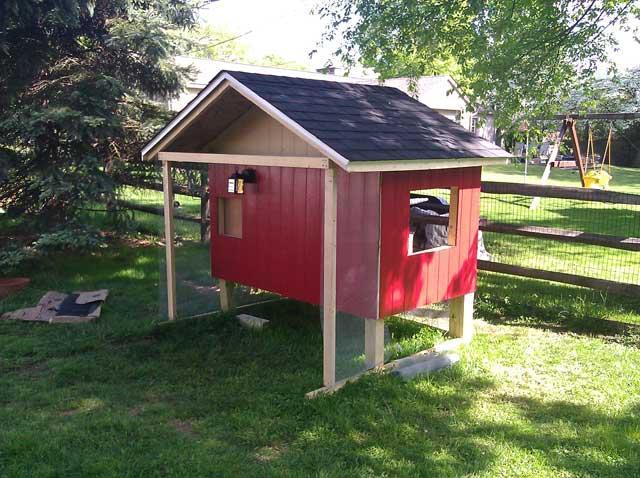
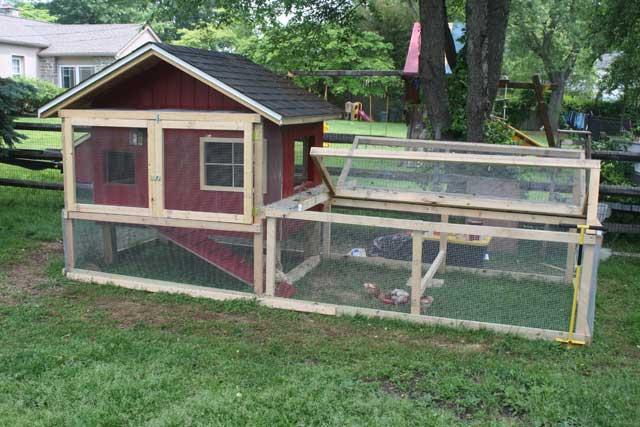
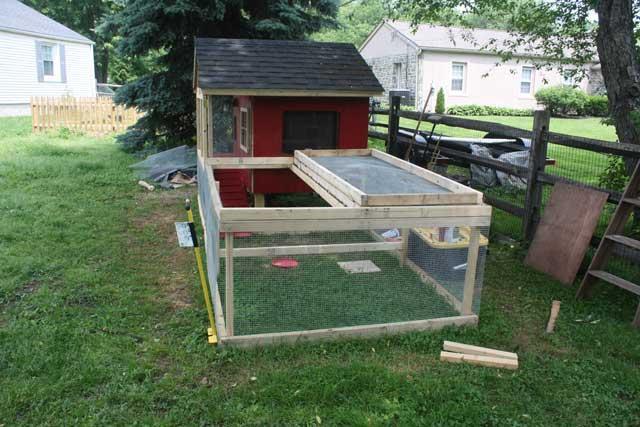
My little babies are just over a week old so I have only a couple more weeks before this has to be done. I'm going to paint it barn red with white trim and I'm going to make an enclosed 6x10 run off the left side.
I wanted a small coop with shelter underneath that could use the deep litter method. It also had to be aesthetically pleasing to look at.
Here's my sketch of what I was looking for. I decided to reverse the location of the coop door. Also in this drawing I didn't have the nesting box location decided. Ignore the building in the background, that was to see how it looked with the roof turned 90 degrees.
The coop sits approximately 18" off the ground and has 12" of room inside for litter. There are two doors on the left-rear side of the coop. The upper door is going to house an 18x24 window and will swing out and will be used for normal access to the inside of the coop. The lower door will swing down like a tailgate and will be used for cleaning out the coop. I plan to put a rubbermaid tote under it and just rake the litter out. There will also be windows on the left side and the left side of the front of the coop. They will all be top hinged and I'll use some chain to hold them open.
The nesting box will be on the right side and will have 3-12" nesting boxes. It will mount in a hinged door to provide access to the inside of the coop to aid in cleaning. It will open at the front of the coop and swing rearward. I may also add an access door to the right rear of the coop depending on how I orient the food, water and roosts.
Here is the base.
I framed each wall and temporarily attached it to the base.
Once all 4 walls were framed I removed them and moved the base to it's permanent location. I then installed the walls.
After the walls were up I started working on the roof. Part of the reason I chose the 6 foot width was so I could use full width (4ft) plywood for sheeting and have an approximate 6" overhang. The roof is removable so that I can assemble and shingle it on the ground. Then 2 people can lift it on and it will be permanently attached. I did forget to add a window into the front.
Here's the start of the roof; it's got a 6/12 pitch.
And here's where I got to before the rain delay. I sheeted the roof on the ground and was able to lift it on the coop myself. It's still missing the first rafter. I'm going to finish framing then it will come down to be shingled. Then I'll need a second pair of hands to put it back on top as it's pretty heavy right now (100lbs or so). You can also see that I added the window and top and bottom supports for the coop door opening.
My little babies are just over a week old so I have only a couple more weeks before this has to be done. I'm going to paint it barn red with white trim and I'm going to make an enclosed 6x10 run off the left side.