New coop and hens

wcasey911

In the Brooder
9 Years
Feb 19, 2010
44
0
22
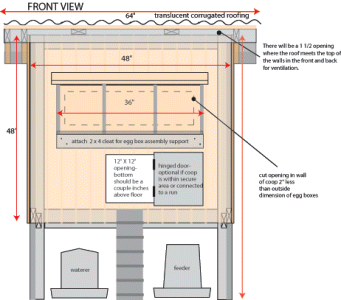
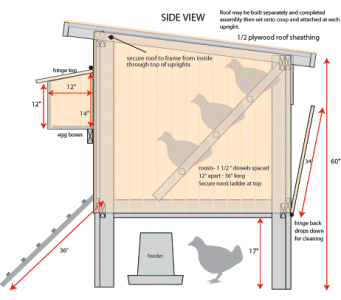
This coop was built from the Purina website plans with a few modifications. I think it turned out pretty good.

49309_100_5014.jpg

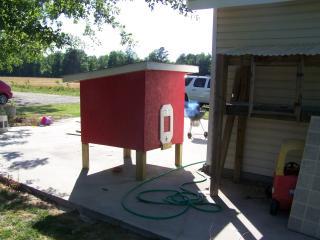
New coop in place in the run.
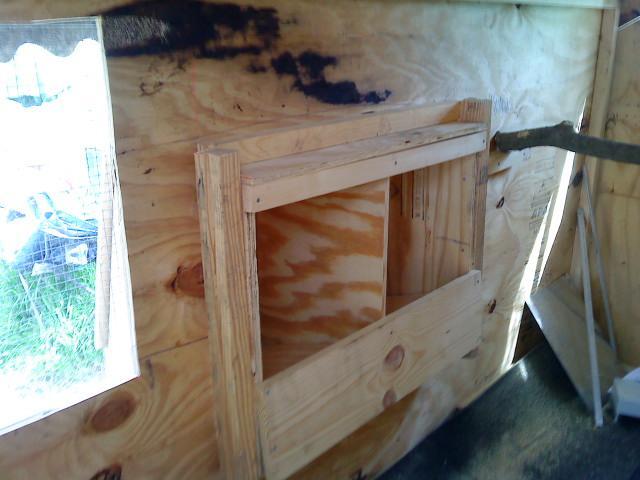
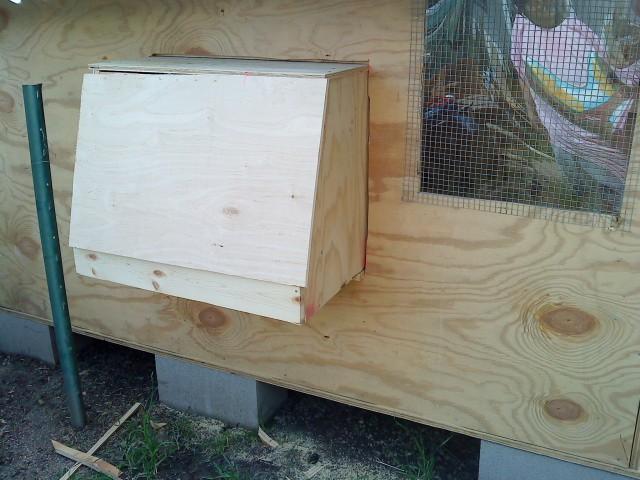
49309_100_5006.jpg

Nest boxes

49309_100_5008.jpg

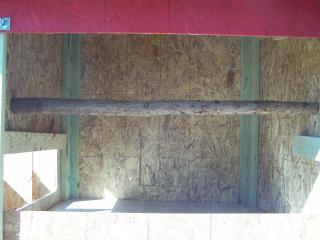
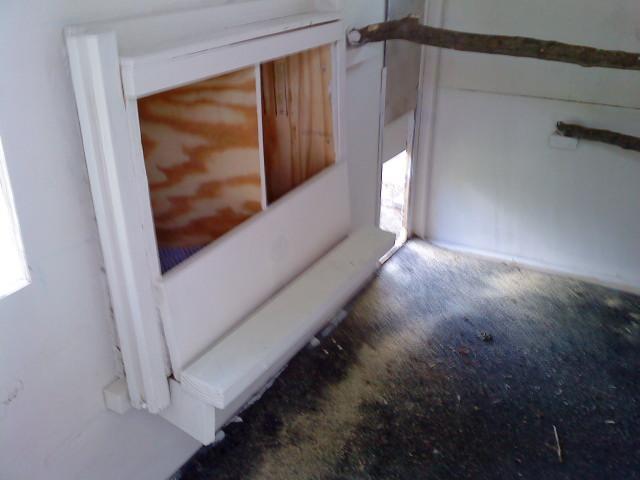
Inside - There is a linoleum covered poop board that goes under the roost.

49309_100_5011.jpg

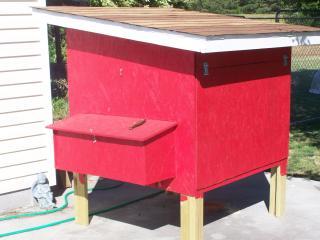
Finished and waiting to be put in place.

49309_100_5013.jpg

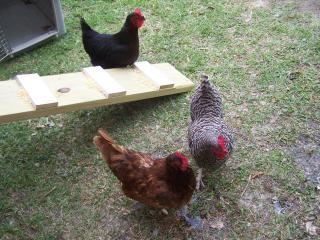
The girls - 1 RIR (Rosie) 1 Barred Rock (Molly) 1 Black Sex Link (Nettie)
 
No windows yet. It does have ventilation under the eaves, but I am seriously considering a window on at least one side. Maybe opposite the nest boxes.
 
Some windows for natural light would be good. Not to mention, if you make them able to be opened, it'll help air the coop out in the summer months
 
Thanks for the tip Naittifan. I'll post some more pics after I've added a window or two.
 
Any updated pictures? Did you ever add the window? I plan on making a few of these for my different breeders.
 
For the life of me,.....I CANNOT FIGURE OUT HOW YOU GUYS ARE ATTACHING YOUR EXTERIOR NESTING BOXES!!! Am I THAT slooooooow...???

Please help me...
he.gif
hit.gif
he.gif
hit.gif
 
The way *I* did it was to cut the hole in the wall the exact size of the finished nest box, and because I'm not a real carpenter, I had a couple little spots where it was a tad too large. Anyway, then I pushed the nest box into the wall, partway into the coop, propped it up from the outside with a step-stool and a couple of well-placed 2x4s temporarily, then nailed a 2x2 TO the nest box top on the inside of the coop. Right at the very edge of the box. Repeated that step for each side, using 2x3s, and the bottom side with another 2xw.

Then I nailed those 2x2s and 2x3s to the wall of the coop.

Then I nailed a front board to the 2x3s.
41679_nestbox_inside_coop.jpg


THEN I nailed two support boards at the bottom, for the perch in front of the boxes.
41679_newcoopnestbox.jpg


So this is what it looks like from the outside; all the support is on the inside.
41679_rollaway_nestbox.jpg


Hope this helps!
 
Last edited:
It's really simple. You need to use 3/4" plywood (OSB) so it is sturdy. You just put a 2x4 underneath the openings you've cut in the wall. These pics are from the Purina website.

Front view:

58980_coopfrontview.gif


Side view:

58980_coopsideview.gif


If you go to the Purina website and click on these pictures it will download a more detailed plan in PDF format.
 
It's a great little coop! I love the colors you chose as well. Depending on your climate, the windowless coop could be just fine. I know here, my chickens would be completely ok with no windows for 10 months a year, and if they are in the shade during the hot part of the day, all year round.

Thank you for posting the link to the hutch building! That was really helpful for me, who is adding nesting boxes onto an exsisting hutch.
smile.png
 

New posts New threads Active threads

Back
Top Bottom