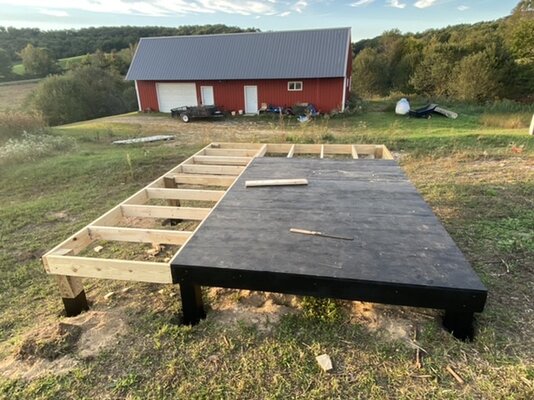
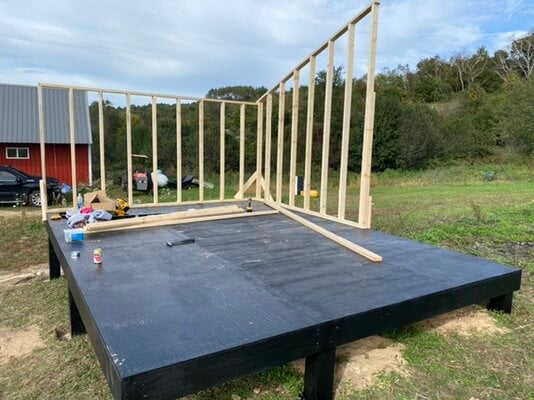
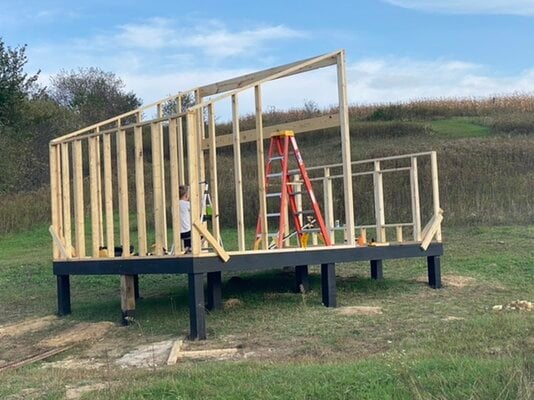
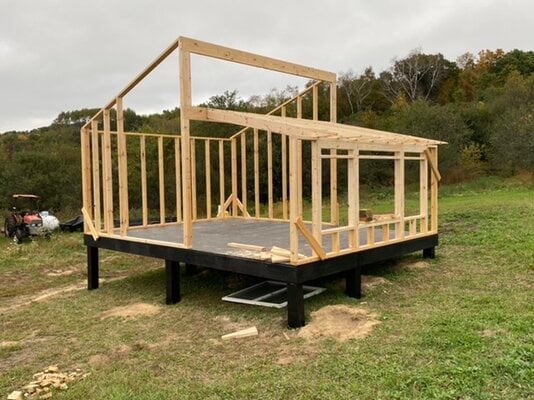
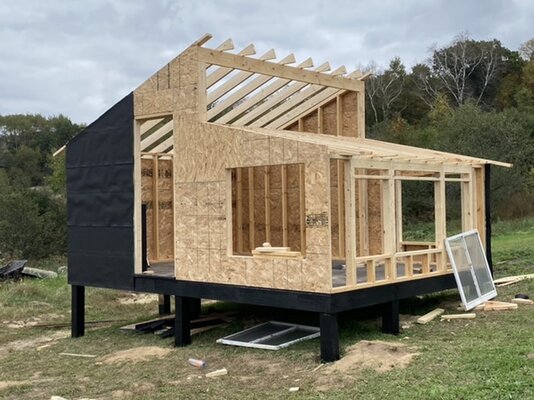
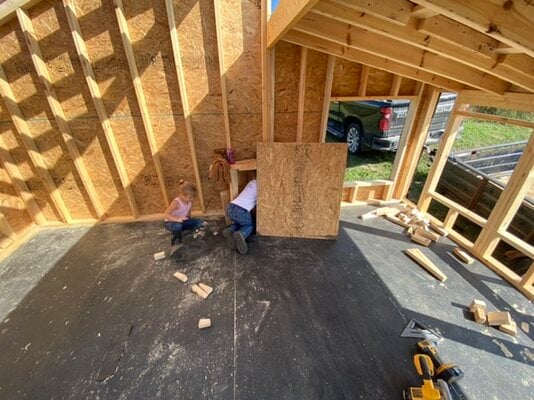
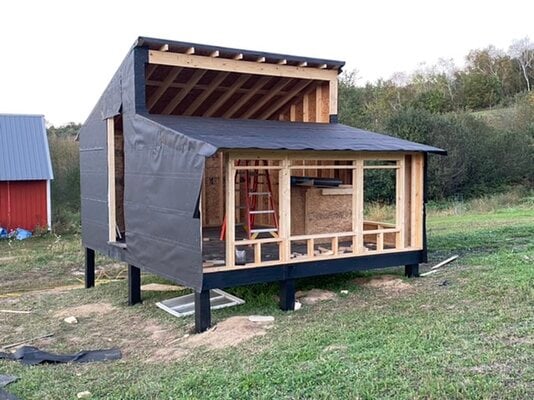
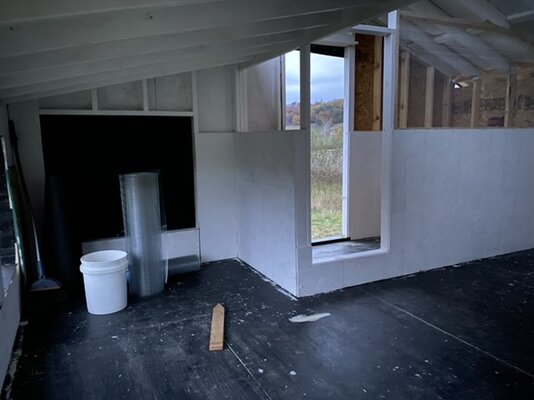
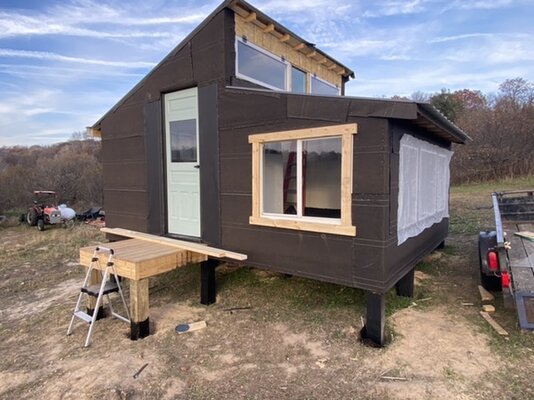
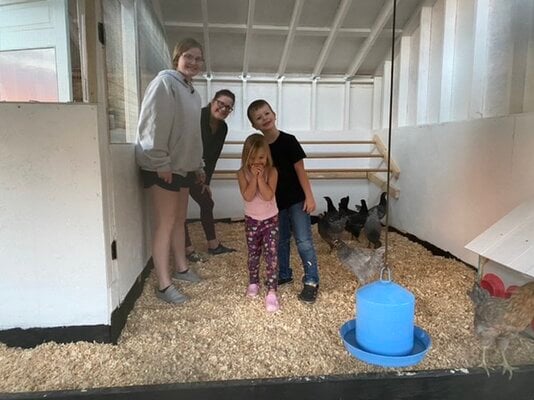
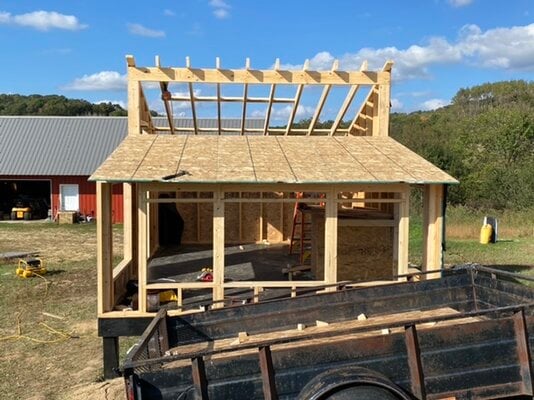
So this late summer the wife surprised me with buying some chicks for egg layers. She’s wanted chickens for awhile and building a coop just wasn’t high on our busy lives priority list. This was 2 1/2 months ago, and we FINALLY moved the chickens out of the garage and into their new coop! It started with materials I had laying around, it is over built, but I should never have to build another one. On 6x6 treated posts, started out as 8x12’, but I added 3 more sheets of 3/4” treated plywood and made it 12x16 after she expressed a desire for a storage area to keep feed and such, and a brood pen where the chickens couldn’t poop on everything. So I’ll post a few pictures of the progress, inside is pretty much complete, outside is wrapped with tarpaper and vertical board and batten siding will happen later this fall or next spring along with adding a run.
MANY thanks to this forum as I got most of my ideas from here and the Woods book which I learned about here. It seemed like the best option from what I read.
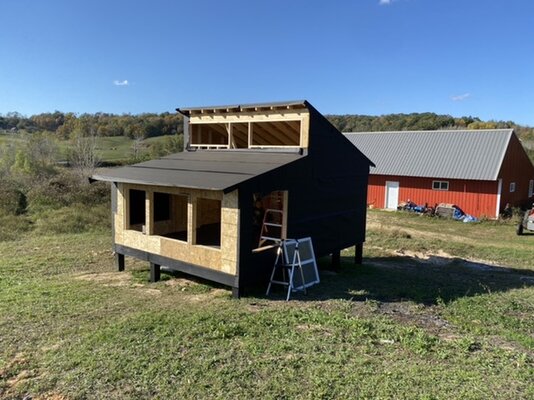
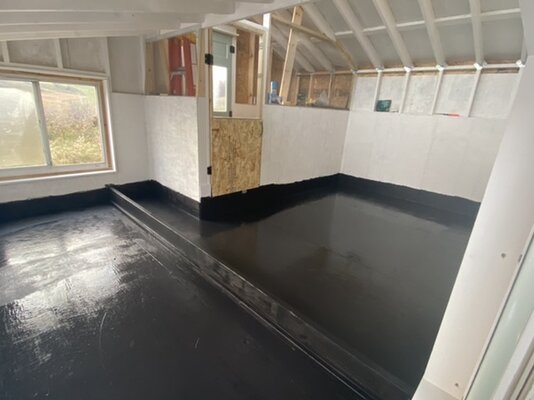
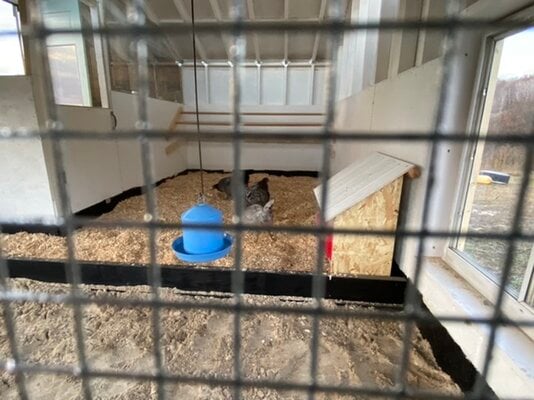
I should add that side windows are storm windows that are temporary, I still have lots to do next spring. Pics with plastic covering front were just to bump up the temperature so the BlackJack #57 would cure better…and the wife wanted fully covered interior walls, but I compromised with a 4’ wall section. Some notes, it is BRIGHT, when people say they still lay eggs in the winter, I can see why. I live in SW Wisconsin and we do get bitterly cold weather, but our plans are to use it as designed and leave the front lower windows with just the hardware cloth tear round. Next spring I will build some tip up windows for the side openings that will hinge swing up to the inside and latch to a roof truss.
MANY thanks to this forum as I got most of my ideas from here and the Woods book which I learned about here. It seemed like the best option from what I read.
I should add that side windows are storm windows that are temporary, I still have lots to do next spring. Pics with plastic covering front were just to bump up the temperature so the BlackJack #57 would cure better…and the wife wanted fully covered interior walls, but I compromised with a 4’ wall section. Some notes, it is BRIGHT, when people say they still lay eggs in the winter, I can see why. I live in SW Wisconsin and we do get bitterly cold weather, but our plans are to use it as designed and leave the front lower windows with just the hardware cloth tear round. Next spring I will build some tip up windows for the side openings that will hinge swing up to the inside and latch to a roof truss.
Attachments
-
 31084E31-03FB-47A9-8A65-94608C7AEBB9.jpeg141.6 KB · Views: 58
 -
 BF7B2BF9-506C-431A-839D-675CD3A05FF9.jpeg123.8 KB · Views: 30
 -
 D5AA0F66-5917-4586-AF04-4B451E3EE769.jpeg124.2 KB · Views: 26
 -
 843E0DEC-6EEC-44B0-A896-2E732BC5E908.jpeg128 KB · Views: 30
 -
 66F7A72C-4925-49C6-988D-DF213CC0B4C6.jpeg123 KB · Views: 30
 -
 B388B4BE-F861-4720-A6E2-393D1F2F5D17.jpeg132.6 KB · Views: 31
 -
 AA0D9146-7844-4E10-B17E-320B7A195F1B.jpeg131.9 KB · Views: 29
 -
 A330791F-9B42-4F0E-BBAE-790143195638.jpeg124.5 KB · Views: 30
 -
 7FA75939-D87B-48F3-83AC-32E0DF1428A0.jpeg68.6 KB · Views: 31
 -
 507EFE68-3F65-40D5-8E17-5F9A805BA20A.jpeg71.5 KB · Views: 32
 -
 3AB7D975-46AD-421D-B80F-E1E3FF4B43EB.jpeg115.9 KB · Views: 36
 -
 1B78AD8A-397D-49DE-8C08-CAAA9D044CBB.jpeg121.7 KB · Views: 32
 -
 AD4C3390-1EAE-4569-A308-FBCC8C26B4D7.jpeg106.3 KB · Views: 28
 -
 BBFB49AD-F3C9-4675-8C1F-E0544F9B67B9.jpeg78.8 KB · Views: 35
 -
 E7CE6AB8-B75E-4A43-BA1D-32A08B154F9F.jpeg98.2 KB · Views: 37
 -
 7F94F9CB-AAAE-4230-8467-D543AFAE025B.jpeg128.1 KB · Views: 38
Last edited:


