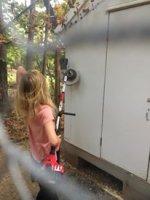
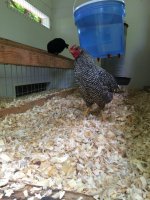
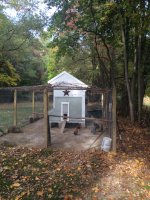
Our coop was going to be grand. We discussed that we would turn a child's play house into a coop. We would add wire and a ramp and fence it in. Simple right? Yeah, it did not work out that way. I brought my father over to plan it out. He said we would buy new wood; the other wood was not great. I said, "No, the point is to use what we have." He said okay and walked our property. He asked what a pile of metal junk was on the other side of the yard. I explained that they were freezer panels from a grocery store. They were rescued after a flood, but they never turned into the "deer stand" that my ex husband envisioned. "Are they any good?" I shrugged; I didn't know what made a freezer panel good or bad. He started looking at them and announced, "This is your coop." I was not happy. He was involved for five minutes and the easy wood project was now metal and weird. He had no idea of how to build a chicken coop; he never had chickens and he was a bricklayer. I had to explain to my father how a chicken coop worked. I explained lay low and roost high. I explained people doors and chicken doors. I explained water and food and a run. He made me draw it out, then I had to take him to a working coop to show him what I meant.
Our high school has a coop, so off we went. He stared at it, he measured the roost height, the width of the roost. He counted the nesting boxes and took pictures. We talked about the fencing needs; it will have to be buried. He just kept giving me the "why?" face. He went home and got to thinking.
The next day, we discussed where the coop should be. I wanted it away from the house; we argued about it. We discussed smell; I picked a spot away from the house and away from the woods. It had tree cover and sun. It wasn't quite good enough, so we had to remove all potential tree threats. He cut each branch that would be over the coop and run. I giggled at his energy, but in hindsight, he was a genius. I would have lost the coop in a hurricane if he didn't think ahead.
I came home from work the next day to find him dragging the panels across the yard to their new home. I thought, "yay! We are nailing them together!" No, we were still designing. He found a nice sturdy panel and made a block foundation for it to rest on. He set four pillars; we discussed digging by the birds. We added four more pillars for support. We had a floor! He then advised we would use the whole panel and not cut when we didn't need to. "We are rebuilding the freezer, it will be sealed." He built a wood frame for a wall. I was confused; I dare not ask. He added the rear wall.
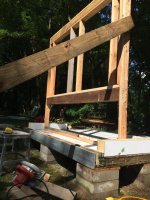 I realized we had an issue. We discussed ventilation and poop trays. Our tall back wall developed four new holes, two for air circulation and two for poop removal. He advised the holes would be covered, "stop worrying." I wasn't worried, I was curious of how he would solve this issue too. I would have to wait.
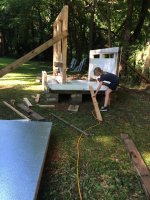
My father liked the look of a classic coop. He liked the way that the nesting boxes stuck out in chicken coops, so he was going to do that. "Dad, you can't bend a freezer panel." He just laughed. He measured the height he wanted, cut the interior side and removed some insulation. He took the saw and cut an angle into the metal. I watched as he bent the metal to create the nesting box shape. I may have forgot to mention, my dad is a genius? He attached the nesting box to the framed wall with rivots. I stared and said, "How are they getting in there?" He cut away the space for the nesting boxes and silicone sealed the seamlines. They were nearly perfect. I pointed to the window holes and made a face. He produced two salvaged Andersen windows from a house that he worked on. Waste not, want not. We installed and sealed them. He used the bits of partial panel to fill the gaps between the windows. Sealed, rivoted. I now have a floor and two walls!
The chicken door wall was easy. One panel on its side would fit exactly. Hole cut for the birds, Rivoted in, sealed. We then had to cut the top panel to meet the roof. That would have to wait for the people door. My vision was an actual door collected from a discarded door world.
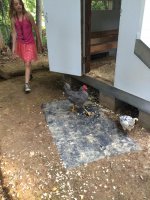 "We are cutting a resealable door from the panel." He used the size of a door to cut the door from the panel. We inserted the wall, and rivoted it into place. There was a giant hole that showed insulation. He created the door jamb and framed the door to match. We had to remove some insulation to get the door to close. He attached hinges, and we had a closing door. I kept testing it, I could not believe it sealed! We discussed door locks and latches. I got to select those. Finally something!
 We got a fresh panel and measured out our roof pitch. We measured two more times, did some crazy math, and cut once. We cut the people door side to match. We were smart though, we made a template so that they would match. Four walls! Uh oh, we need a roof.
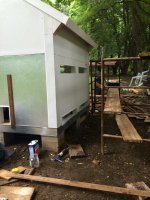
Please bear in mind. We are now one month into the project, and we have spent $40 on screws, rivots, some wood, and other small stuff. I was supposed to be done by now, but I was in it for the long haul; this was never going to end. Every day after work, I would join him to hold, cut, measure and discuss Oldies music. Oh, back to the roof.
One panel sufficed for the back of the roof. We used the partial piece from the window project to make the front slope. I am not even sure we had to cut it, because the portion was so close in size to what we needed. I would say we are lucky, but he had planned for this too. Screws, rivots, silicone. Done? Not by a long shot. We had to cover, seal, and beautify all the raw edges. We attached metal edging all over the coop. Remember don't worry about it?
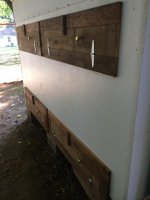 We built wooden covers with hinges for the poop doors and the ventilation hatches. The wood for that was cut from an attic of a house my father rehabbed. It was installed in 1922! We built a chicken door from a caution sign that ended up in our possession. We didn't steal it; we definitely found it.
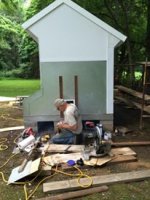 We framed out the door and attached strings. We installed door latches and knobs. We are so close! Not so much.
 We had to build a roost and nesting boxes. Using wood from another project, we covered the open portions of the window wall. I watched as my father built 6 nesting boxes of even size.
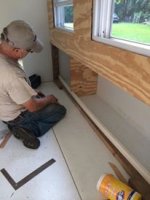 He had gone back to the school to see if the chickens were comfortable, so he knew he had the right size. He cut holes in the dividers. When asked what the holes were for, he replied, "Chickens are nosy." I don't know where he gets this stuff! He installed a banister type rail for them to use in front of the nesting box. Rivoted down. We have the inside!
 At this point, I am so excited, we are done! We have to now build a run. We have to dig a trench through clay to bury the wire.
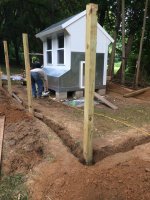
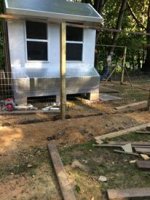 We discuss the size of the run. I wanted it large enough for them to exercise. I should have gone larger. We didn't want to pay for hardware cloth, so we purchased what I call Fox wire at the hardware store. We asked on facebook for old fence posts. Miraculously, they arrived and they were free. Apparently I have many friends with unfinished privacy fences. We sunk the posts and attached the wire. We filled the trench. We made a decision to not use concrete to set the poles. We used the clay and some faith. we firmed it up with wood from pole to pole. Faith only goes so far! We proceed to run chicken wire over the fox wire. We ran two layers of chicken wire up to the top of the posts. We built a door for the run, and attached it. Small ramp added, with a fight over how far to make the foot grips; we enjoy a good argument. We added simple closures and realized that we had hawks and owls. What now?Would this ever stop?
I went to the old hardware store and purchased bird netting. We had no idea how to get it attached without it sagging. In our rants, someone suggested bamboo poles. They grow everywhere and they are strong and free. About eight plants later, we have a support system. The bamboo is screwed into the wood supports and doubled up with string for strength. The netting is secured with nails into the wood supports. So, the netting is nailed in; I finally got to use a nail. Total time for this coop: 3 months. Yes, my one week project took three months!
The best part of using these stupid freezer panels is: My coop is essentially a thermos. I can close the vents and windows, and the coop has just enough ventilation to be comfortable. In the cold winter, I can take a 5 gallon bucket of hot water, add a lid, and we have enough heat to keep the waterer in a liquid form. In the summer, I open the windows and the vents and we have good air flow. It is water tight- thanks silicone! It is sturdy, as it has survived several large storms. I think the coop is actually better built than my actual house! I used what was free, and when I didn't have it, I asked for it. People were happy to help with plywood, fence posts, whatever we needed.
What I wish I had done: build storage and an alternate run. I had not anticipated the need for food storage. I would have liked to build a closet for at least three bags of feed. I would also have build an alternate run. I would like to alternate grass growth in those runs. This would have made us redesign the coop, and we discussed this if we have to move. Currently, we have a muddy mess at times.
I would never complain about the experience or the product. I have an original Tony Poppop chicken coop. I spent more time with my father in those three months than I had for years. I learned plumb and square. I realized I could still do drafting, and I reaffirmed my belief in my family's McGuyver. I learned to use a rivot gun, and I realized that there is a tool to cut Chicken wire that makes a fun sound. I am a part of that coop; I helped make it happen. I couldn't be prouder!
