The Co-op Coop Coup's Coop Construction is Complete!

JanetSmithery

In the Brooder
9 Years
May 11, 2010
72
1
39
Eugene, OR
This coop construction project is dragging on a lot longer than I had thought, so in order to make me feel like we're making progress, I thought I'd set up a construction log.

On June 13th, we began construction by demolishing the poorly-functioning hippie greenhouse on our future coop site.

57140_100_3323.jpg


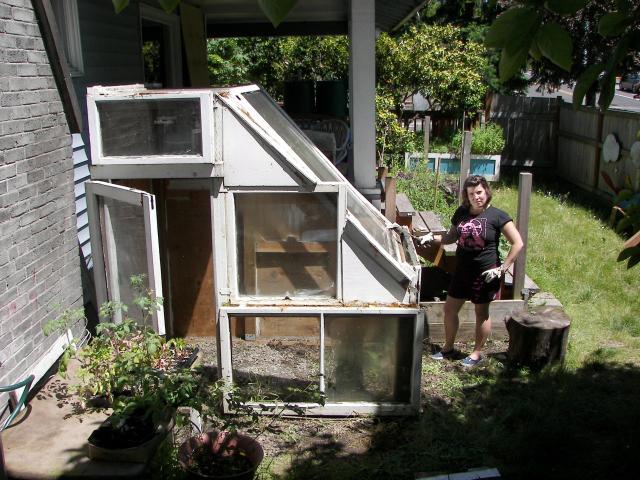
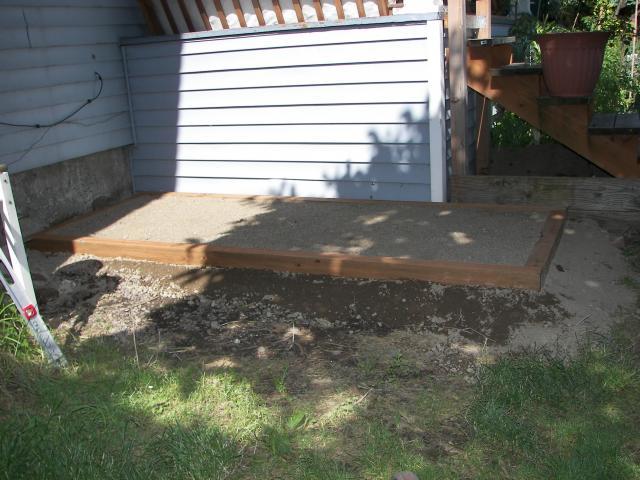
This proved to be a royal pain for demolition partner Rosalie and myself. Luckily, some visiting fathers took matters into their own hands--they confiscated the power tools after Rosalie and I had gotten the windows out of the frame and got the rest of the greenhouse down in a matter of hours. Afterwards, it took Rosalie and I a couple of days to clean up the site (lots of carcinogenic foam, nails, and pieces of glass were scattered over the site. After that was done, we got a pickup truck load of sand and gravel and leveled the site. By June 23rd, we had built a 4'x10' frame of pressure treated lumber for the foundation, stapled hardware cloth to the bottom, positioned it on the level gravel bed, and filled it with the rest of the sand.

57140_100_3389.jpg


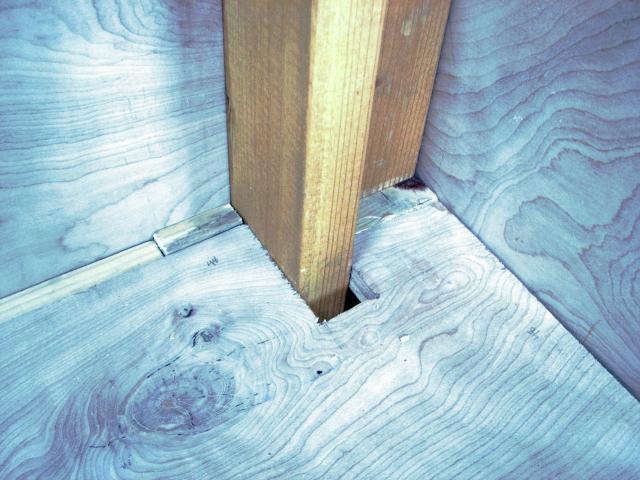
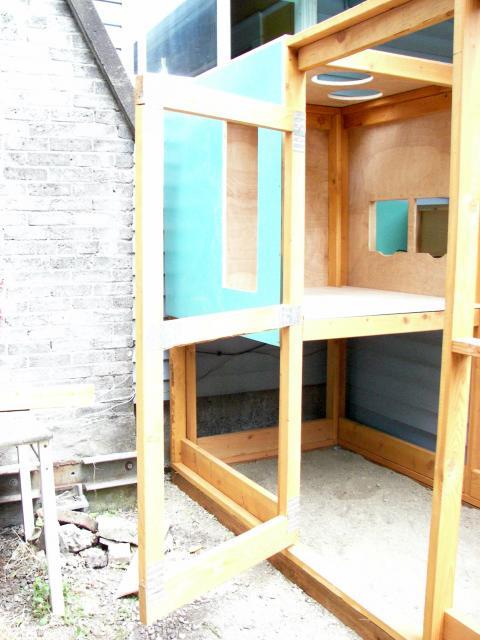
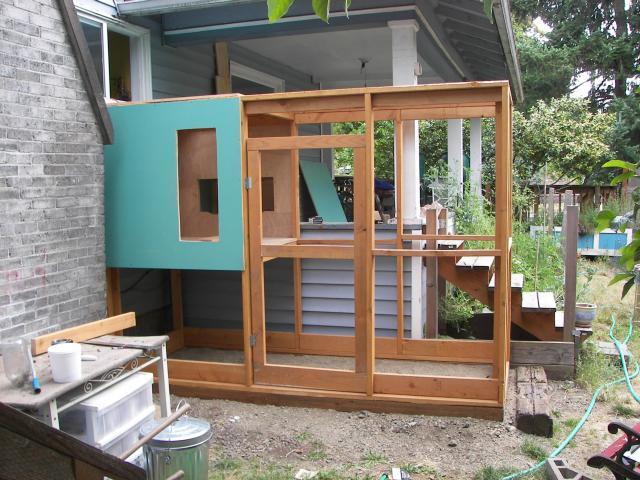
We then spent several days cutting 2x4s for our frames, making the frames, screwing up the frames, redesigning the frames, dismantling the frames, resetting the frames, and staining the frames. We really wouldn't have been so particular (it's just a chicken coop!) except that we had designed the frames to be independent panels so that the coop could be (fairly) easily dismantled and rebuilt elsewhere if future co-opers decided that chicken care and maintenance were not for them. By July 2nd, we had the plywood for the coop walls painted. By July 4th, we had the final panels stained. On July 12th, we made and set the nest box for one of the inaccessible walls, and by July 13th, we FINALLY managed to get the frame for our coop up!

57140_100_3476.jpg


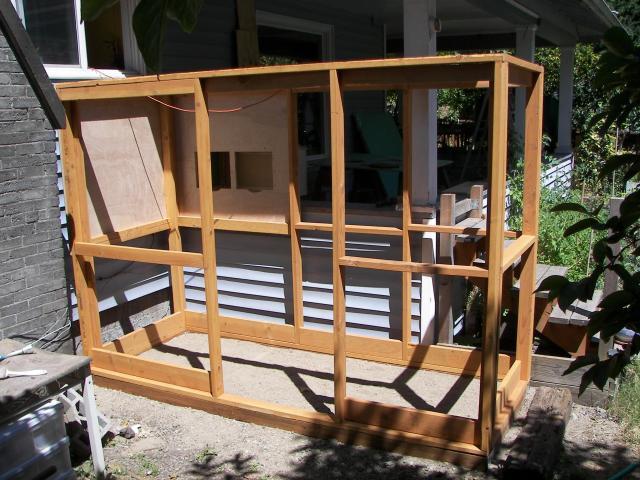
Of course, about two seconds after the last screw went in place, we all realized we should have put our hardware cloth on the panels before putting them up, as it will now be exceedingly difficult to fit the hardware cloth in the panel corners...but we're going to deal with that problem when it comes.

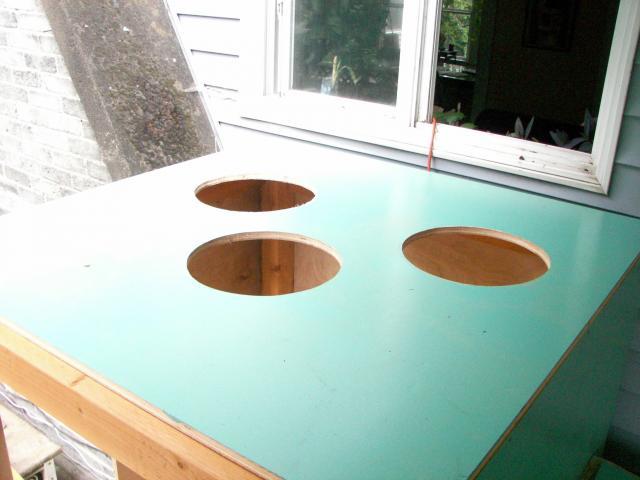
This weekend...setting the floor joists and trying our darndest to get our traffic lens windows to fit in the holes we cut for them!
 
Last edited:
I can tell already that this is going to be an entertaining thread!
clap.gif
pop.gif
Can't wait for more!
thumbsup.gif


I like the way you did your foundation with the hardware cloth in the frame and the sand.
 
Oh, where to begin on today's difficulties? Maybe with the Great Window Debacle of '10, which itself has nearly a two-month long history.

Back when I first began designing this behemoth, I stumbled upon this coop that uses a recycled traffic light lens as a window in the coop. Neat idea, I thought. Our coop is going to be much larger, so I figured we needed more traffic lights. One quick trip and $60 later (Gawd, shipping!), we owned three yellow traffic light lenses. One broke in shipping, so the seller sent us another a couple weeks later.

When we finally got ready to place the lights a couple weeks ago, we couldn't decide how to arrange them! I wanted them in a straight vertical line offset to the right of our 4' square. No, said my housemates who all thought it would look too much like a traffic light. So too was a straight horizontal line nixed. I nixed the popular idea of totally random placement. Finally--after four hours of discussing and trying different arrangements--we agreed on one light in the middle and two offset in a vertical line to the right. Out came the jigsaw, in came the holes and...

The lights didn't fit. "Installed in a matter of minutes" my left foot, lisseree ! We sanded and sanded and sanded for a week. No dice. Maybe we didn't make the holes circular enough, I don't know. Maybe it was impossible to get the rubber gaskets cleanly into 3/4" plywood. At any rate, I eventually gave up sanding and tried to shave a little more wood off with the jigsaw...and inevitably made a hole too big.

So we're scrapping the traffic light window idea, and since we don't have any money to get a new piece of plywood, we're using the circular disaster as a ventilated roof for the coop part of our coop/run!

57140_100_3486.jpg


This afternoon, we went to the local ReStore to find a sheet of plexglass for a new window, and found an old cabinet window that will look wonderful and will require only a couple screws to install. Thankfully, I think we can manage that. Cutting an appropriately sized rectangle was a piece of cake, and the cabinet window cost a whopping $4. Wins all around (But what on earth will I do with the failed traffic lights?!)

This makes four sides of our 4' cube coop finalized, so I thought I'd turn to the floor. Determined not to make a mistake on this piece of plywood, I triple measured every single dimension, drew a schematic, measured my board, accounted for the horrible 'slice the piece of plywood in half' cut, re-drew the schematic with the new dimensions, and proceeded to cut.

But, darnit, I forgot *one* measly re-calculation, which made my cuts in the back of the coop off by about half an inch.

57140_100_3495.jpg


There's another two hours wasted trying to cut slivers of wood to a size good enough to fill in the back gaps.

Thanks to these extra-long summer days, my housemates and I figured we could whip out the people door to our coop/run before sundown. It's just a rectangle, after all, with no miter joints or anything. Five boards, six screws drilled at an angle and six joining plates later, we had a perfectly square door. We then discovered that the place where the door needs to go is not square. After struggling with the door for an hour and a half, we finally got it hung. It rubs on one side of the frame and has a gap almost 3/4" wide at one bottom corner, but it swings open and shut.

57140_100_3498.jpg


After pouring some drinks and congratulating ourselves on surviving another day of coop work, we realized we should have hinged the door on the right side instead of the left side. As the door is, we'll be letting all the chickens out every time we need to give them food or water.

Back to the drawing board, I guess.

57140_100_3481.jpg
 
Bummer about the traffic light windows
th.gif
- I thought that sounded like a really cool
cool.png
idea! Your coop looks like it's off to a great start though, and your writing style is very entertaining!
thumbsup.gif
 
It is coming together great!! Sounds like most coop construction though - just a few hiccups!!
lol.png

Sounds like you are learning heaps - remember it is a CHICKEN house - will they notice if things are just, not perfect??.

With the door swinging the way it is, you will just be having some more interactive time with the girls.
wink.png


I look forward to seeing it finished and inhabited!!
 
Ah, yes...the interactive time. I adore "socialize the birds" time, but it's a commitment. At 6 weeks, they're quick little buggers when they escape, and I don't want to find myself in a situation where I've got only 10 minutes until I need to be teaching (I live across the street from my university) and I have to catch 4 fugitive birds. In the Oregon rain. In a busy street. In heels.
gig.gif


For all I'm complaining over the little hiccups in construction, I'm not really frustrated with the project. It is annoying to plan and plan and plan and plan (seriously...I even *wrote down the order in which we were to do things!*) and then you find you have a warped board, or the stain needs two days to dry. I have found that construction is not as easy as my childhood LEGO sets made it seem. But the little hiccups are what's making the construction fun. This thread wouldn't be near as funny if everything went perfectly. And, of course, the chickens won't care. Heck, they'll be thrilled that they're out of the dog pen/sheet topper situation.
 
Last edited:
Ahhh! The joys of custom carpentry! My own little coop went through a LOT of modifications during the building process and now that I've declared it "done" I'm currently "planning" it's expansion. sigh

I used to do custom woodworking, and a big part of the reason that I don't do so much anymore is because I refused to commit to a deadline. No matter how much experience you have, or how well you've planned, it doesn't take much of a hiccup to send everything straight to H-E double hockey sticks. One time, I set 6 freshly varnished panels on saw horses in my yard to dry while I continued working in the shop, thinking they'd dry faster in the sun AND I could continue making dust in the shop. My neighbor watered her yard at full throttle and, even with a 6 ft privacy fence between us, the sprinkler totally ruined the finish on my panels. You can't plan for everything. With some projects it's better to start with an idea, rather than a plan.

IMO I'd leave your door like it is. Maybe put a screen or board across it that's easy to step across (for people) but that'll slow down energetic little peeps. Besides, it may be one of those serendipitous mistakes--it may be easier to get in and out of the coop with your hands full the way it is.

The Co-op coop is looking great! Please continue to keep us posted, the metamorphosis of the backyard coop is a beautiful, fascinating thing.

P.S. I just noticed that it looks like you can access the nest boxes from the back porch. BRILLIANT!!!!
 
Last edited:

New posts New threads Active threads

Back
Top Bottom