Trailer Coop Build (Pic heavy)

BJ57. Why the pass?

There are a few reasons and I could go into a lot of detail but in the end (1) I personally don't like working with materials like that and (2) I'm managing the flock and land following USDA organic, among other, guidelines and do not want to risk using something like this when I have other options. I am not already certified and do not have a certifier to ask if it's ok to use, therefore will err on the side of caution :)

Laminate has seams.

Yes, but they are pretty tight. I installed this in a basement office and spills happened. The liquid would sit on top of the flooring. I was impressed and surprised given it is not very expensive material. The only downside I found was it scratches really easily. For a coop I don't care but I would re-think installing it inside again.

I suspected the mat/foam material would not work for multiple reasons. Thanks for providing your thoughts on that as well :)
 
Sounds like laminate might be your best choice.
Are there guidelines/regulations on materials used for housing in the USDA Organic program?
 
Are there guidelines/regulations on materials used for housing in the USDA Organic program?
If interested, here are the high level poultry guidelines pdf (for this conversation the Livestock Living Conditions section):
https://www.ams.usda.gov/sites/default/files/media/Poultry - Guidelines.pdf
This is the entire guideline: https://www.ecfr.gov/cgi-bin/text-i...2&tpl=/ecfrbrowse/Title07/7cfr205_main_02.tpl

This is one of the few grey areas in my opinion. I can dial in almost everything except this. It's clear that treated wood is a no-go, and that is repeated everywhere in their documentation.

The national list of allowed and approved substances doesn't appear to address this topic either (https://www.ams.usda.gov/rules-regulations/organic/national-list) because it is focused on vitamins, minerals, and chemicals added to food or crops.

The biggest problem that I've run into is a a lot of the USDA documentation leaves the decision of conformity up to the ceritfier which is fraught with potential issues. In addition, if you are not becoming certified (generally you need to make enough $$ from your farm to make certification worthwhile) then the certifiers will not even talk to you. Simply put, they work for money and you aren't paying so they aren't talking to you.

It's been frustrating for trying to start a tiny organic farm. My research skills and willingness to dig through lawyered-up material (alongside my general gluttony for punishment) is the only reason I keep on this path. :D :D

In the end, the idea is that you do not provide the chickens with access to anything that is non-organic (as defined by their terms, not the natural world's!), and when I look at BJ57...my flock will have access to it, which means I do not want it to contain any harsh chemicals or banned substances.
 
The biggest problem that I've run into is a a lot of the USDA documentation leaves the decision of conformity up to the ceritfier which is fraught with potential issues.
Yup, am familiar enough, as my brother was certified years ago when the program first started. Not long(a few years) after, costs went way up, loop holes got bigger, compliance checks went way down......turned into a bit of a joke, and may still be....like 'free range' eggs.
 
I've been able to again spend some time on this...finally.

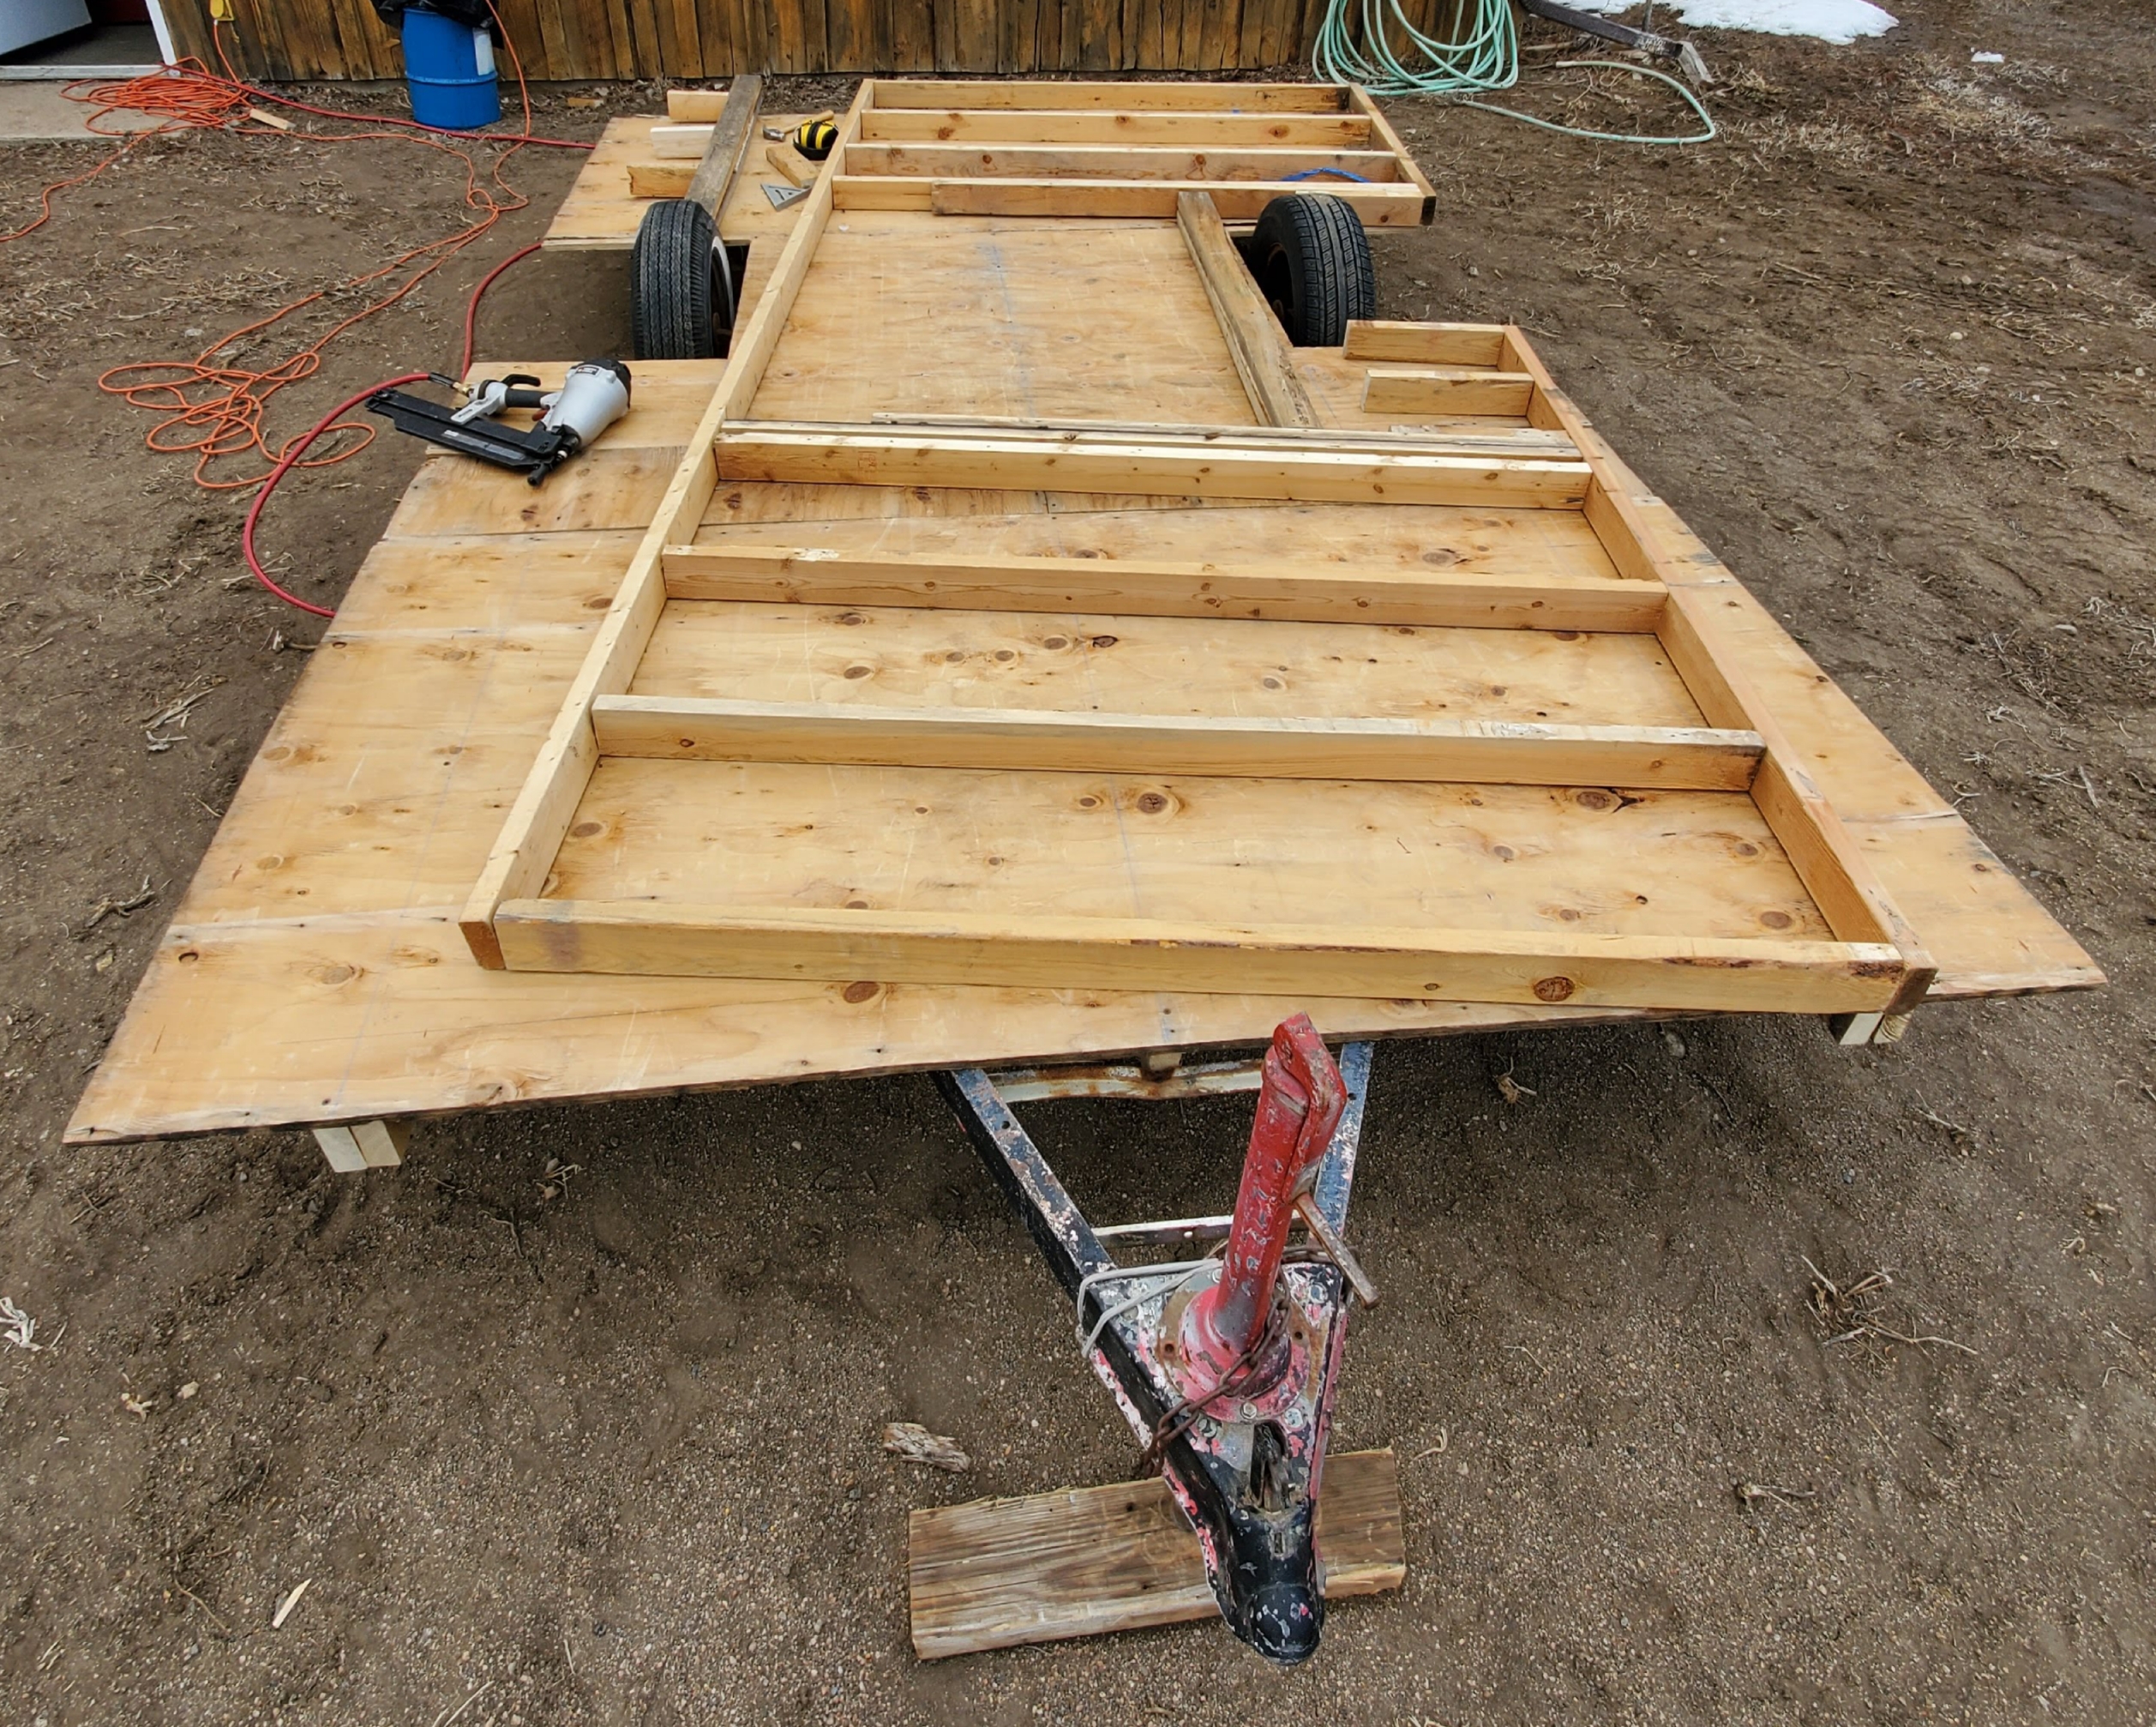
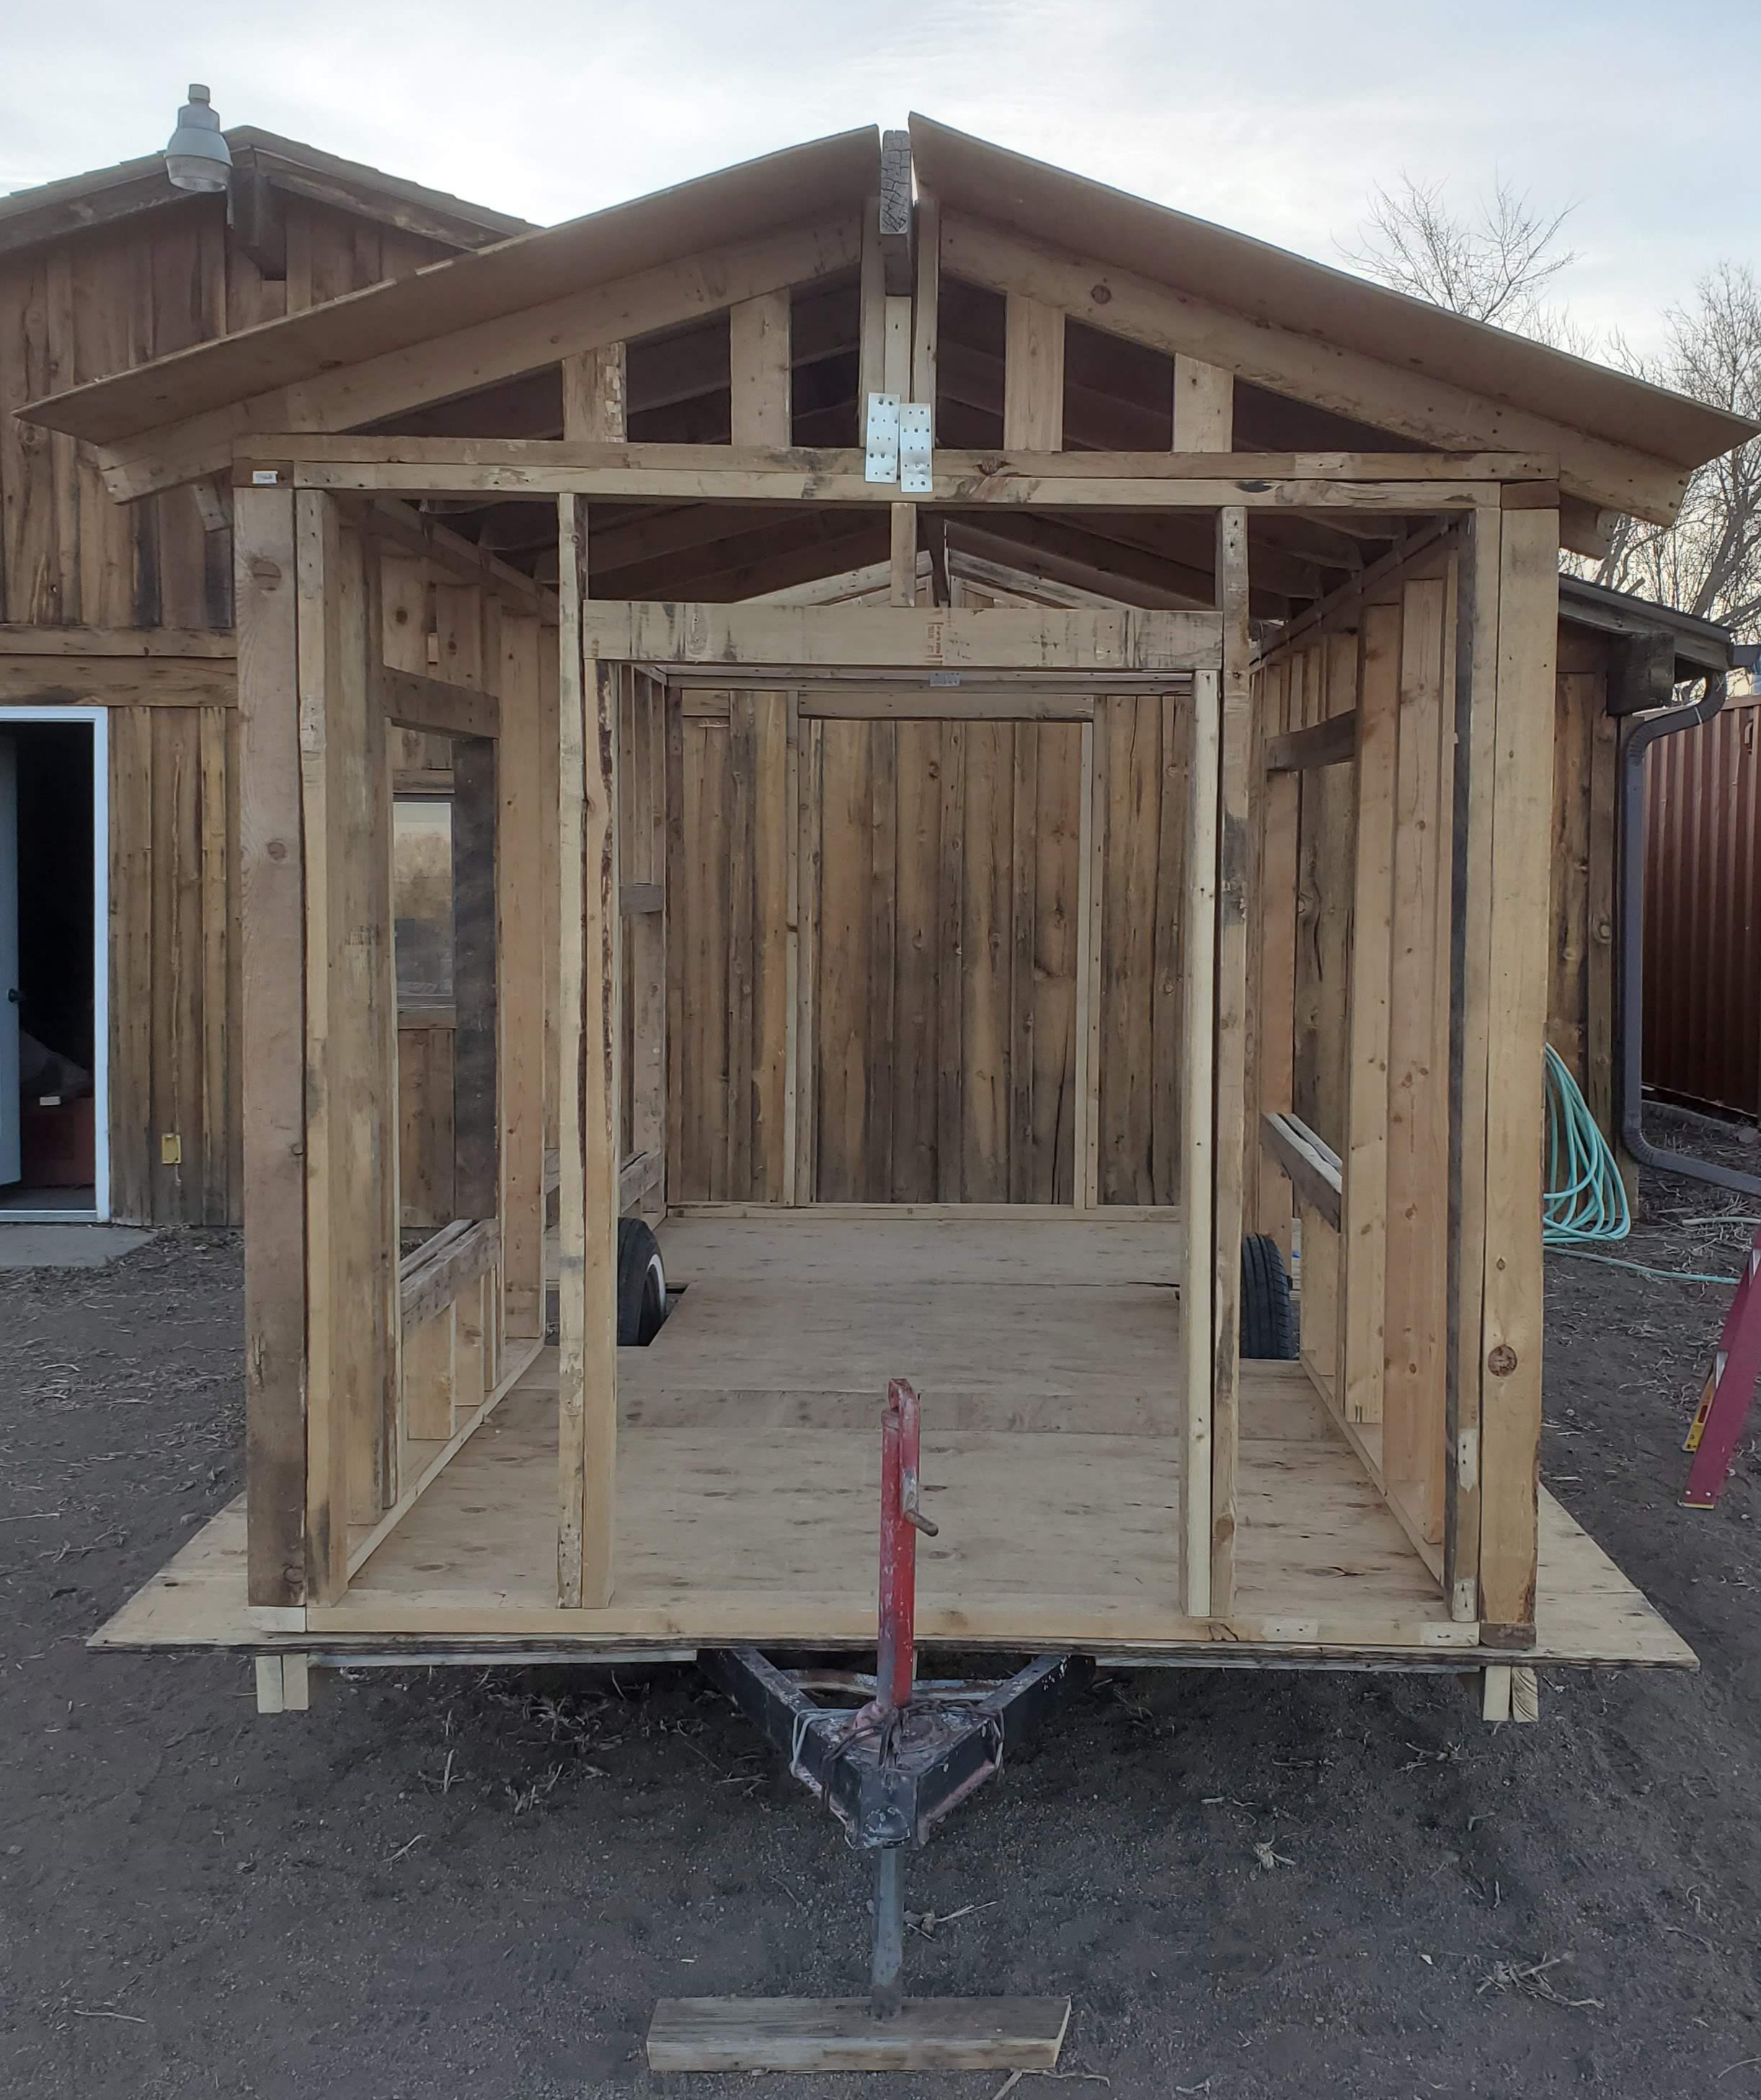
Pulled the trailer outside and began building the larger wall
YV1iQzS.jpg


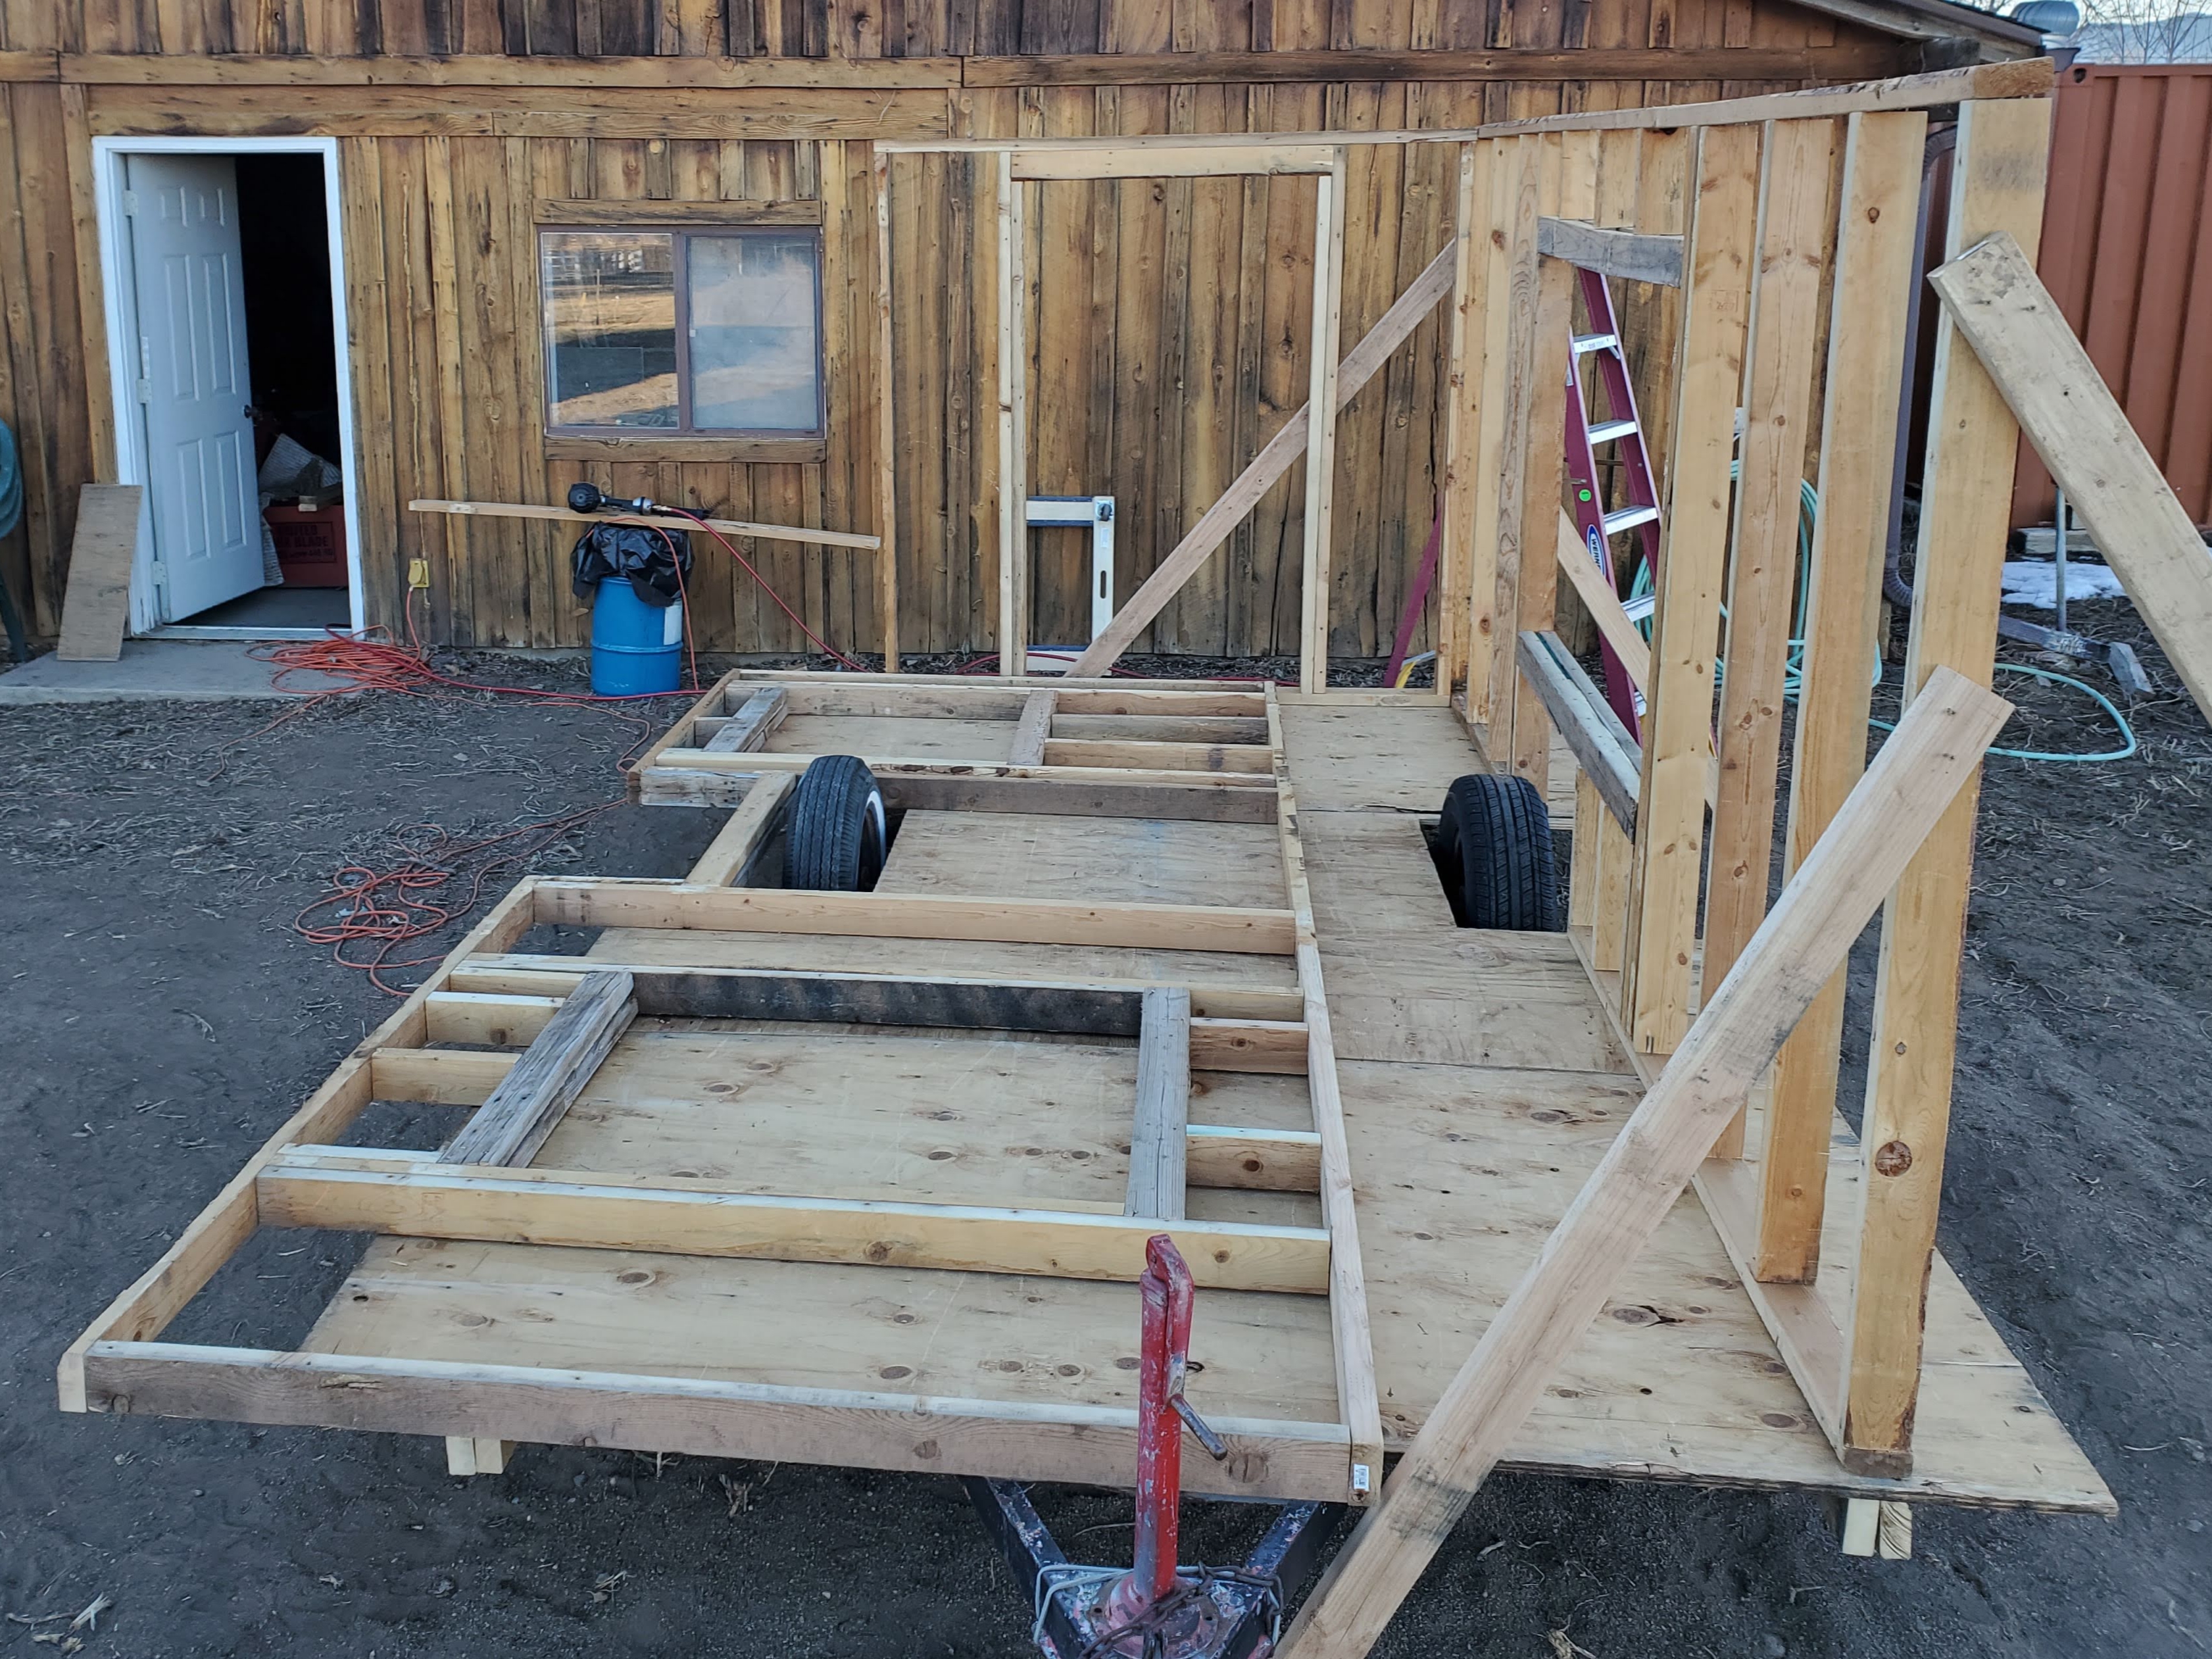
Once built, I pulled out the front and back doors which I previously built. Working alone meant standing the walls up then bracing them with 2x4s.
2Zrqt3L.jpg


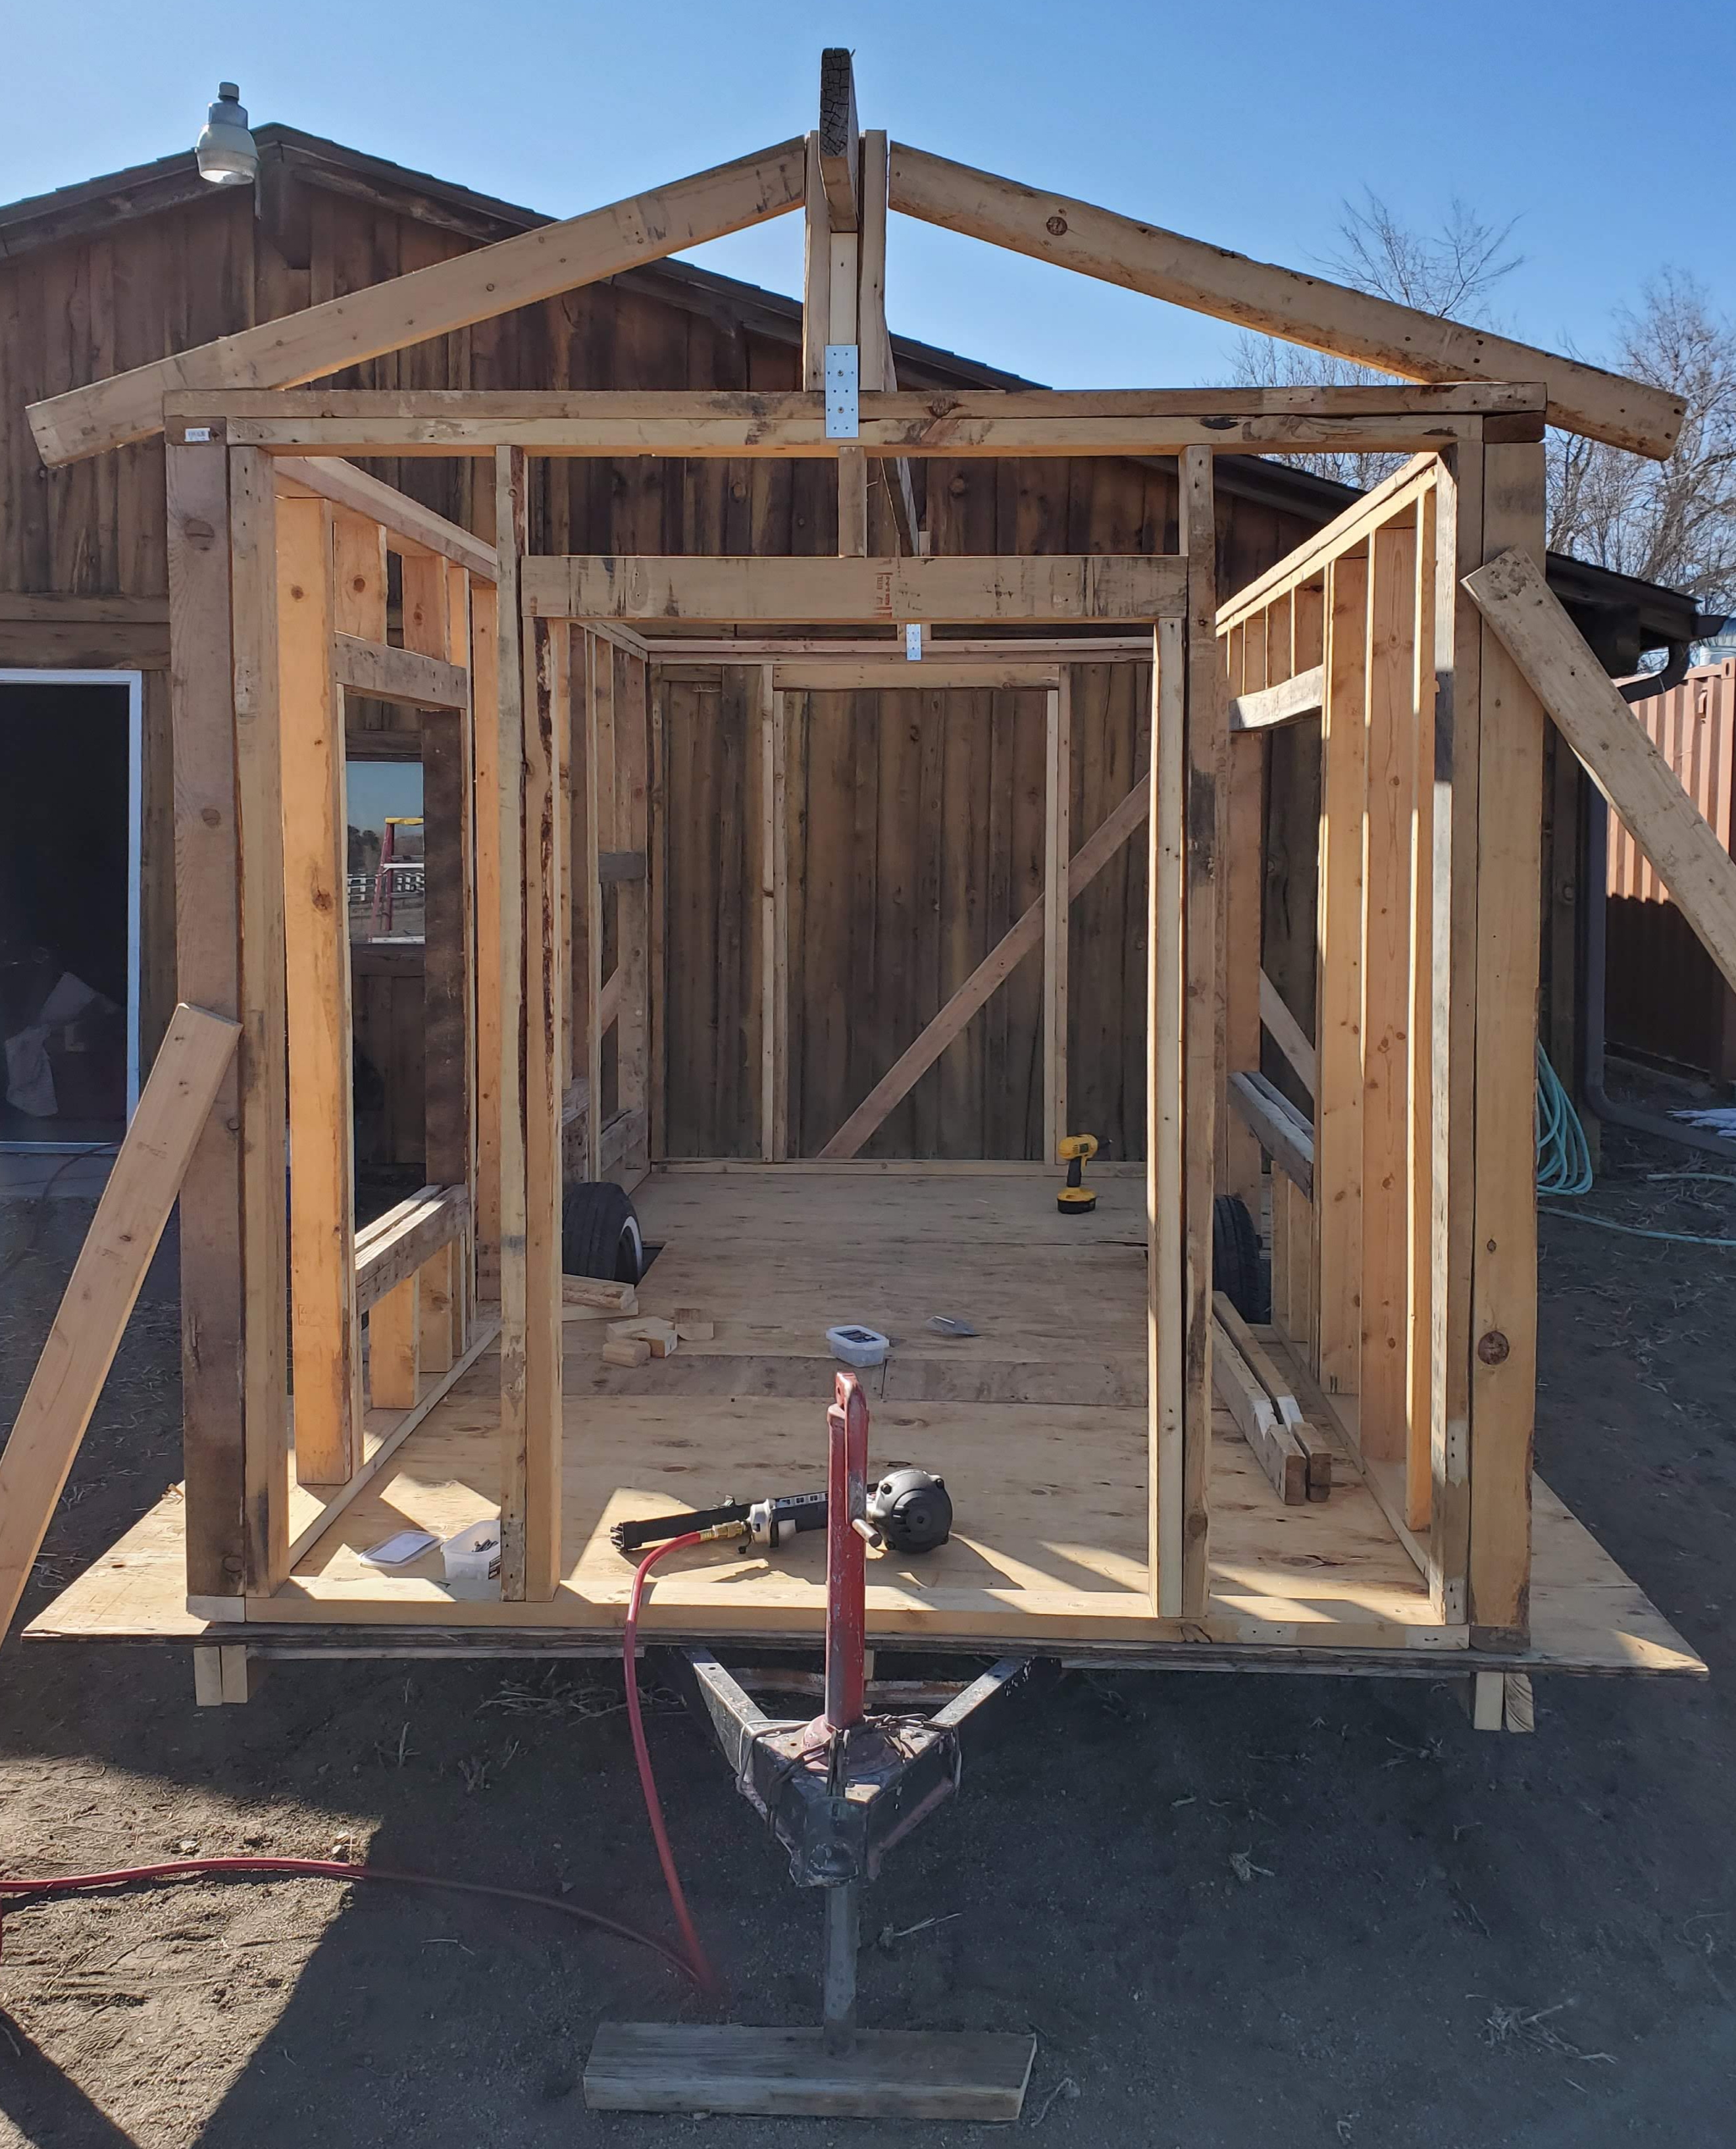
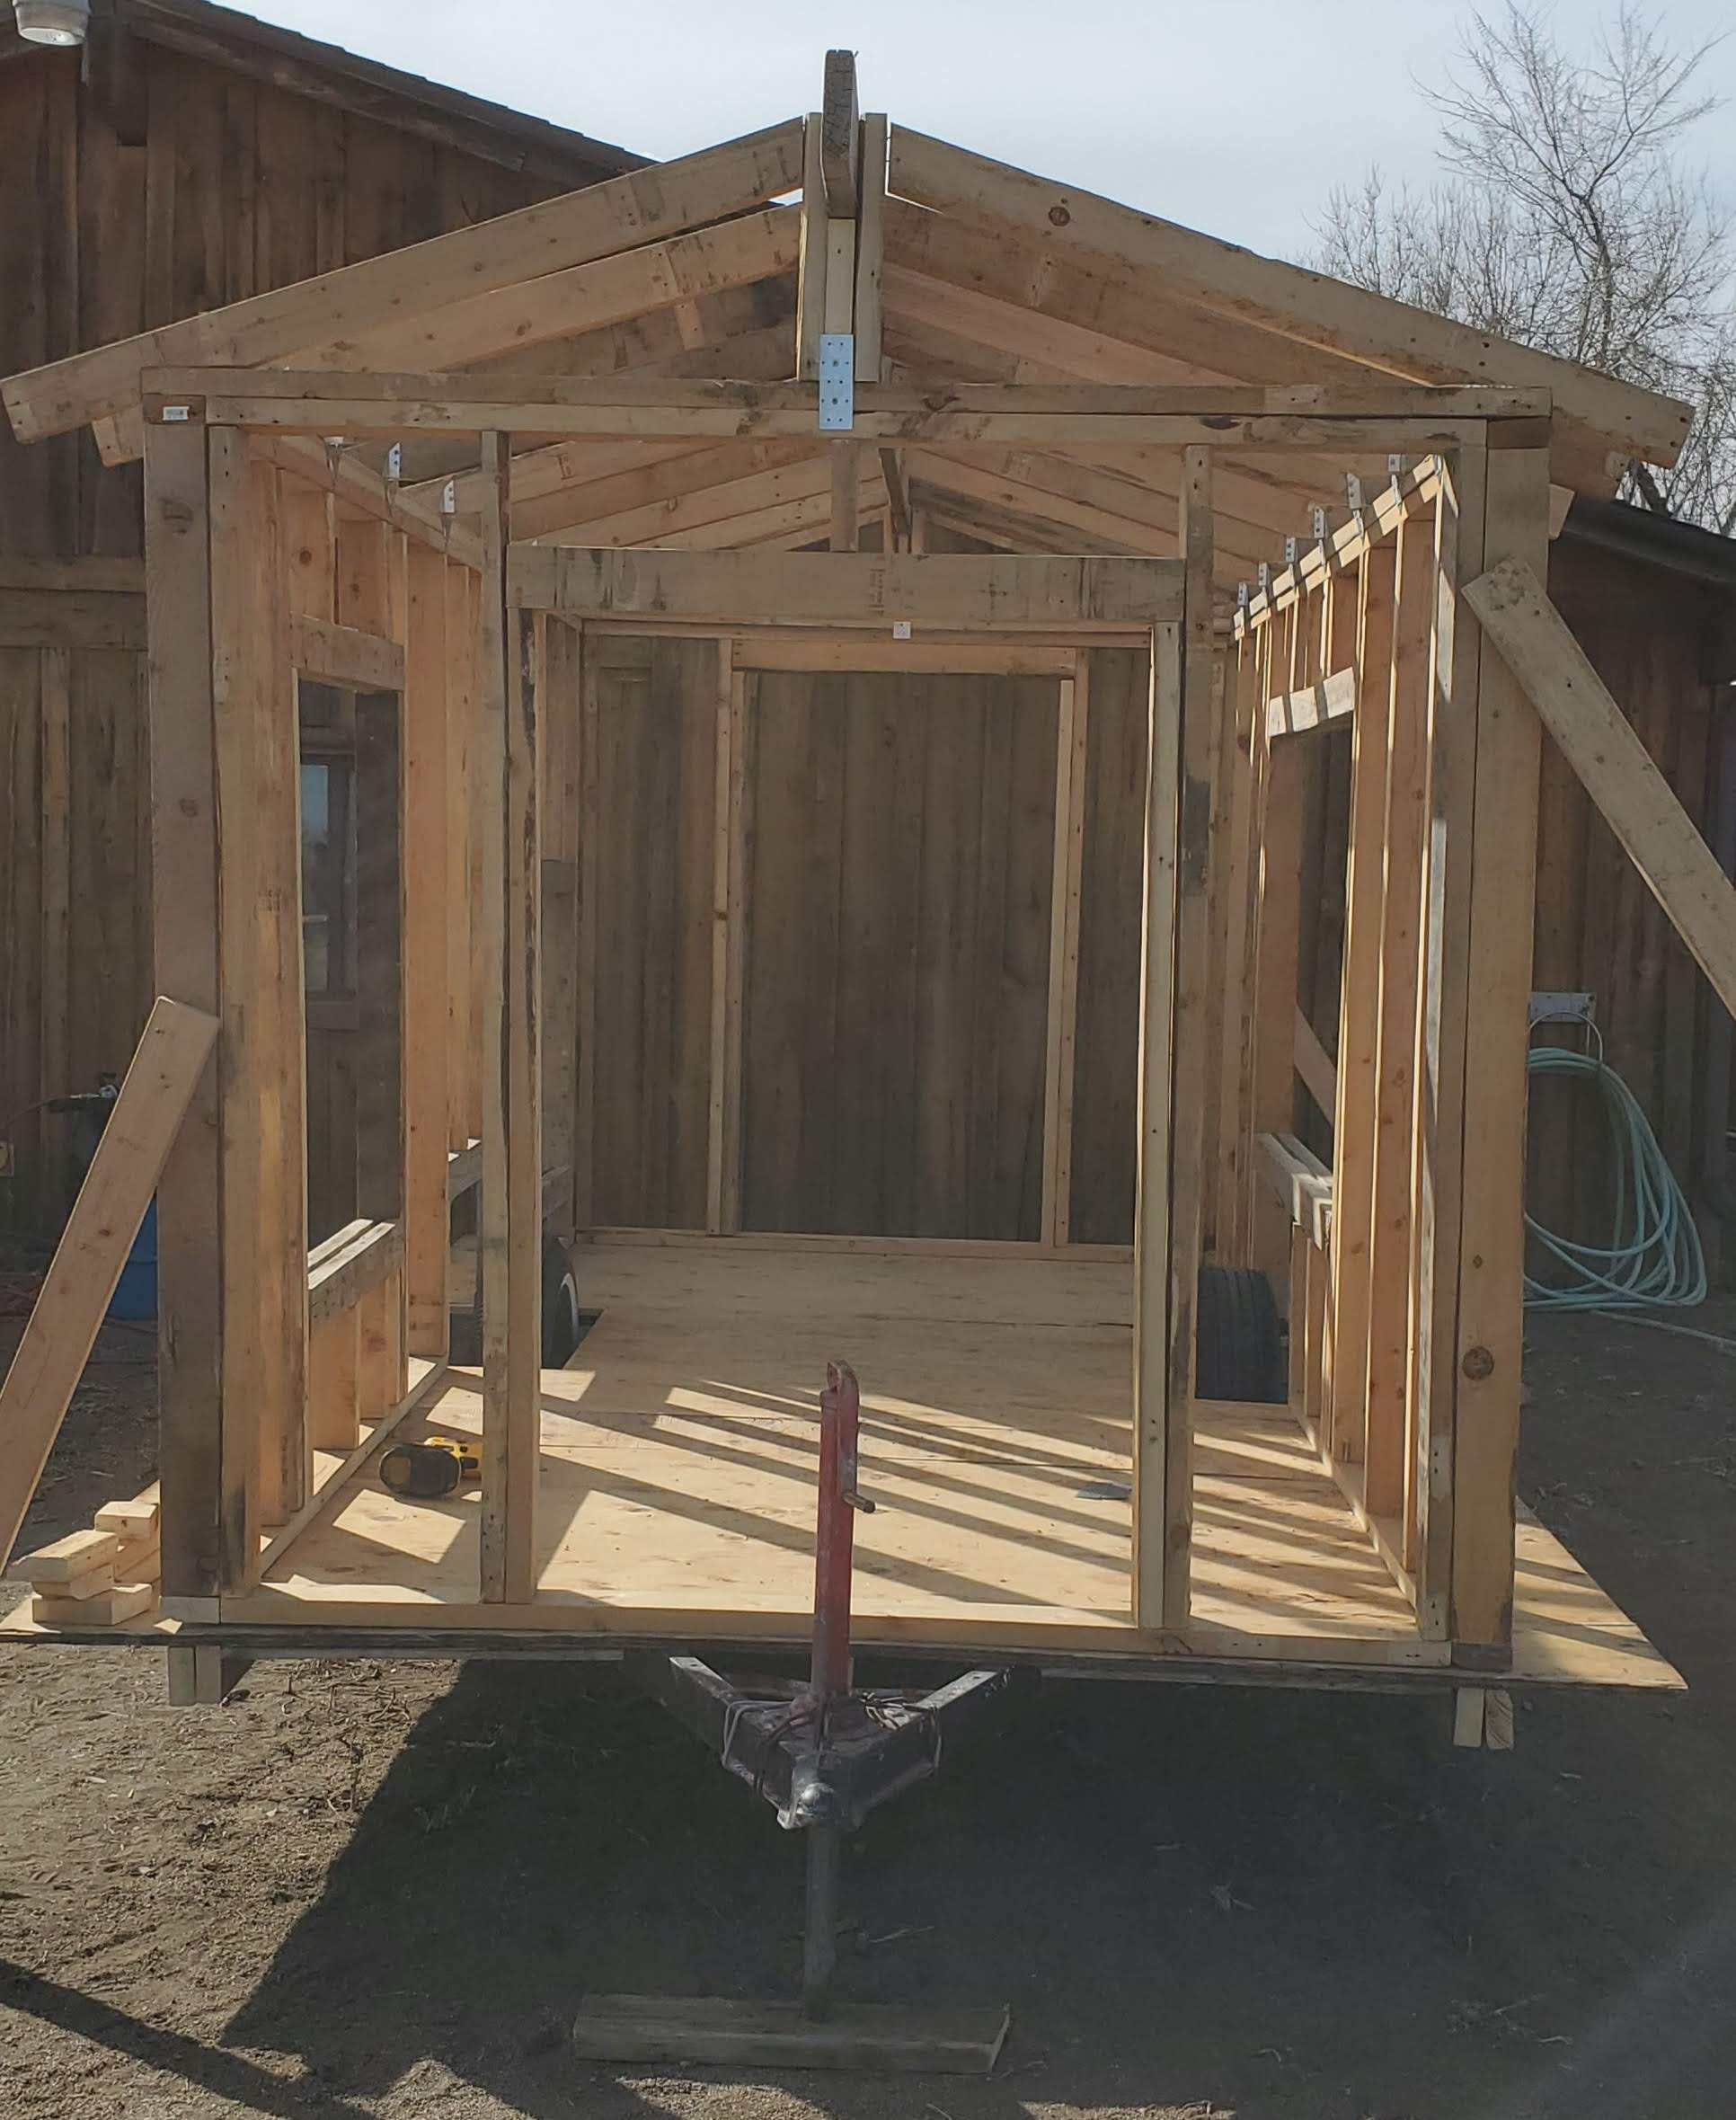
I spent a lot of time getting the ridge beam braced and the right height. In this pic I had added the top plate connecting the walls, the ridge board and supports, and the first rafter. I later replaced the single metal plate on the beam support with two. It's not coming down! :D :D
YcdVoo3.jpg


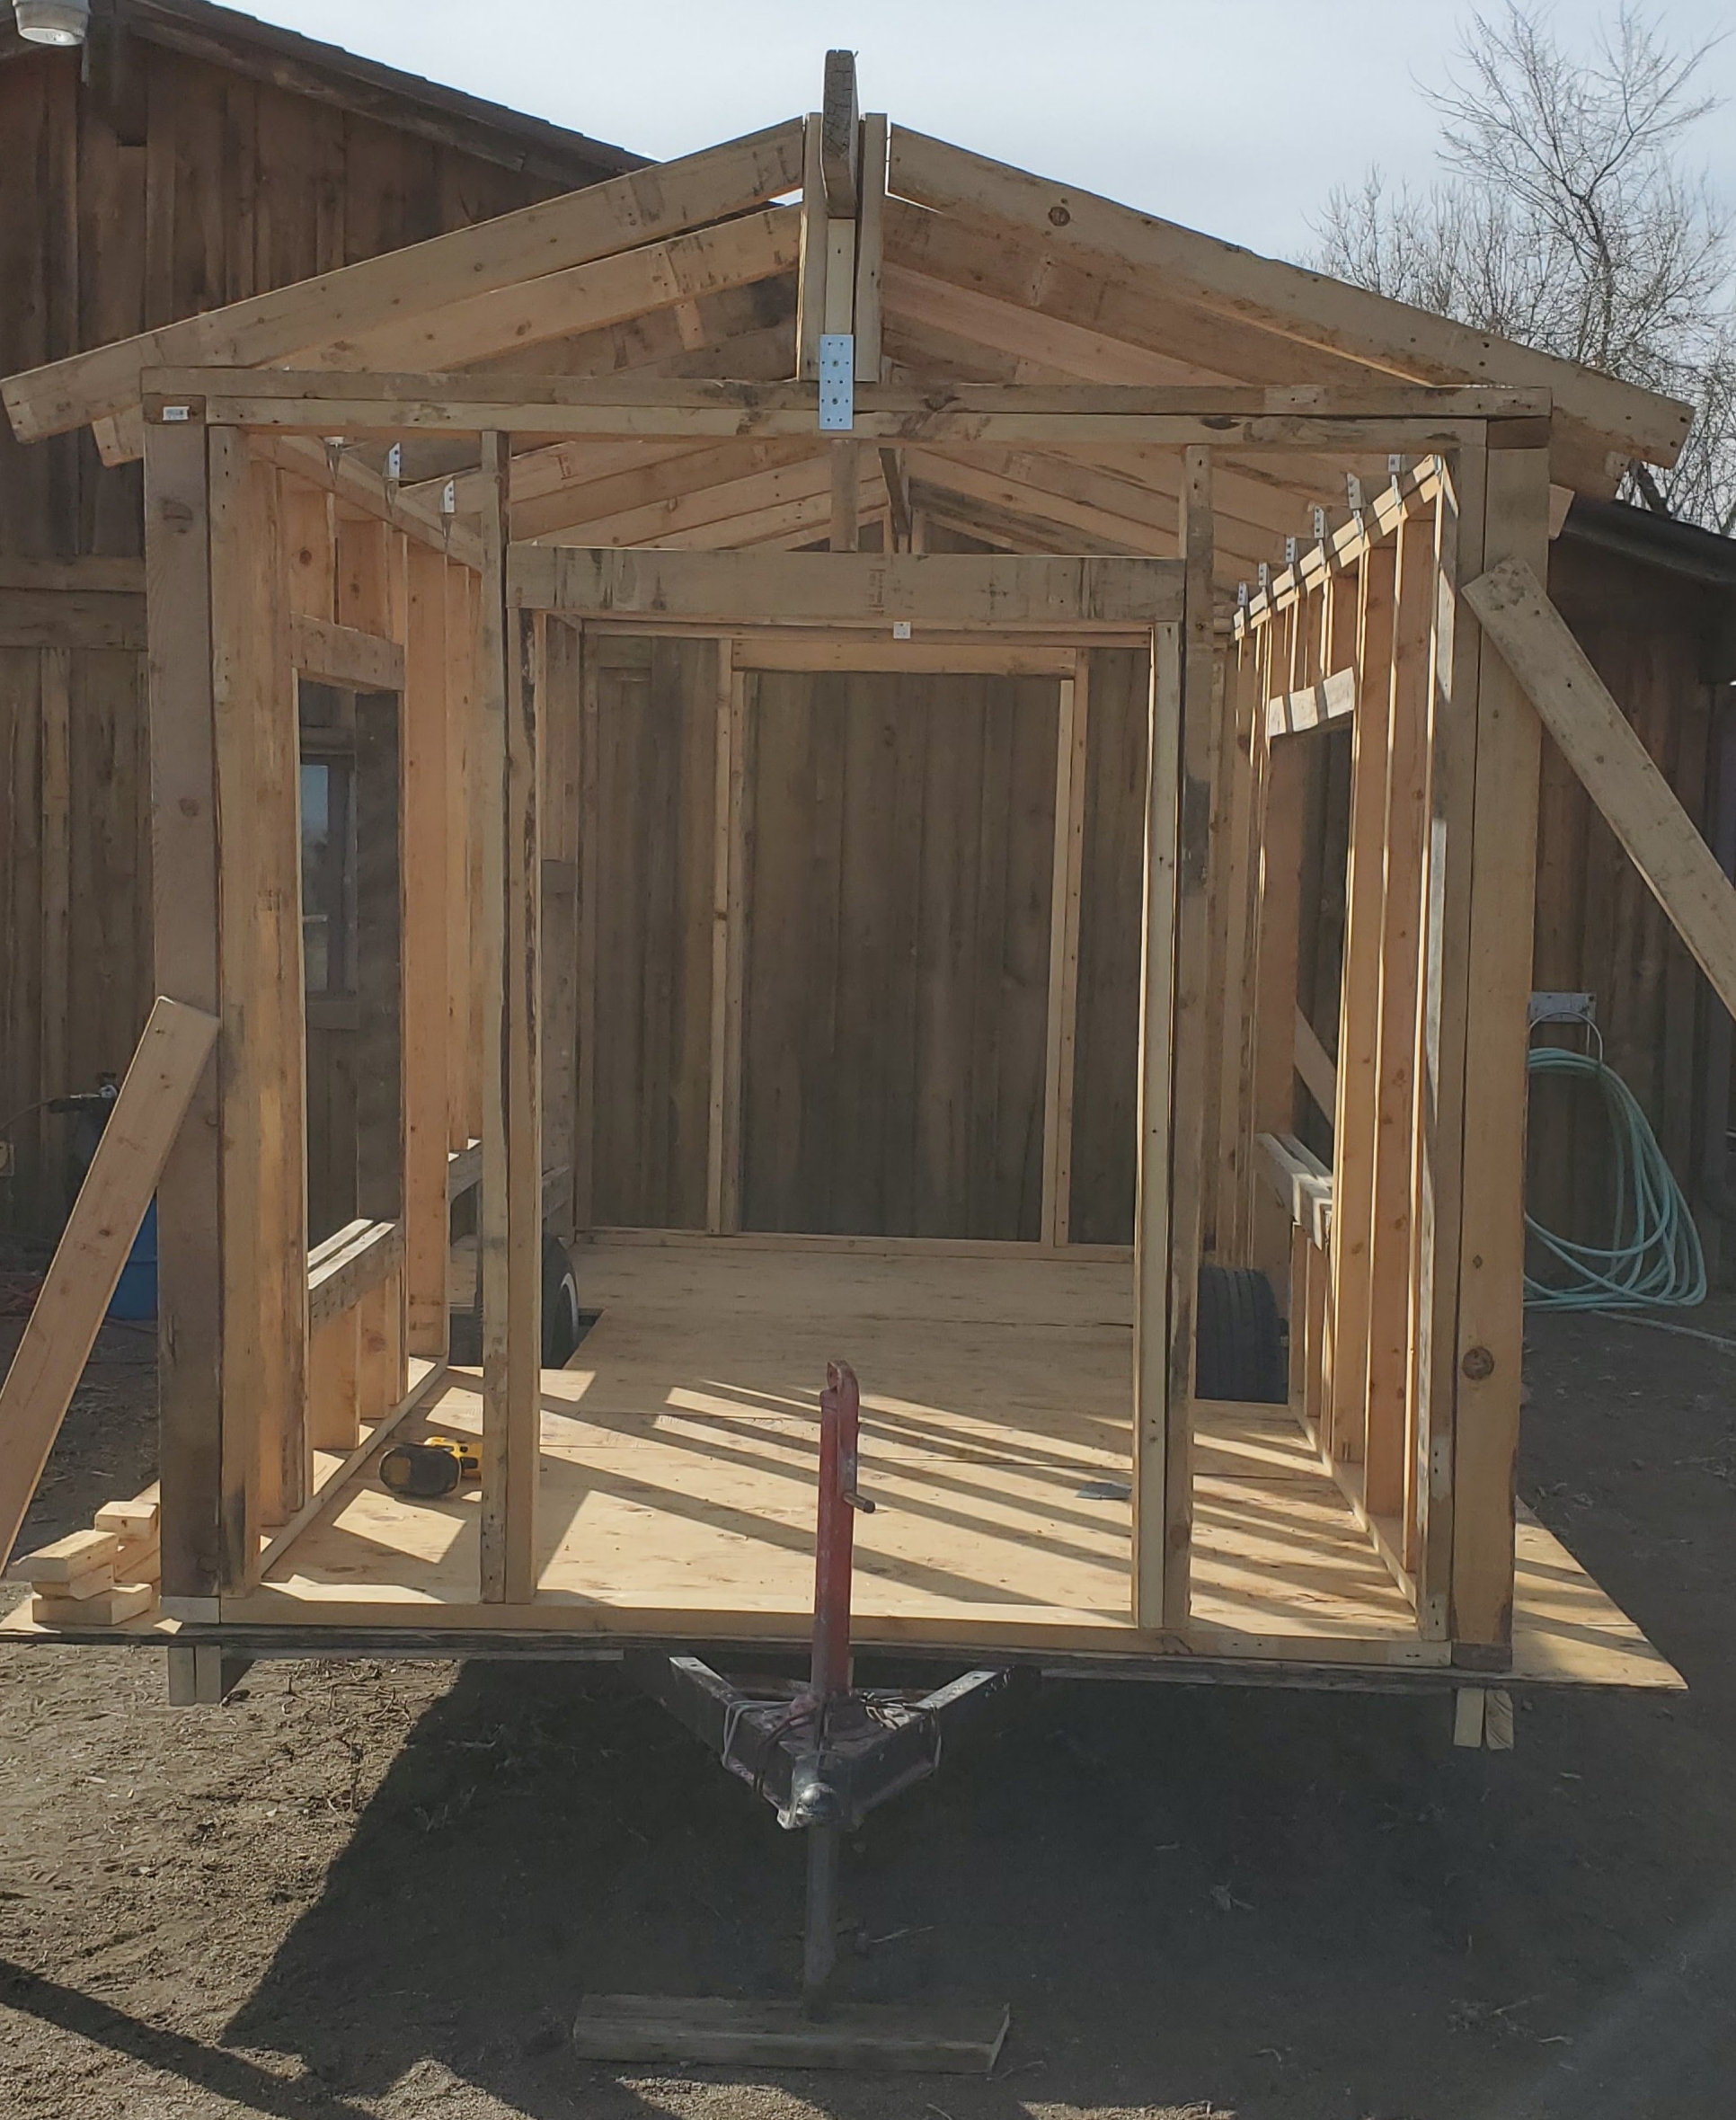
Added all of the rafters. Did you know there are 10 nails holding the rafter the the wall?!?! Then another 3-4 holding the rafter to the ridge beam? My arms are tired!!!
Cra1aTe.jpg


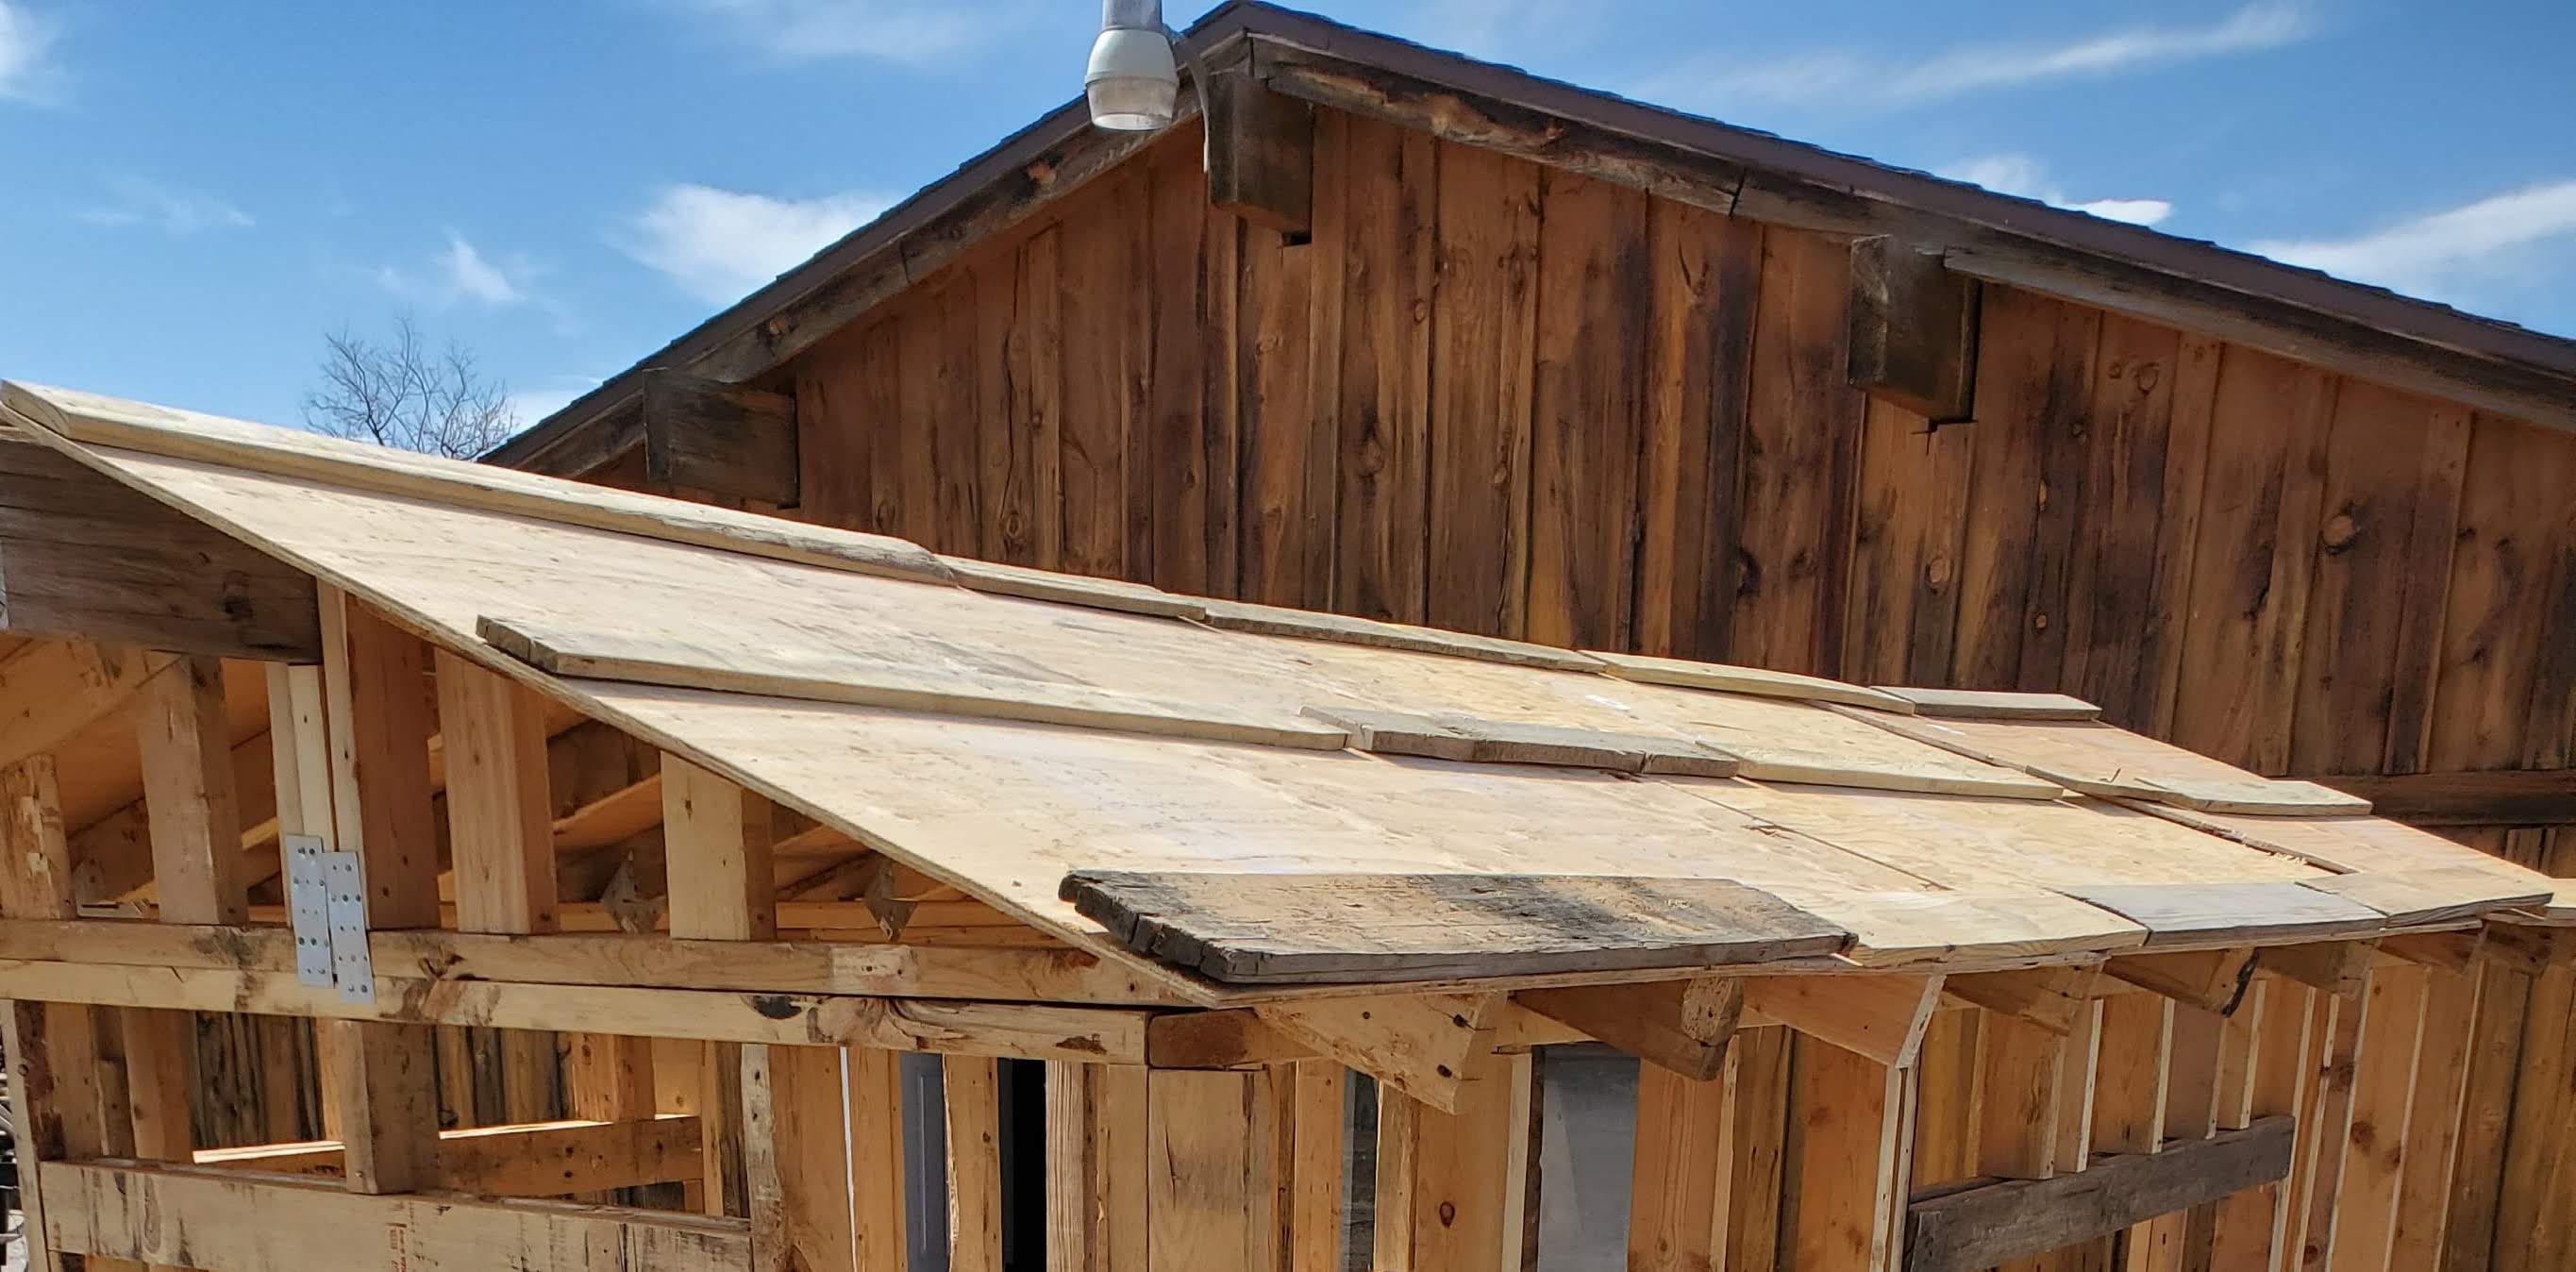
Removed the temporary screws from the metal plate holding the ridge beam support on and replaced it with two, on each side, nailed in. Put the supports in for the end rafters, added 8ft of plywood each top side, and called it for that day. They are building a new bank close by and gave away the shipping containers made of plywood sheathing, free plywood for the roof!
fxQZa5y.jpg


Starting to look like something! It's not close to perfect but the chickens won't care!

Best part is, every bit of wood used has been free. Lots of glue, previous holes, dirt, and twisted 2x4s, but it all works! Let's not discuss hours put in though :D :D :D
 
Last edited:
Also, I shot myself in the finger with the nail gun. It hurt! Now its swollen and sore.
My left thumb has been hit with the hammer so many times that it feels like it's been rubbed raw. It might just fall right off.
Shoulders and neck are on fire from working above my head.
Did I mention the brazillion nails I pounded in!?!?

These chickens better love me!!!!
 
I've been able to again spend some time on this...finally.

Pulled the trailer outside and began building the larger wall
YV1iQzS.jpg


Once built, I pulled out the front and back doors which I previously built. Working alone meant standing the walls up then bracing them with 2x4s.
2Zrqt3L.jpg


I spent a lot of time getting the ridge beam braced and the right height. In this pic I had added the top plate connecting the walls, the ridge board and supports, and the first rafter. I later replaced the single metal plate on the beam support with two. It's not coming down! :D :D
YcdVoo3.jpg


Added all of the rafters. Did you know there are 10 nails holding the rafter the the wall?!?! Then another 3-4 holding the rafter to the ridge beam? My arms are tired!!!
Cra1aTe.jpg


Removed the temporary screws from the metal plate holding the ridge beam support on and replaced it with two, on each side, nailed in. Put the supports in for the end rafters, added 8ft of plywood each top side, and called it for that day. They are building a new bank close by and gave away the shipping containers made of plywood sheathing, free plywood for the roof!
fxQZa5y.jpg


Starting to look like something! It's not close to perfect but the chickens won't care!

Best part is, every bit of wood used has been free. Lots of glue, previous holes, dirt, and twisted 2x4s, but it all works! Let's not discuss hours put in though :D :D :D
The build is going very well!
 
Also, I shot myself in the finger with the nail gun. It hurt! Now its swollen and sore.
My left thumb has been hit with the hammer so many times that it feels like it's been rubbed raw. It might just fall right off.
Shoulders and neck are on fire from working above my head.
Did I mention the brazillion nails I pounded in!?!?

These chickens better love me!!!!
I hope that wound heals up well!
 
Adding more. It's coming along slowly, the roof is now in place and took a lot more time than expected. The roof took about 3 times longer than I expected. Not because of issues but just the amount of time to do each thing and working alone makes things a bit tricky. Each rafter took minor adjustments, lots of nails, and focus so I didn't pound my thumb any more. :D

EV1xxOr.jpg


Then I put on a 3/8" layer of plywood sheathing which I reclaimed from a shipping box/container. I then added purlins (aka strapping) made from pallet slats. Some of these pallet slats were so strong that I had to pre-drill nail holes in order to not bend nails!!

3nFiN6q.jpg


Then came the 30# felt (wind is blowing a bit lifting it up in the pic)
DlYiKsb.jpg


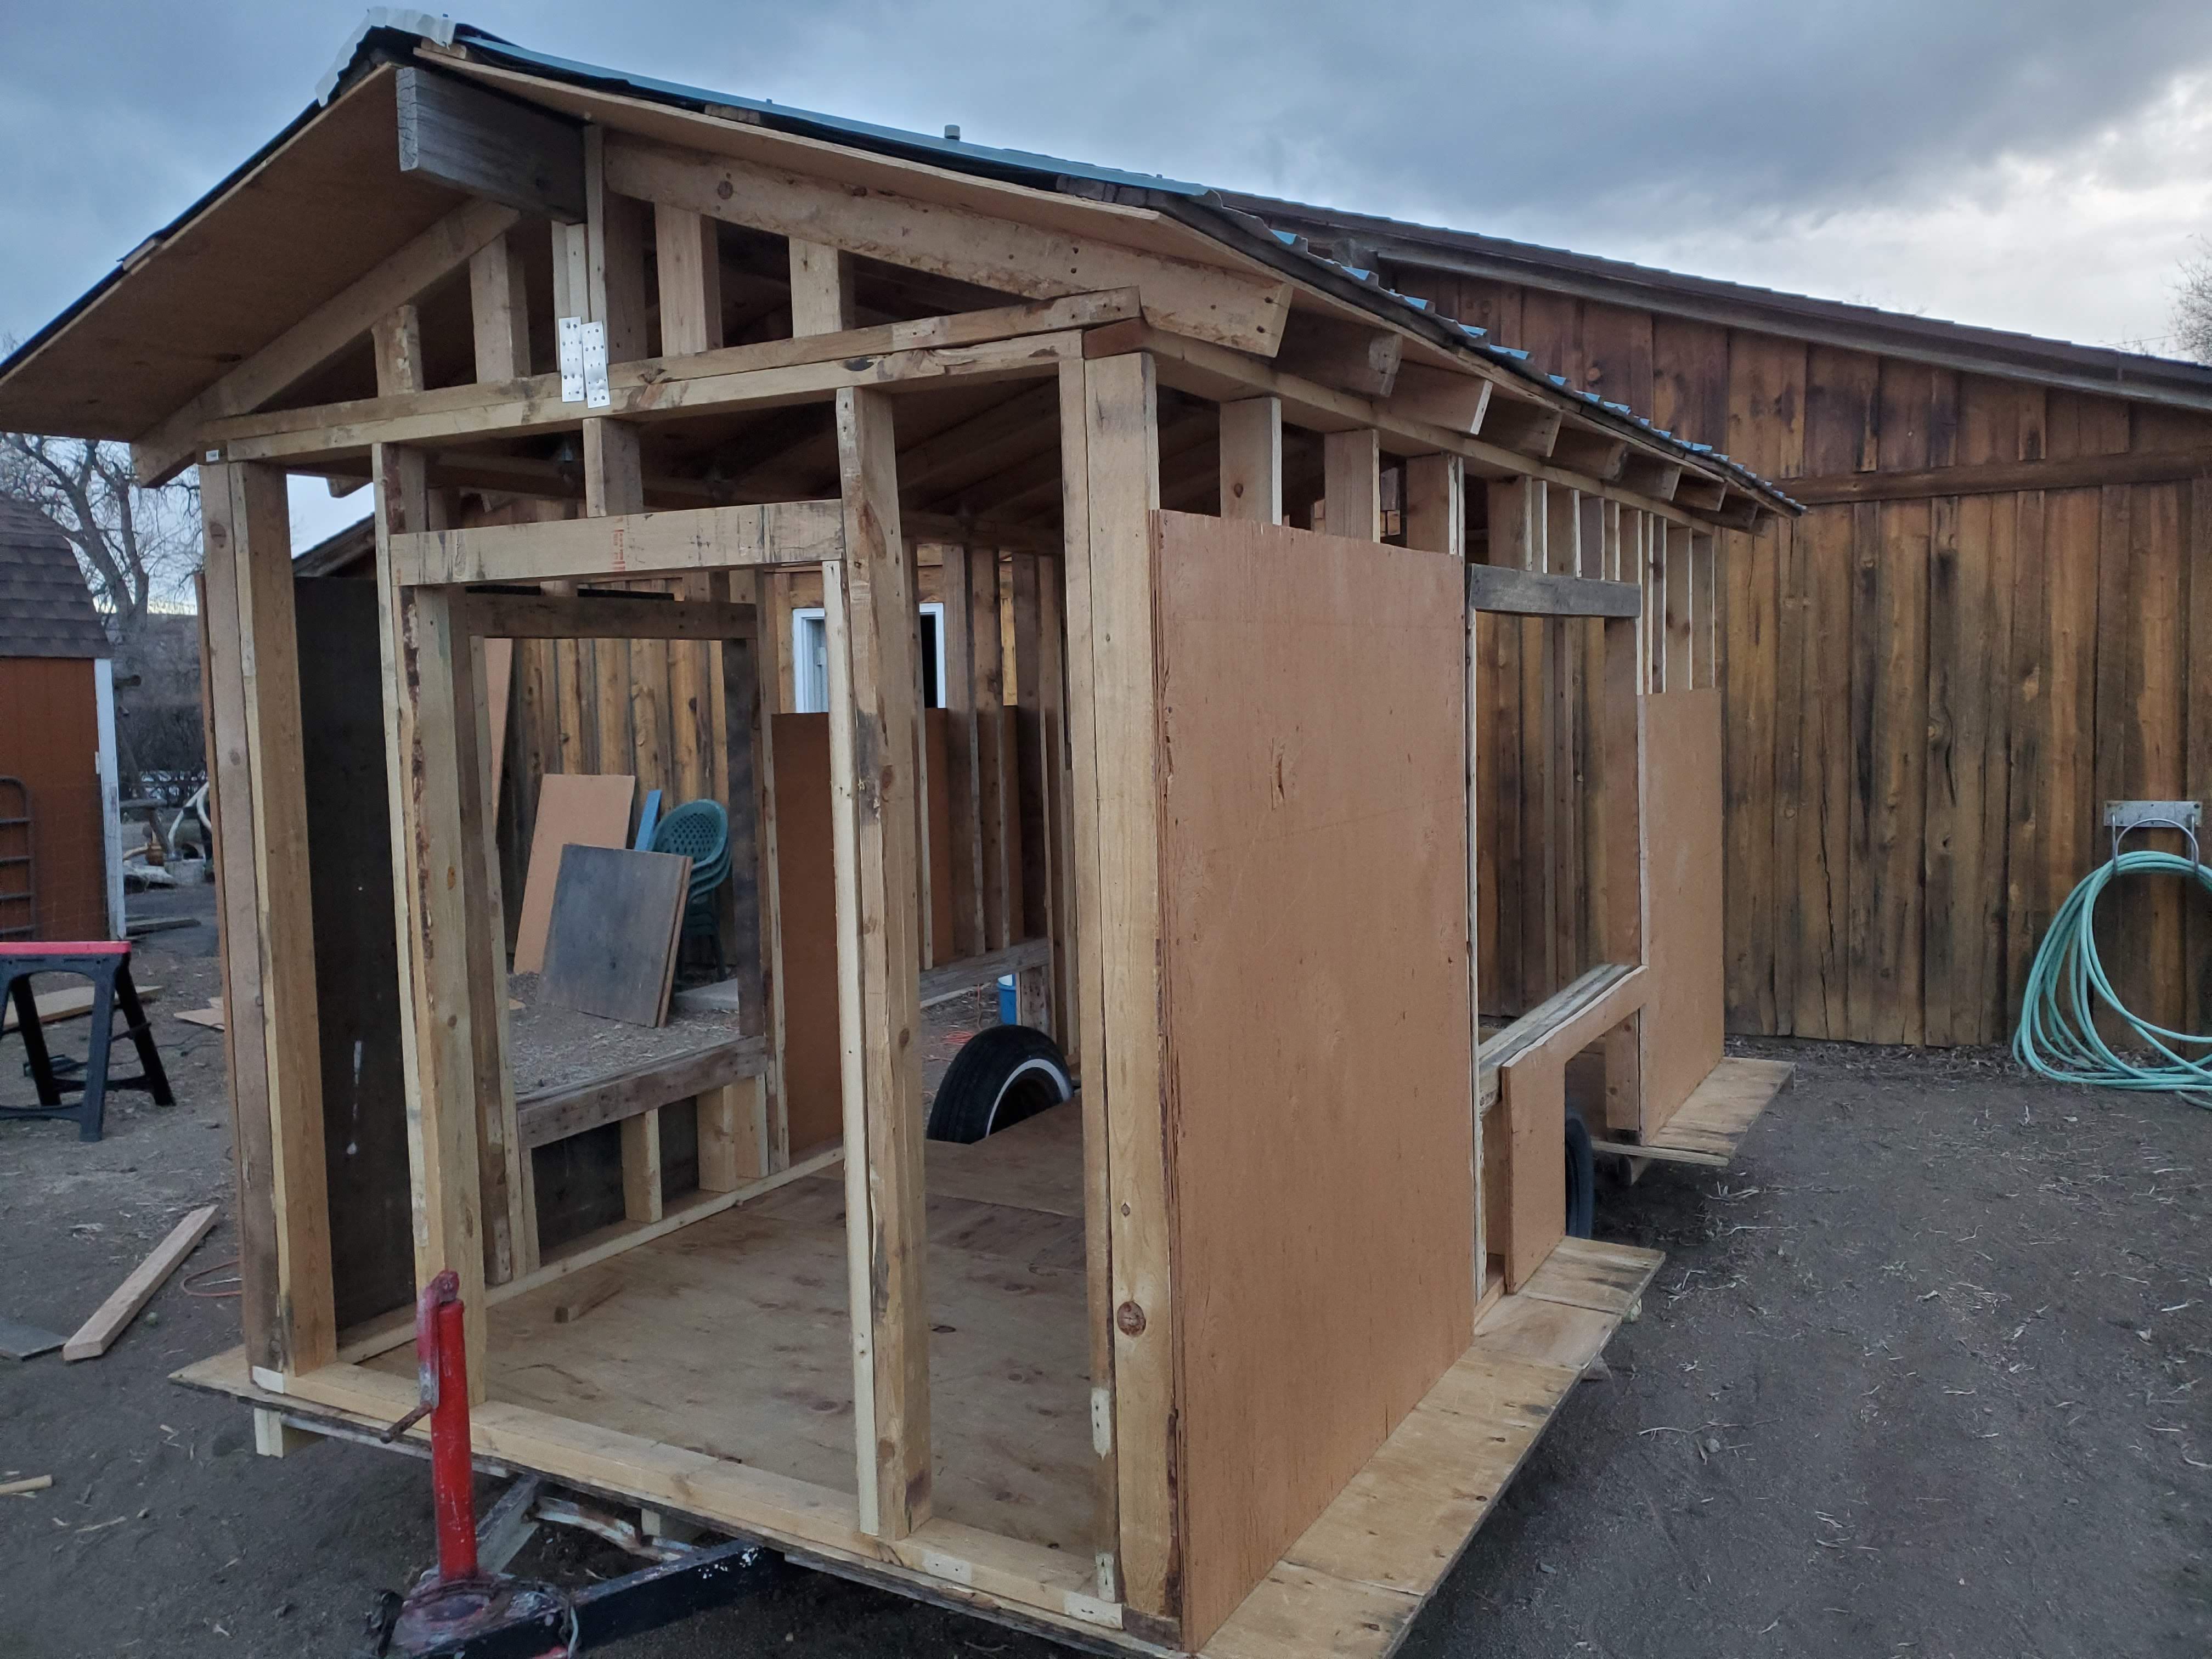
Then the metal roof, foam to prevent water from blowing up under it the cap, then the cap. One day on Craig's list I found a post where someone was giving away the materials from a large loafing shed. It took me an entire day to remove the roof but I came home with 16' long sheets of metal roofing plus six 15' long 2x6s. I did purchase the roof cap and foam:

wJ2l4W4.jpg


I was even able to get a couple of the walls on

QP9VIoz.jpg
 

New posts New threads Active threads

Back
Top Bottom