TWEAK MY COOP~Tweaks on the Cheap

Beekissed

Free Ranging
16 Years
Feb 14, 2008
22,974
5,277
742
This world is not my home.
Just thought I'd start a thread on coop tweaking...sort of a "Pimp My Ride" for chicken coops, but without all the glitzy frills. I don't think it's something that ever really ends as the flocks change, weather cycles change, materials wear out or you realize someone out there has a better idea that you could use. Getting ready to do the traditional spring coop tweak and, as usual, I always look for ways to do things cheap or free because chickens should be a benefit, not a liability. Anyone can throw money at a coop and make it stick, but it takes real ingenuity to do the same thing without throwing money at it, so those are the tweaks that intrigue me most..sensible, sturdy, workable cooping.

Feel free to post pics and details of your current tweaking project~especially if it's focused on repurposing or recycling things on hand, or things you've scavenged for cheap or free...I find those to be the most interesting coops of all. I'll probably be stealing pics and posts from the DIY thread because those folks have some fantastic ideas..that's a thread that's worth a look when trying to turn scraps into coops. Please don't post pics and such just to show off your mega coops that have cost you thousands of dollars to build...this is just not that kind of thread. This is a thread about finding cheap solutions for an ongoing need....more ergonomic cooping.

Knowing that this original post will be lost to editing in a few short days, I'll try to show what I'm working with and a loose idea of what I'm moving towards and why in this first post, so please forgive me if it's a tad long with pics and such.

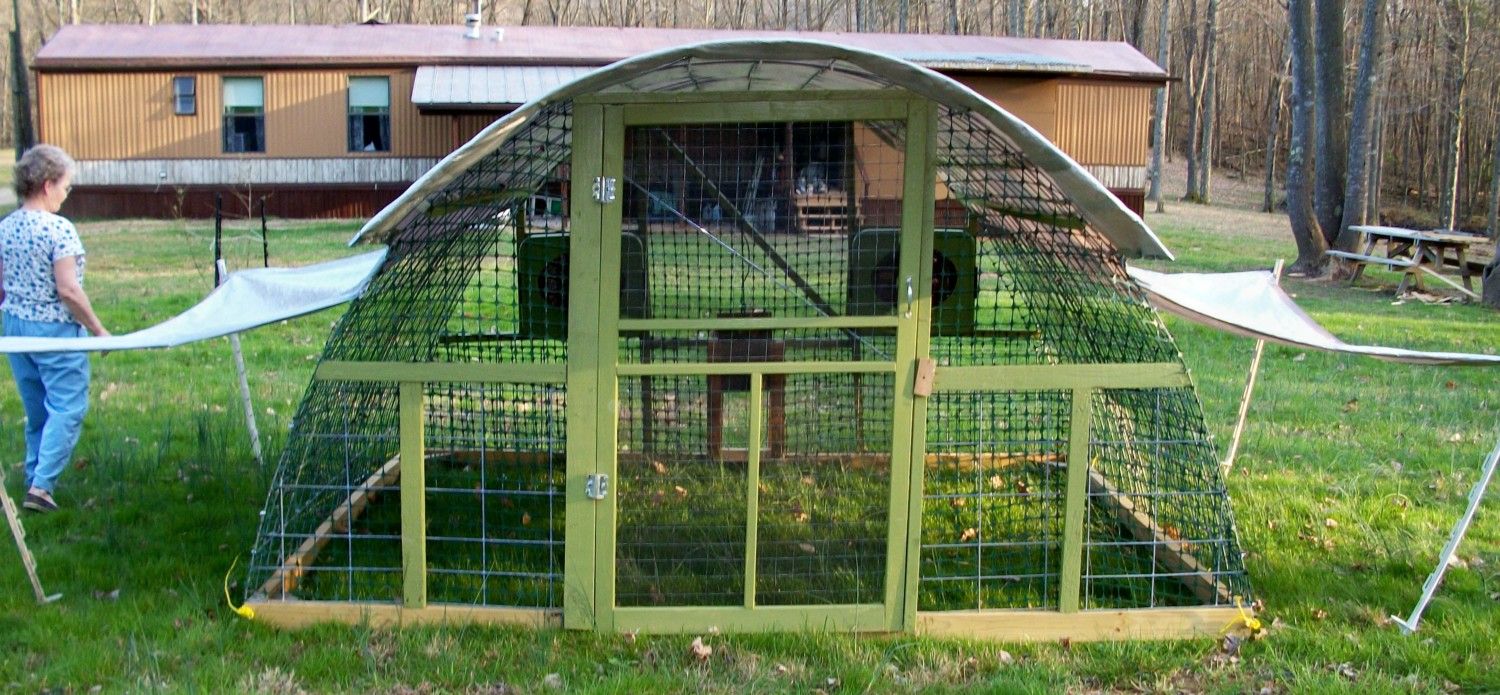
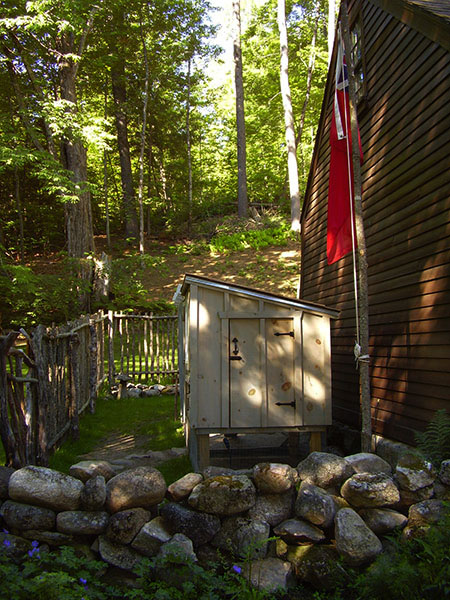
Here's the coop I built over 2 yrs ago, an 8X10 cattle panel hoop coop. It was originally built for my mother, so small was okay...she's a small person. I think she is in one of the pics. But, guess who is using it the most? Yep..me. I'm not small. I'm not even medium. So this little Hobbit coop is really crampy for me to move around in, but I'm determined not to go larger on the coop size..that will just be more expensive. I just want to make this coop FEEL larger by changing the design and equipment a little.


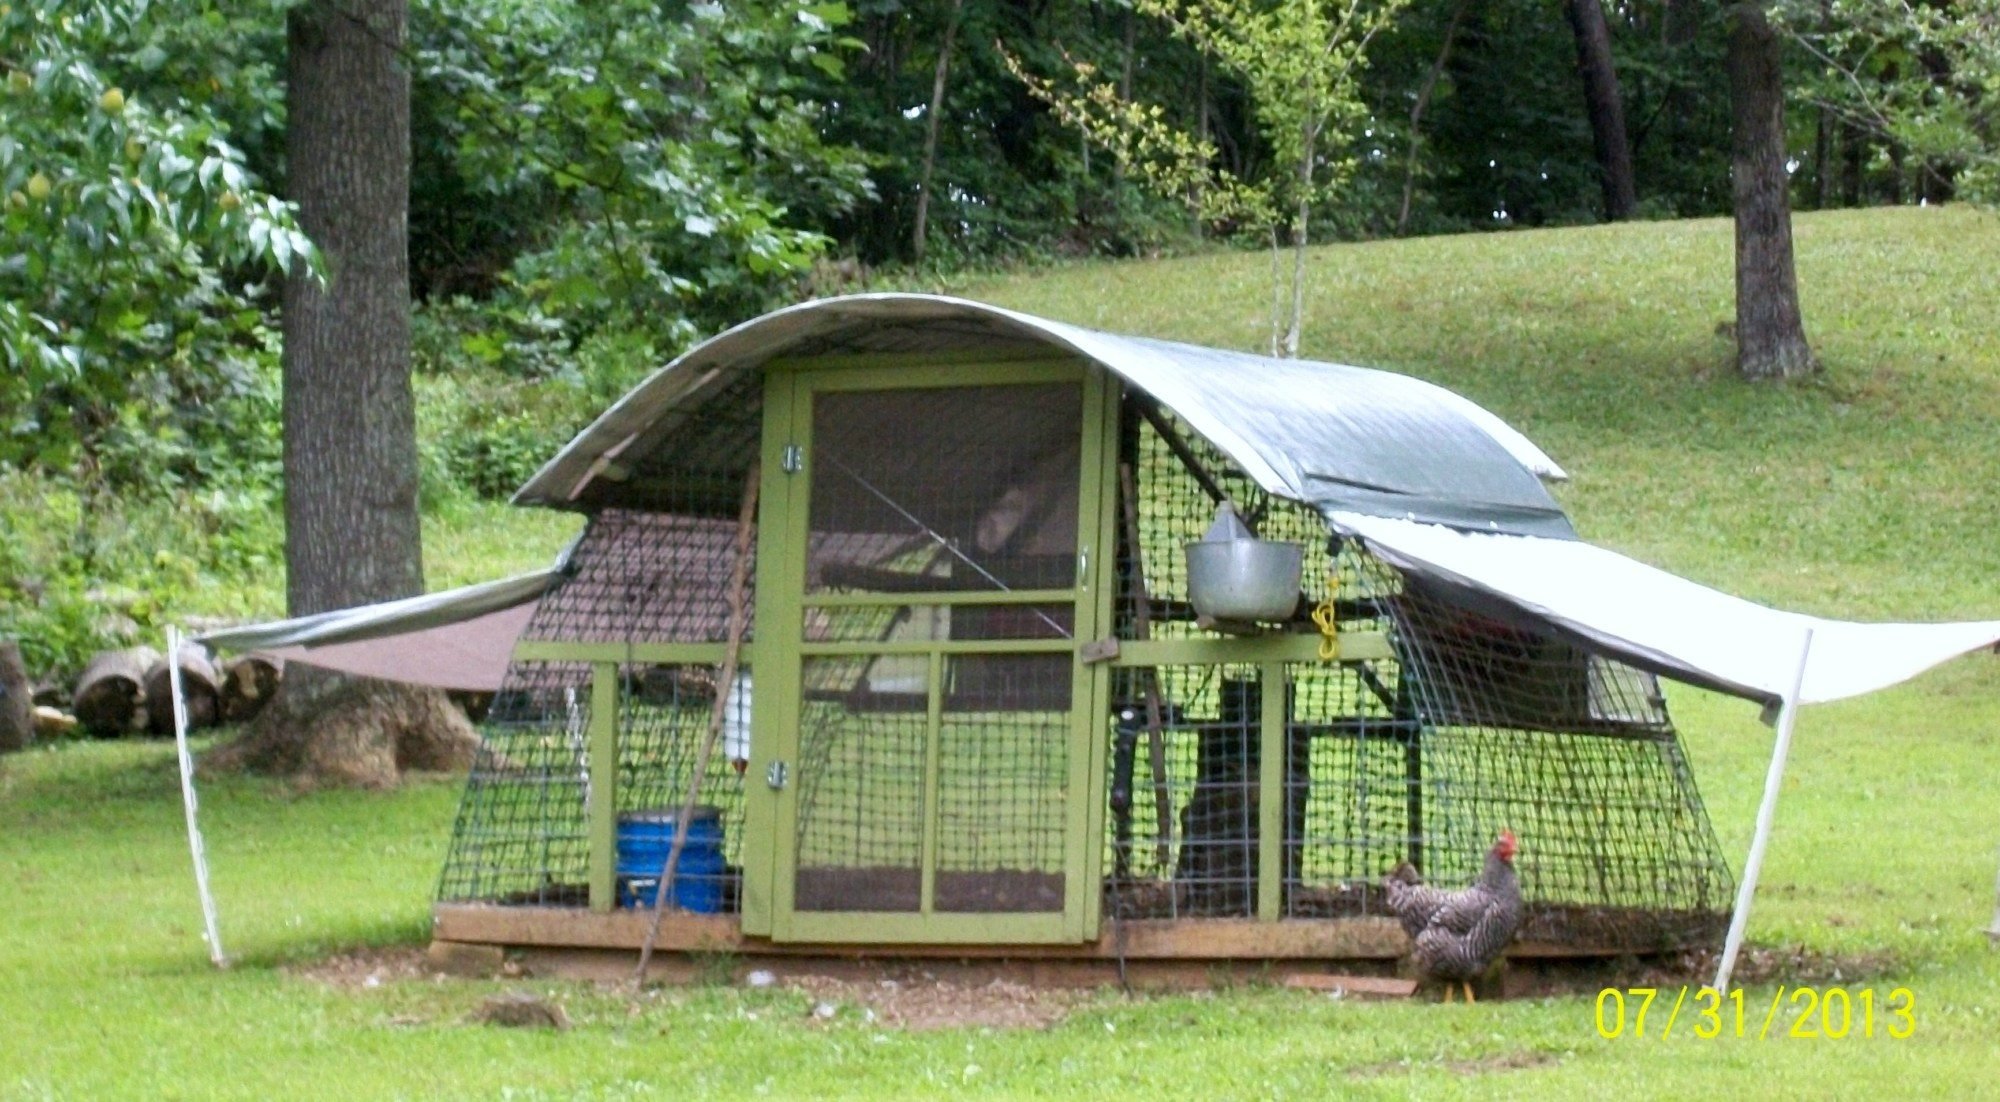
At first, the design was working and I loved the coop, but soon started to see some flaws in my original ideas. I won't go into depth but the coop leaks in some areas, I should have placed the pop door in the front of the coop and also the nest boxes. And I should have more nesting situations. Ultimately, I'd love to have a bigger coop but I'm determined to keep my flock small enough to fit into this coop. I just need to do things better to do that.

This winter was the real clincher...the extended and severe cold and snows left me with a coop that was dark, dreary, wet and chilly. None of the chickens got frostbit or anything but I just wasn't satisfied with the way the coop was performing. I like my chickens to have light...lots of it...and air, lots of it.

In the winter time that air is even more important and my coop has plenty, but it just seemed to be too scattered, leaving the coop too cold for my liking. I won't heat a coop, no matter how cold it might become, but I do like my coops to retain a certain level of warmth that is some degrees warmer than the outside. I use deep litter, so that's always a challenge for winter cooping to provide the necessary ventilation to accommodate the deep litter process.

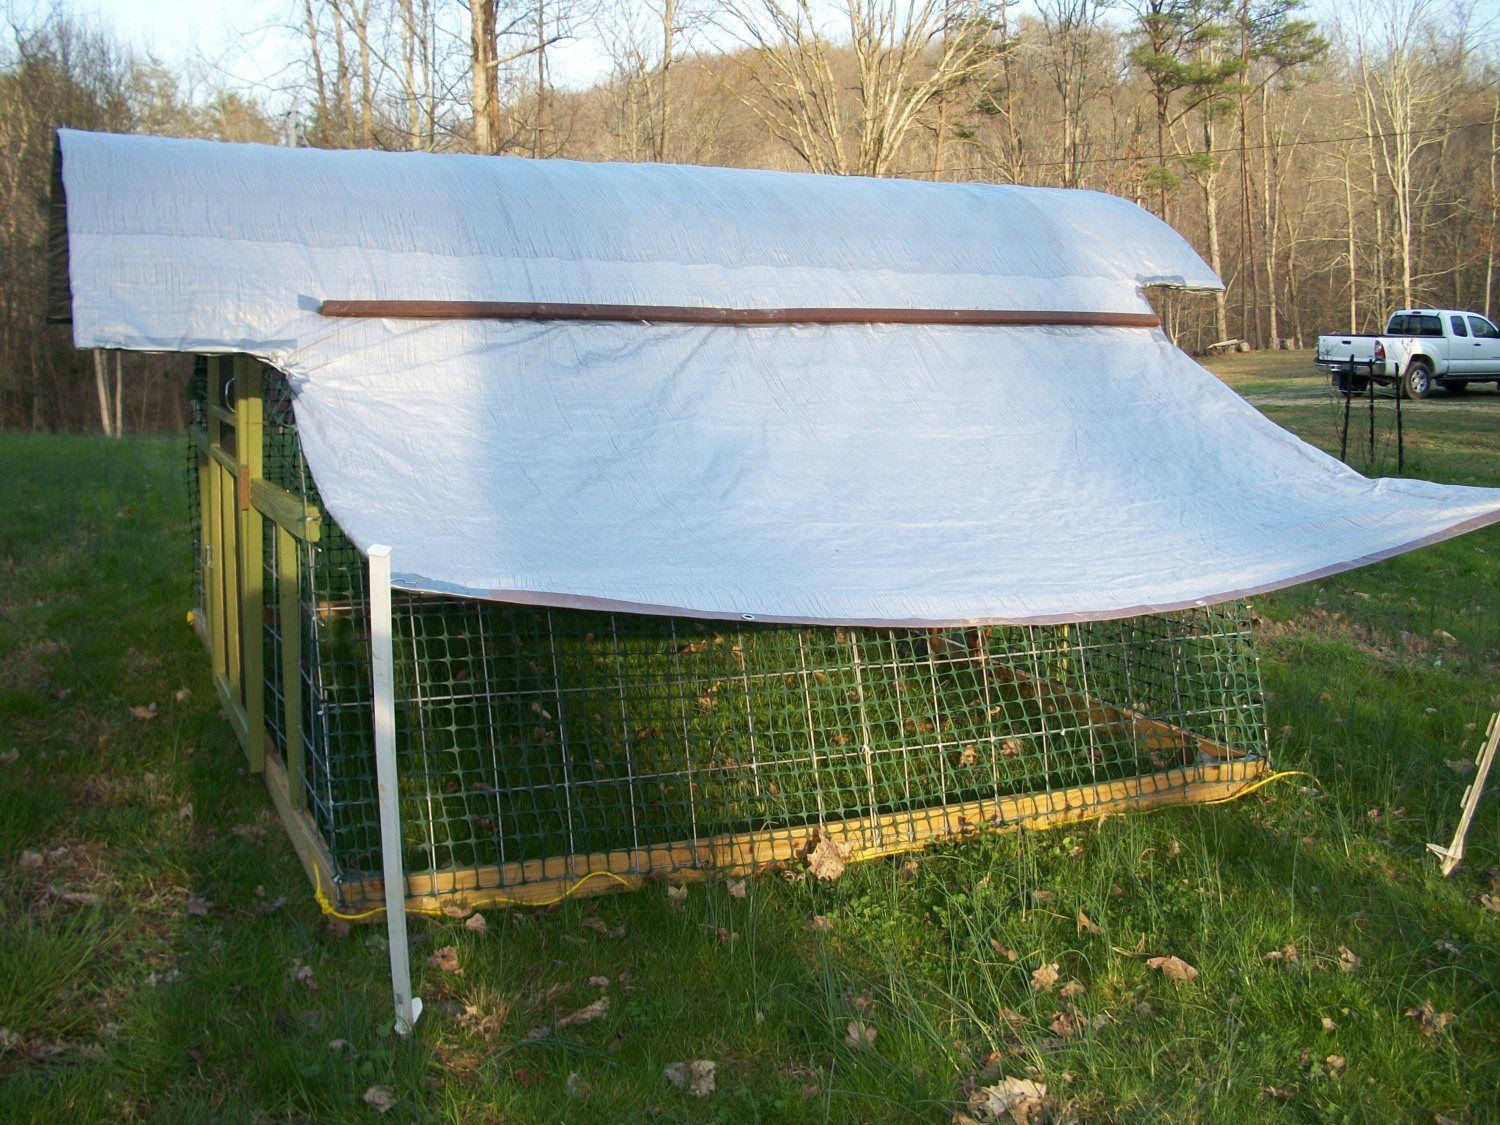
My tarps need replacing, so I'm taking this opportunity to change the weather tightness of it all, while adding more light. I've ordered a clear tarp as my base tarp for the coop so as to let in light and the warmth of the sun this next winter. In the summer, I'll apply a smaller tarp at the roof to provide shade.

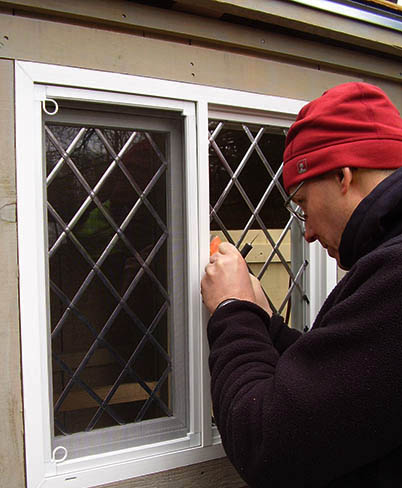
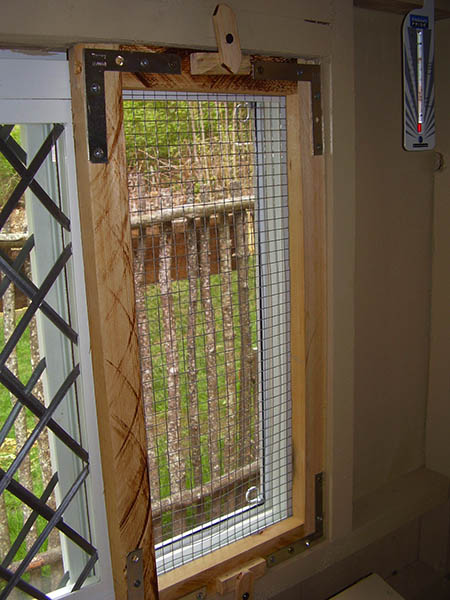
I'm going to build in the end caps with the abundance of scrap lumber we have here...it will be a hodgepodge of types and sizes of lumber but a coat of paint in the end will make it all look right. I'll be placing windows at that time...just wooden shutters that can be opened or closed and the opening will have netting over it. I'll be placing ventilation panels at the bottom of these end caps as well...I'll show a pic of those later. I happen to have a few on hand.

I want to devise nesting boxes that are easily removable in case I get a broody....and then I can slip an extra nest box into that space after the broody box is removed. I'm still thinking on those but I'm leaning towards 5 gal. buckets...I have a few on hand and they are very easily obtained cheap or free. I already have hinges to use for the outside access...these were taken from old kitchen cabinets.

Well...you get the drift. There are many changes I want to make. I'll try to keep this thread updated with pics of the changes and the work in progress, as well as the finished tweak. If there even is such a thing....
big_smile.png
...tweaking just goes on and on....


For the past 3 years I have used a silver tarp on this hoop coop, thinking the color would reflect the light and keep the coop cooler. I was wrong. I removed that old tarp and placed a bluish-green tarp on it as a temporary measure until I could get the coop construction done. Meanwhile I had removed the back "porch" shelter, combined it with the front porch shelter and made a longer, more hooped around porch on the front and covered it with a green tarp as well.

My coop is several degrees cooler just with these two changes!!!
th.gif
I can actually FEEL the difference in there. That grey/silver tarp was letting in too much light, apparently, because the coop feels shady and cool compared to. I was thinking the darker colored tarp would absorb more heat from the sun and just bake it in there but it is not....am loving this simple and accidental tweaking lesson.

It just so happened we cleaned out the shed recently and found a bag with a brand, spankin' new tarp in it and no one could remember from whence it had come....so read FREE, because we would have remembered buying such a thing. Sometimes people give us stuff they pick up at yard sales and such that they think we can use and we both feel like this is one of those things. Hence the lovely sea-colored, heavy duty tarp now on the coop....a FREE accidental improvement. Not only that, it was the exact size needed for this coop when I place the additional hoop on the back. Win/win!

I know folks don't feel like God involves Himself in our lives to such a degree that He sorts out things like tarps on a chicken coop, but I have seen over and over where little things that benefited us that could not have been mere coincidence(I no longer believe in coincidences) were on hand and fit a certain project or need in our lives like it was tailor-made for the purpose. I call that God given. For this I praise His name!!!
celebrate.gif
 
I never really posted back to this thread about the changes made to my coop, all on the cheap. I used scrap lumber from various things...old fences, many scraps from broken down wooden crates from back in the 50s-60s, other lumber from that era~read TOUGH...too tough to get a nail into and many holes for screws had to be predrilled. The only new lumber was some 2x4 for framing and such.

Now don't all you fellas laugh at my crude construction....I'm just a woman with old tools, old materials and very little know-how, so I do the best I can to build it strong but don't often worry about the finer details.
wink.png


I added another hoop to the back of the coop and enclosed the ends with wood. I also built a dog house on the back of the coop, big enough for two dogs, of pallets stuffed with hay for insulation. I'll post pics of the transition from green and basic coop to red and bigger coop/dog home.

Tore the front off, removed the 2x2 bracing and replaced with 2x4, also placed bracing all along the roof line.


The difficulty with a hoop coop is getting all the wood to fit the curvature of the hoop and finding a good place to fasten one to the other. This pic shows the nest box construction on that side...


My scrapped together nest boxes, with cedar log pieces as a leg up into the nests. You can tell how much of this wood is pure scrap...I think it adds some whimsy to the whole thing, but one would have to burn down the entire coop to ever get all the screws out of this wood.
lol.png


Part of my lumber supply....all FREE wood!


And some of my other wood used on the coop....


Outside access to the right side nest boxes...later on I put a magnet cabinet door fixture to keep the door closed, so the little bungee wasn't a permanent fix.


The hens didn't mind the cobbled up nature of their nesting...they really seem to love these better than those plastic totes from before. This is from the outside access.


The left side nest box is a single unit, hopefully for broody hens and such who are hogging a nest. It has outside access as well.


Got the front of the coop enclosed with wood...finally! The large cracks here and there were intentional, for added ventilation at all levels and were easy to do with the nature of my building materials...it was like fitting a puzzle together to cover all surfaces and still be able to fasten to a brace.


A lot of the hardware for the hinges and such we already had, stored here and taken from this or that house/cabinets over many year's time. I loved getting to reuse them at last, here on this coop. The doorknob is an antique, glass doorknob set I found at a yardsale about 15 yrs ago and had been dragging it around ever since, knowing I'd find a use for it. Found some reproduction glass knobs for the nest box doors to match, so it all worked out.


The windows above the nest boxes drop down for added ventilation. I used 550 cord as a control for these that doesn't allow them to drop down all the way onto the next box doors. Used the same cord for the same function on the doors of the nest boxes.


Then I built in the back of the coop and got to play with different ways of including adjustable ventilation back there. This pic also shows the new roosts...I can reach each and every chicken on these roosts, which I LOVE. That's important to me. The side windows can be opened to allow huge cross breezes and the back window opened to allow air in from the other direction if need be. In the summer they have air from all sides...makes it nice.


A pic of the back of the coop before I added the attached dog house...another puzzle pieced together. attaching the boards to the side of the hoop proved challenging, but was solved by drilling holes in the boards and zip tying them onto the fencing like lap siding. Worked like a charm!


One of my favorite changes to this coop was the addition of a clear tarp for winter wear....it kept the coop a sunny and warm place to be, as opposed to the darker tarp I had on there leaving it a dark, gloomy affair all winter. Best investment I had made in a long time, didn't cost any more than any other tarp but is made from much, much stronger construction.


Large window in the back can be raised for warmer months..that thing is HEAVY. These knock down boards from wooden crates are heavy, thick boards.


The flock LOVED the new coop, roosts and nests....you could almost see their interest and comfort in it all. Having different levels to the roosts was a good change for them and also the nest boxes being located on the opposite side of the coop than the roosts really helped also.


The dog house...mid construction, showing the hay insulation. Even the floor is made from a pallet stuffed with hay, lined with plastic on the bottom and sides, then topped with heavy plywood. Dry and warm, you might say.


The back of the dog house is a full pallet, stuffed with hay and on hinges so it can be opened up for easy cleaning of the house.


The interior, with a heavy two layer towel over the entrance. This dog house gets closed in the warm months, as Jake doesn't use it then and I don't want chickens laying in there. That's the reason for the heavy door on the front.


A feed sack retainer wall, stapled into this back entrance doorway to keep the bedding inside when I open it. I put down a layer of cedar chips, then straw and, on top of the straw goes his memory foam bed.


In the winter, the front pop door on the coop is closed and the one at the back of the coop is opened, into a little porch the dog and chickens both share...it has a wall there to keep the wind from blowing into either door and keeps their "porch" dry and cozy.


Back door of the dog house....


Then the whole thing got a coat of paint to bring all the scraps together into a more unified look...


The yellow squares you see are a feed sack cut down and attacked to the roof to provide rain guards for my outside access doors...the rain was blowing right into those doors before I put these up. Feed sacks are so very versatile.....those little curtain rods you see on the front door are perfectly spaced to hold a feed sack with the end cut out. This little feed sack curtain acts as a wind block on days when the wind is capricious and blowing snow right into the coop...doesn't happen often but it does happen. See the feed sack curtain below on a subzero and windy day....


This little coop/dog house combo tweak on my hoop coop has been very much a success. I love sitting up in the coop now in the winter and watching the flock enjoying the added space, light and amenities now available to them in this larger, better coop.

Some of my favorite things about this big coop tweak was the opportunities that arose to repurpose many items...the wood, firewood, feed sacks, a door knob and even a cord from an old heat lamp....it was used to wire my coop light. The pull on the light chain came from an old ceiling fan that had been removed from the home in the far, far distant past. All these little touches of reused items gives the coop a story...many stories.

Here recently I did a few more tweaks to the tarps and it really improved the coop once again and I got to remove the feed sack rain flaps...I'll miss their sunny colors.

Last winter I used an old kitchen step stool to hold my water bowl up and out of the DL and it worked very well....though it didn't necessarily blend into the rustic coop decor.
lol.png


....so this year I was going to tweak again to build a drop down platform with a roost step to provide the same function. But then I thought....that step stool isn't doing anything else all year, why not put it to work again this winter? It's currently out on a stump with its first coat of red paint....when it's fully painted its new, farmy color, it will be used once again as my watering stool.
 
Last edited:
Hi! We live in NEW HAMPSHIRE~
We are historical reenactors living in a little 240 yr. old house that has been a DIY labor of love to restore for over 17 years. We JUST got chickens for the first time last April---4 English buff orpingtons, and put up a coop. Always on a tight budget, we do pretty much everything ourselves and have a lot of fun working on our various projects! We had just finished building our own fence of trees we cut down, and had 'tricked out' our purchased coop (from Coops for a Cause, where a portion goes to charity) with period-style hardware (from our attic stash), 'leaded' windows we did ourselves, and a few other things such as swing-out branch perches we designed and built from branches. Now the coop area blends in nicely with our old New Hampshire house.
My husband thought our fence was reminiscent of the stockade fences at Plimoth Plantation or Jamestown, etc., We had a salvaged-for-free piece of highly-weathered 18thc. board, and a 17thc. 'Brit' flag---since we do that type of reenacting. Hubby has a degree in illustration and design, and is creative and quirky. He said the fence reminded him of an "old fort"...SO...what did we do???
Well, created one, of course!
We made our flag pole from a tree we cut down, and hubby hand-painted 'FORT ORPINGTON' in a 17thc. font on the old board, which we affixed to the fence around our coop and run! We think it looks just grand with our 18th century home and fits with the old-time lifestyle we live---(Yes, that is us in the avatar photo, and below in this post!)


coopwindow2.jpg
coopwindow3.jpg

I leaded the coop windows and Adam trimmed~
screen1.jpg

Although our coop has a nice window screen, we were afraid it might not be 'predator-proof' enough...
Adam designed and made this interior screen that fits behind the regular window screen and slides from side to side, out of leftover, durable hardware cloth and only scraps and stuff we had in the shed, and hand made the wooden turnbuckles that keep it in place.


I put all the hardware on the coop myself. Hubby helped with the leaded window...

coop_best2.jpg

The coop/run area just up against the old post and beam woodshed.

flag_1.jpg


coop_nitelight.jpg

...The little night light inside the coop that lures our girls in every evening.
perchdesign3.jpg

Inside of the run, Adam designed the neatest swing-out perch and made it from a maple branch...

perchdesign2.jpg
perchdesign1.jpg

Because it is low for us and we'd have to duck down every time we were cleaning the run, he came up with an ingenious way to latch it into place on one end, and he has an iron 'butterfly' hinge on the other end...
For cleaning the run we unlatch and swing the perch over to the opposite side wall where it sits on it's own bracket. We just swing it back and latch it into place when we're through! Brackets are wood scraps we had in the shed.
I clean the coop every morning. I have an old 5 gal. plastic bucket I have probably had for 10 year. I painted COOP CLEAN UP on it with black paint and I keep litter, scoop, rubber gloves, mini rake and poultry protector spray in it, in the woodshed. All I have to do is get the bucket out each AM and do my thing in the coop/run which is right next to the old woodshed.


HOLY COW....IT WAS A MESS AND A MUD PIT WHEN WE FIRST STARTED OUR COOP AREA....Here a neighbor boy helps hubby~


Adam painted the sign in 17thc. script by hand on an 18th CENTURY, WEATHERED BOARD WE HAD SALVAGED FOR FREE.


We 2 cut down all the trees and built the entire fence and gate...
We fenced the coop area on 3 sides, and the forth, at the front is an old stone wall.


IN PROGRESS, BACK IN APRIL~


Finished fencing/gate.


We just found this small lantern on sale. We added a solar LED light inside of it and hung it on the outside of our chicken coop with a rosehead nail, and left it to rust, and shed some nice subtle light through it's piercings at night...


We also built this fence with trees we cut from our own property. We then created the 'mini meadow' in front sideyard for our 4 buff orpington girls by flinging native wildflower seeds we collected and letting the grass grow long...It's really looking MUCH better now~


Here we are in some of our reenactment 'kit'. You can 'visit' us at our website
www.thecountryladyantiques.com
(Our 18thc. house was a many year period restoration completely done 'on the cheap' by us.)


Last edited:
Your place is extremely beautiful!!!!!! I could look at it all day long! And I love, love, love your stick fencing and the skill and time it displays....so few take the time in this world today to do something artful and beautiful like that, myself included. Thank you for posting these pictures here as I will carry the memory of them along with me....I've been wanting a wattle fence around the garden for a long while but never seem to get the time to do one, but your pics have spurred on my dreams once again.

The coop is very cute and beautifully built and I love that you've reused the antique materials...simply beautiful!

Can't see what level of ventilation you have in your coop but come winter you might want more than you have with the one fenced window that is shown....resist the temptation to buckle your coop down tightly to conserve warmth, as your chickens carry their barn on their backs. All they need is a place out of the wind, fresh air while they sleep so they won't get moisture of their own respiration on their combs and wattles(air that moves up and out of the top of the coop), sunshine and good feed to get them through the winter.

LOVE your place!!!! Prettiest place and prettiest touches I've seen on BYC all these many years.


Thank you SO MUCH for the compliments! We appreciate it more than we can say~ We had done our own authentic wattle fencing around our garden years ago and that lasted about 5 years and then had to go. We did the 'tree stockade look' this time, and the 'tree zig zag rail' for our mini meadow. We had no experience with anything. We were always on a tight budget. I was a widow when I bought the old house in 1998, and it was the pits! I worked on it alone for 8 years and then met my hubby, Adam. I had to teach myself to do everything, and on a miniscule budget. I love salvaging, and have found some great stuff for free or trade. For the fence, we just cut down trees in the wood, hauled them down the hill and built it all by hand, just doing it with no tutorial!
If you get a chance to visit our TOUR page


Your place is extremely beautiful!!!!!! I could look at it all day long! And I love, love, love your stick fencing and the skill and time it displays....so few take the time in this world today to do something artful and beautiful like that, myself included. Thank you for posting these pictures here as I will carry the memory of them along with me....I've been wanting a wattle fence around the garden for a long while but never seem to get the time to do one, but your pics have spurred on my dreams once again.

The coop is very cute and beautifully built and I love that you've reused the antique materials...simply beautiful!

Can't see what level of ventilation you have in your coop but come winter you might want more than you have with the one fenced window that is shown....resist the temptation to buckle your coop down tightly to conserve warmth, as your chickens carry their barn on their backs. All they need is a place out of the wind, fresh air while they sleep so they won't get moisture of their own respiration on their combs and wattles(air that moves up and out of the top of the coop), sunshine and good feed to get them through the winter.

LOVE your place!!!! Prettiest place and prettiest touches I've seen on BYC all these many years.

Thanks so much! We appreciate it more than we can say. We taught ourselves to do everything and on a miniscule budget. I moved 1000 mi. alone as a widow in 1998 and bought the house, which was the pits---a real mess. I had no $ to speak of. I worked on it alone teaching myself skills for almost 8 years before I met my hubby! Please visit our TOUR page if you would like to see the house, etc.!

http://www.thecountryladyantiques.com/tour.php

(You should see the period style 'beehive' cob clay bake oven we built in our back garden, with no $$ and salvaged materials! We even dug all our own clay in the woods and hauled 15 five gallon buckets of it down the hill to the yard and stomped it with straw and sand to make the cob mortar!!!!!

Here are a couple photos, but there is much more info and photos on our site!)

Our house has been a 17 year long, completely DIY labor of love with plenty of salvaged or garbage picked 'finds'!

Not to worry~Our coop is ventilated all around the whole interior roof line. The coop is next to the old post and beam woodshed, so somewhat protected on that side, and we have elec. in it. We chose those lovable orps because they can tolerate the New Hampshire winter. The fence side/coop window side of the coop is south, so nice warmth of the sun even in winter on a sunny day coming in the coop window!
Again, thanks so much~You really made our day, and we hope you will check out our site and see all that we've done ourselves!
love.gif


JUST ONE OF OUR MANY DIY 'ON THE CHEAP/FREE' PROJECTS!


WE EVEN MADE THE OVEN DOOR FROM A PIECE OF SALVAGED 18th CENTURY WOOD FROM A PERIOD LOCAL DEMOLISHED HOUSE, AND THE HANDLE IS A BENT BRANCH FOUND IN THE WOODS~
big_smile.png


ALL ROCKS WERE SALVAGED FROM ROADSIDES. BRICKS SALVAGED FROM LOCAL OLD MILL. WE USED TREES FOR THE LEAN-TO POSTS AND THE REST OF IT WE BUILT USING 19thc. BOARDS WE WERE GIVEN FOR FREE FROM OUR FRIEND'S 1830 BARN. INSULATION IN THE STONE BASE WAS BOTTLES FROM THE DUMP! WE HAD NO IDEA HOW TO DO THIS. JUST READ A BOOK FROM THE 70's AND SPENT A COUPLE MONTHS IN THE SUMMER 2 YEARS AGO BUILDING IT. WE HAD A BLAST! IT WORKS GREAT! SUPER HOMEMADE PIZZA, BREAD, AND ANYTHING ELSE!
 
Last edited:
Subscribing! I bought an old farmstead with tons of scrap laying around. Since we live on one income, I tend to "tweak" my coop with things I can find laying around the farm. Love this thread!

I am hoping to make myself a little hoop house shelter out in the field for the chickens to hide in and make more use of the property. Since my chicken yards were once old feed lot space, there sure isn't much for cover out there. Just lots of grass.....
 
some pics as promised of coop from old trampoline


used 3 sections from trampoline dia to form ends

joined end sections with uprights that held up safety net around tramp mat


as i didn't have access to a welder ,drilled & pop riveted joints

more pics soon
Pete
 
Got screws, plastic and lumber for the coop tweak today...slowly gathering the materials to make this happen. I can't wait to be building something again.....I get to use my DeWalt drill and anytime I get to use that drill I am a happy woman!
wee.gif
The only lumber I am buying new for this are a few 2x4s as that is the one type of lumber I don't have in my scrap pile...used them all up on the last build. Hope to use up a lot of scrap lumber just to get it out of the yard....doing major farm junk clean up this year and burning some brush piles, old wood that just can no longer be used, etc.
 
Bee, I had posted photos of the building back when I was first thinking of getting chickens, but a few little things have changed.


This is the outside. you can see it began as a scrapped building to begin with. most of the windows match except the one cut down door. It has a steel roof but the outside is like an asphault shingle material. I have to do some repairs this summer. I noticed over the winter that there is some rot near one of the windows that needs to be fixed. I am also hoping to recover the outside and reinforce sections of the interior.

Before we purchased our first chickens we had a fire that burned the entire prairie right up to these buildings. Including all of the fencing that was here previously. This fence in front has not been repaired permanently, but hopefully within the next month. I have a large tree just to the right outside of this photo that was badly damaged in the fire. We are having it removed this week and then hope to repair the fencing here in front.


This is the storage area. I need to do a major clean up in here. I am storing some styrofoam that the husband wants to cut to fit in the ceiling slats and walls. As you can see, the fiberglass stuff on the back wall is needing to be covered up. I was going to use plywood to cover all of this. I think I have some half sheets laying around that could work here. There are a bunch of extra windows stored here too. I am hoping to use them for another coop. The trash bins are holding my grains for FF. The orange hook in front and the buckets are the ff. I've got my extra brood bins here because they need to be cleaned and put away. There is a big blue pool shell in the back too that I am considering unrolling to use as a brooder for the guineas that I have in the incubator. I forgot, the cats live here to keep the mice out of the feed.


This is the enterance to the first side of the coop. This side has electricty. I put up those roosts when we began with our first 5 hens. This year I want to expand them to run the whole length of that back wall. You can see, the one board is bent. I want to fix that too. Now that it is summer, the hanging feeder will come out. I am feeding the fermented feed again, and no one is really eating this mix any longer. The brood box is housed in here. My father helped me build it out of scraps leftover from when we built our deck and a sheet of plywood left over from one of my hubs construction jobs. the chicks in here were sold and paid for, but the lady never returned my calls when I called to tell her they were hatched. The far left is a door.


This shows the same area from near the roosts and both doors.


This photo is shows the backside of the door. This side of the coop I typically didn't use because we have never had enough birds, but I want to be able to use it as a grow out or breeding area.
The nest boxes on the bottom were salvaged from my grandpa's farm. They are so cool and have these lovely slats between the boxes, but the chickens hate the ones on the very bottom, and prefer the smaller, completely private boxes above. I need to better separate the boxes on the bottom unit and add a roost bar to the front to make entering a bit easier. The bottoms, I might close off and use for broodys if I ever get one. This side of the coop has no electric and the ceiling needs to be supported. There are a few boards starting to fall loose in this area. the tree branch is serving as a temporary roost. I had to split up a few birds who were acting a bit sick a few weeks ago. It doesn't seem serious, and seems to have improved so I will likely move everyone back together this week.


The same area looking out from the nesting boxes. This is a grow out pen I set up because I needed the brood box when the woman didn't pick up her chicks. The youngsters were too small to go in with the big girls at the time. They are 9 weeks old today so I will start integrating them with the rest of the flock this week. I plan to keep the hens to add to the laying flock but the boys will be dispatched soon. I would like to either set up more permanent pens here with individual access to outside, or add some extra roosting areas. at one time, I considered using this for duck housing, but I like that I can let the hens have run of the whole thing in winter when the snow is 50 inches deep and they refuse to go outside. ;)


oh, one more. This is the beginning of my hoop shelter.The fowl have the run of this whole yard, but tend to stick to the front part that is a lot of plain dirt. I am trying to entice them to move outward into the fields. The two forward posts are in. I set an old tire at the base of each. I filled it with dirt and will plant some squash . I will just run a piece of chicken wire around the tire for a bit to keep the chickens from digging it up and hopefully it will grow up the sides of the panel a bit. I need to give them some cover out there so they feel more secure. The trees in this photo were also damaged by the fire and are mostly dead. I considered cutting out the dead stuff and using to make a sort of twig/log hoop cabin. If I can find the time, I would love to have a more permanent structure out here. If I can can make it work, I will likely add one more shelter to the left of those trees.


So, yup, pretty much it including my goals for the space. :)
 
Last edited:

New posts New threads Active threads

Back
Top Bottom