what would you pay for a accurate digital thermostat custom built?

Something this small would go small pac ? what part of the UK are you in ? And BSA used zeners for a right good while with better then fair results
 
Last edited:
This is what I have: http://cgi.ebay.com/New-Ranco-ETC-1...tem&pt=LH_DefaultDomain_0&hash=item4150f2f78d ....... and wouldn't have anything else. Easy to set..............and, as responsive and accurate as they come. This is what I've got in my brooder controlling a 250w heat lamp. Can be moved from bator to brooder in seconds. Can adjust 1º at a time if need be. If the price can be matched or beat, maybe.......it would be hard to beat the reliability of this unit.
 
Last edited:
i live in devon in the uk, been keeping and breeding chickens for over 30 years now, infact i live on and run a rare breed chicken farm the electronics side of things has just been a life long hobby that got outa hand
big_smile.png
, most those 30+ years i built my own bators and controll systems, the main project i am working on at the mo is a auto candler, wich should be ready for testing soon
 
Here is my thoughts on the homebuild thermostat. Yes you can save a few pennies, if you know what you are doing. My second thoughts are your suggested heat source and the problems you are likely to experience in regulating your actual temps with that heat source. Light bulbs get very hot, much hotter than the targeted temp range you are wishing to control. Once turned on, they continue to heat up until the target range as determined by your sensor is to where you desire it to be. Problem is, the lightbulb will be much hotter than the target temperature by the time the sensor cuts the light off. What you will experience is a severe overshoot in temperature and any accuratecy of the thermostat is thrown out the window. To counter this one would have to have a much better sensor than you have chosen for your design. Sensoron sh11 might be one you could consider, of course you just shot your cheap budget as this sensor is going to cost you around $30. The higher the resolution of your sensor and microcontroller will allow for faster refresh rates on the actual heat controller and the ability of the sensor to sense the approach of the target temperature, and thus reduce instead of completely turning off the electrical supply to your heat source. This will prevent the overshoot in temperature and provide a much tighter hysteresis between the on and off of the thermostat.

Personally, I would scrap the whole lightbulb approach for building an incubator and move to the much more efficient and durable Nichrome wire heating elements. This wire is almost as cheap as a light bulb and you dont have to worry about it buring out when you need it most. It will also make your thermostat design much easier to do and a thermostat that is much easier to fine tune for its application. The nice thing about the nichrome wire is if you are having problems with overshoots or undershoots of your temperature is you can simply change the lenght of the wire to fine tune the actuall temperature range of your heating element. for example, where as 60ohms might prove to keeping the target temp range to +/-2 degrees, a simple increase in the wire lenght by a couple of inches to a reading of 70ohms, might tighten the target range to +/- 1 degree. One could continue adjusting the wire lenght until they have reached the accuratecy range of the thermostat which using the proper sensor could be measured in 1/10ths of a degree. Of course if you are using a light bulb, you can change the wattage size of the bulb to effect the heating temperature, but its hard to find a bulb you can adjust wattages to just one or two watts if thats what it takes to reach the proper temperature ranges you desire. You usually endup using either one size larger or smaller and settleing for the results that change provides. With nichrome wire you can fine tune a fraction of a inch in wire lenght at a time, starting with a longer than needed wire and cutting off a little at a time to match your incubators ability to hold the proper temp ranges.

I pm'ed you concerning a brd. and silk. file if you want to build a really accurate thermostat, humistat, motor controller. Reply with a email address and I will send it to you.
 
thanks for the offer mud but the design i outlined on here was a way for people to do something fairly cheap. the thermostats i make for myself use a combination of dallas 18B20's (3) and sensiron SHT71,s i mainly use the sensiron for humidity but its nice to have it as backup temp as well. all the bators i make are cabinate type fairly large and i temp control the bulbs when i use them. the idea for bulbs were because others on here use them, normaly i use ceramic heaters or indeed like you say i wind my own nichrome heaters but i thought that was a bit far for most peeps, this prototype bator i have under construction will have a heater upgrade later in the year as i am having heated rollers made for me but they wont be ready for a couple of months so i am making do for now, overshoot has never been a problem for me but i use a temp controlled pwm fan matrix so that makes sure every part of the bator is EXACTLY the same temp, i should also point out i pwm the bulbs so they are infinately adjustable heatwise. thanks alot for the silk offer its appreciated but i have all the stuff to design and make boards i am amazed at the junk i have collected over the last 30 years! lol but would be good to stay in touch with you and compare notes on future projects.
the latest i am working on is almost at the testing stage and is a microcontrolled laser candler that can detect alive/dead eggs at 4days old, needs more testing tho and probaly a tweak here and there but so far seems to work well, the hardest part was the cnc frame to mount the laser on

ooo just read your pm muddstopper.... i understand now
big_smile.png
sorry for the confusion i have pmed you back let me know if you dont get it the messages seem to be playing me up at the mo
 
Last edited:
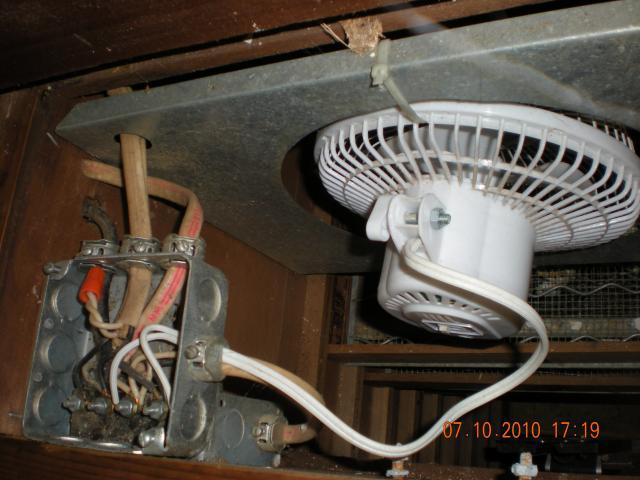
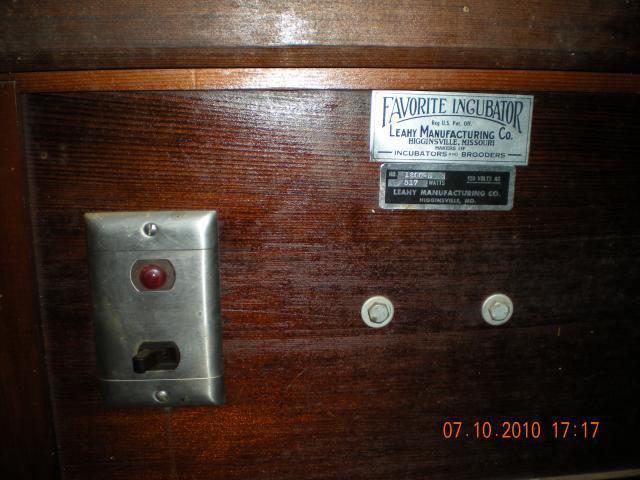
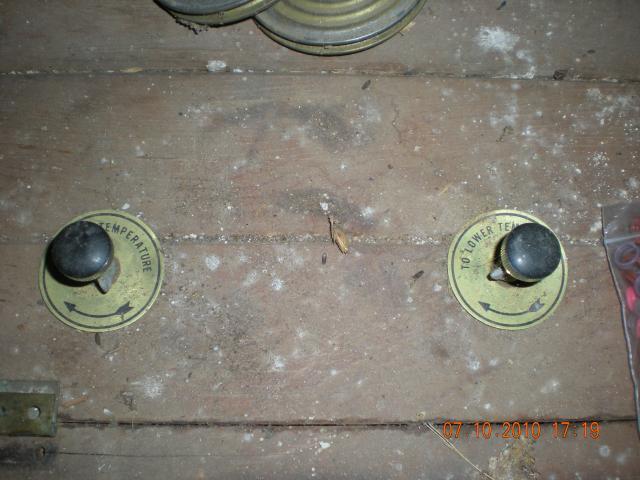
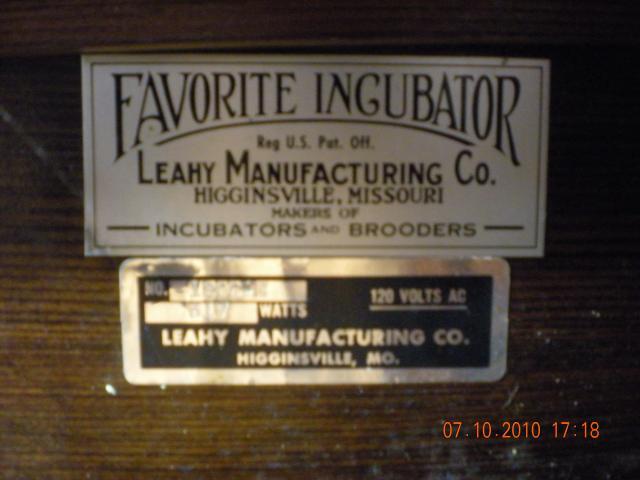
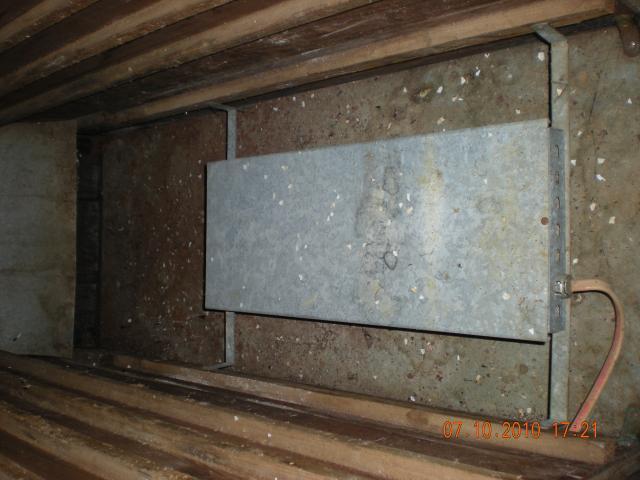
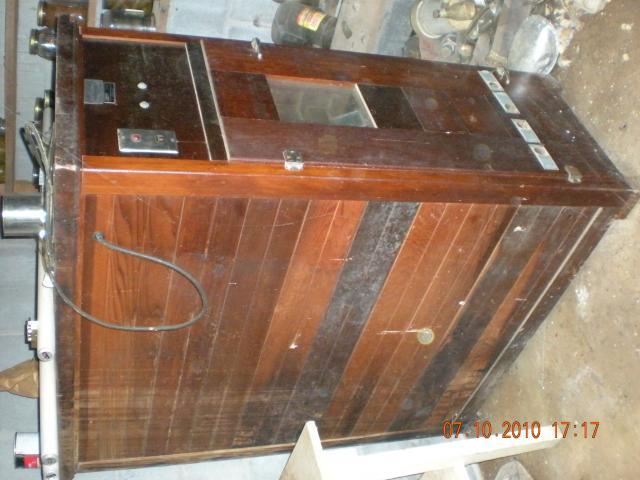
below are pics of what I have it says 517 watts on the tag on the front. it uses 2 wafer thermostats to control the heat which I don't like wafers because of the fluctuation between on and off is a couple of degrees. I have had this incubator for several years it has been used twice and works it needs a new finish/stain job on the outside I would like to upgrade the inside as well I have no idea what kind if heating element it has but I'm OK with it unless theres a better option I would to be able to control temp and humidity. I would like to know what you have offer? I have no clue whats involved with humidity control what will I need? all it has right now is 2 water pans in the bottom that set over the heating element as you can see the fan went out after about 10 days on the first use this was a quick fix but it works a fan speed control isn't necesary unless its useful I'm am cureently using an LG incubator and hate the thermostat control, it has a knob and when you turn it up or down you can't tell you've moved it but the temp change can be pretty signifigant at times what other options are there? I will answer what questions I can about the incubator there is no paper work and I haven't found anything on the internet its old I'm 27 and its quite older than me I saw one on here a few days ago that had been redone and its got my wheels turning on this one again. I prefer quality over price but want to keep it affordable of course

Thanks
Kenneth Flippen

46532_dscn1296.jpg

46532_dscn1292.jpg

46532_dscn1295.jpg

46532_dscn1294.jpg

46532_dscn1298.jpg

46532_dscn1291.jpg
 
great incubator ken!! i realy love the old stuff! are you anygood with a soldering iron?? making a board to controll it should be no problem. if you can solder then all i would need to do is preprogram a chip for you. by the looks of it in the picture you will need a rewire tho. as for the heater it looks like a straightforward resistive heater (basicaly a fancy word for heating by wire element). so your options would be straighford switching it on or off by a controller (simple) or PWM (also known as PID) wich basicaly means the heater is never fully on or off but varied depending on the temp. PWM is the most stable but from a software point of view a little more complex to do also the boards are a little more complex as you have to use something like a thyristor and to do it properly you need to detect the falling edge of the AC mains signal. choice is yours personaly for hobby use i would say go with a straight forward on/off situation.
as for humidity..........easy to do but if you want accuracy then be aware accurate sensors (3%) start around the $30 mark just for the sensor! if you can live with less accuracy then the cost falls alot with 5-7% sensors costing around $15 and 12% accuracy alot less. give me a few days to finish a couple of things and i will pm you
 

New posts New threads Active threads

Back
Top Bottom