It all began when I decided that having a few chickens around our place would be a fun and worthwhile project, for myself and our family. It would teach the kids responsibility and provide a great food source for our family. It wouldn't take much time or money to do and I thought that a few chickens running around would also help with our tic problem here on the hill. We already had 2 calves, 5 dogs, a cat and 5 kids so chickens seemed like the next logical step.
Ok, you got me, that is not exactly the story. Actually, I found a blogger here in central Ohio who kept talking about how much fun it was having chickens and the crazy antics she witnesses and I just had to have some. The other story is just what I tell to people who don't already love chickens...
I am a strong do it yourself kinda girl so before mentioning anything to my wonderful fiance I thought I would be proactive about this undertaking by doing everything myself. I got on line and started looking at coops and ways to build them cheap and easy. Of course I found BYC and all of the coops here and decided it would be fun to make a coop using old reclaimed wood and pallets. How hard could it be right?
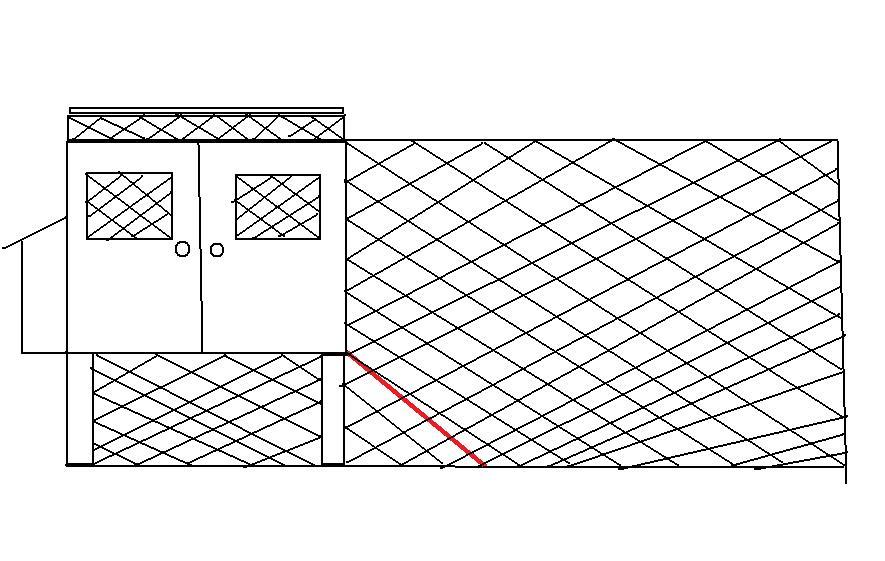
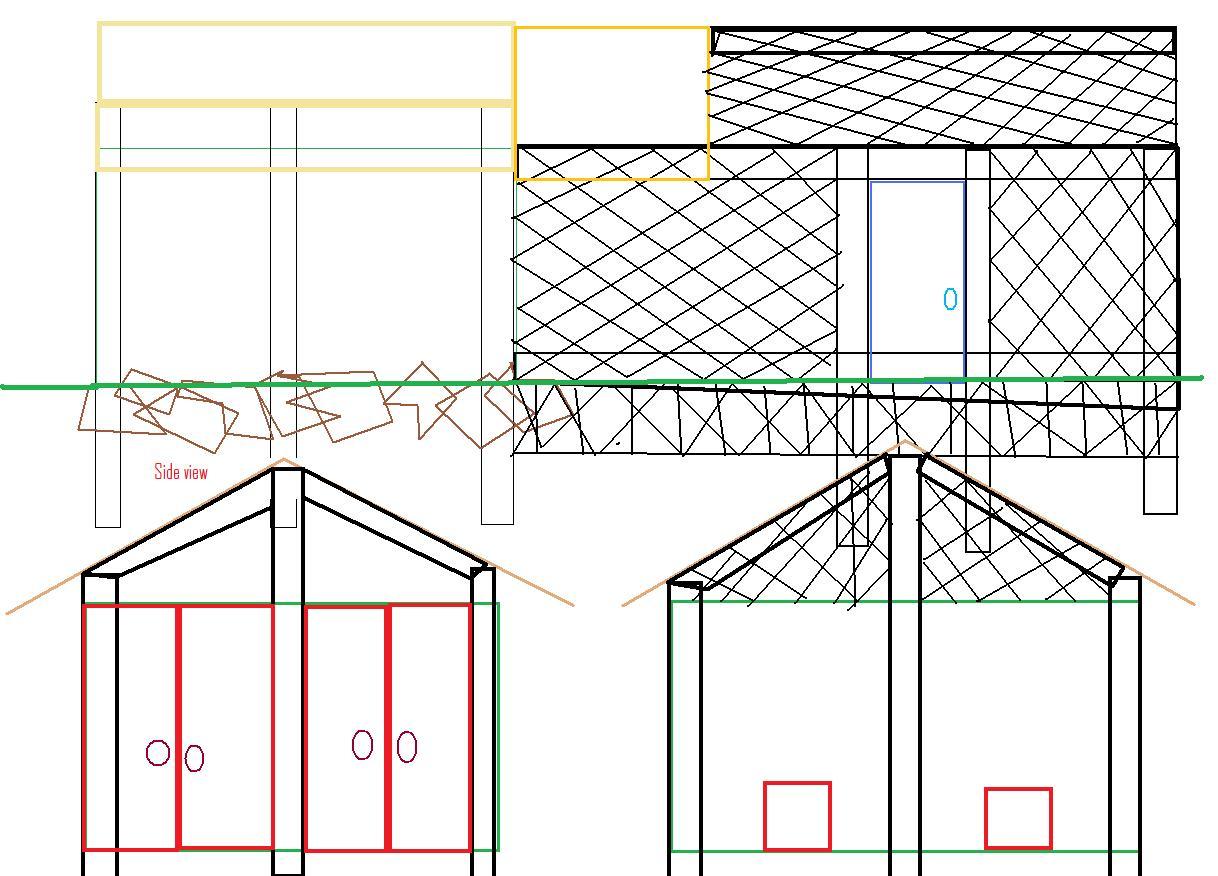
The original drawing and idea:
I figured it would be a 4x8 ish coop with a run, 2 doors that opened to reveal the whole inside of the coop to make cleaning easy and a nest box on the outside to make egg retrieval easy and painless. I wanted the roof to slope from the doors down to the other side to make it easier to roof and control the rain shed to one side of the coop. I assumed this would hold 6 hens or so, and that would be enough. I also planned to make something to hold a dozen or so meat chickens aside from the main coop.
At this point I decided to show my plans to my DF and to my surprise he was on board with the idea. He had raised chickens as a child with his parents, and had even used the barn we use for the calves now for meat chickens a few years before I came into his life. However, he said that I had no idea what I was in for... meaning that it was not going to be as easy as I thought it would.... Did I mention I was a strong independent woman? I knew I could handle this, no problem!
So, the first call I made was to my Dad... he seems to be the man that knows everything and he could help me find some materials to get going. As it turns out my Aunt was having her 100+ year old oak flooring removed and he was sure I could come and get it. An ad on Craigslist yielded a couple of windows, a few pallets, a bucket of nails, and some tin for a roof. A friend on face book even gave me a couple shipping crates, plus a couple extra sides to one that they used part of. Wow! That was easy! I was already developing a nice sized pile of material to make my coop. The work has begun! With such mild temperatures in Ohio this winter we were able to start at the beginning of February.
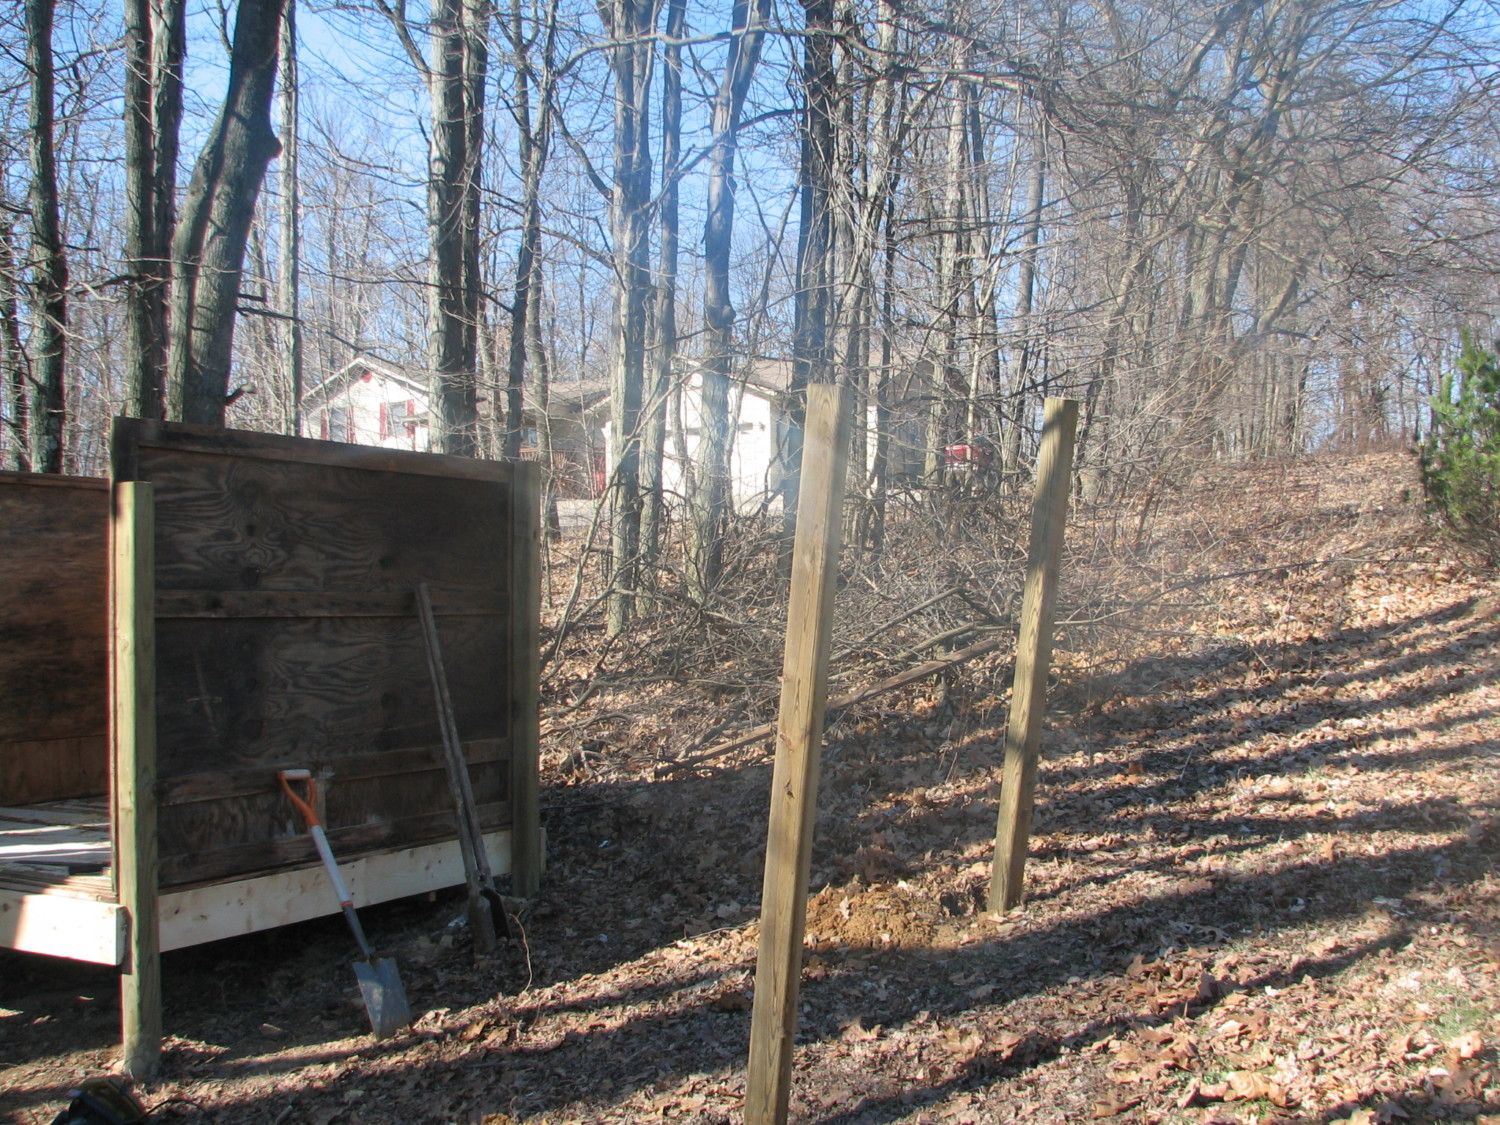
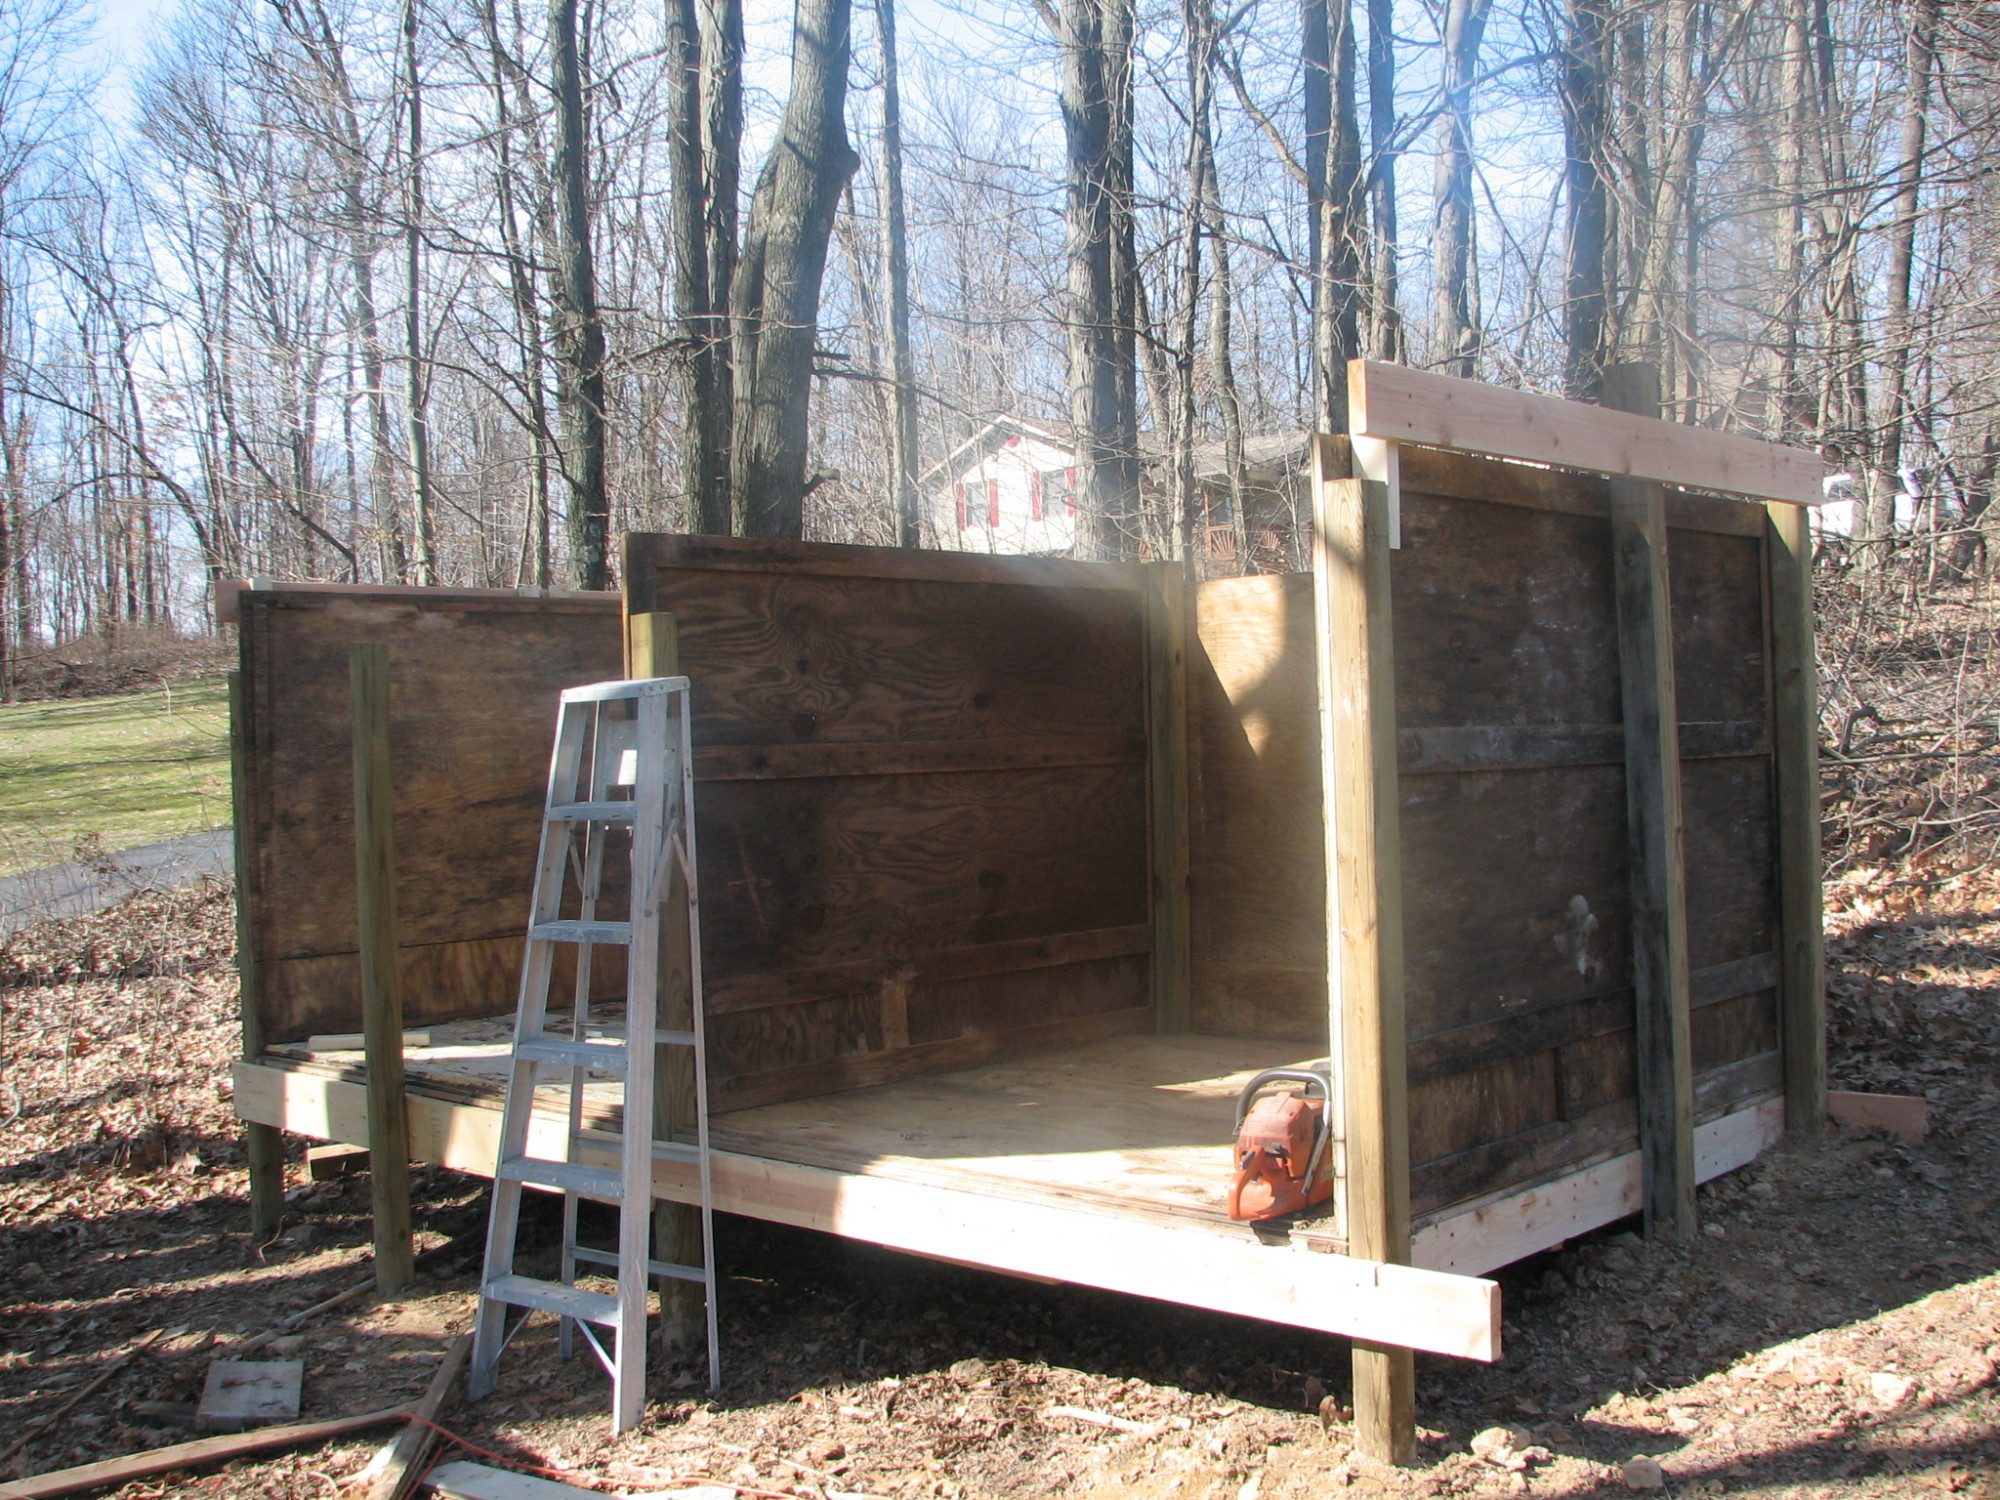
We began by deciding the perfect place for a small set of chickens, away from the house, but close to where our garden is. That way we could easily compost the poo but not have to worry about the smell at the house. We did have to purchase 8 4x4's. DF said that if we were going to do this, we were going to do it right, and make it good enough to last. I guess my idea of a simple easy build was out. We also purchased 4 2x8's to act as supports for the floor of the shipping crates we got from the friend. We used a post hole digger to sink the poles 2 - 3 feet into the ground and attached the shipping crate to the supports. It began to look like the coop was now going to be 7x7x5 tall. We also used the old oak flooring to reinforce the floor. The crate floor was ok, but we assumed that after some time the particle board would wear out.
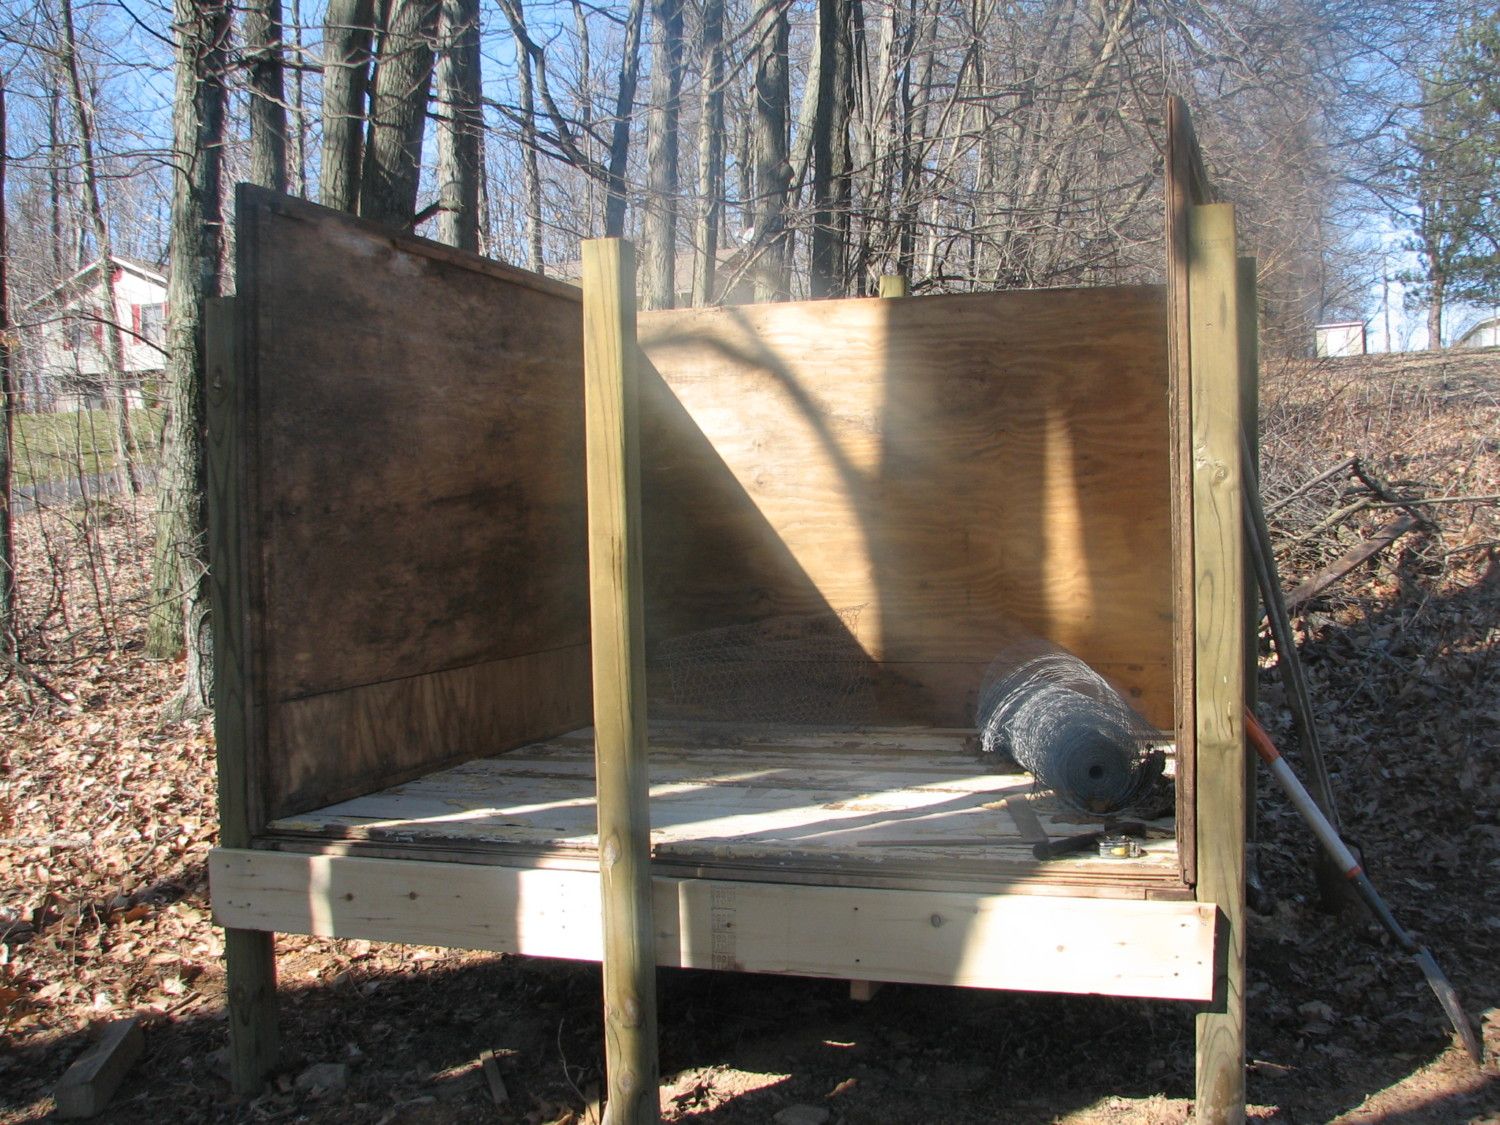
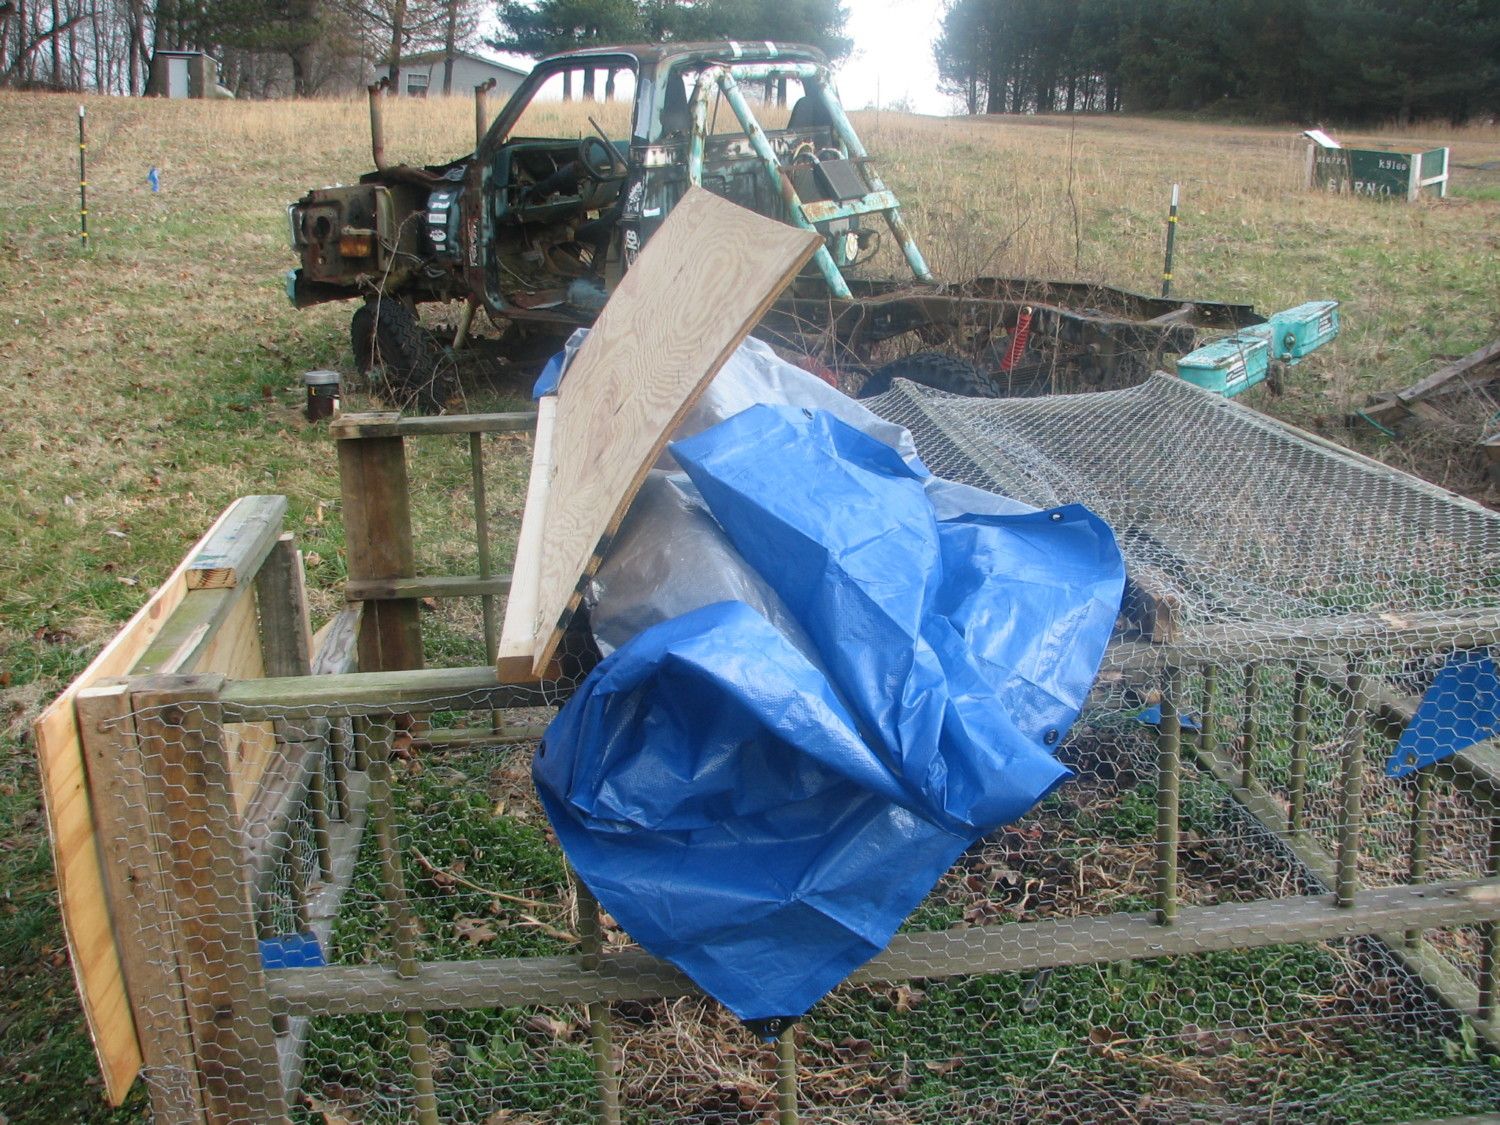
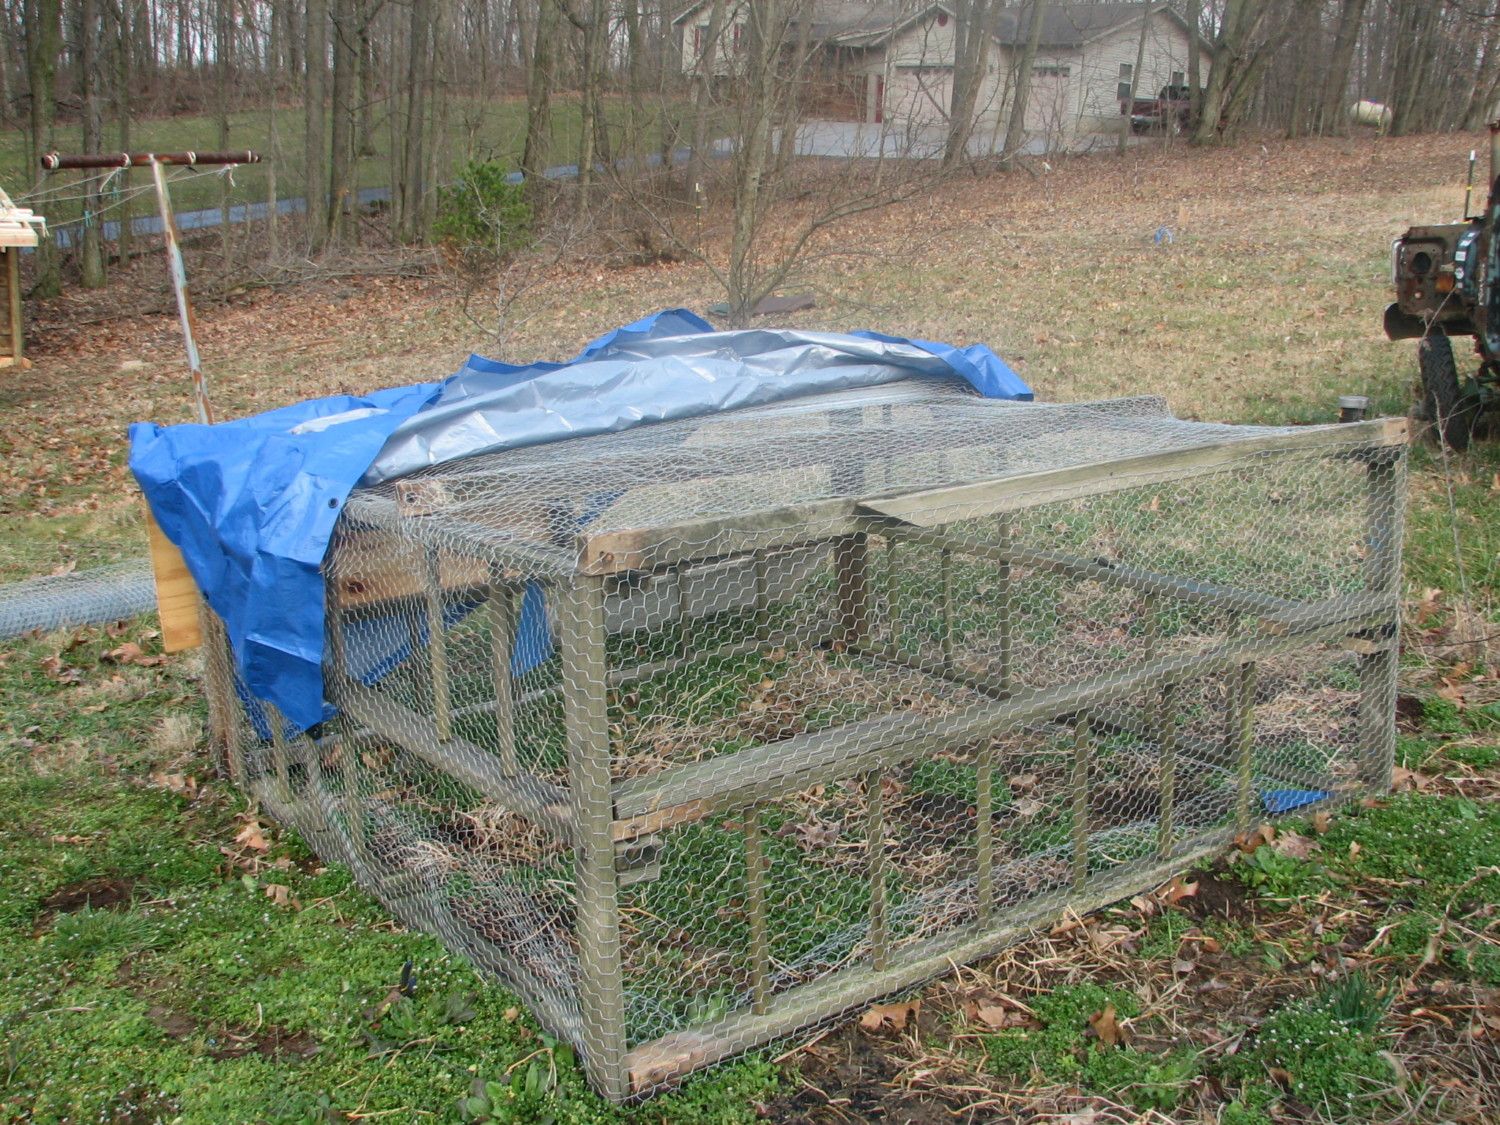
This seemed like a perfect time to order my chickens. The coop was coming along nicely and I was so excited! After spending many days trying to decide which chickens I wanted to order I decided on 2 -3 chicks of 9 different breeds!! That's right folks... chicken math had taken over my brain! A total of 23 chicks were ordered. We also decided why just do 12 cornish cross chicks, why not 20? After all, several family members were pleased to hear we would have fresh meat and eggs! Oh boy, it was quickly beginning to sink in that the coop we had well started was in no way going to be big enough! To avoid the question of what to do now we got to work on the meat chicken tractor, and the old wooden swing set was just begging to be torn down. Armed with a saw - zaw and a hammer I went to work knocking down and sawing apart the half rotten toy. After much finger pinching, many stripped screws, and tears I was finally able to complete something myself: the meat coop:
The only purchases I made for this project were a piece of plywood for the door, a 2 x 4 to support the hooks that would hold the food and water off the ground, and of course the chicken wire. The coop will be place within the electric field fence so I was not too worried about predators getting to it. Whew, glad that is done, now back to the hen house...
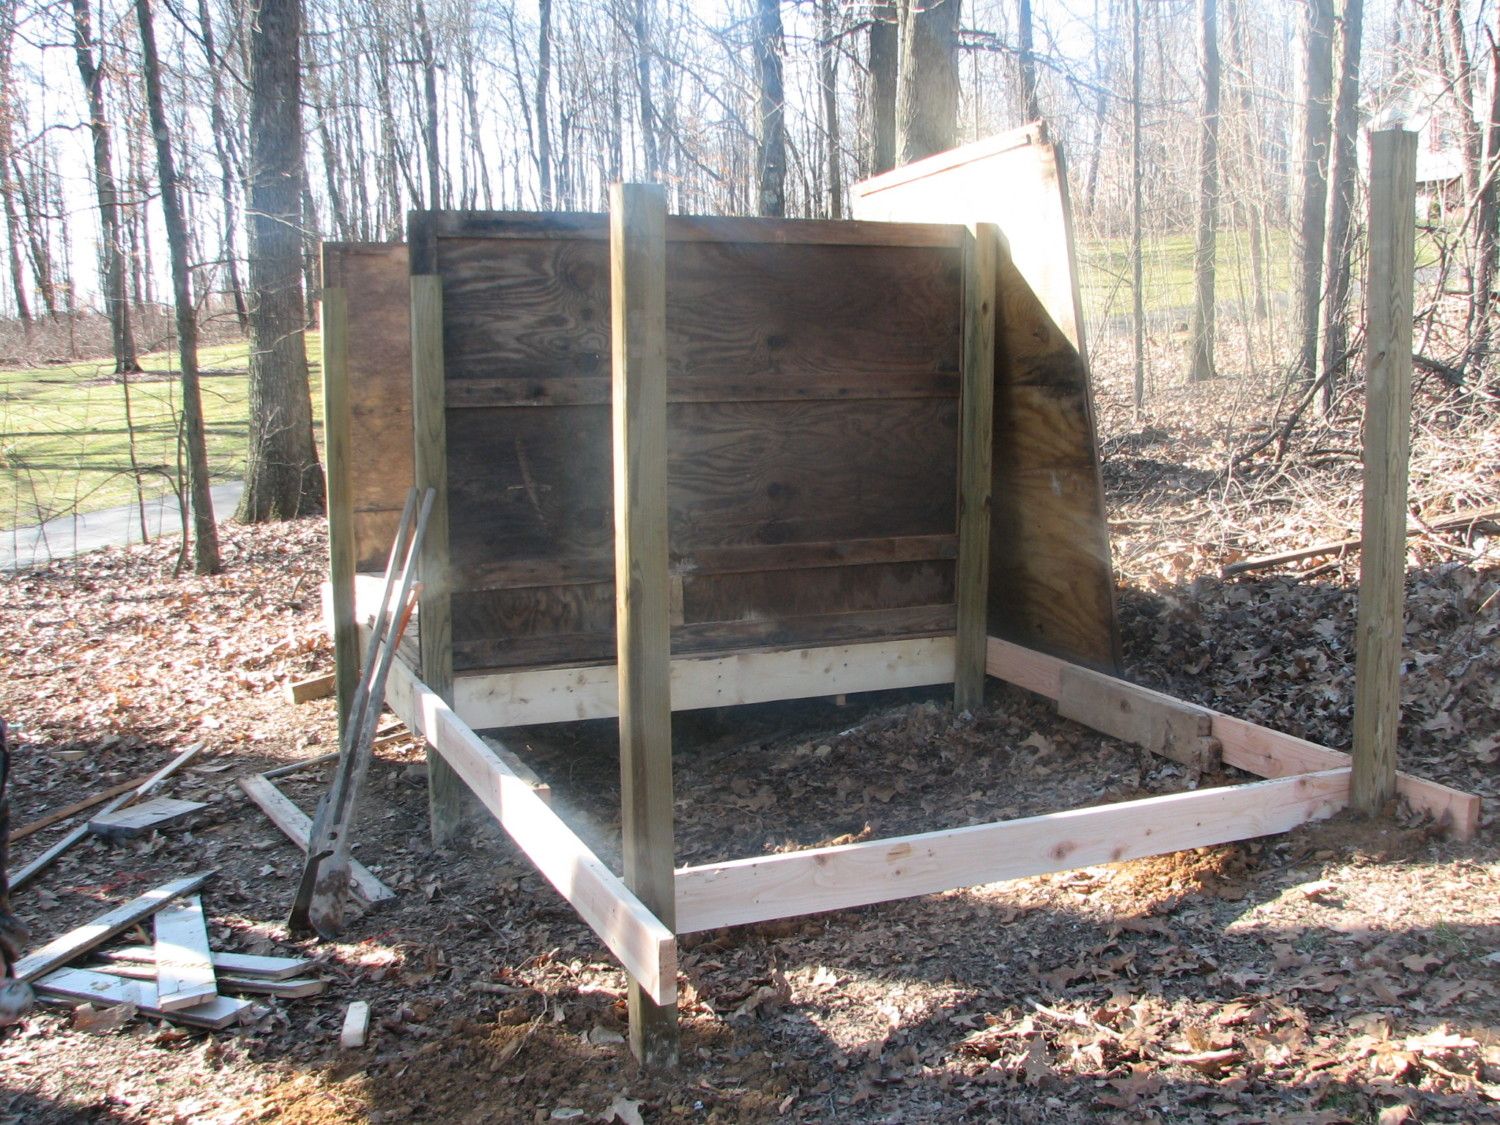
We used the same concept as we had before, sink the corner posts into the ground 2 - 3 feet and used 2x6's for the floor supports. I elected to leave the center side in place. I knew I would have chicks of different ages to begin with and knew I would need to keep them separate until they were the same size. Thank goodness I had the foresight to raise the original coop off the ground 2 feet, this made the back corner of the new side just at ground level. We live on a hill and the only level spot is said to be somewhere under the pool, but it is not even perfect.
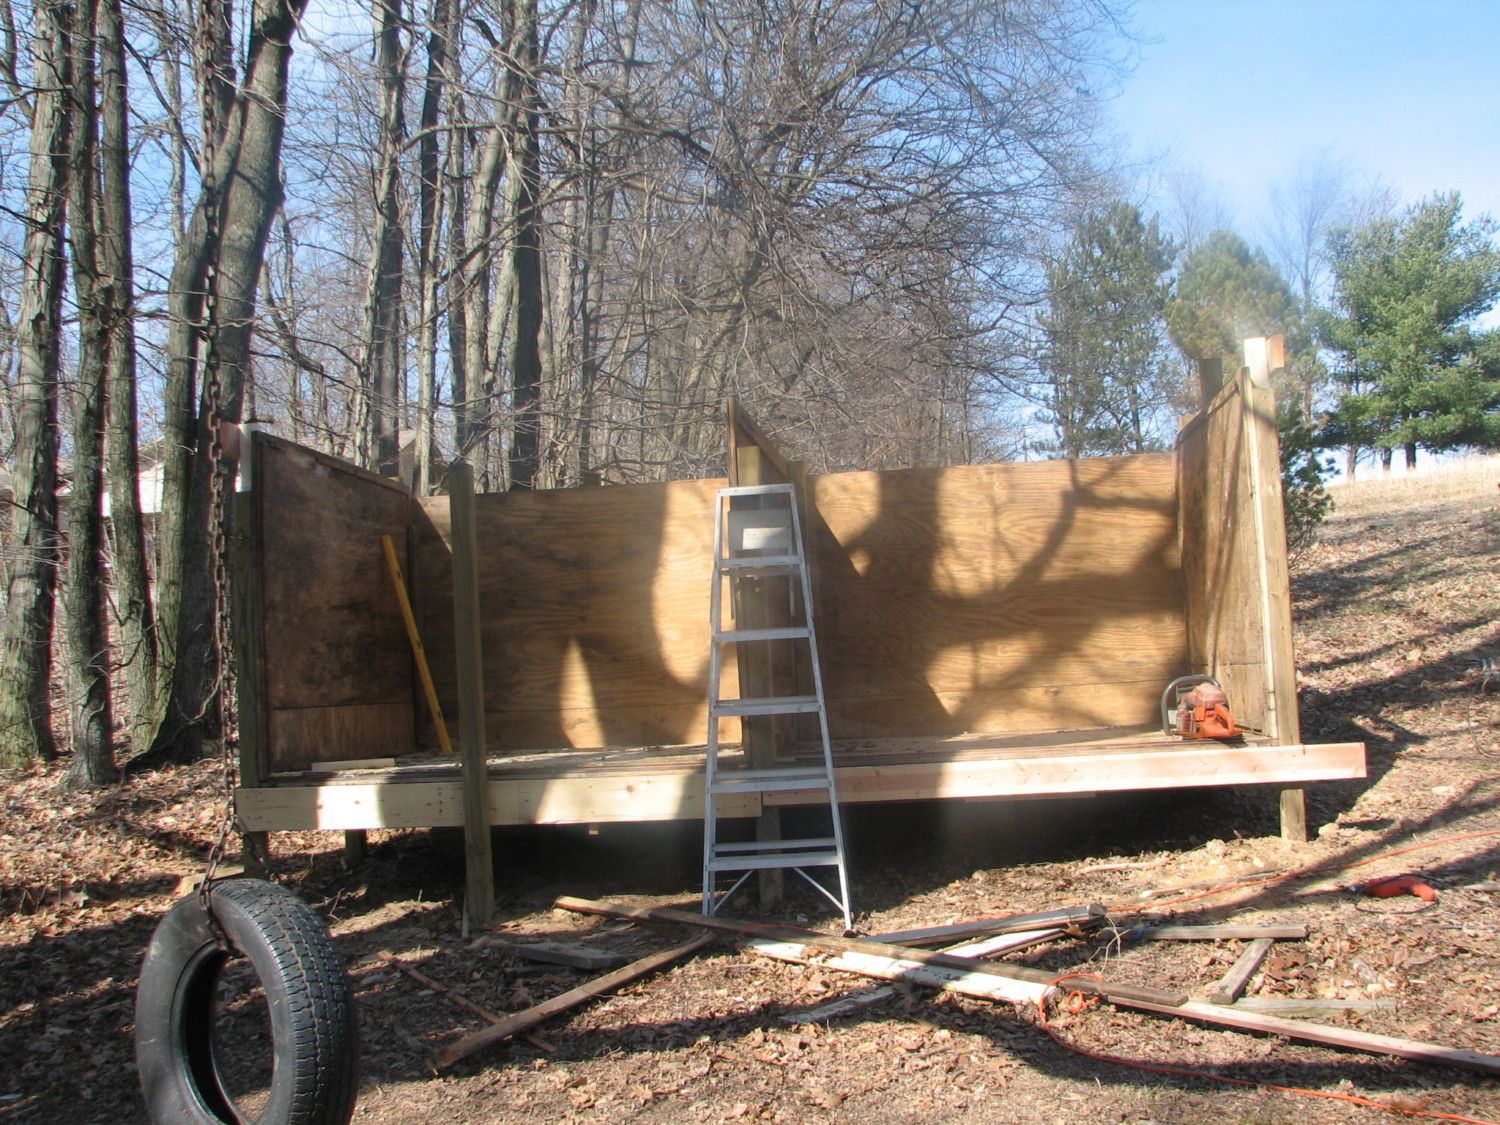
Sides and back all up. Again the floor was reinforced with the old oak wood flooring. The coop is level, I am just not a great photographer...
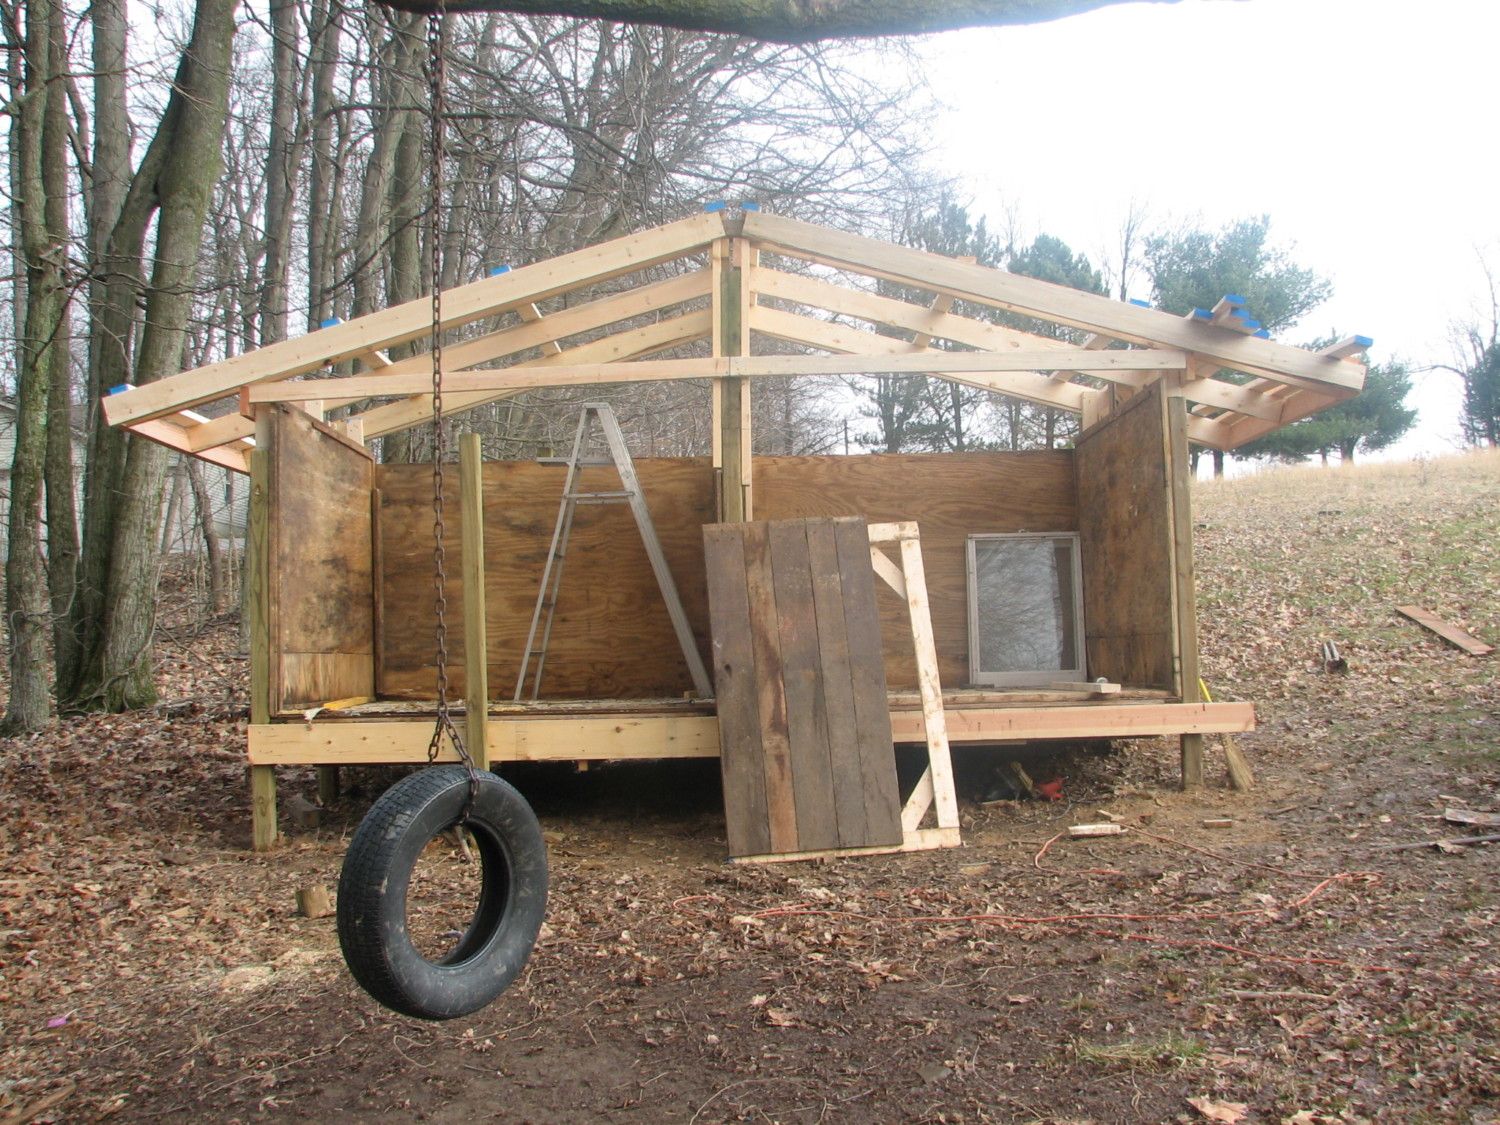
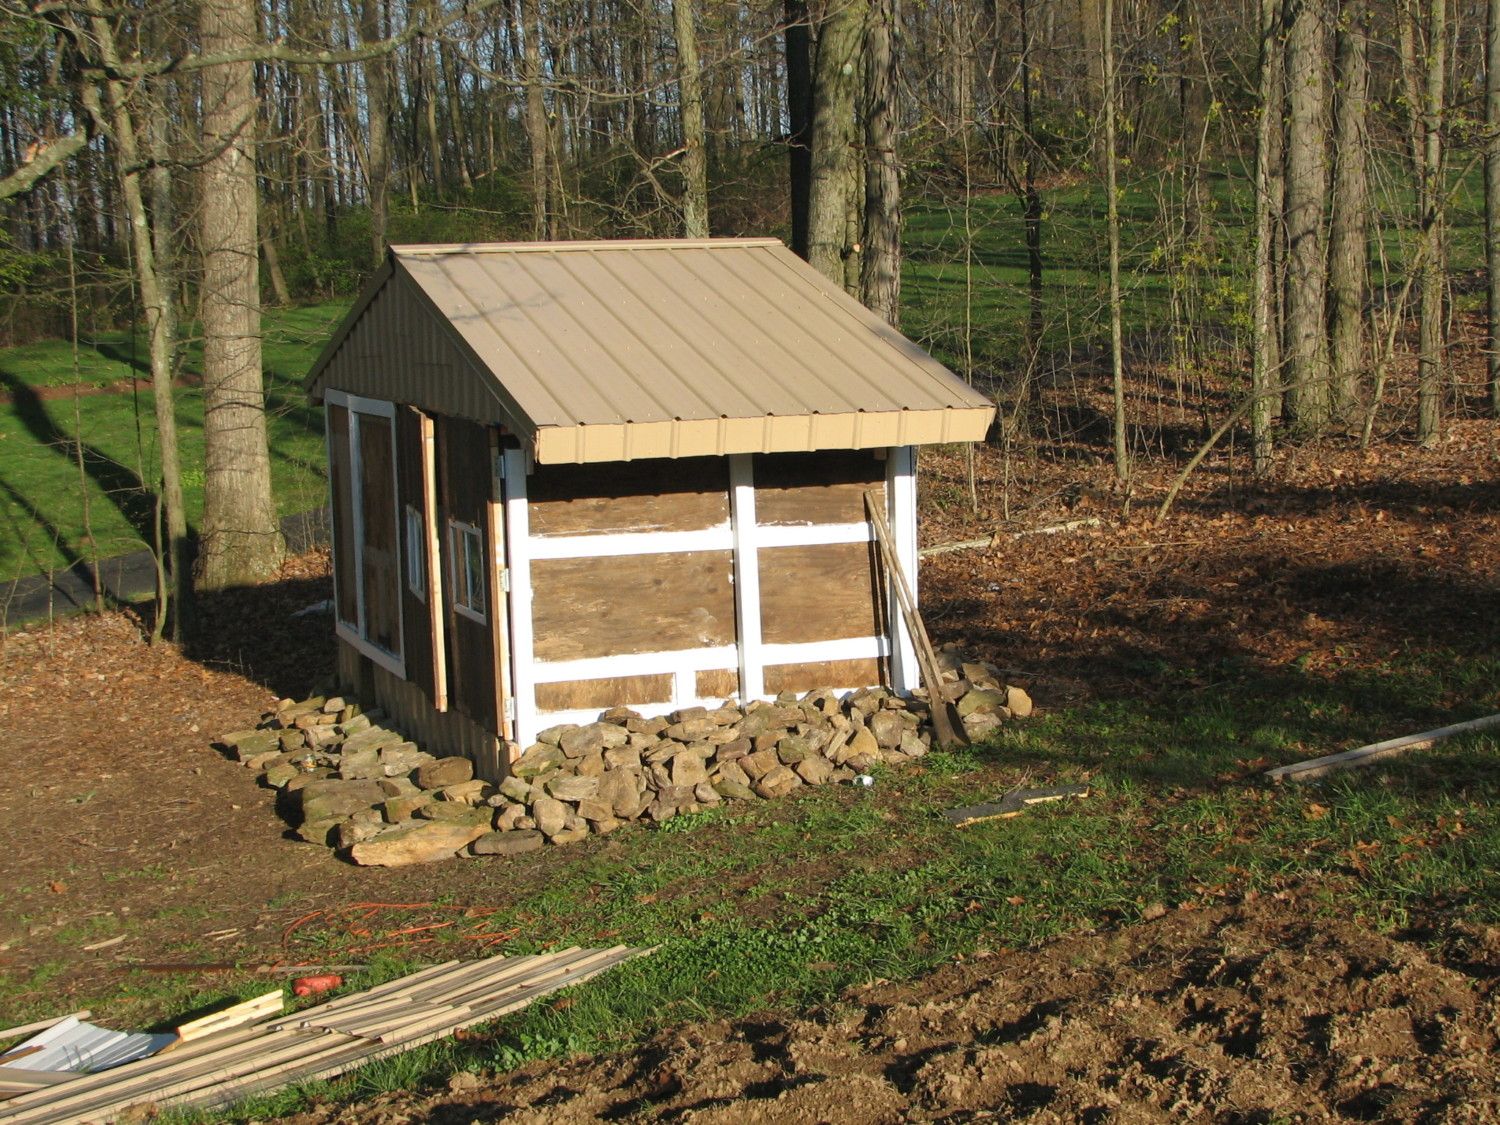
Here you can see that the floor joists are just level with the ground on the new front corner. Also, you can see that we used 4 x 4 posts on center on the sides to better support the floor, and soon the roof. Of course the original plan to make a side sloping roof will now not work. Therefore, we made some last minute changes and additions to the top of the 4 x 4's and crate sides to make them all level and allow for some ventilation at the sides.
As you can see from the pictures we had to do a lot of improvising to raise the center joists high enough for a reasonable slope. The roof is framed by 2 x 6's and 2 x 4's were used as supports to later attach the tin roofing to. I had gotten some free tin at the beginning of the project, but it was no where near enough. We visited the near by pole building supply center and asked for their seconds area. We ended up coming home with a bundle of tin that was cut for a customer who never returned for his materials for less than half the price of new. The tin is rated for 40 years and there were several extra pieces that we were able to put to good use. The most expensive part of that trip was the special screws needed to prevent the water from coming through.
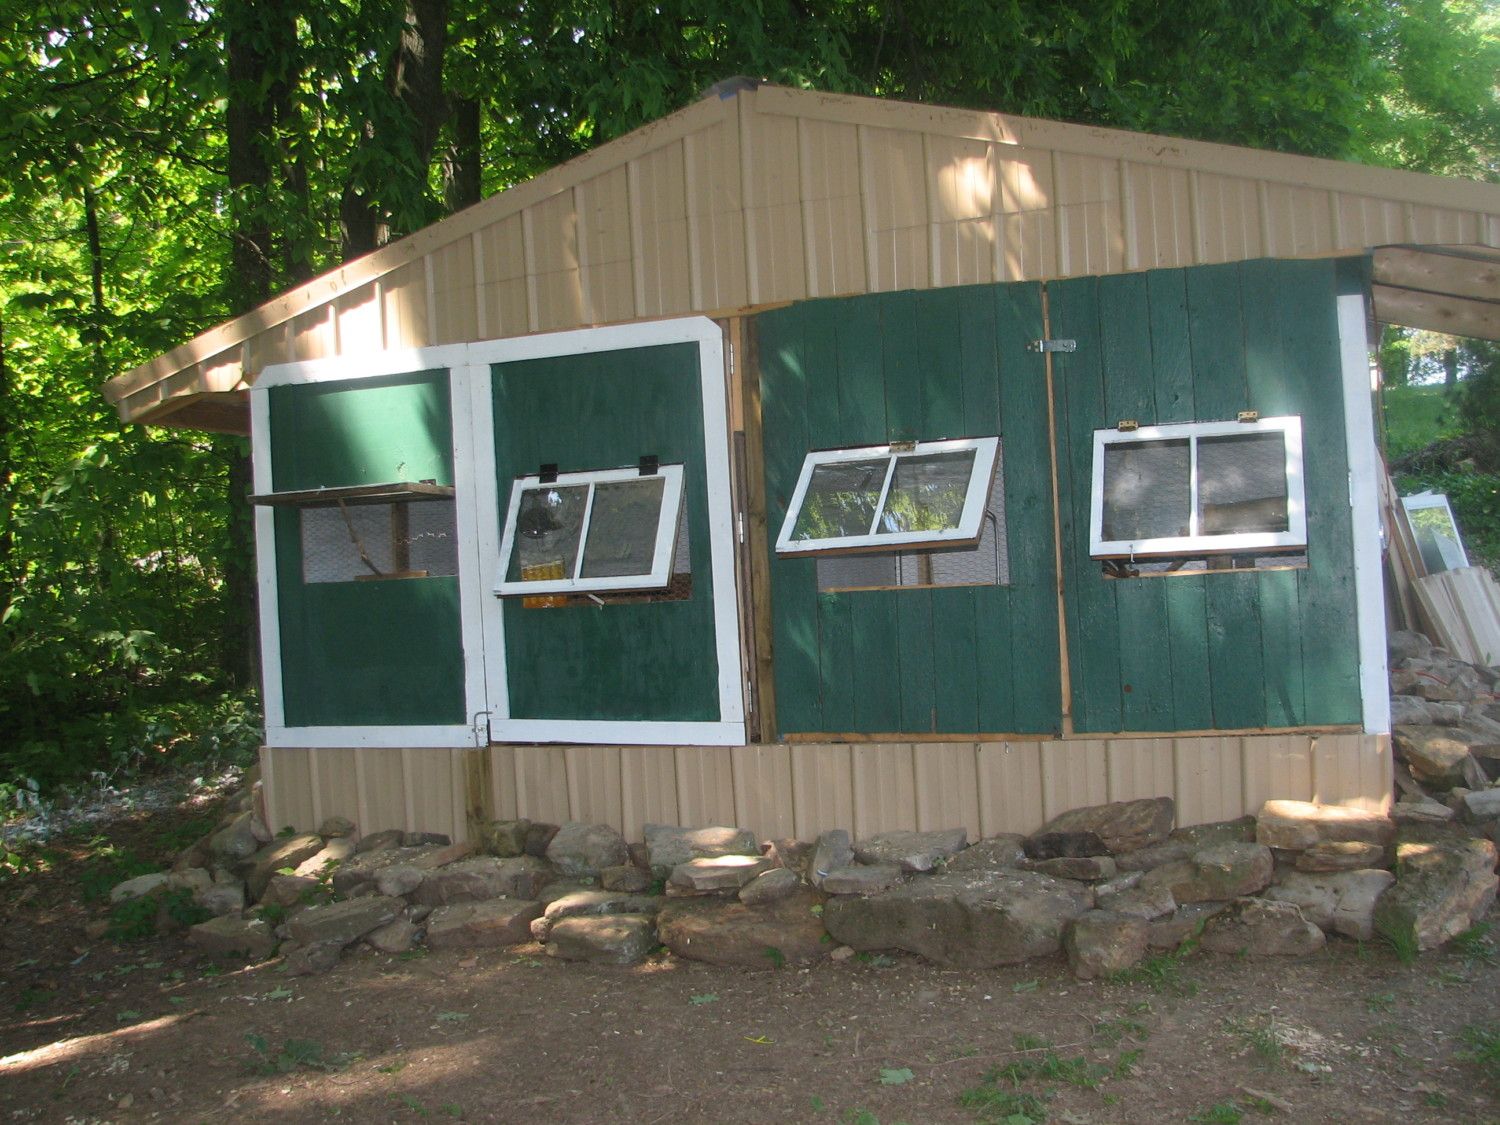
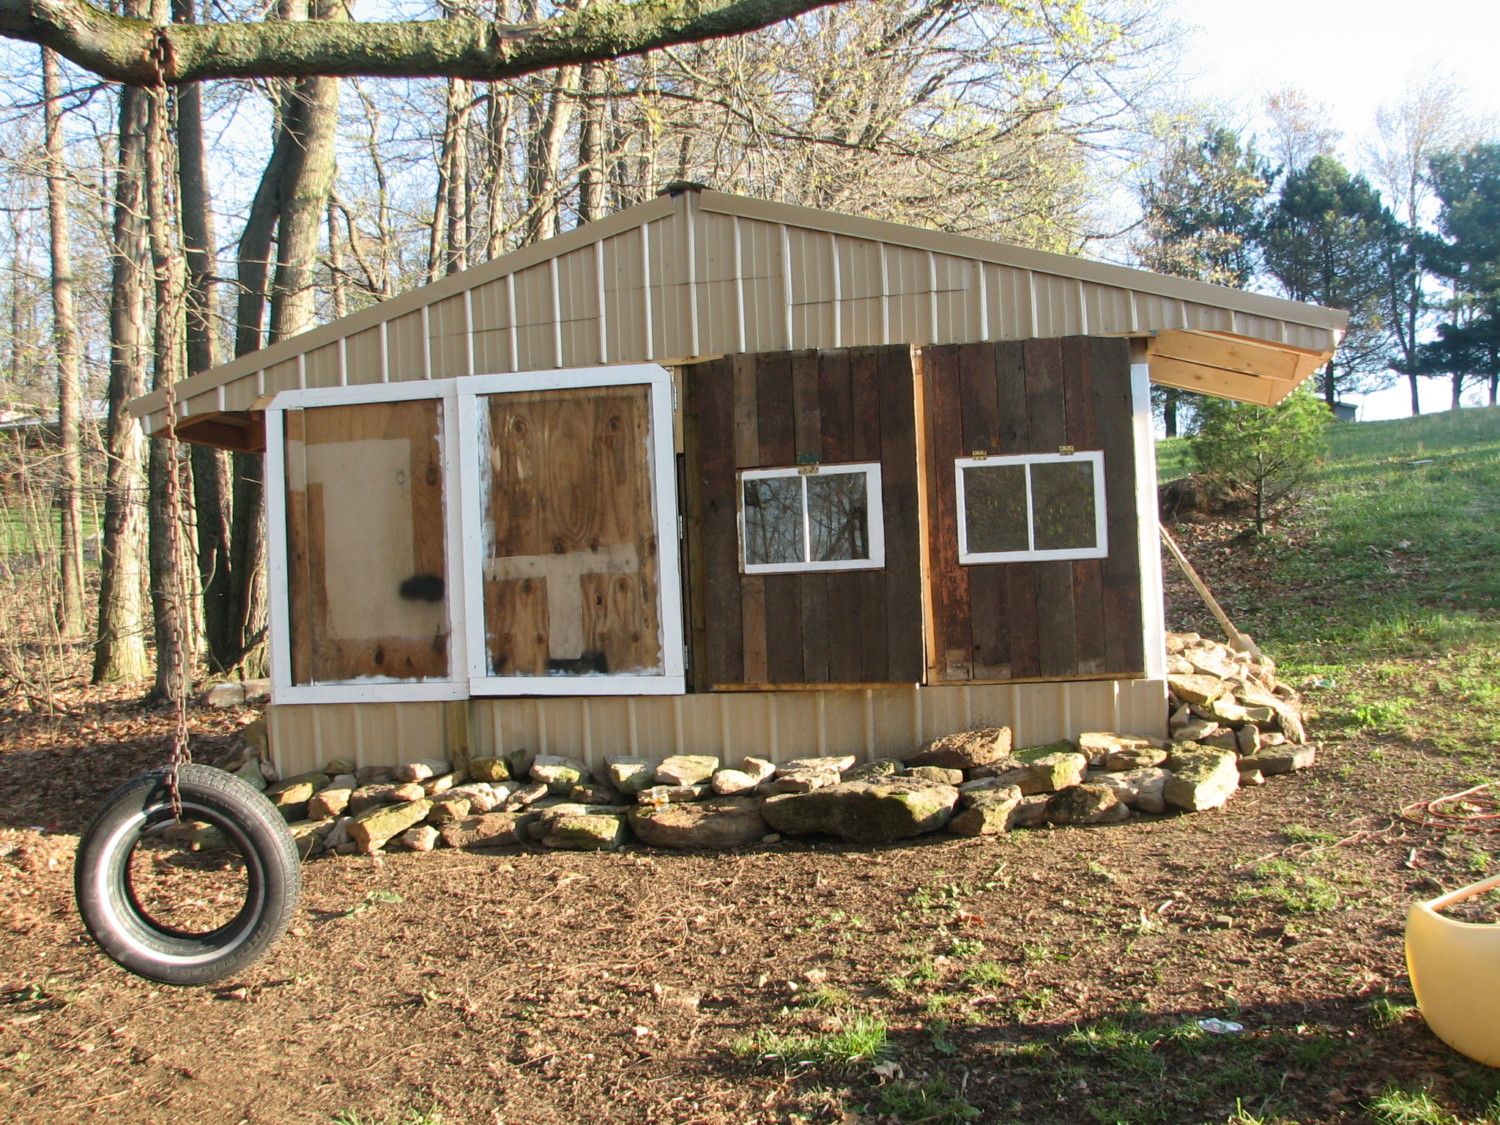
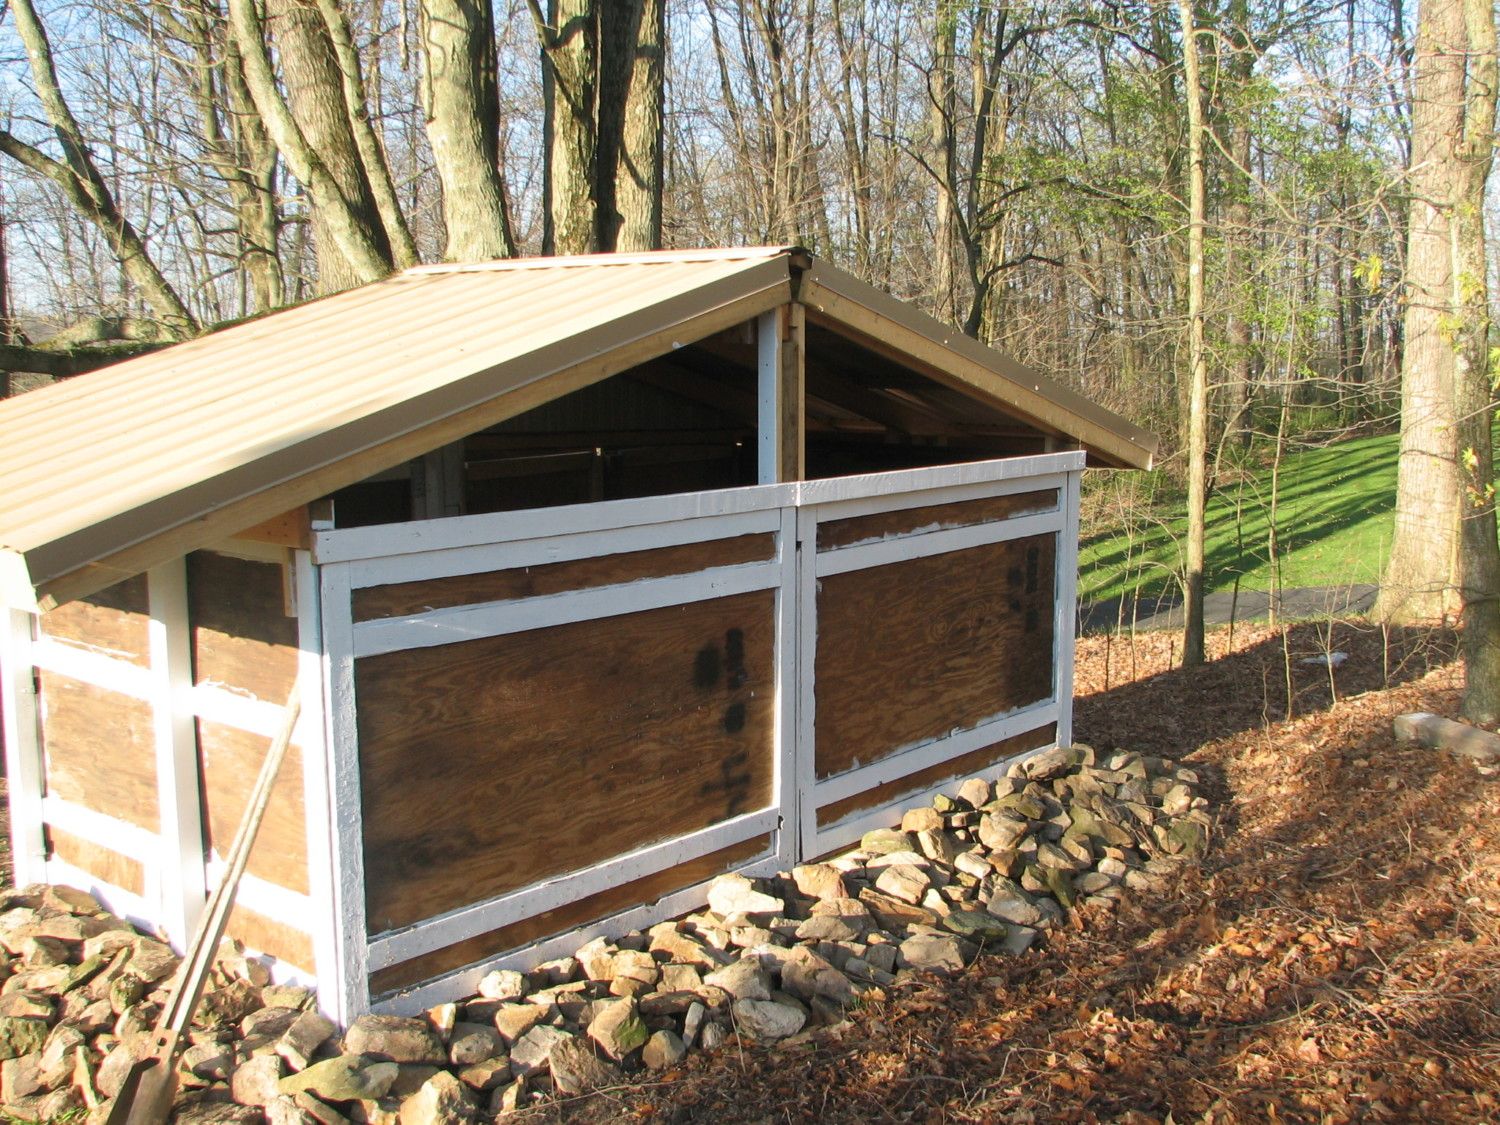
We also began work on the doors of the coop. We made a frame from 2 x 4's and used the oak flooring. It gave the doors a barn like look that I love. Unfortunately, we did not have enough of the flooring to do all 4 doors so the doors for the left side of the coop are made from another section of the shipping crate.
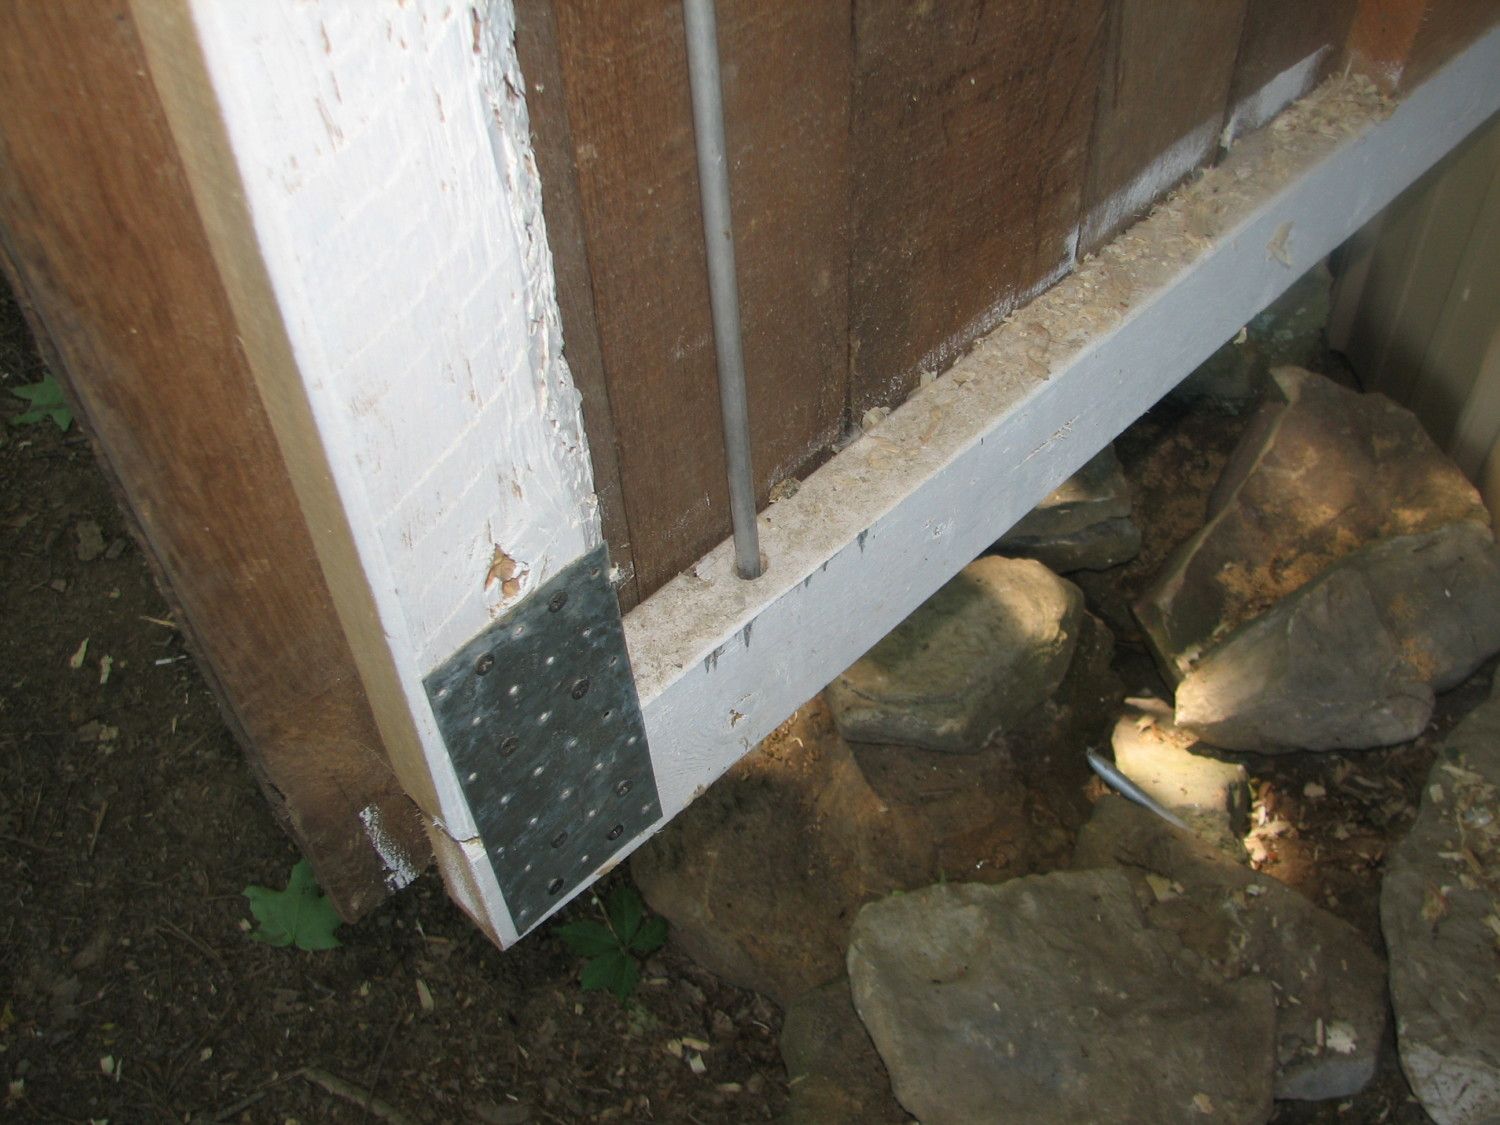
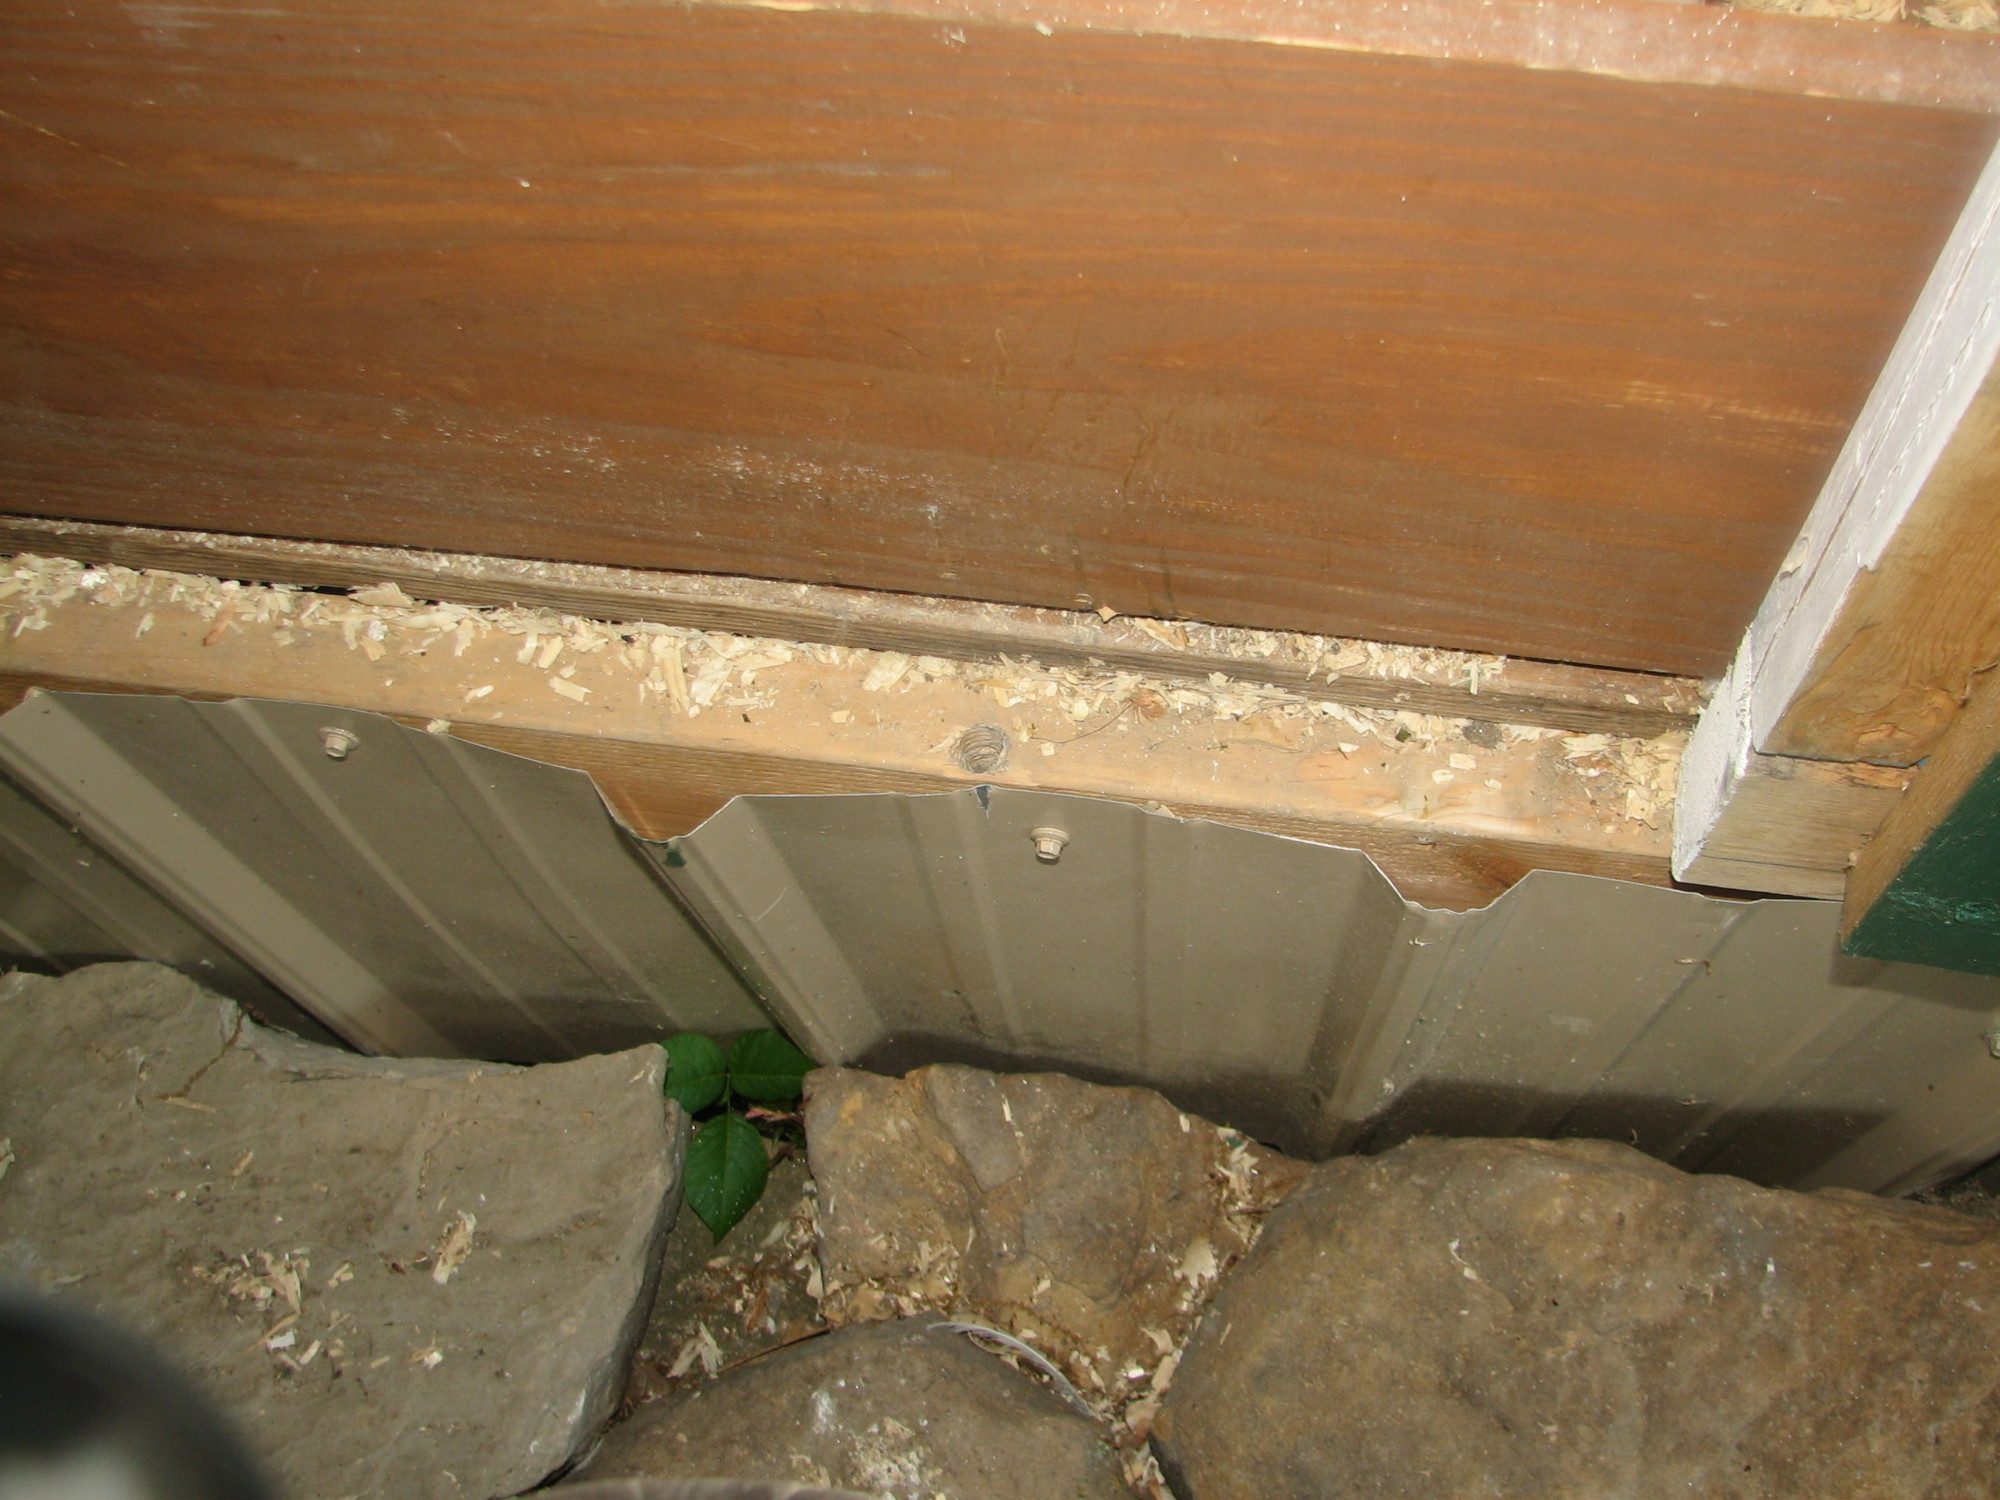
Most of the rain and wind comes from this side of the coop so we elected to use tin to block the weather. If, down the road, we believe that there is not enough ventilation we can add a vent. Also pictured are the sandstone rocks that we collected from the woods next door. There are plenty for the taking, and several were big enough to place in front of the doors to use as steps. Before we added the rocks we placed the tin from the frame of the coop down about 4 inches underground to prevent anything from trying to get under the coop to live. I also started painting the trim. I used semi gloss exterior paint for ease of cleaning and to brighten things up. The windows are reclaimed from the farm dump we found in the woods and are installed with hinges that will allow them to swing out and provide more ventilation in the front of the coop.
The dirt patch closest to the camera is the newly enlarged garden. It will be easy to get the compost material to the proper place.
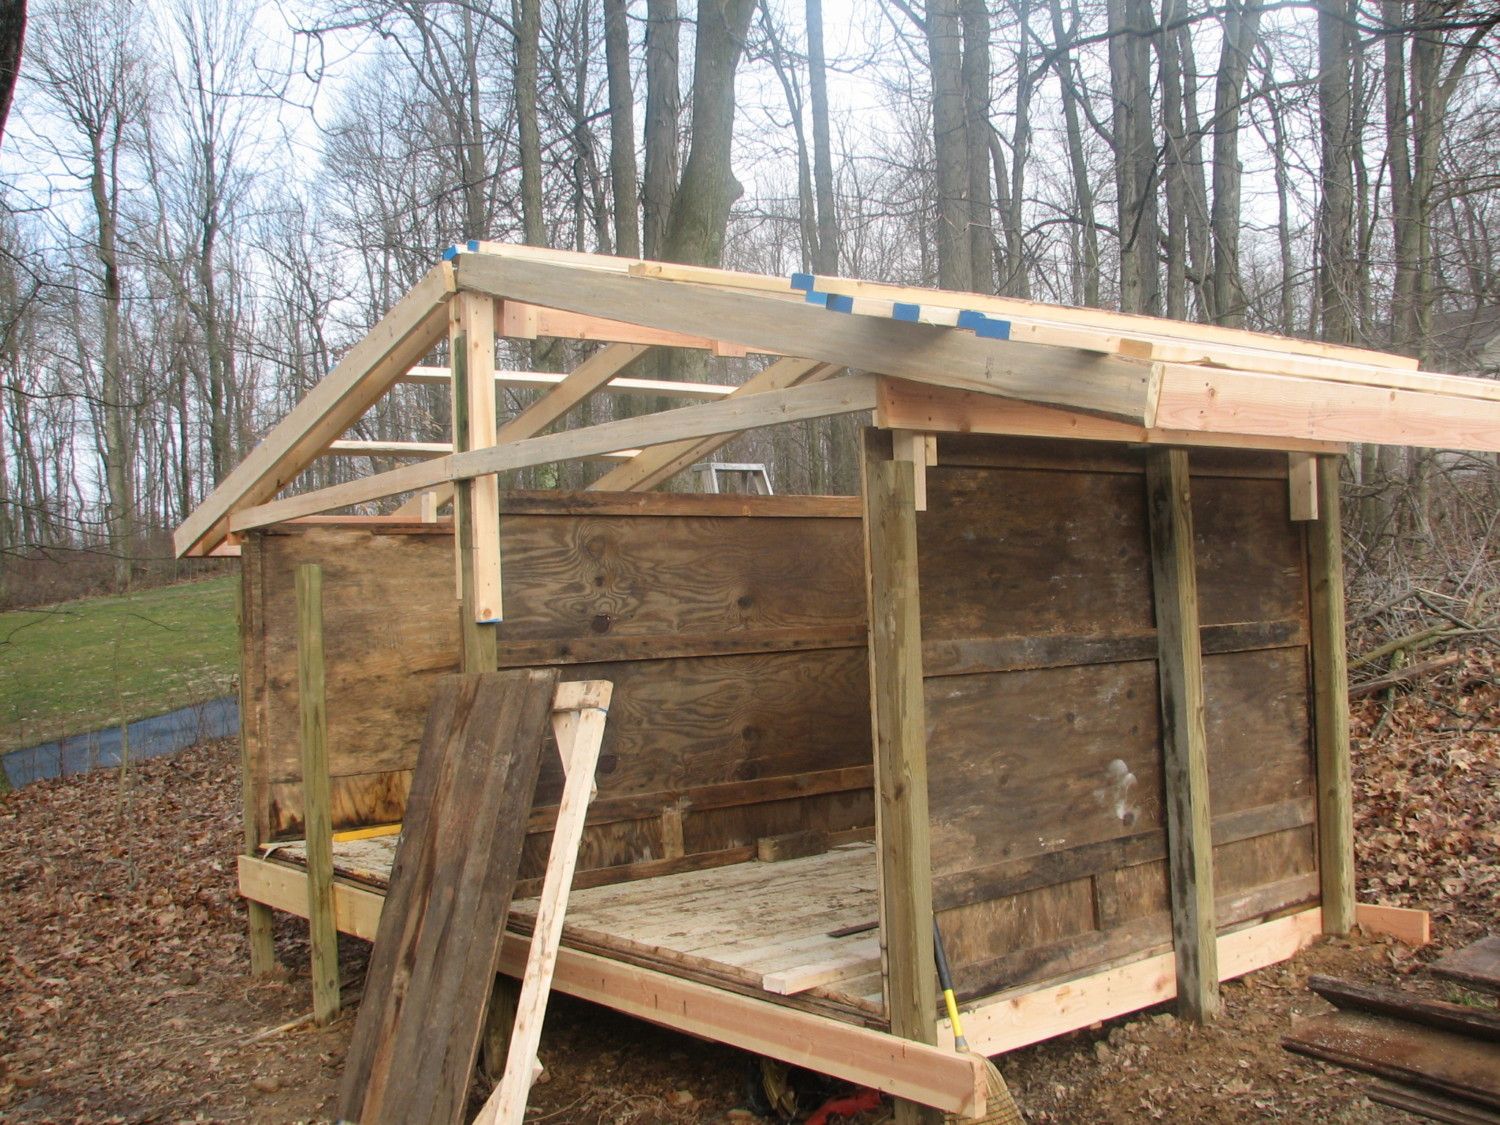
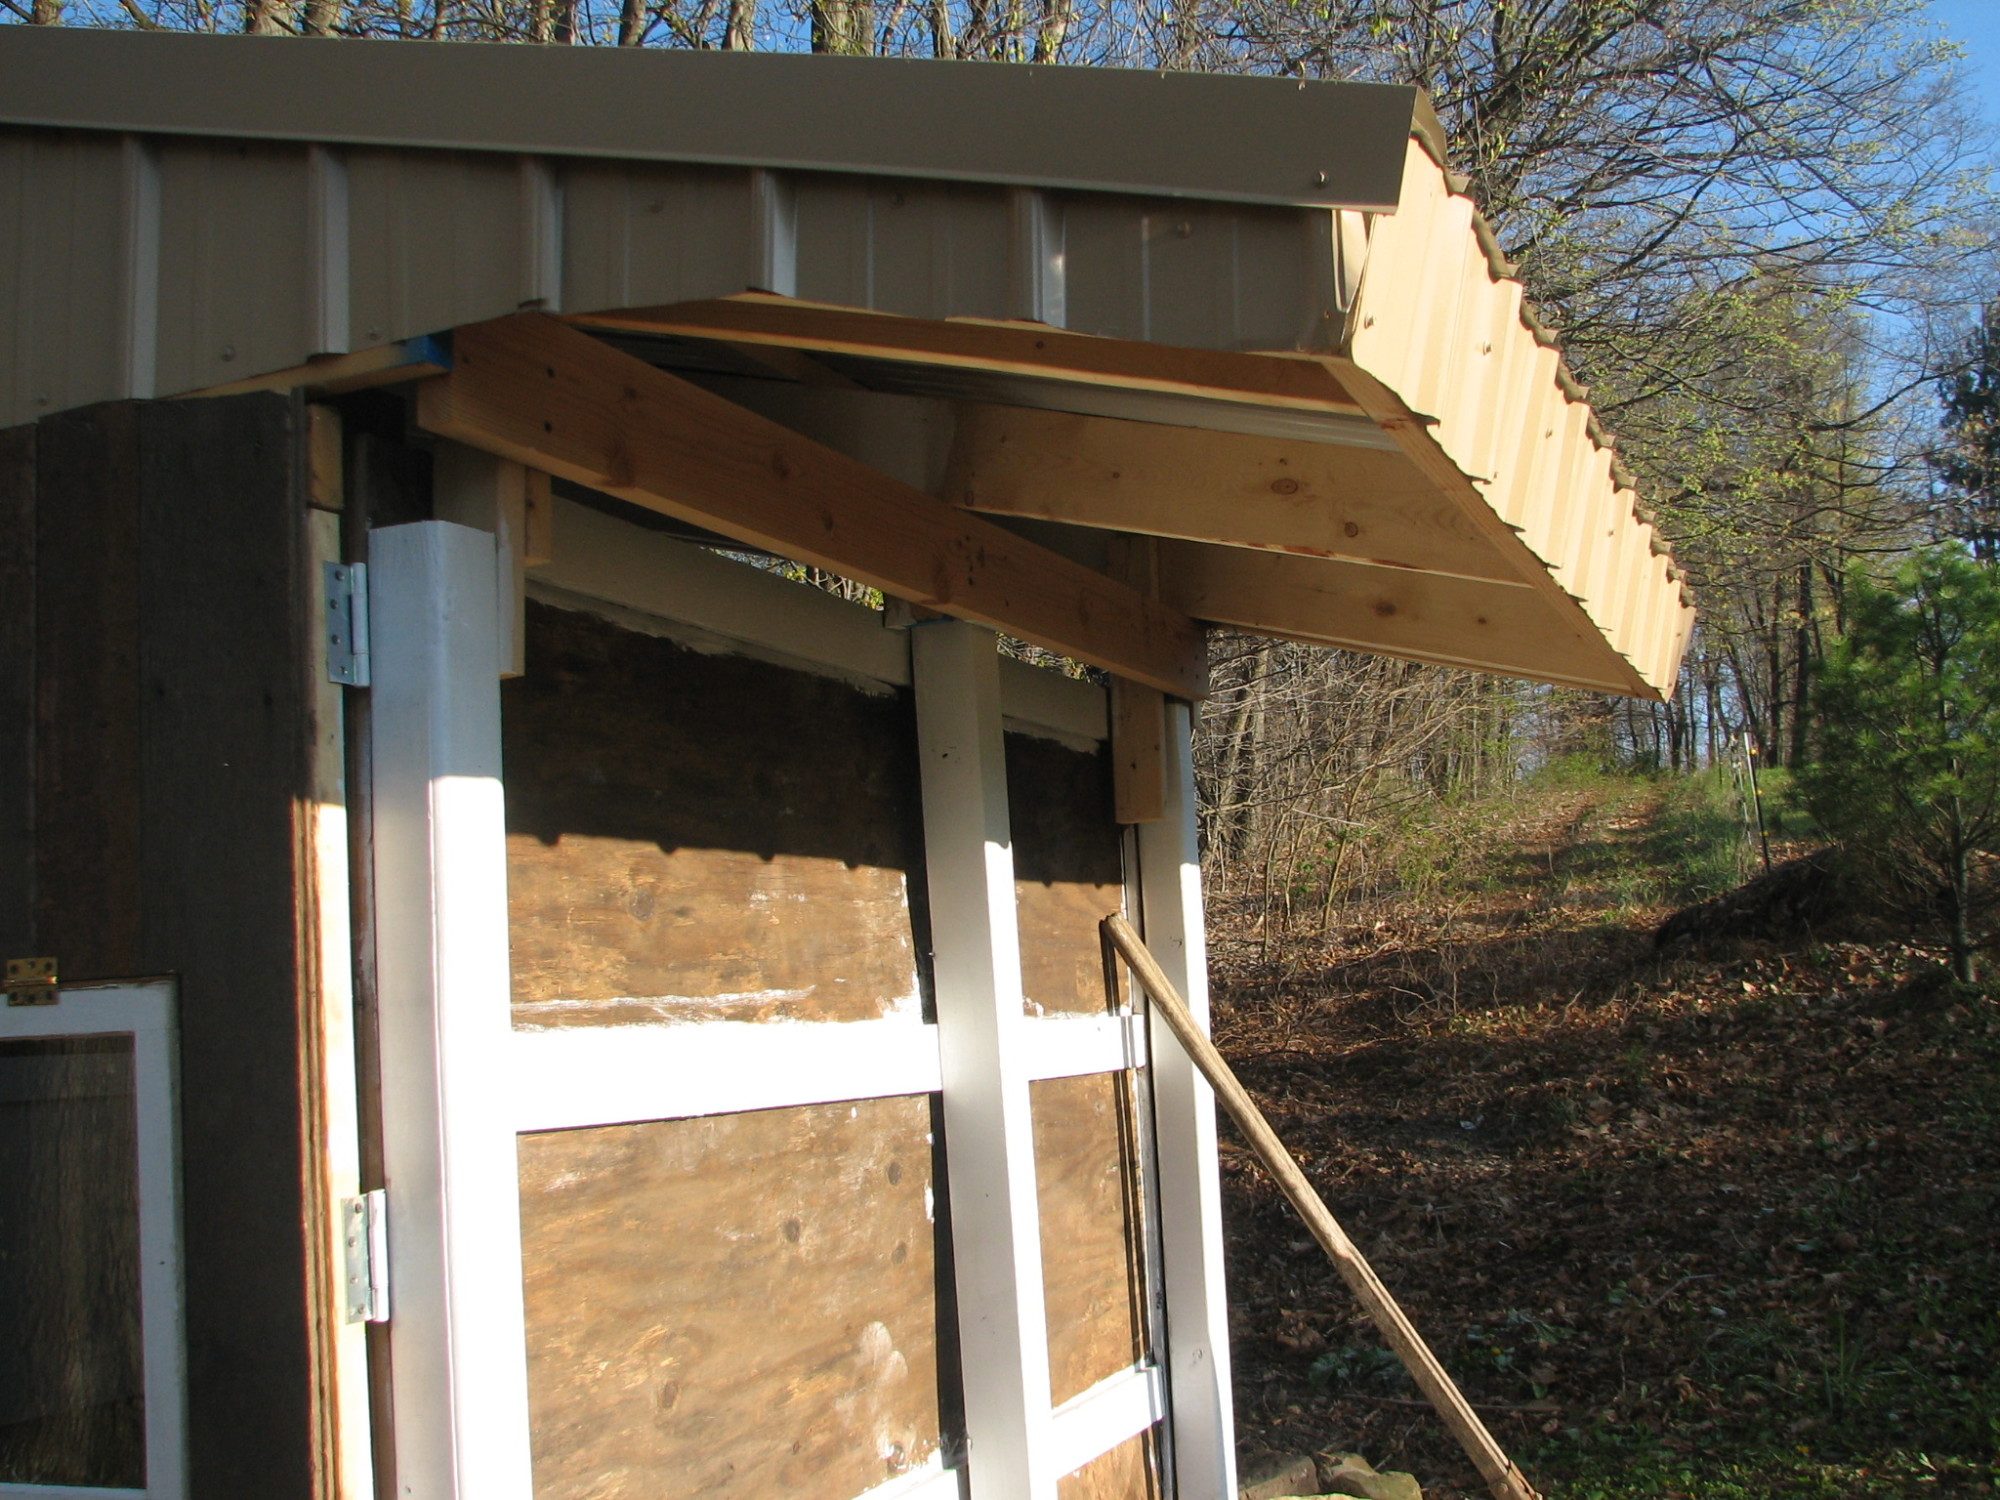
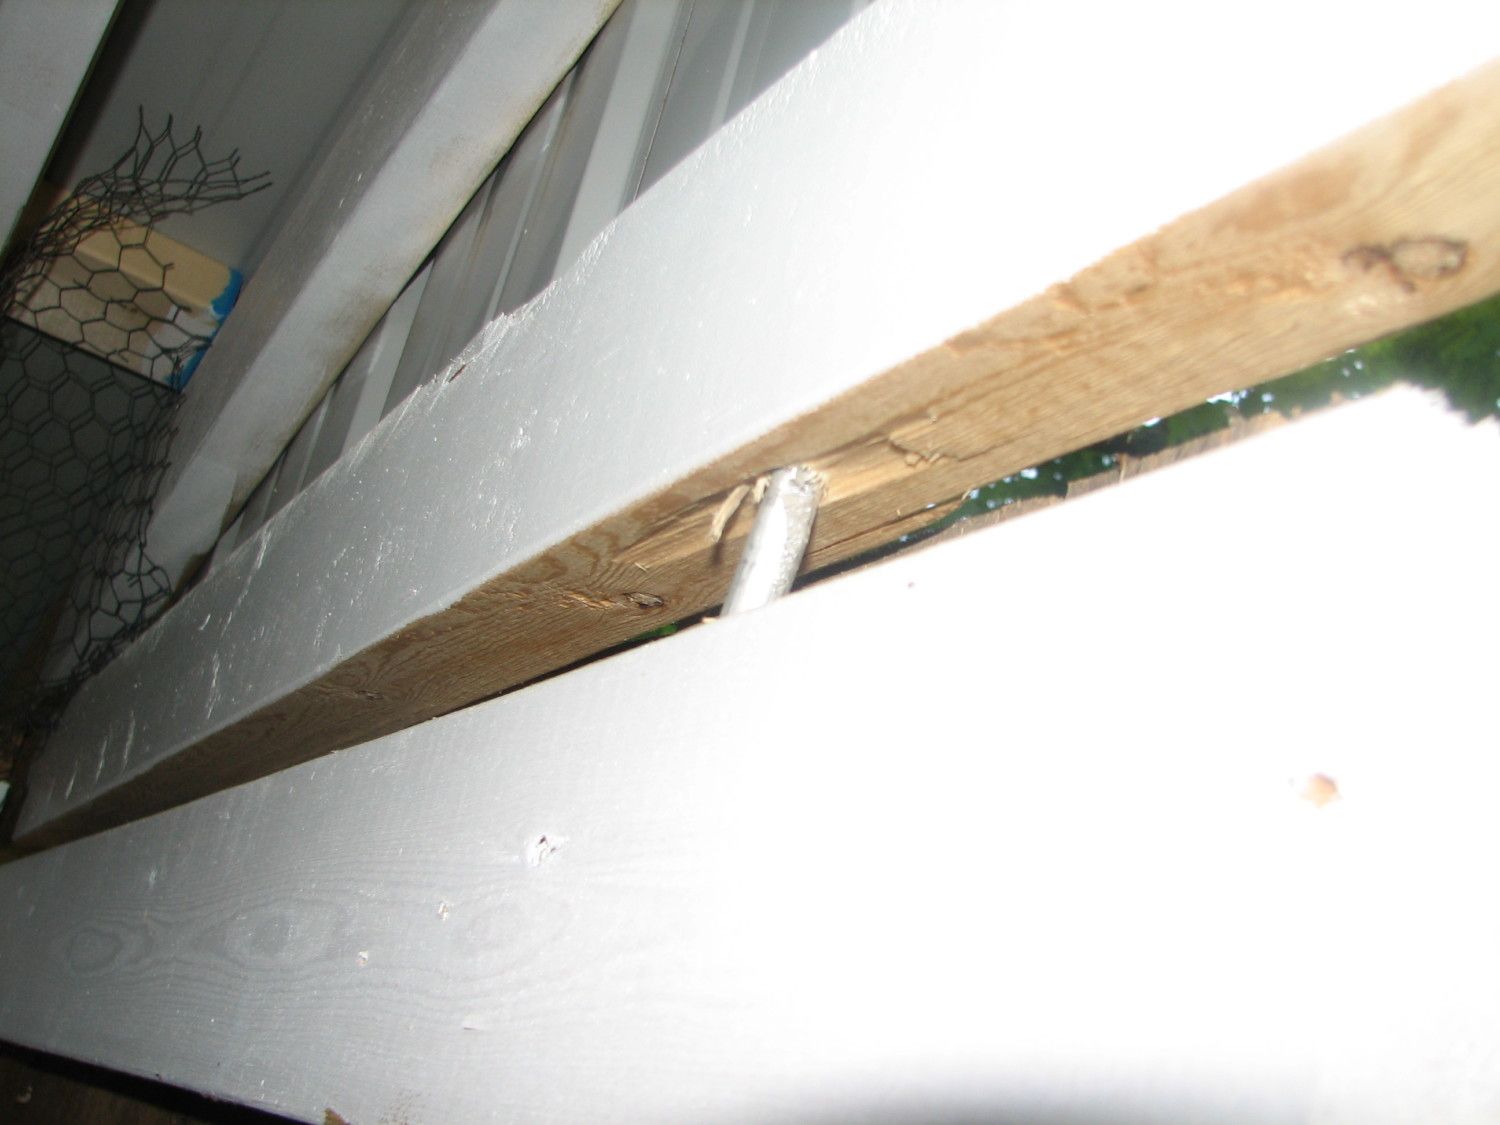
We encased the exposed 2 x 6 roofing ends to make them more weather proof. The back corner is dangerously close to my head when I walk underneath... Don't ask me how many times I have hit my head on it...
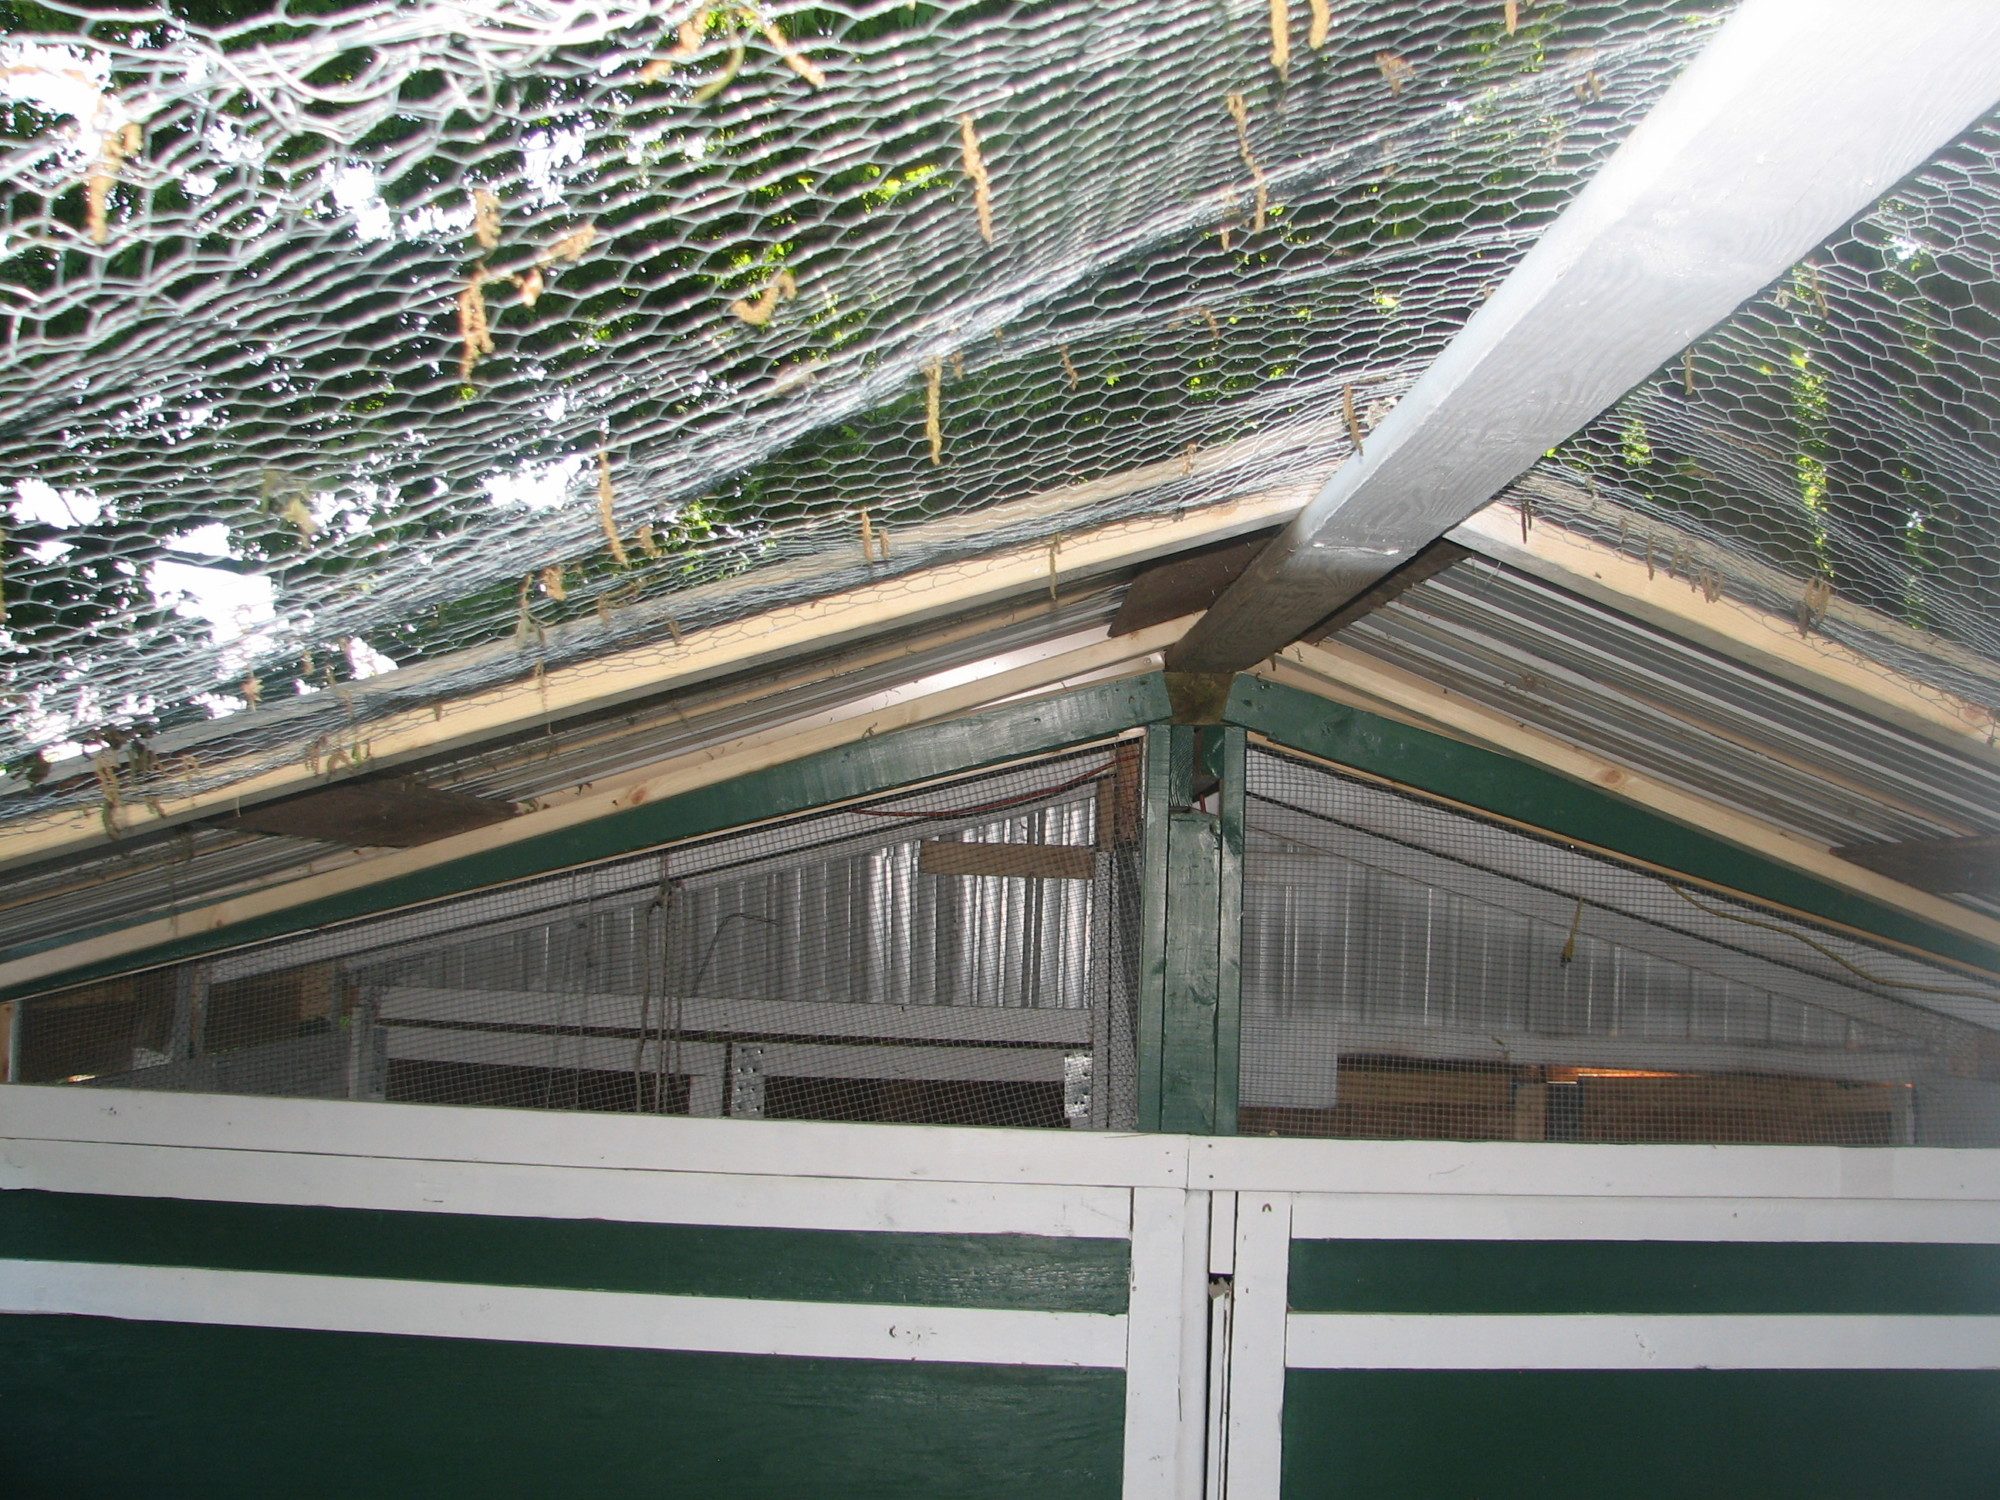
We left the back side of the roof open for maximum ventilation. This end will also be where the run is attached to the coop.
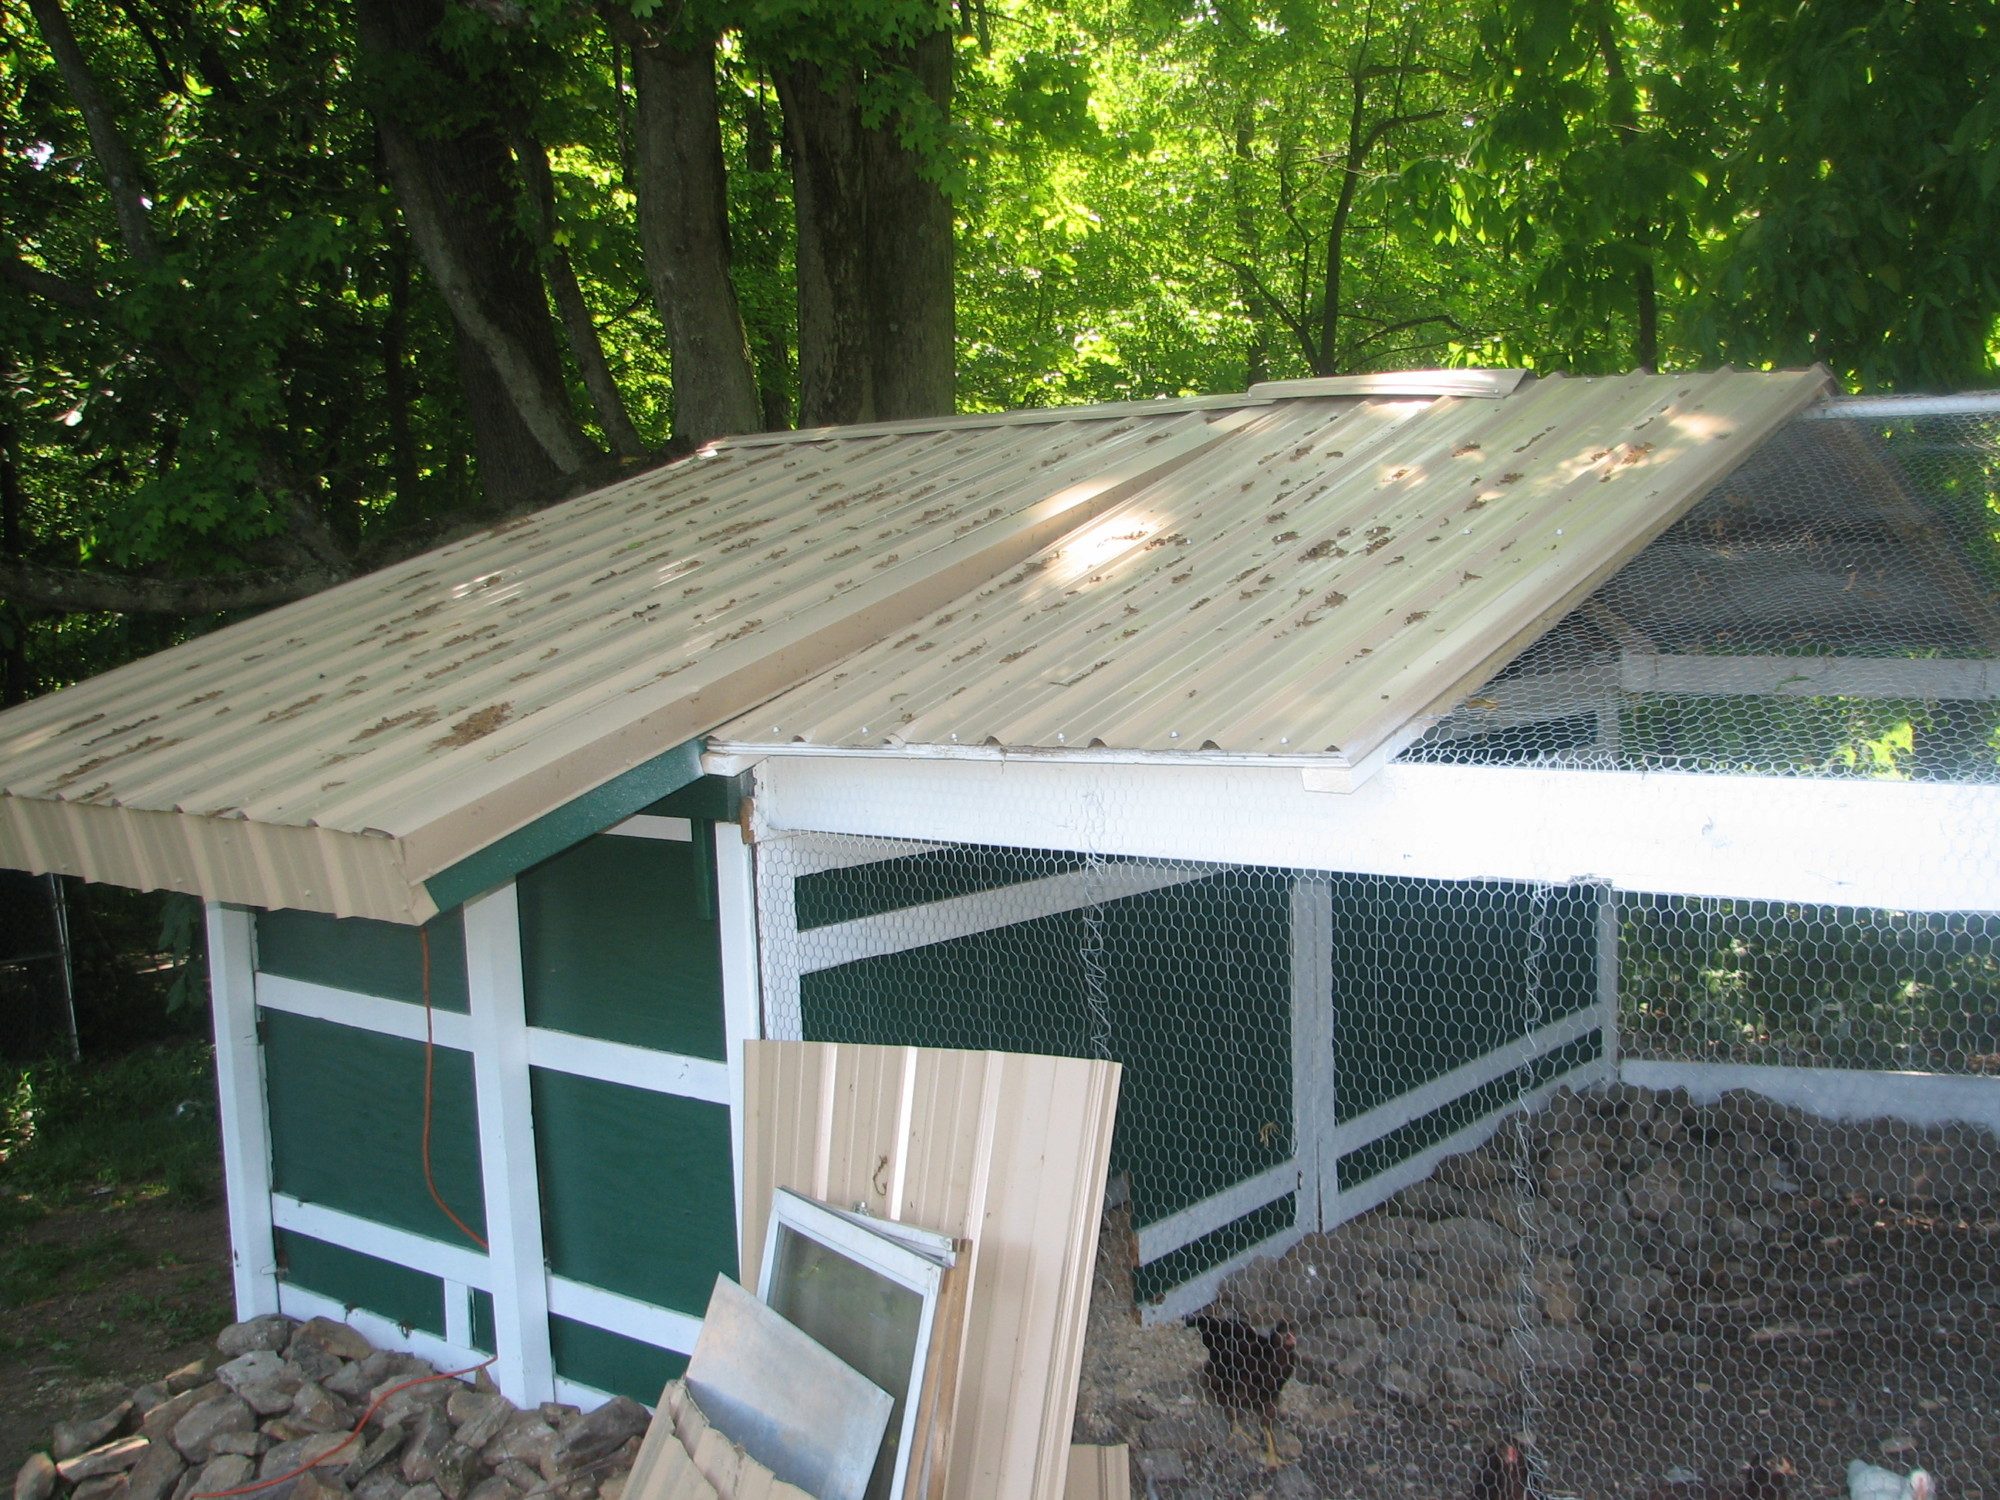
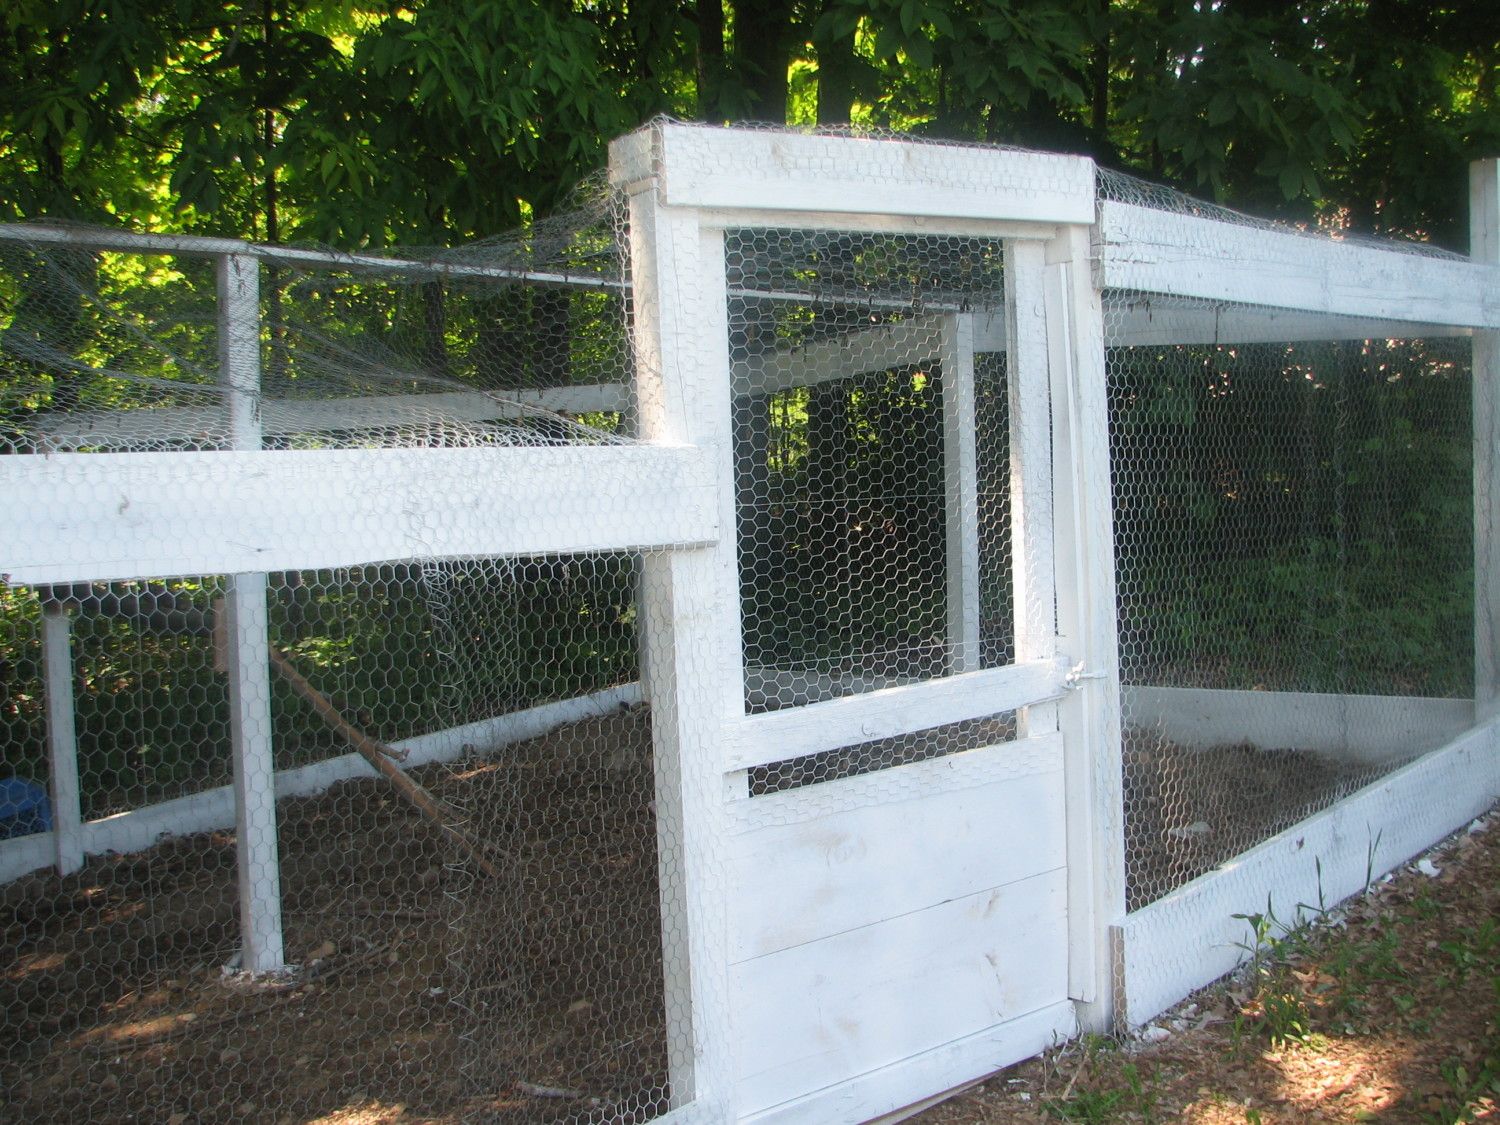
Jump ahead to the completed run... We used 2 x 6 framing to make the run. We also used some of the extra tin to make a covered area for the chickens outside the coop, as well as keep any rain and or snow and wind from going into the completely open side of the coop. Because we live on a hill, and the run is going up hill, the frame of the run is staggered to allow for the pitch of the hill. Since we added the cover we had to make the peaks match. Therefore this end of the run is a little shorter than the other, but I can still walk under it easily. I scored major big time and purchased several rolls of chicken wire and hardware cloth from a farm auction. Therefore for added protection we covered the whole roof in the chicken wire, as well as the sides. I will also be adding 1 x 2 welded wire around the sides to make them more predator proof. The pile of extras you see in this picture are materials to make the roof of the nesting boxes that will be added when the girls are bigger, as well as a roof for the outdoor feeder I will be building.
We also used scrap lumber to make the man door into the coop. The roof of the run is supported with a center 4 x 4 and 2 x 6 running from end to end. This allowed us a place to attach the chicken wire across the top to hopefully provide enough support and prevent any damage being done by the snow and ice we might get this winter. Since we had to stagger the height of the run to allow for the hill the placement of the chicken wire was difficult. Eventually I just cut a piece big enough for the opening and wired the pieces together. Sure does not look the best, but it will prevent the birds from flying out, and other predators from getting in. 2 x 6 boards were laid across the ground and the chicken wire is buried 2 feet under ground. Sandstone rocks will also be added around the run to discourage anything from digging underneath. We placed a 2 x 6 board on the back of the door level with the uneven ground to make the door slide across the ground but keep things from going under. Hopefully this will be enough, but we will probably also lay rocks in front of the door to keep things out. The whole run is painted inside and out with the same trim paint to make it better weather resistant.
Back side of the run
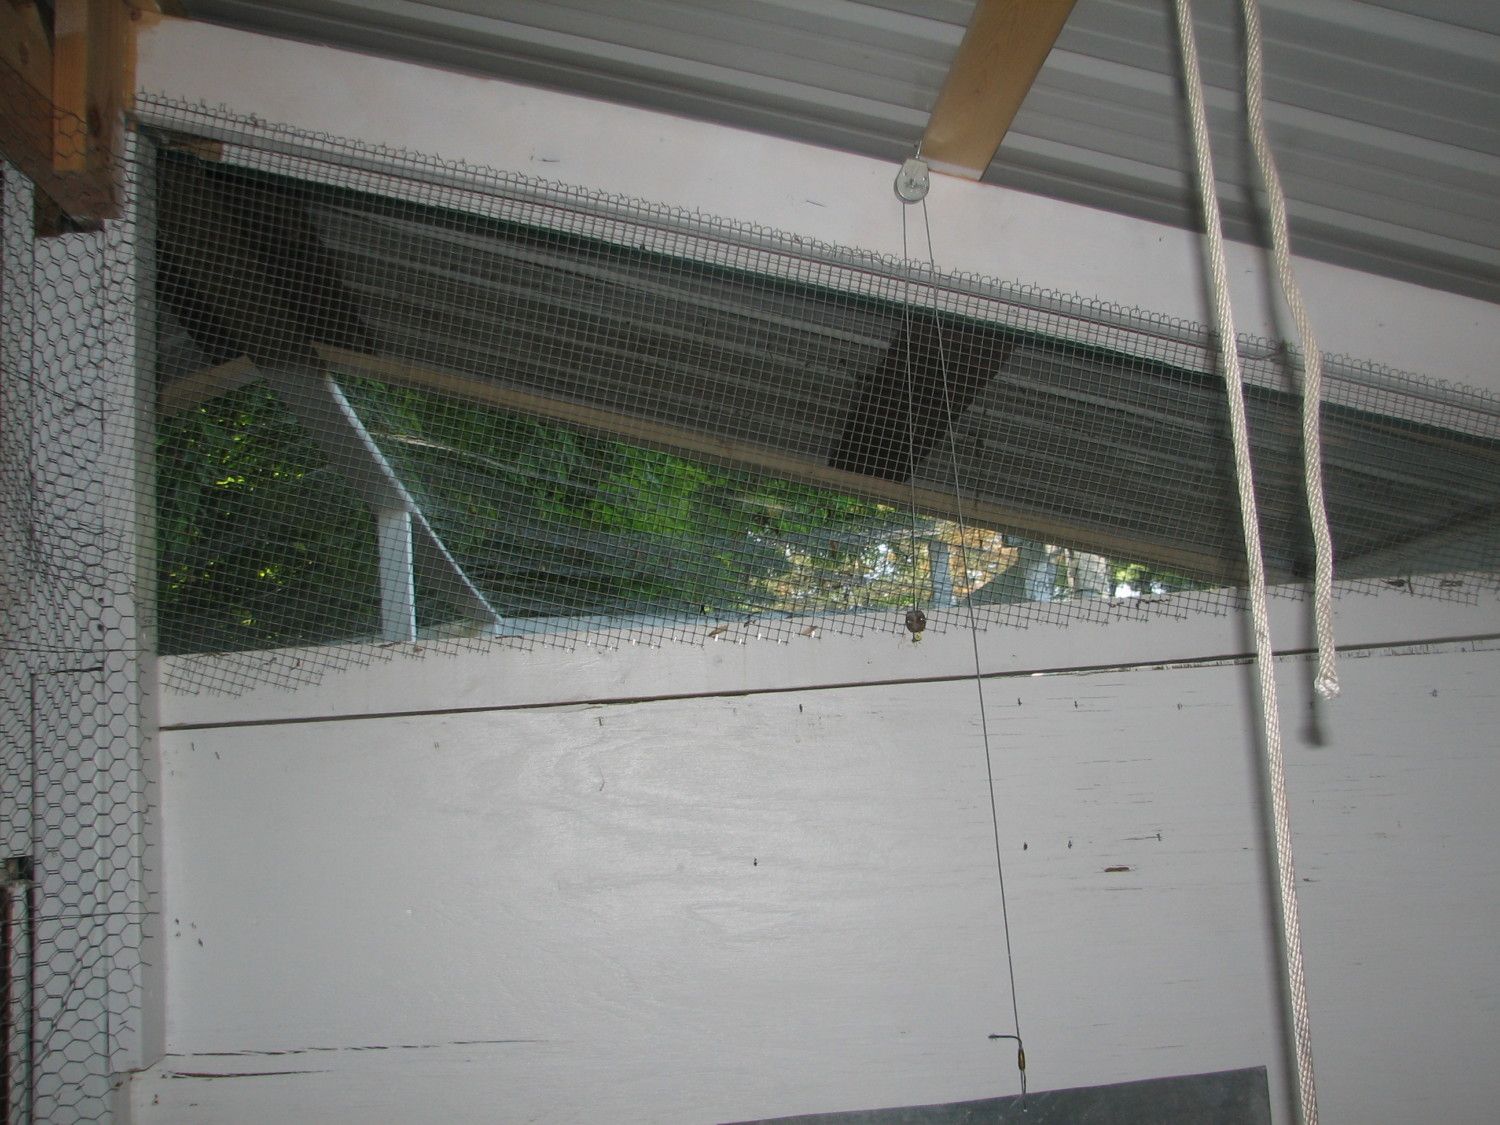
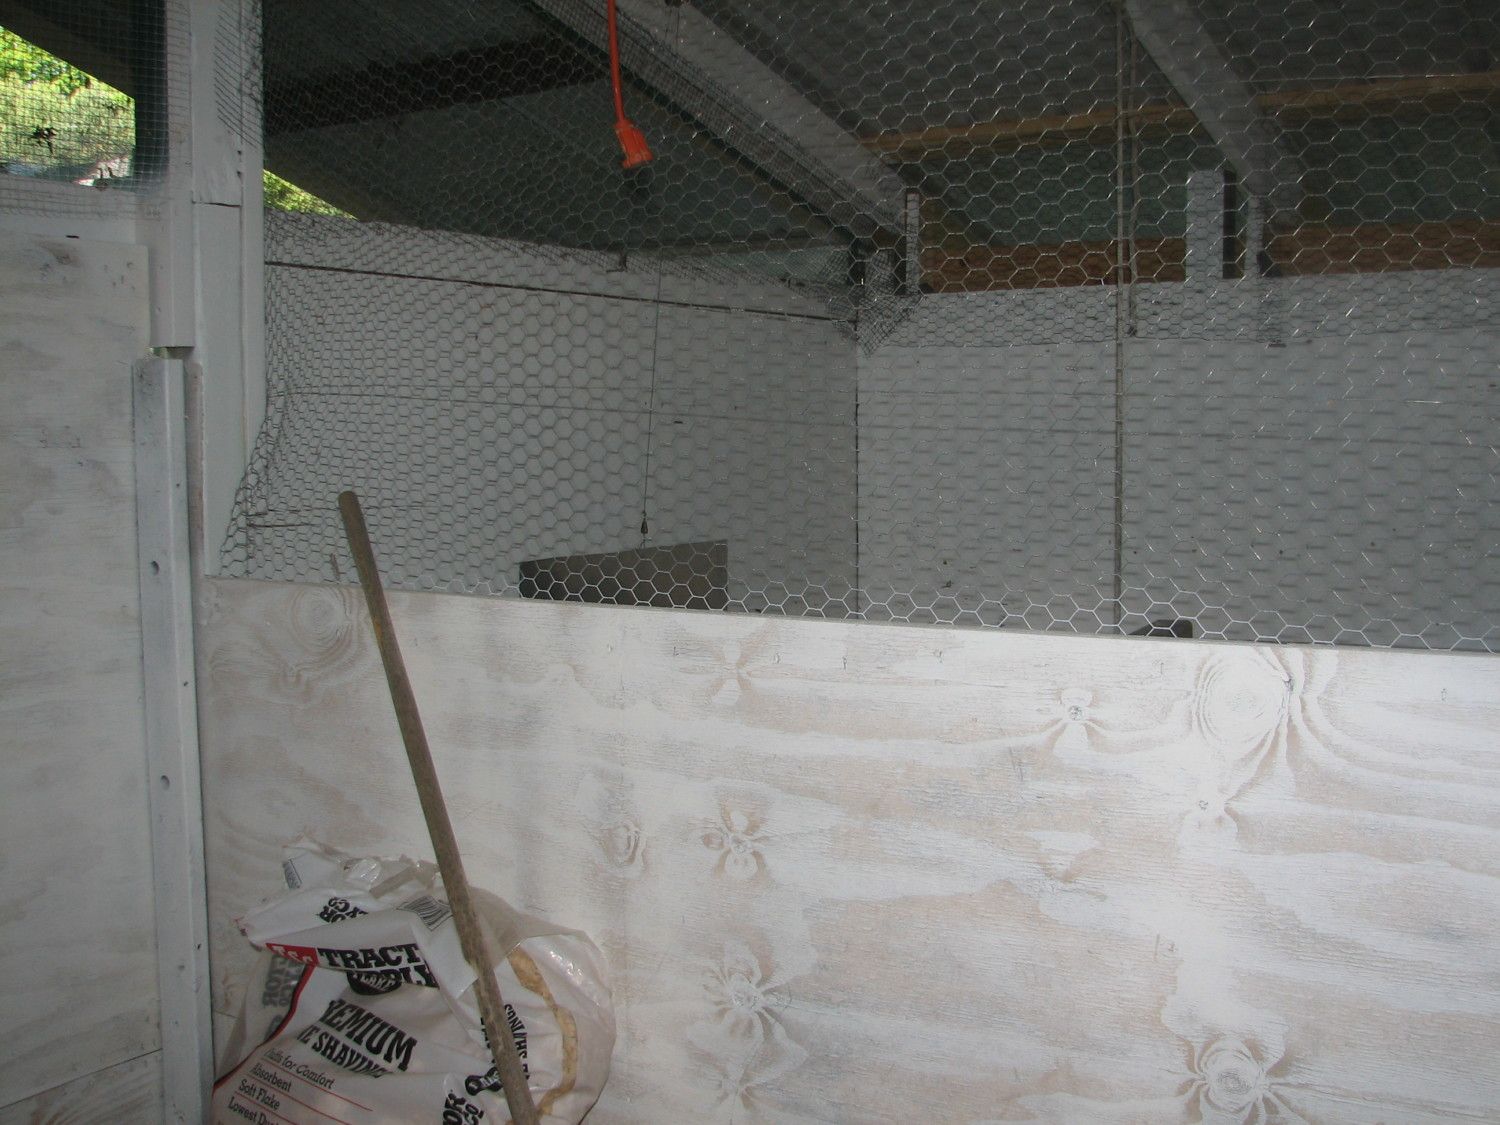
View from under the run into the coop. You can't tell but the opening under the roof is enclosed with hardware cloth.
View from inside the coop. The hardware cloth is installed with heavy duty staples.
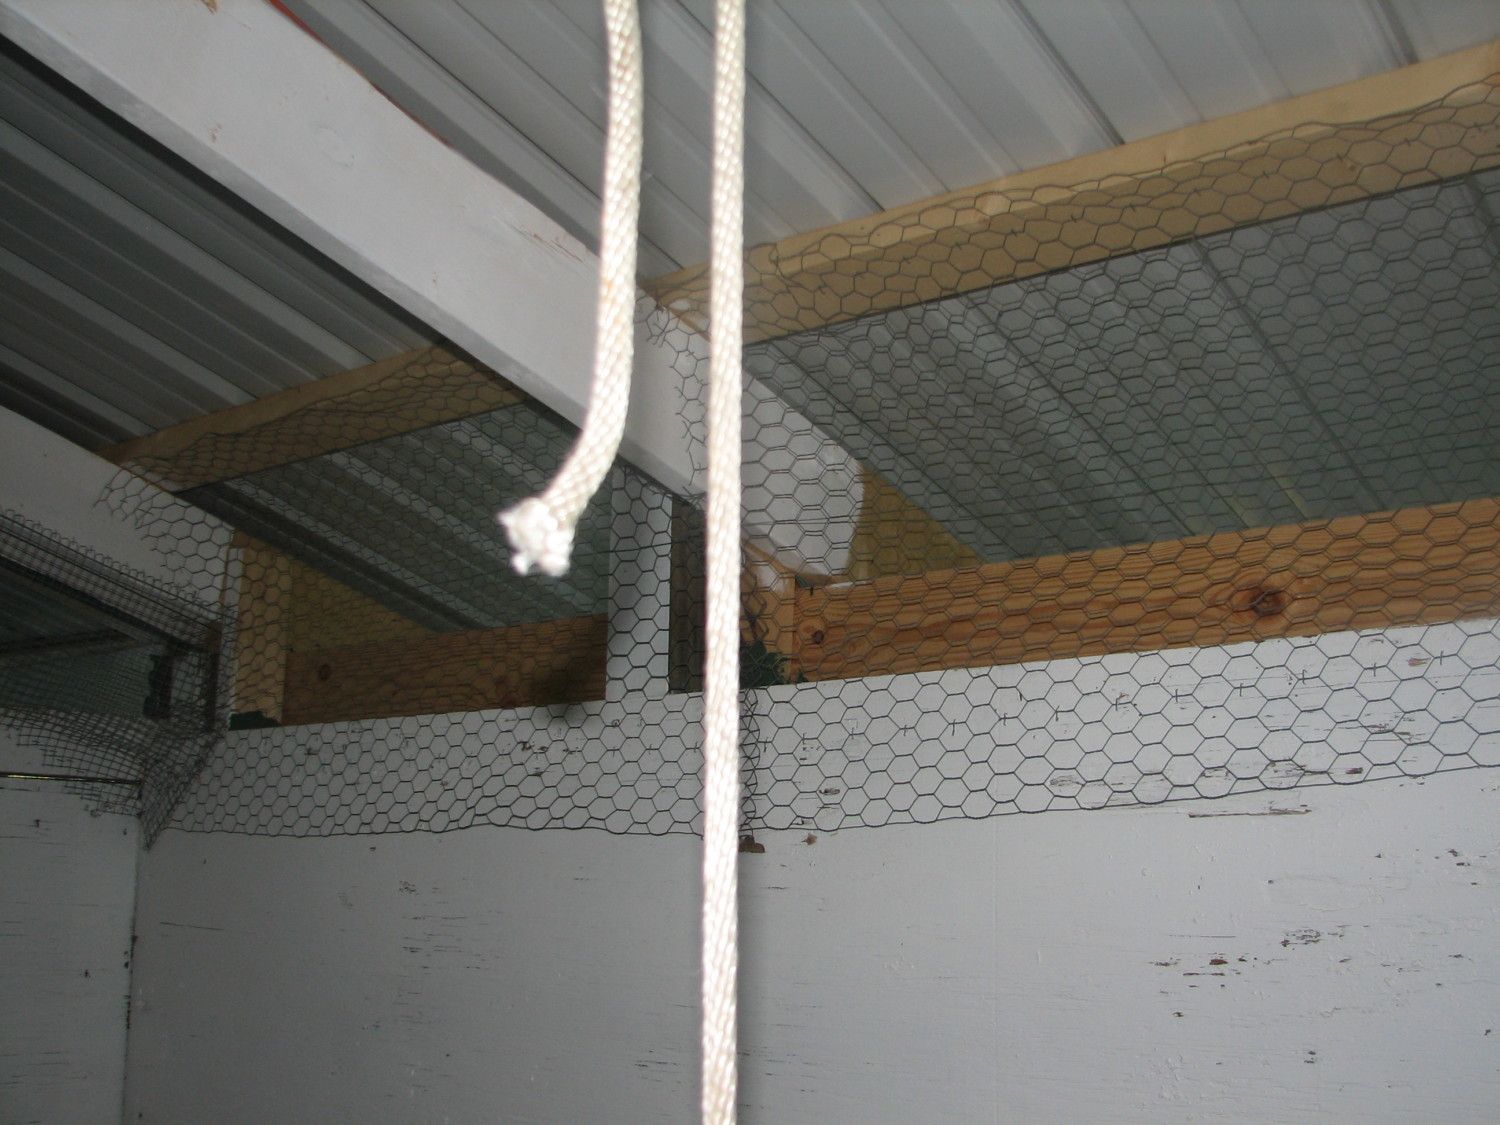
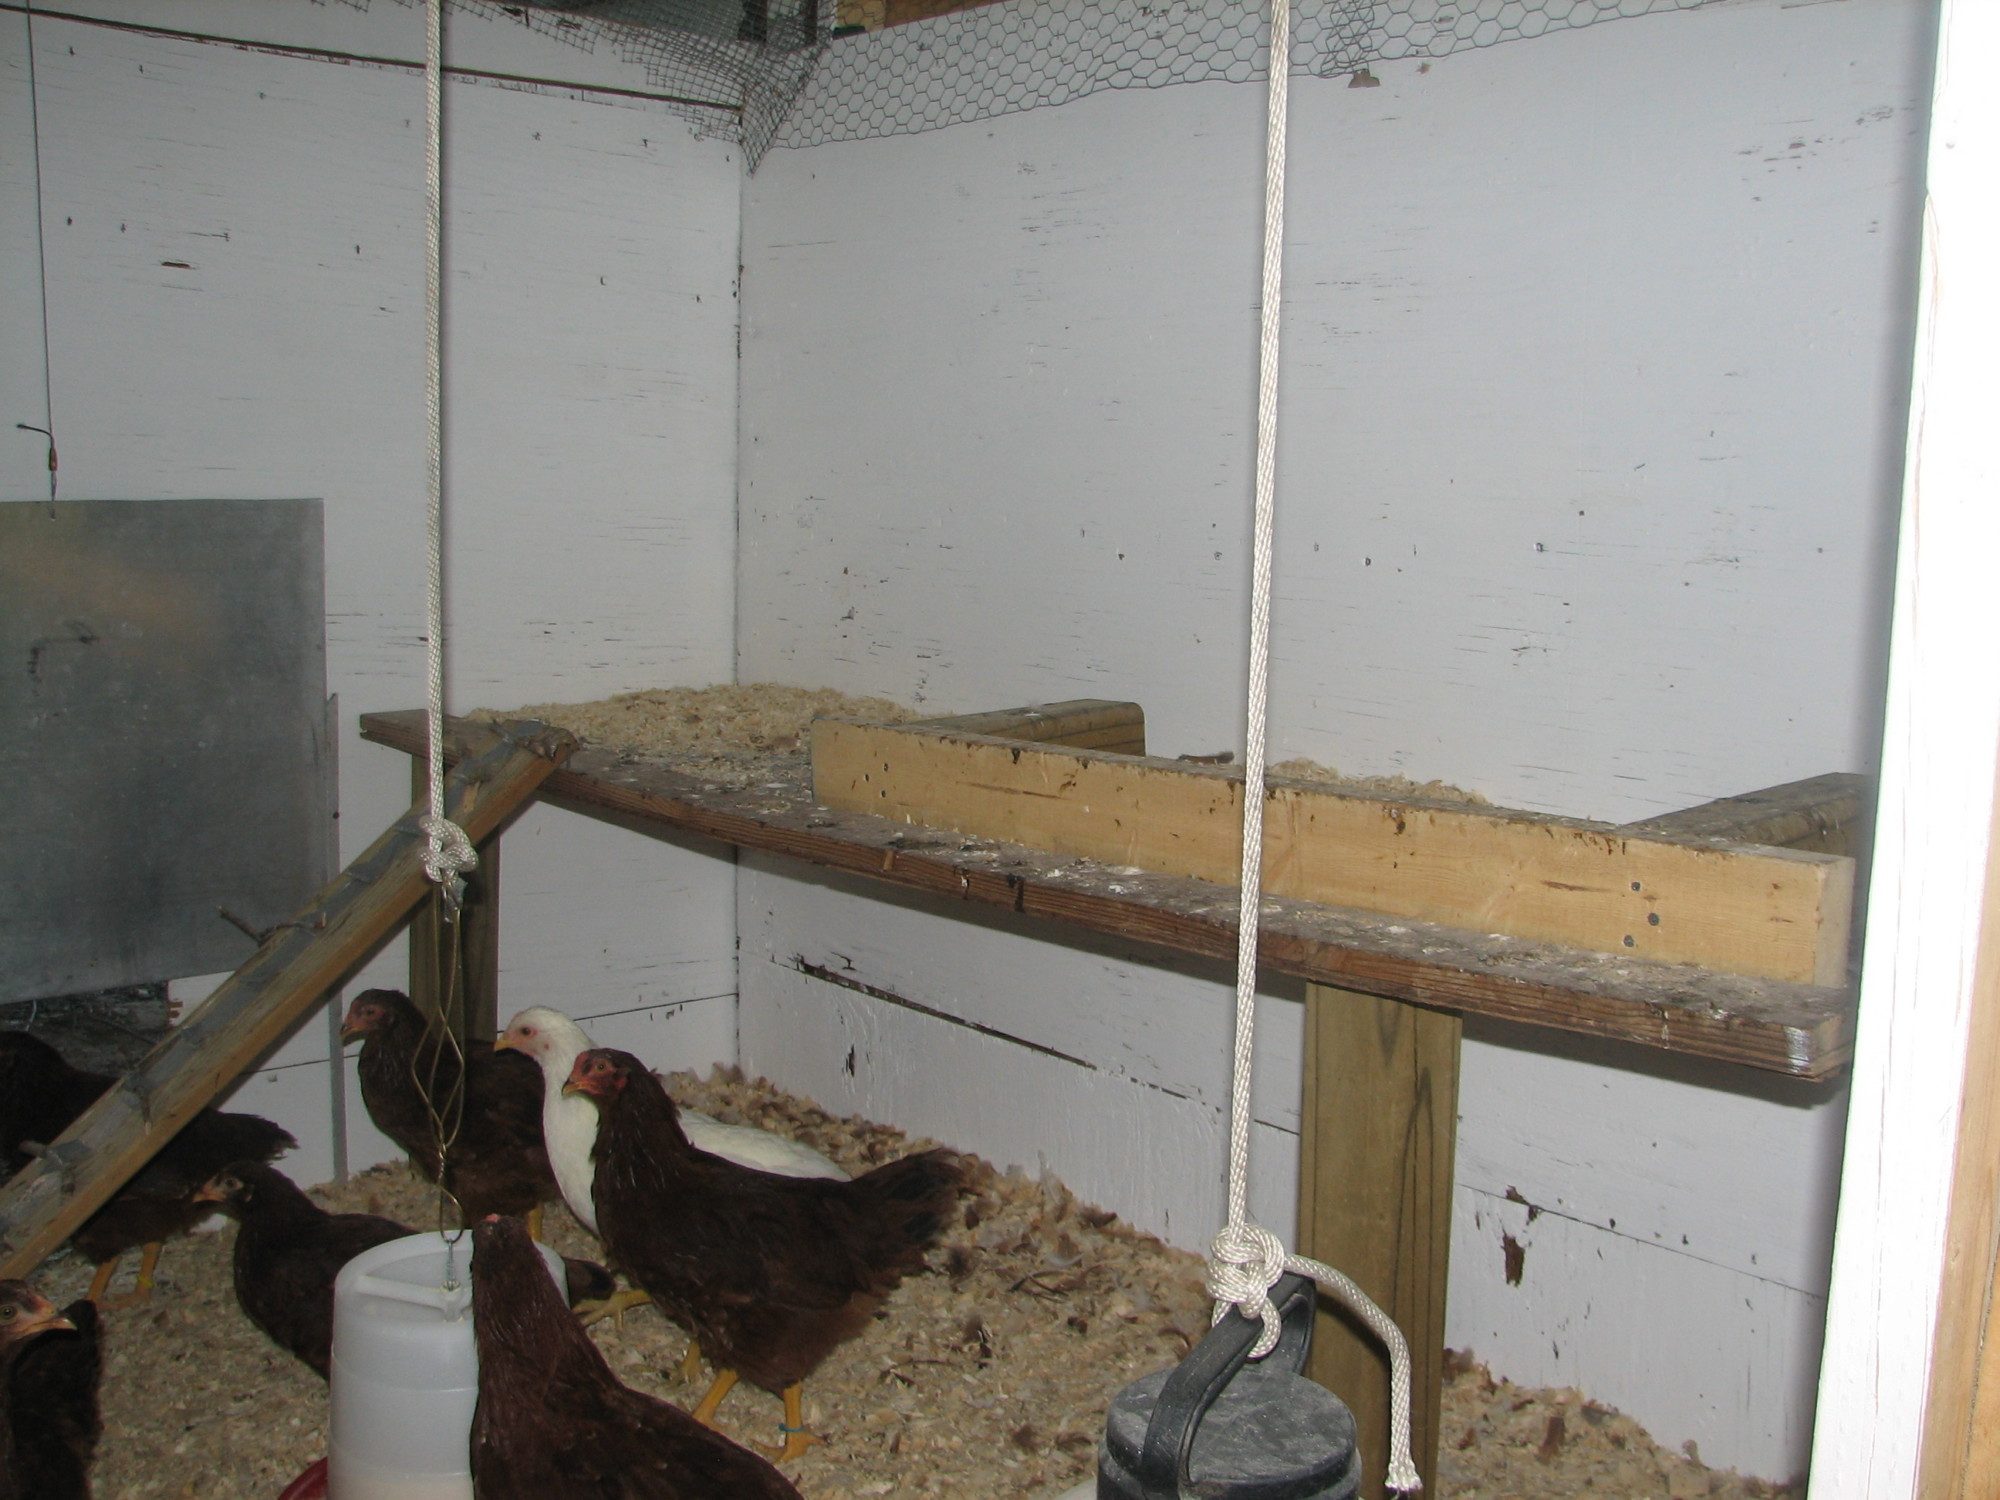
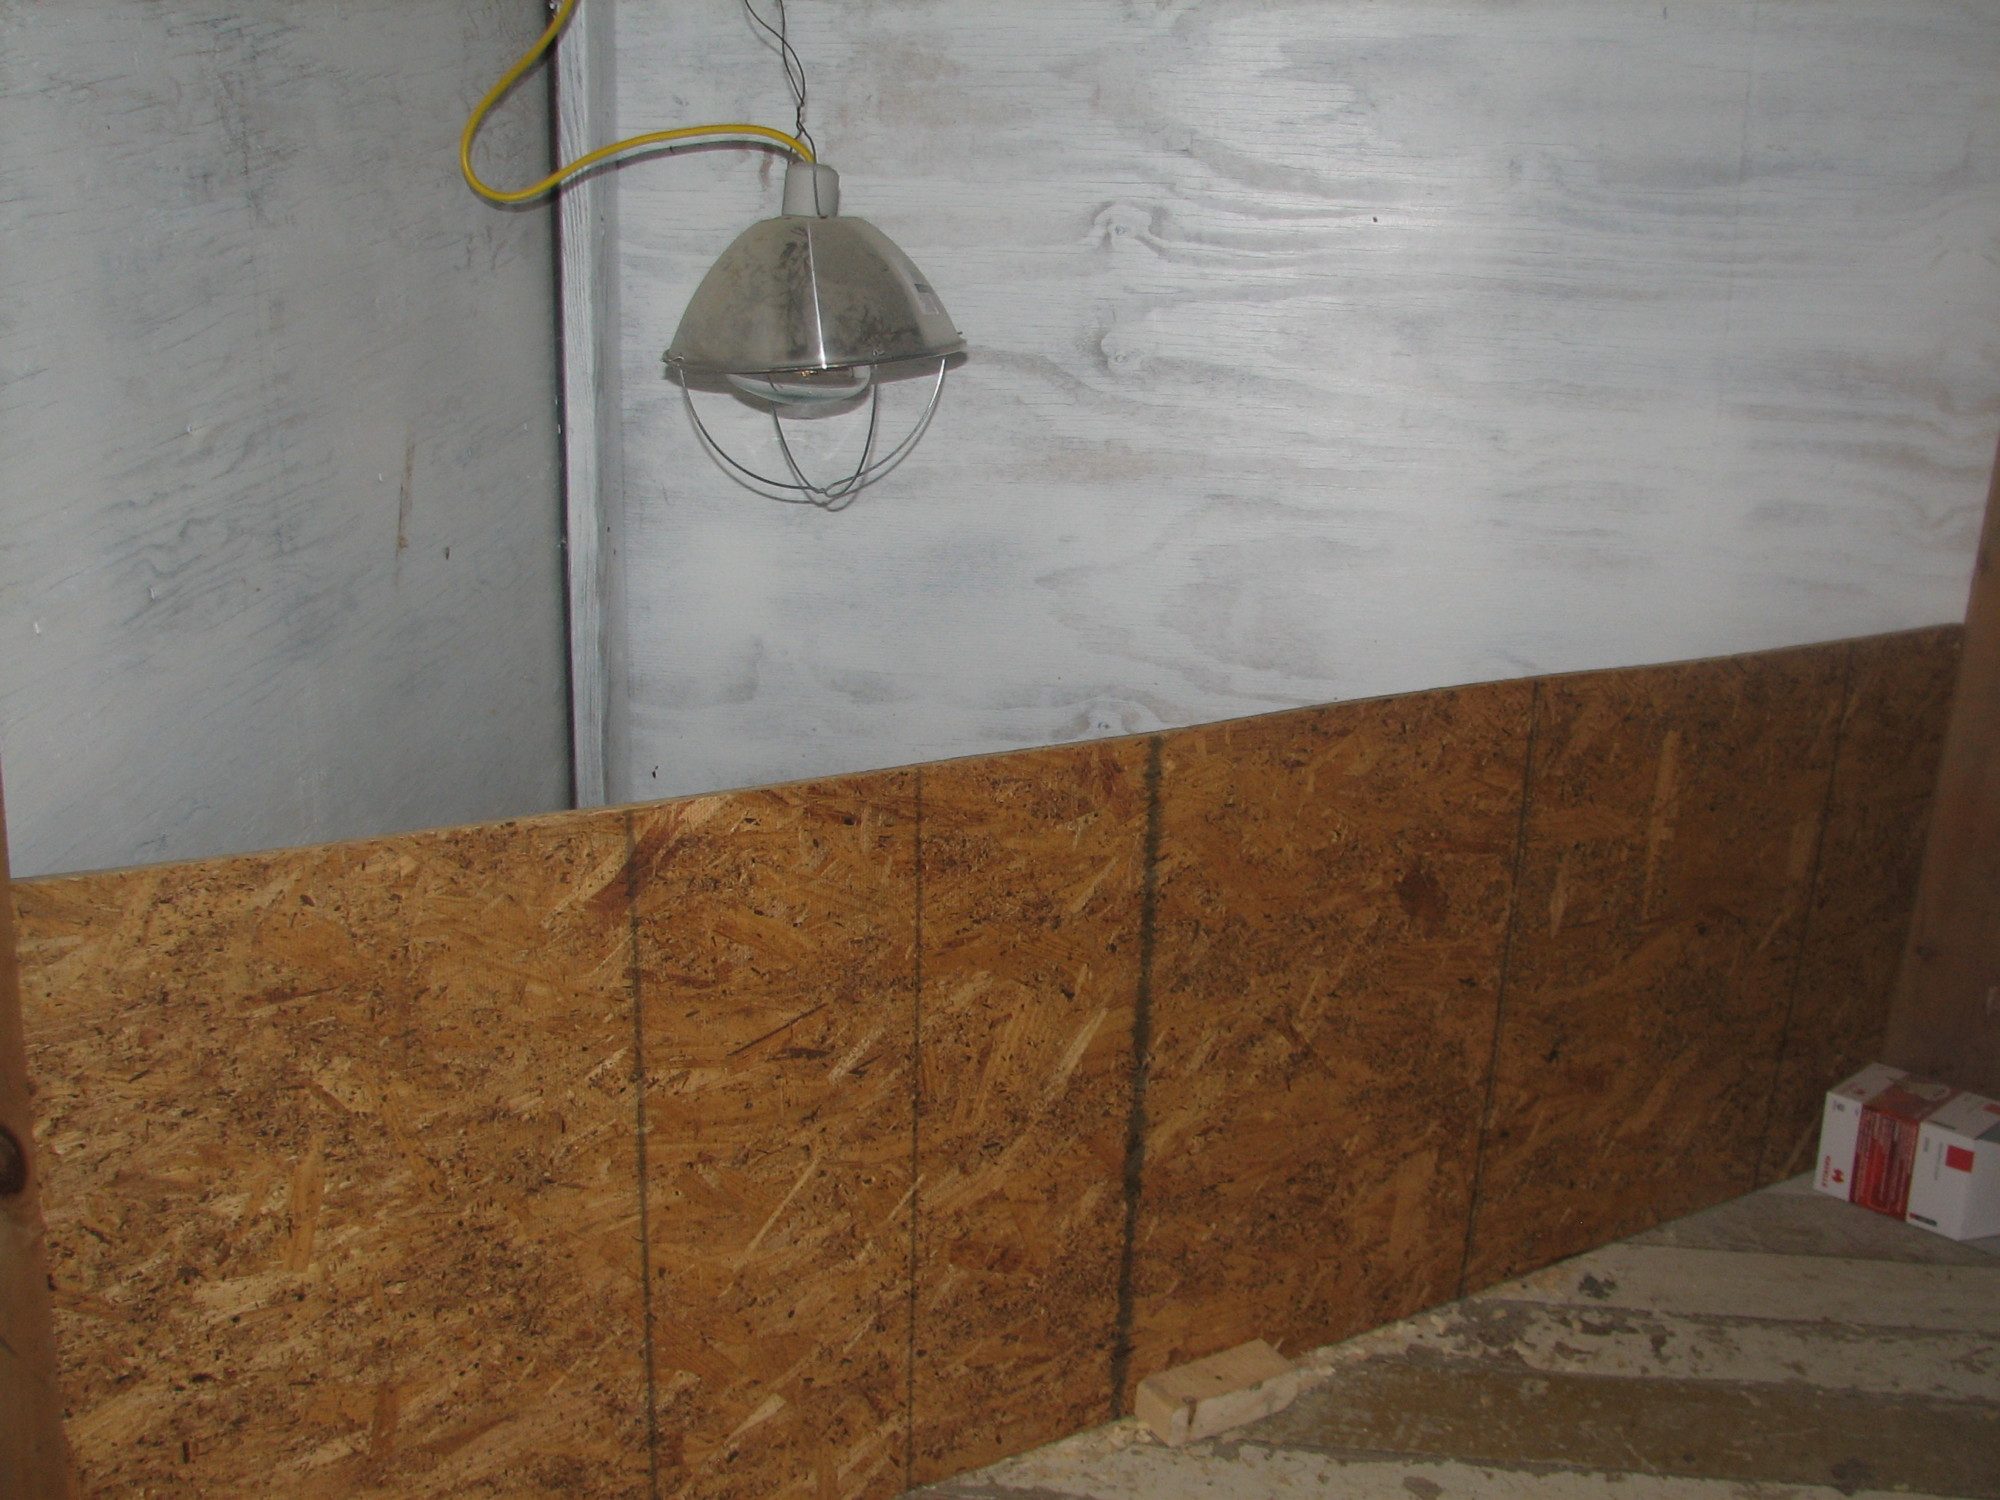
I used chicken wire on the sides. Hopefully it is strong enough to keep things out. I opted for the weaker stuff here because I thought it less probable that predators would be able to access this opening. You can also see that I painted the interior of the coop with the same white paint used elsewhere. Because the sides are made of the particle board I had to use a lot of paint, and it sure did not turn out perfectly, but it should last a while. By this time I already had chicks moved in! My daughter decided she wanted to take a fancy poultry project so 6 buckeye chickens and 1 white rock hen were enjoying all the room of the coop. (That means I will have a total of 30 birds in the coop!) The rope you see in the picture is supporting the hanging feeder.
This is the right side of the coop finished for now, complete with the buckeyes and white rock. I built the poop board and for now the roost is just resting directly on it. Eventually the roost will be bigger and will be mounted above the board. The board is also completely removable by unscrewing 2 screws. I made the ramp up to the board with a scrap piece of wood and duck taping sticks to it for cleats. The kids ( chickens) figured out how to pull some of the sticks out from under the tape so I need to pull it out and revise the plan. The chicken door is a piece of aluminum on a pulley for now. I have decided that while it is predator proof, it is not very easy to raise and lower. I will be working on something else soon.
For now the coop is still divided into 2 sections. I will have several different ages of chickens so until they are old enough to be put together this wall will remain up. The top and bottom of the wall are made of chicken wire to allow the birds to see each other, but not pick on each other. When they are all about the same size I will remove the bottom portion of the wire and it will allow them to go from side to side under the board.
Right now the left side of the coop is set up as a brooder. The meat chickens were just moved outside in their tractor and the hens that I got with them will be moving out here today. When the next set of hens come ( June 4th) I will brood them in this section as well, and there will still be enough room for the first set to be in the remainder of this side.
To lock the doors we use an aluminum rod extending through the window down into holes drilled through the bottom of the door frame and into the 2 x 6 support of the coop. This cannot be operated by a coon or other predator, and also makes for a tight fit and won't allow anything to pull from under the door to get it open. A 2 x 6 board was used as a kick board to keep the pine shavings from falling out to the coop when the doors are opened. They are completely removable for easy cleaning.
We used the same concept for the top of the doors that are not used unless we are cleaning out the coop. Little coon fingers cannot pry open this door!
All in all I am pretty happy with the way my coop has turned out. While it is nothing like the original plan I love it even more. Of course the cost is quite a bot more than the free I had hoped for, but after getting some of my chickens I am very happy we went with a longer lasting, prettier coop. We spent about $500 on all of the materials that we had to buy which would have been much more without the great deals we found from auctions, friends, and family. I still have to finish the left side of the coop after all of the chicks have been brooded. This is where the nest boxes will be located (hanging on the outside of the coop with access from the inside) as well as another poop board and roost. The complete dimensions of the coop are 8 x 14 and the run is 14 x 12. Since the run is not as big as I would have liked ( darn property lines) I will allow the chickens to free range as much as possible. I plan to make a hoop coop next year to house our breeding buckeye stock which will free up some room for the other breeds.
If I could make any changes I would first like to have known about chicken math before I started! It would have saved so much time and aggravation when building. Therefore, I would recommend ordering your chickens before you start on your coop, or at least making the coop 2 times the size you will need! Also, I would have moved the coop further up hill and had the run extend downhill. I am not sure how well the run will drain correctly so I might have to change the dirt floor to gravel or cement to make it work.
Other than that I love my coop and have had a great time working on it! A plan for the now build coop and run is pictured below. While I will not include dimensions because the ones we used were specific to our shipping crate and hill I am hoping that it will be enough of an outline to help someone else make their own coop! Enjoy!!
Please feel free to comment and let me know what I have done wrong or right, I still have work to do so anything that I can change and make better for the kiddos is welcome!
Excellent job of building and reusing materials. Also congrats on being frugal and searching for low pricing. This is a great coop and run and a good read for someone who is thinking about making one of their own.
what a massive project!! Great amount of pictures & excellent instructions - I bet your kids are going to love swinging and watching the chickens! I would suggest getting a roll of vinyl flooring to prolong your wood floor life