"Villa Gallina" A Tiny Chicken Coop, By Judith Correa-Ellotfi
"Regard it just as desirable to build a chicken house as to build a cathedral." -Frank Lloyd Wright
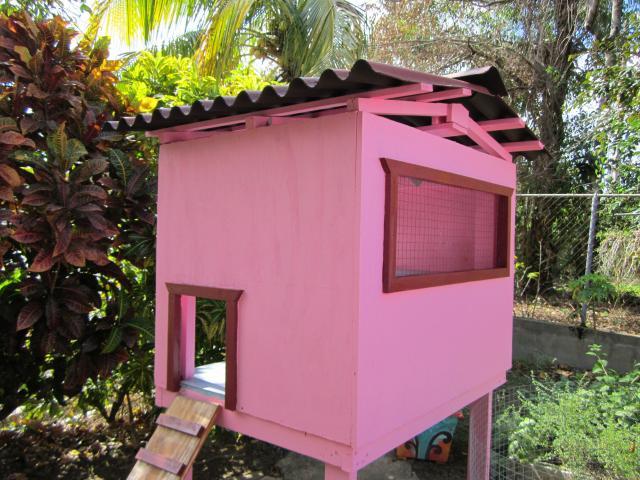
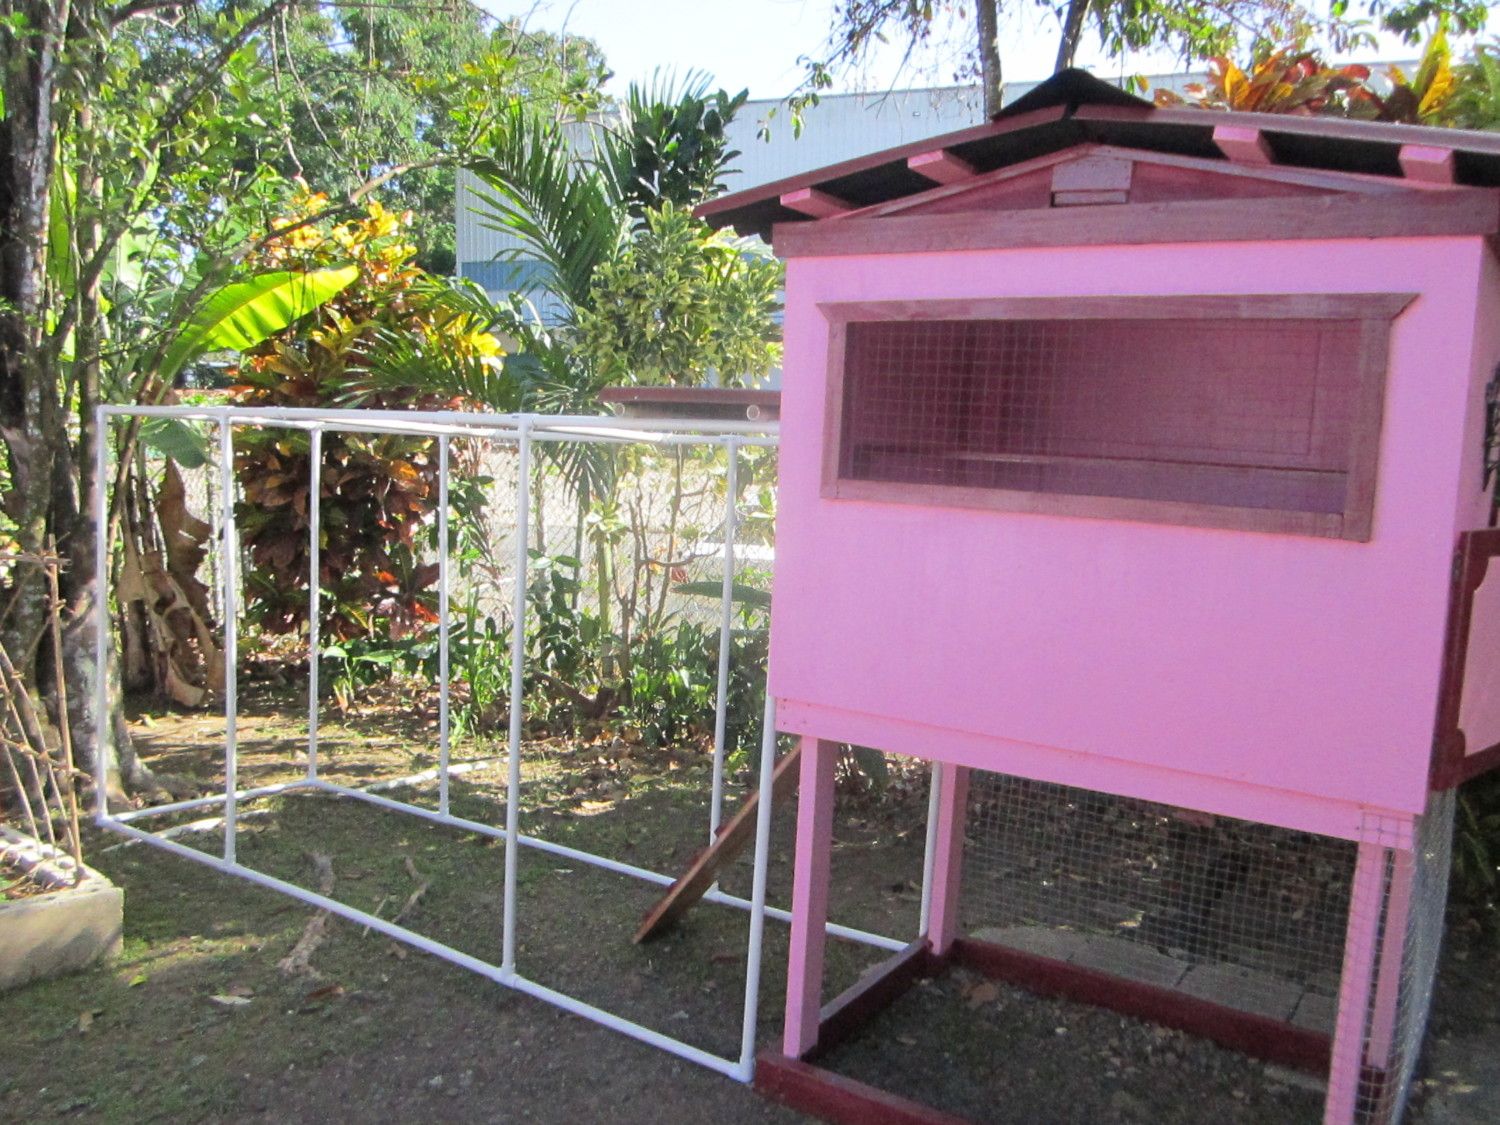
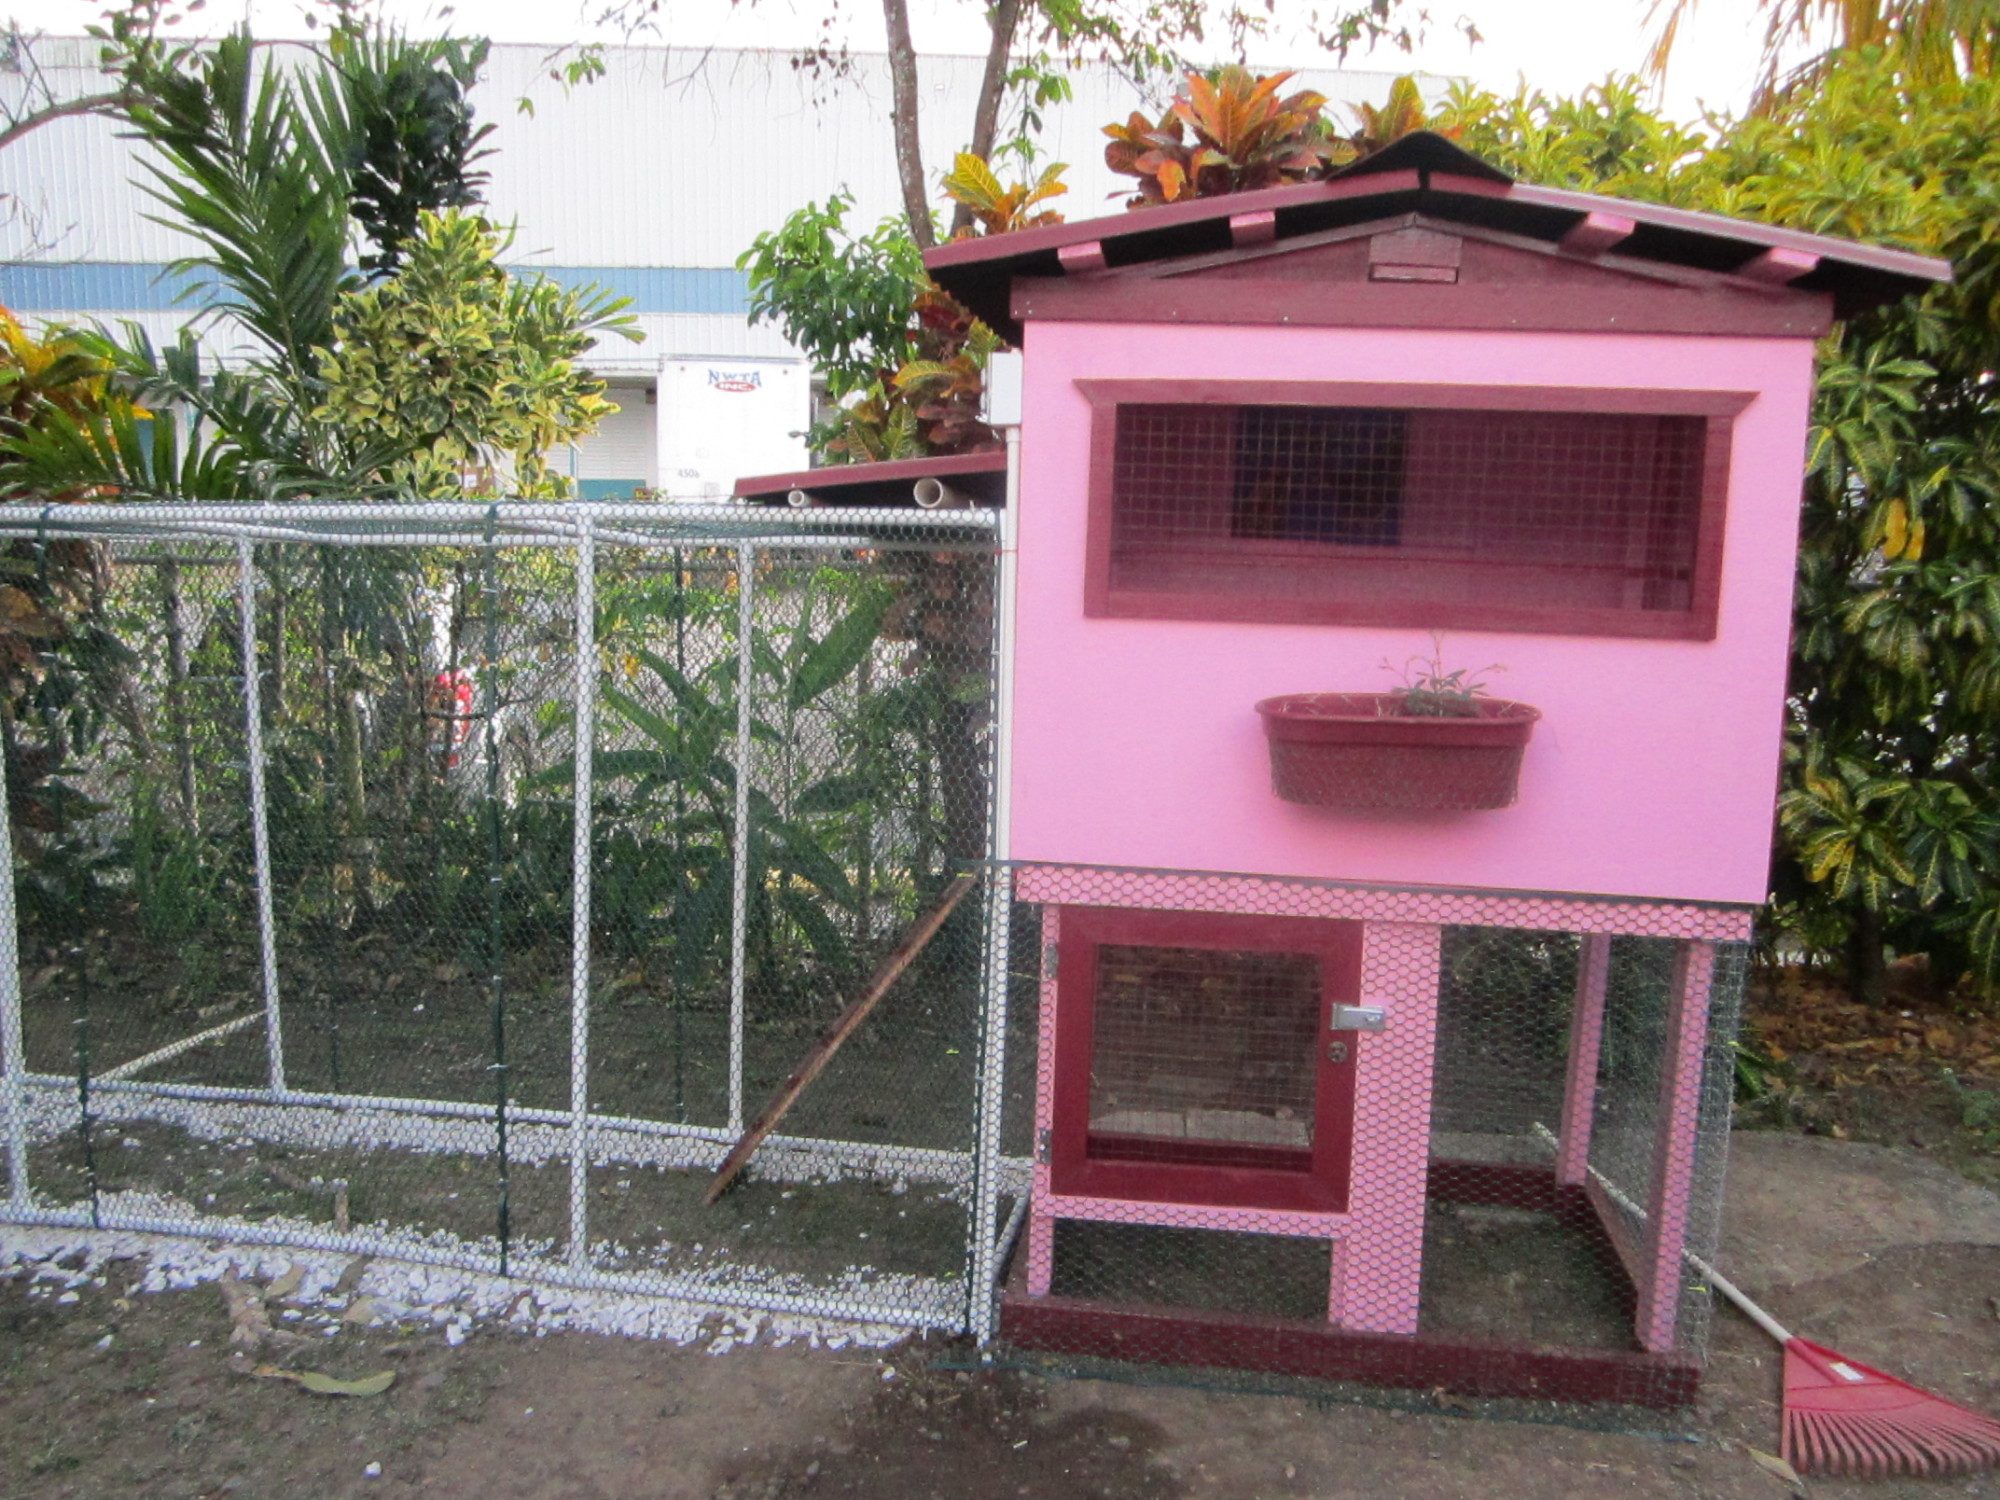
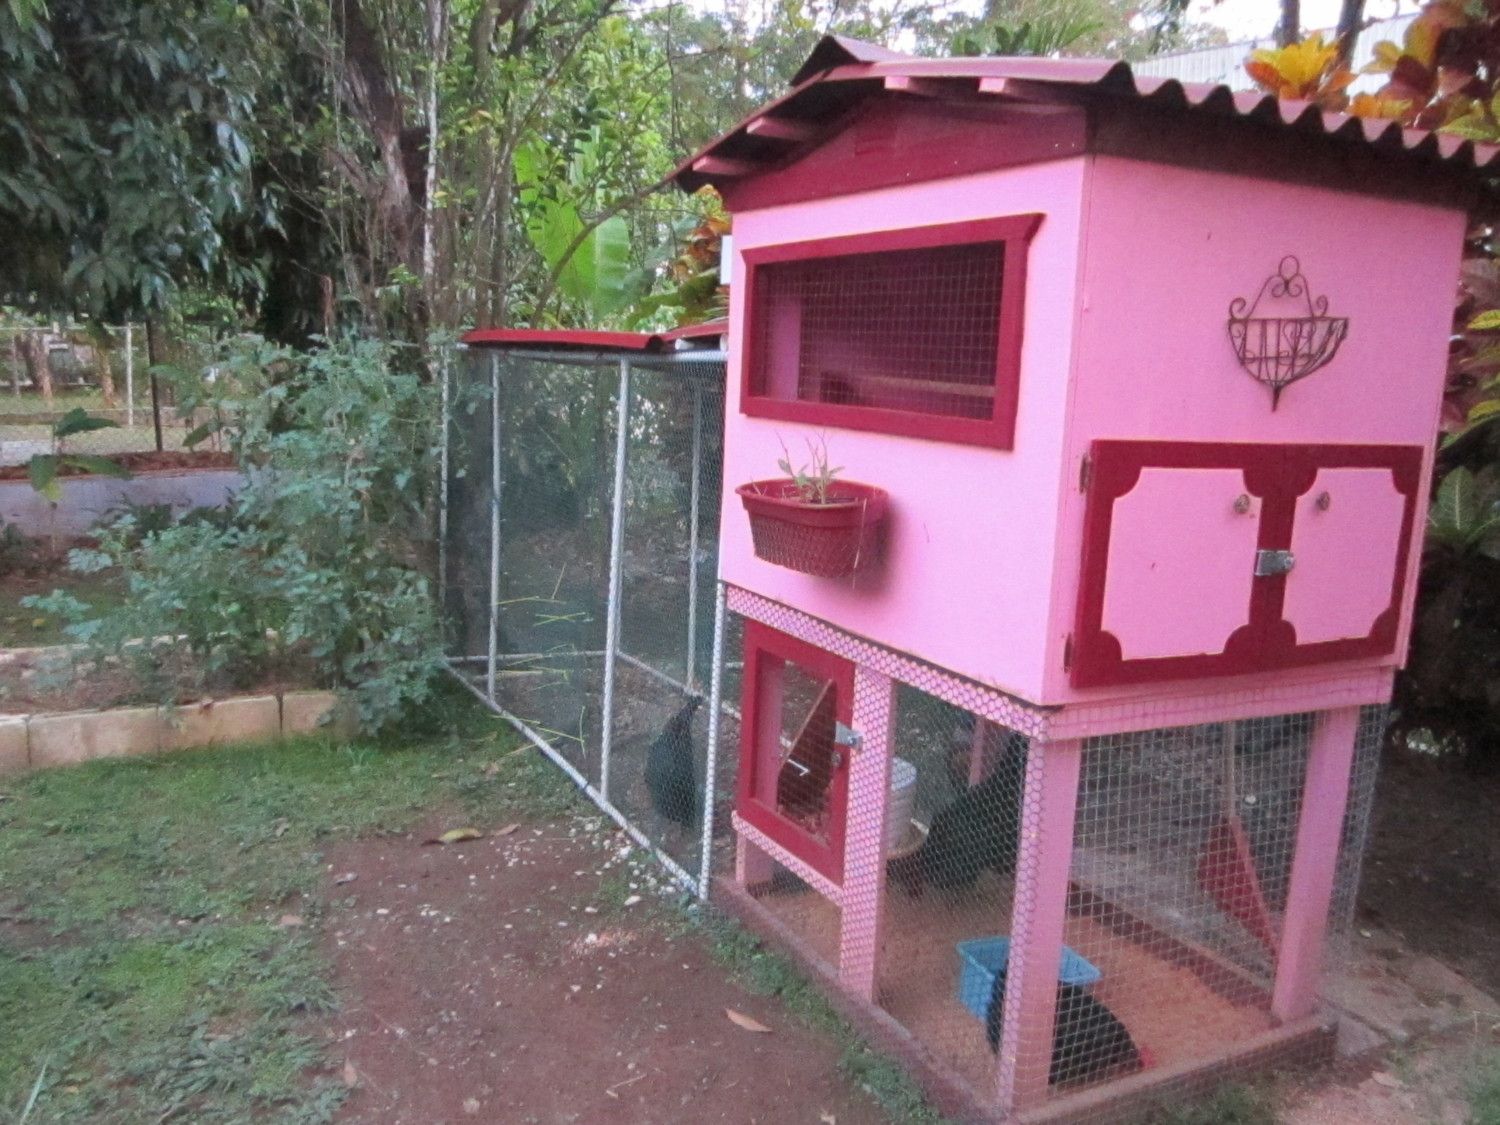
Villa Gallina is a 3’x4’ - 2 nests coop , with an attached PVC run 9’x3’x 4.5’ designed to use in a tropical environment in a suburban small backyard.
There are not many predators, God forbid a burglar that jump the fence or a stray dog. Safe enough to protect them from “Guaraguaos” a local pray bird from the family of hawks as well as dogs.
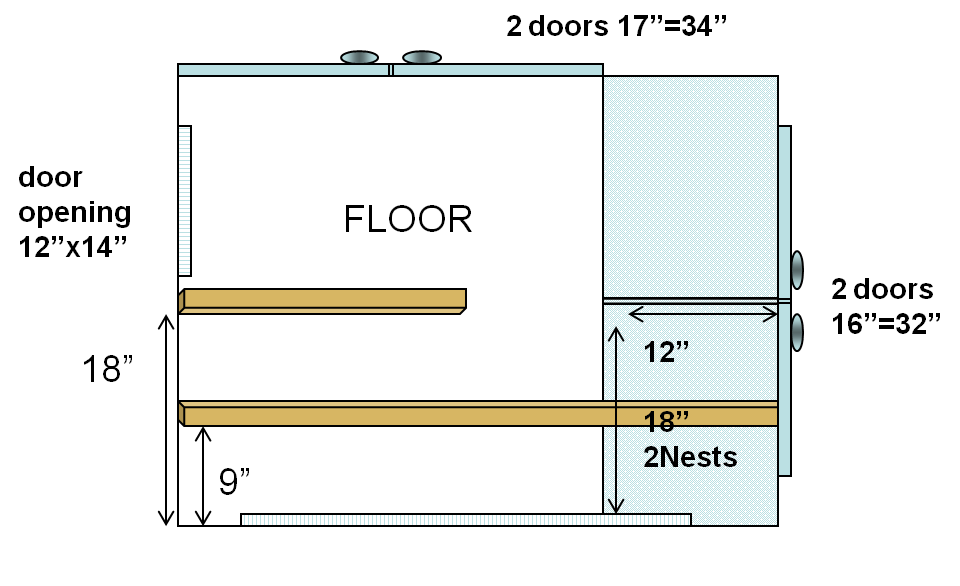
It will host an initial family of 3 birds (1 rooster & 2 hens) but in theory may house up to 7 hens (giving more than 2 square feet per chicken in the run & 11“ each space in the roost inside the coop.
Its made out mostly of new treated wood panels and 2”x4”, semi-industrial linoleum tiles, asphaltic zinc, 1”x1” metallic wire & an attached ¾”PVC tubing and green plastic chicken wire run. We also re-design and adapt the original plan in order to save some money and re-purpose 4 good quality mahogany doors, laminated with Formica in the exterior side, savage from our old kitchen cabinets. Also the door the in the run under the coop was a re-purpose canvas stretcher (18 years old) made out of good quality wood 1”x4”.
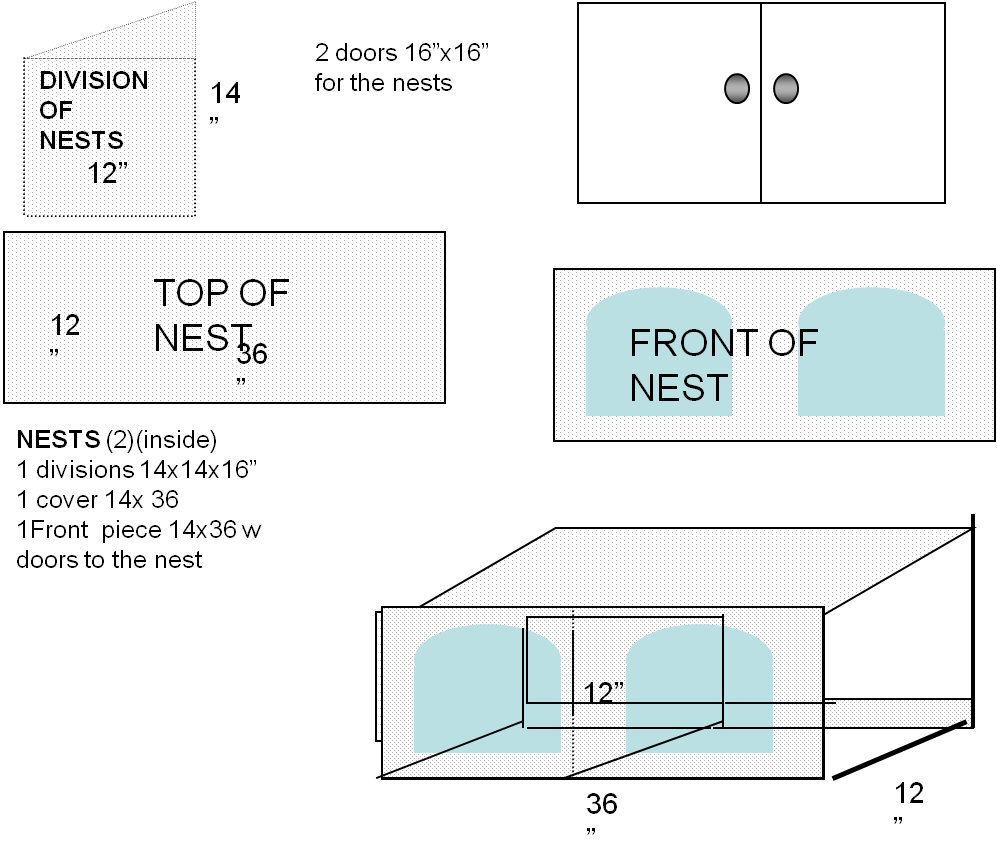
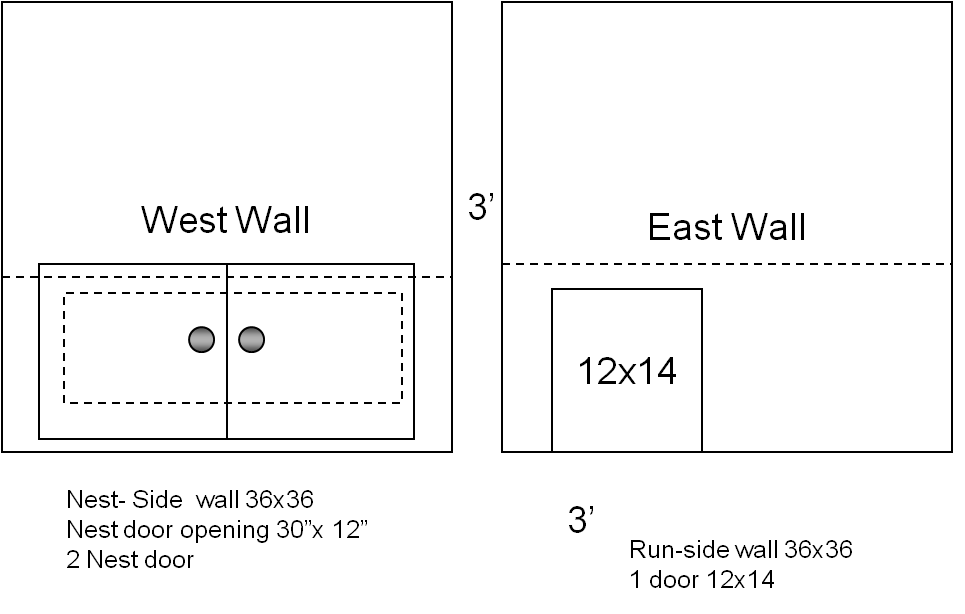
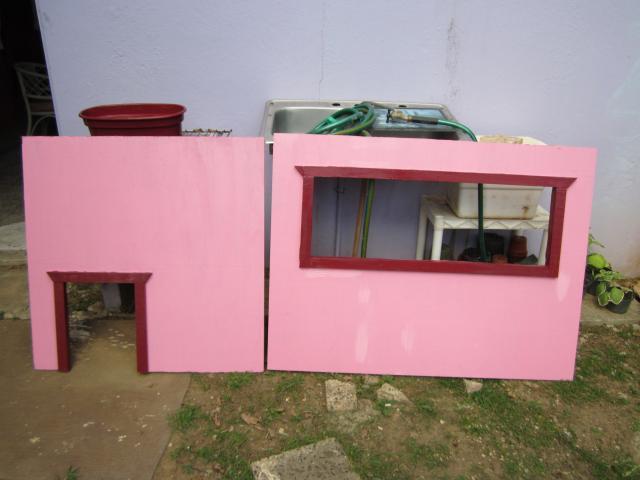
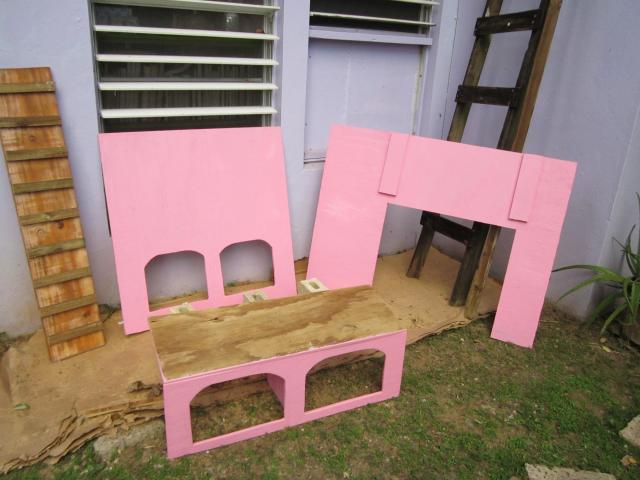
Here is a simple layout of the walls & floor, as well as the nest parts:
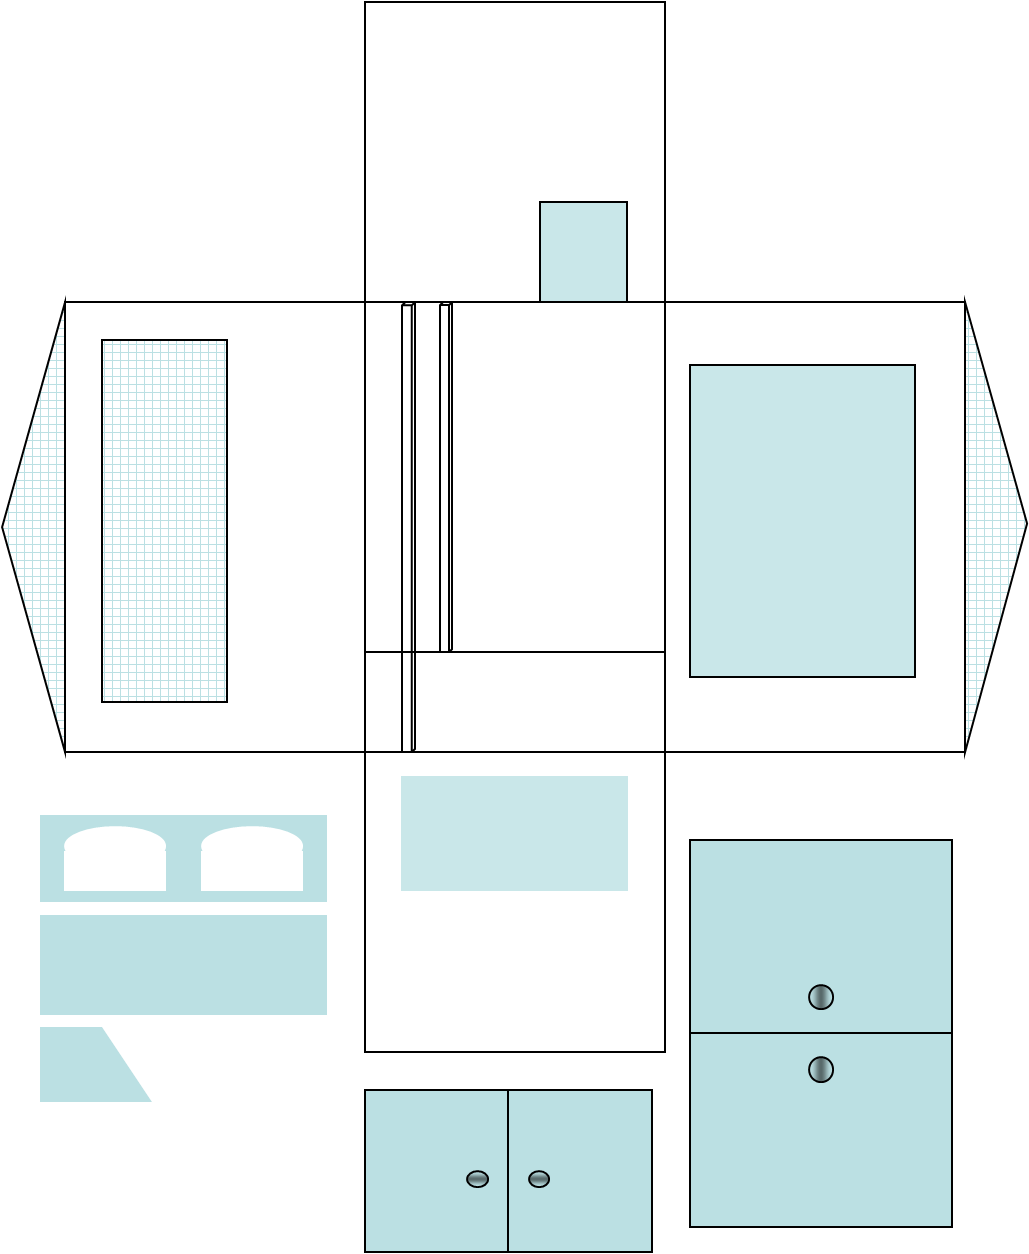
Front wall, back wall, ramp/ladder, roosts...
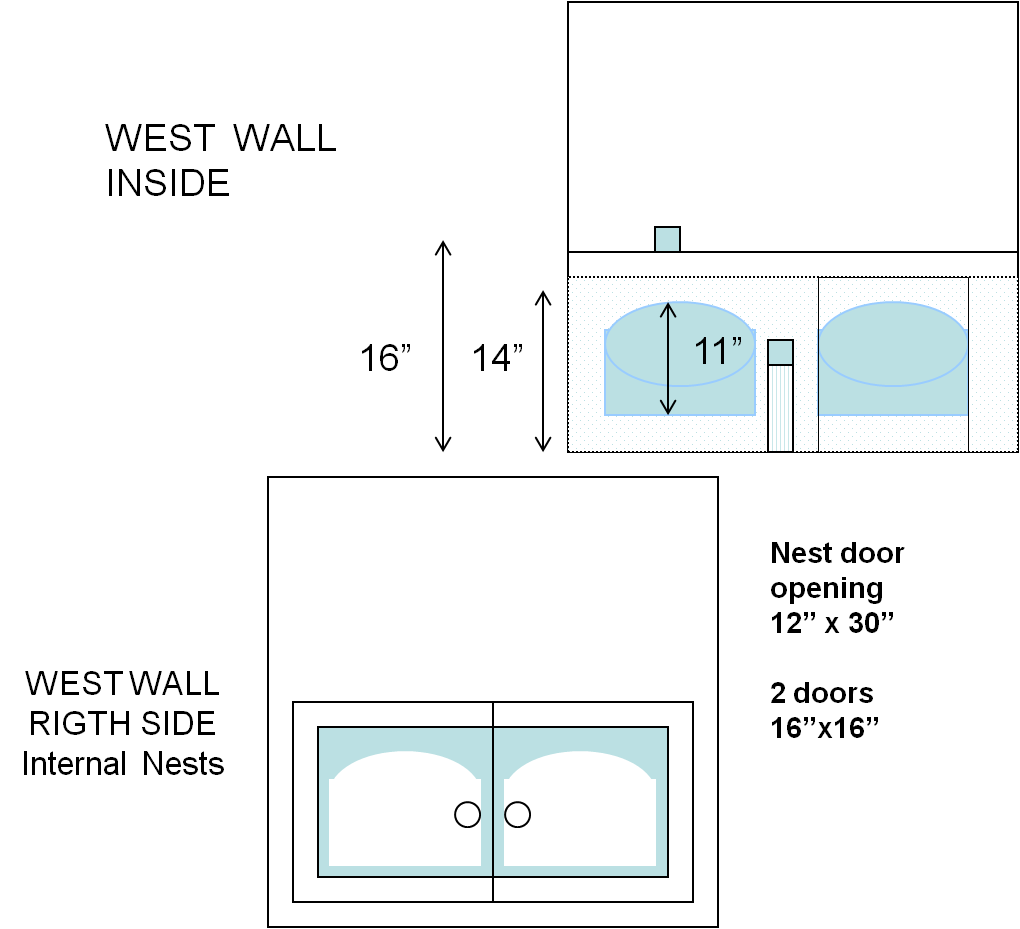
Nests...
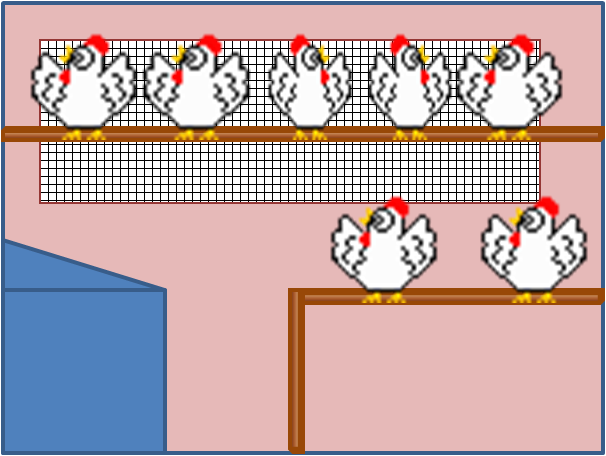
& this is how I calculate how many fit in the run space (each square represent 2 squarefeet) ... lol
3'x9' attached run & 3'x4'under the coop run...

Gathered the materials, buying little by little and searching for good materials to reuse.
List of Materials
COOP
- 1 panel 4’x8’x 3/4” (floor & front wall)
- 1panel 4’x8’x1/2” (side & back walls)
- 4 pieces 2”x4” x 6’ (posts)
- 6 pieces – 2’x4”x 47”
- 6pieces-2”x4”x 33”
- 6 pieces – 2”x2”x2’’
- 4 pieces- 1”x3”x48”
- 8 pieces 1”x2”x4’ (for trimmings & ramp steps)
- 78 - 3 ½”decking screws
- 1 box 1 ¾ “drywall screws
- ½ lb. 1 ½”nails
- ½ lb. 3”zinc nails
- ½ lb. U shape clips
- 15’x3’ -1”x1” wire ( New A GIFT FROM A FRIEND)
- 15- 12”x12” semi- industrial linoleum tiles & 1 quart glue
- 1 ondura corrugated asphaltic roofing sheet – 48”x72” & 1 ondura asphaltic ridge cap 72”
- 1 set of hinges
- 3 latches
- 1 Gal semigloss exterior acrylic paint color “Very Pink “& 1 Quart ” Plastic Vinyl Enamel “Deep Garnet
- 4 cabinet doors with knobs & hinges
- 1 wood canvas stretcher
- 1 piece 1”x10” x 5'
- 10 -10’x3/4”PVC tubes ( cutted in 8 pieces - 53”, 6 pieces 33”,
- 12- ¾” PVC T’s
- 8- ¾” PVC corner fittings
- 1 – 1/8 PVC clear adhesive
- 2 rolls 25’x3’ – plastic chicken wire
- 2 bags 100pc plastic straps
- Re-purposed material:
- 1 piece 2”x36” PVC tube
Finally spent my Christmas vacation building it. Is the first time I build something, but armed with a power-drill, a jigsaw, a hammer, measuring tape and a square; started what my husband called the "Chicken Villa Project", and which end up at Villa Gallina.
I started on December 24 by cutting /assembling as much as I feel confident to do (My husband was willing to help me but working 6 days a week, don't leave him much time to do so, so I went on, asking him for advise at some points, and knowing that if I get stuck he will came to the rescue. As I started to succeed, I decided to keep on working, but still will leave him some to do
")
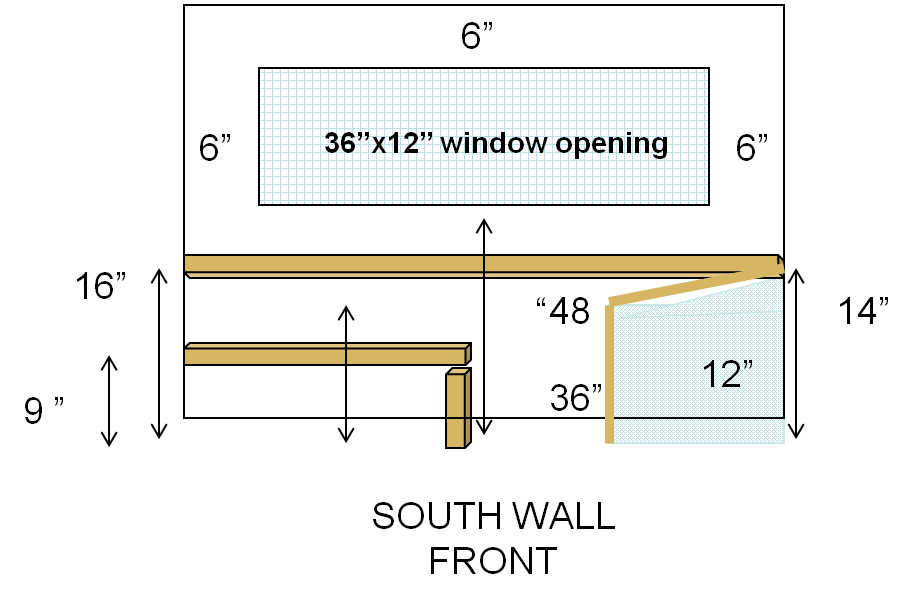
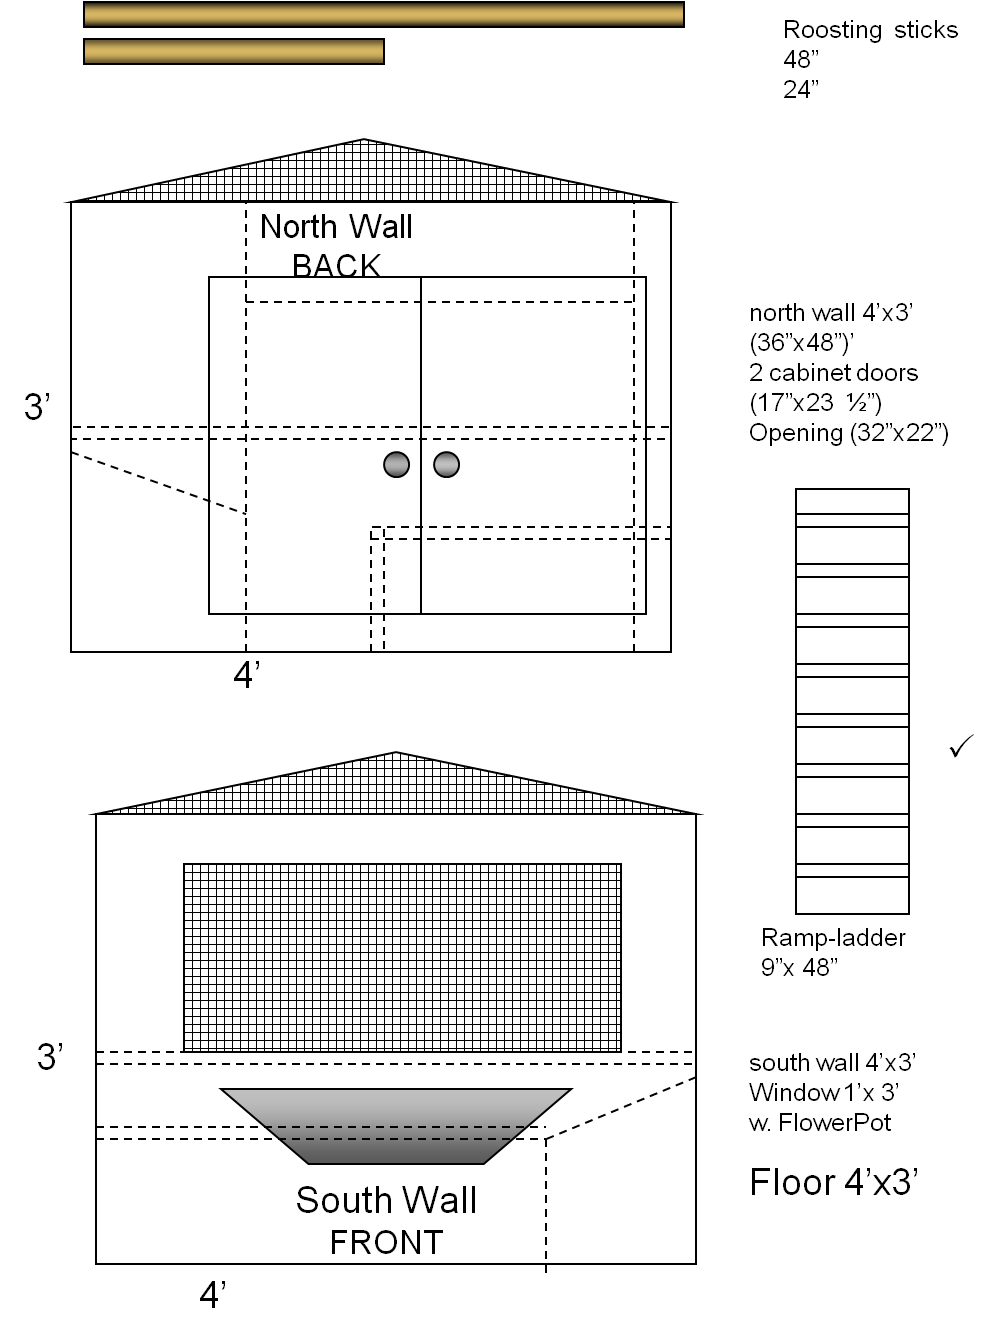
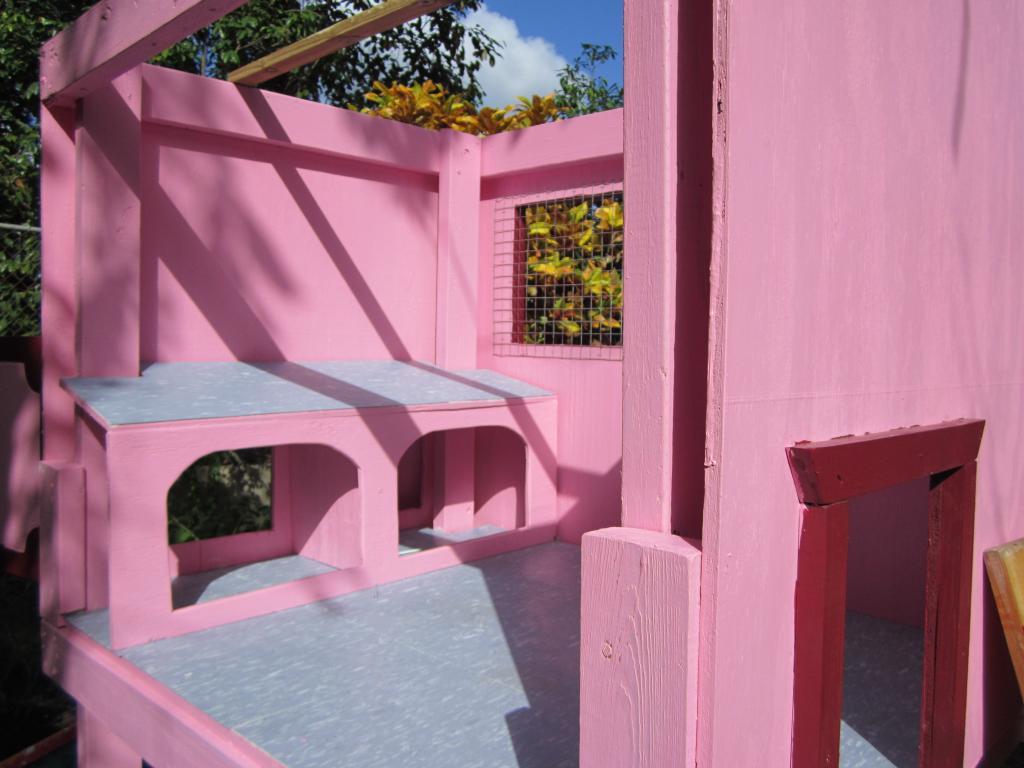
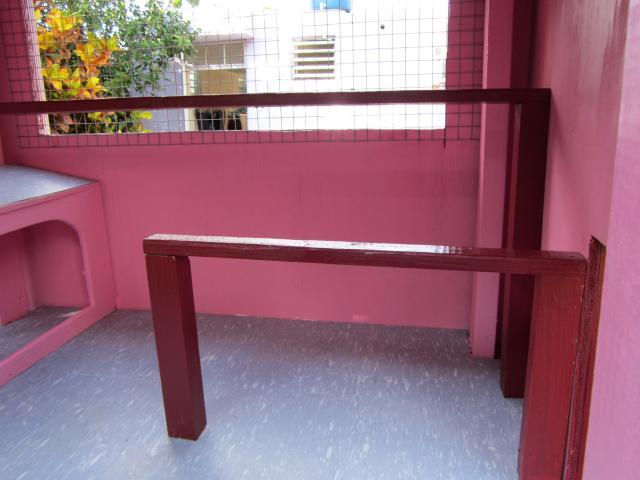
First I cut & assemble 2 pieces -3'x3'x1/2" (walls; one with the chickens door, another with the opening that give access to the nests) 2 pieces- 3'x4'x3/4" (one with a window opening 12"x36",and the floor. With some left overs built a 3'x4'wall with an opening door for give access to human for cleaning).
The frame is 4 posts 2"x4" x6', six pieces 2"x4"x 47" & six 2"x4" x 33" (assembling the frame was so far the most difficult part of the process, first time it took me a whole day & came out twisted, so next day I had to disassemble and try again, one of the post was bended and a 1/4' difference at assembling made it all wrong, so I must took all the 72 screws and started again, this time I used only one screw in each end just to hold it in place and started setting up the floor and walls, and then go back and reinforce with the other 5 screws.)

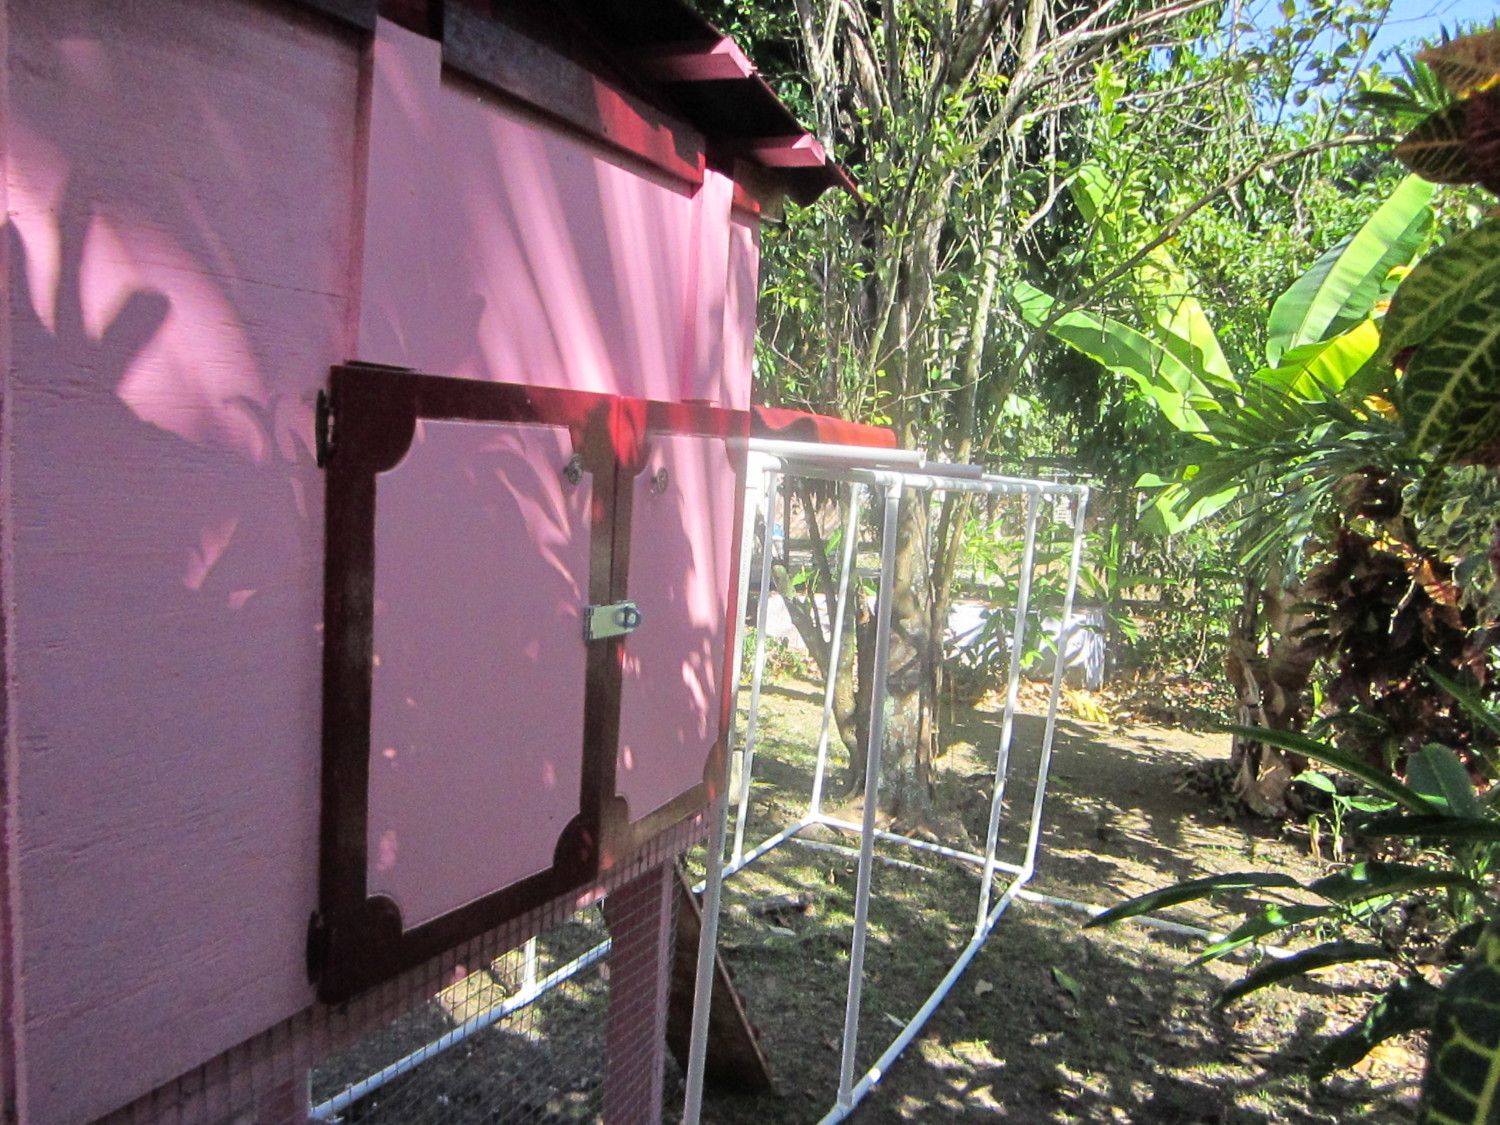
I use 4 doors from our former kitchen cabinets, they are covered with Formica, but i paint them

Still need to fix the ceiling, is still loose... I need to do another trip to the lumberyard but today is a Holiday in PR, 3 Kings Day
") . Also need to cover the down part with wire and construct and attach a runner. (3'x 6' x6' if we decided to fix and use a re-purposed cage or, 3'x 4 1/2'x 9' if we decided to built a new one )
. Also need to cover the down part with wire and construct and attach a runner. (3'x 6' x6' if we decided to fix and use a re-purposed cage or, 3'x 4 1/2'x 9' if we decided to built a new one ) 
Villa Gallina PVC Runner
Getting closer...
Today's achievements ( January 16,2012):

Under the coop runner is finished, door & locks installed

Only need to put some trimmings
JANUARY 22, Sunday
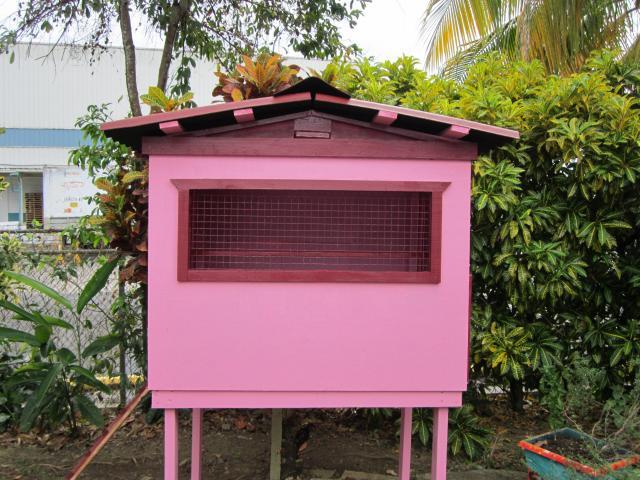
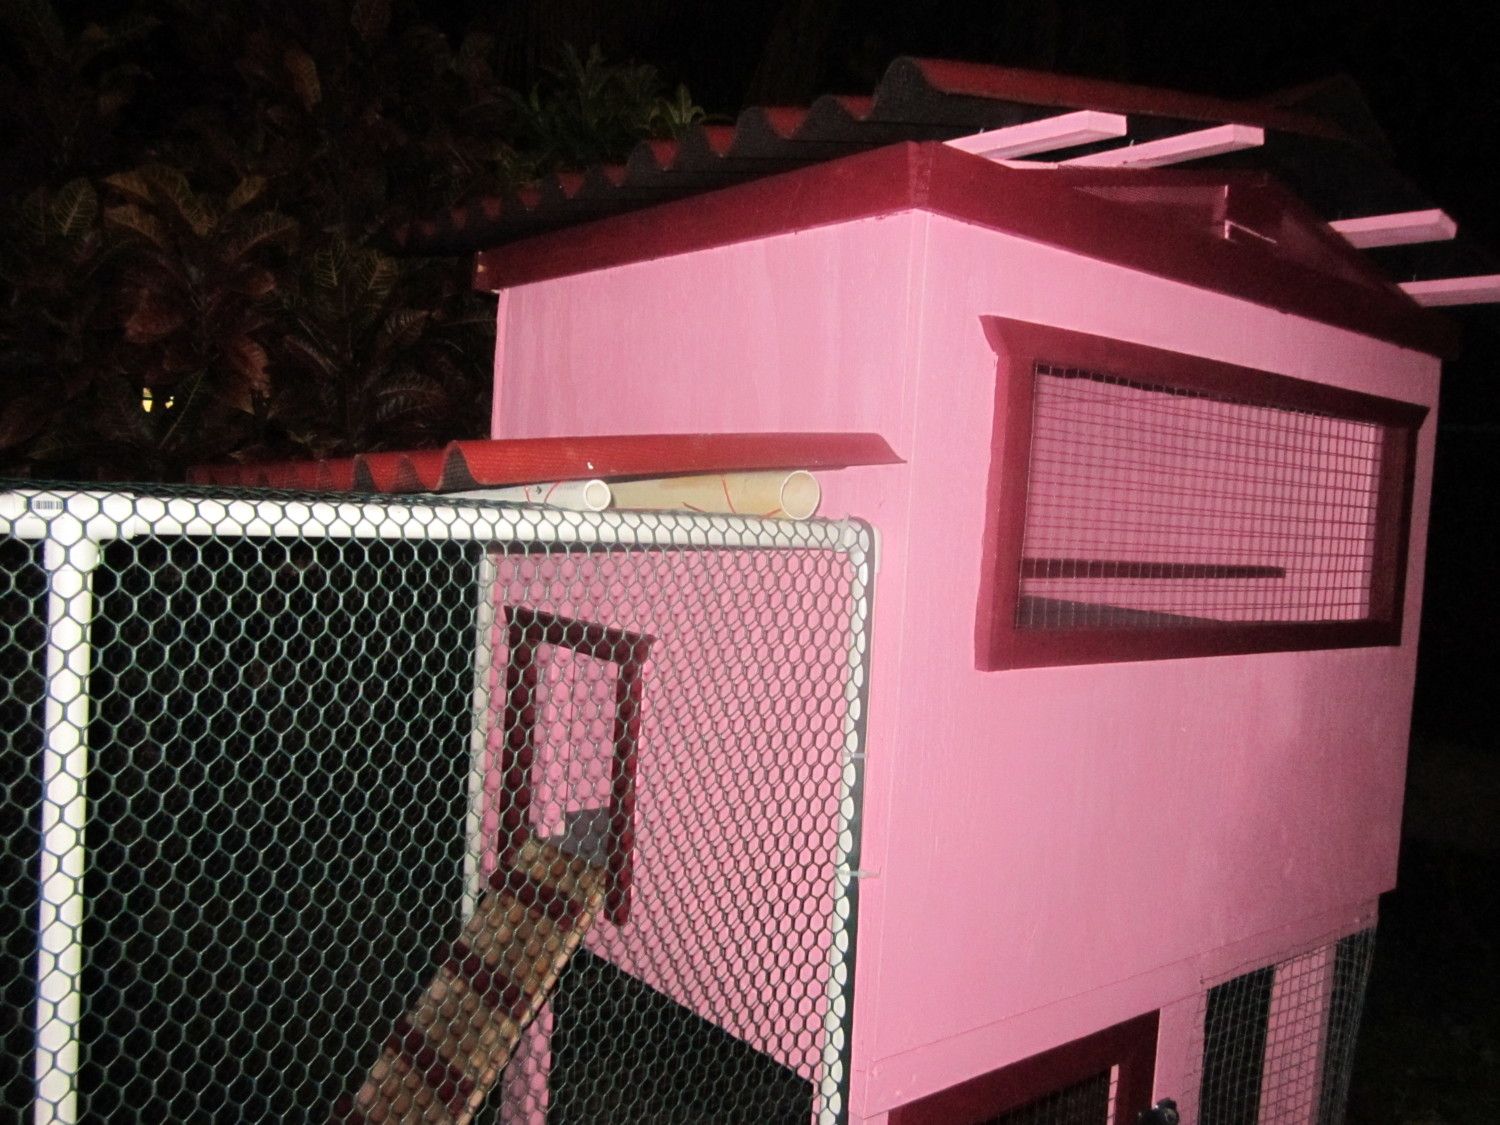
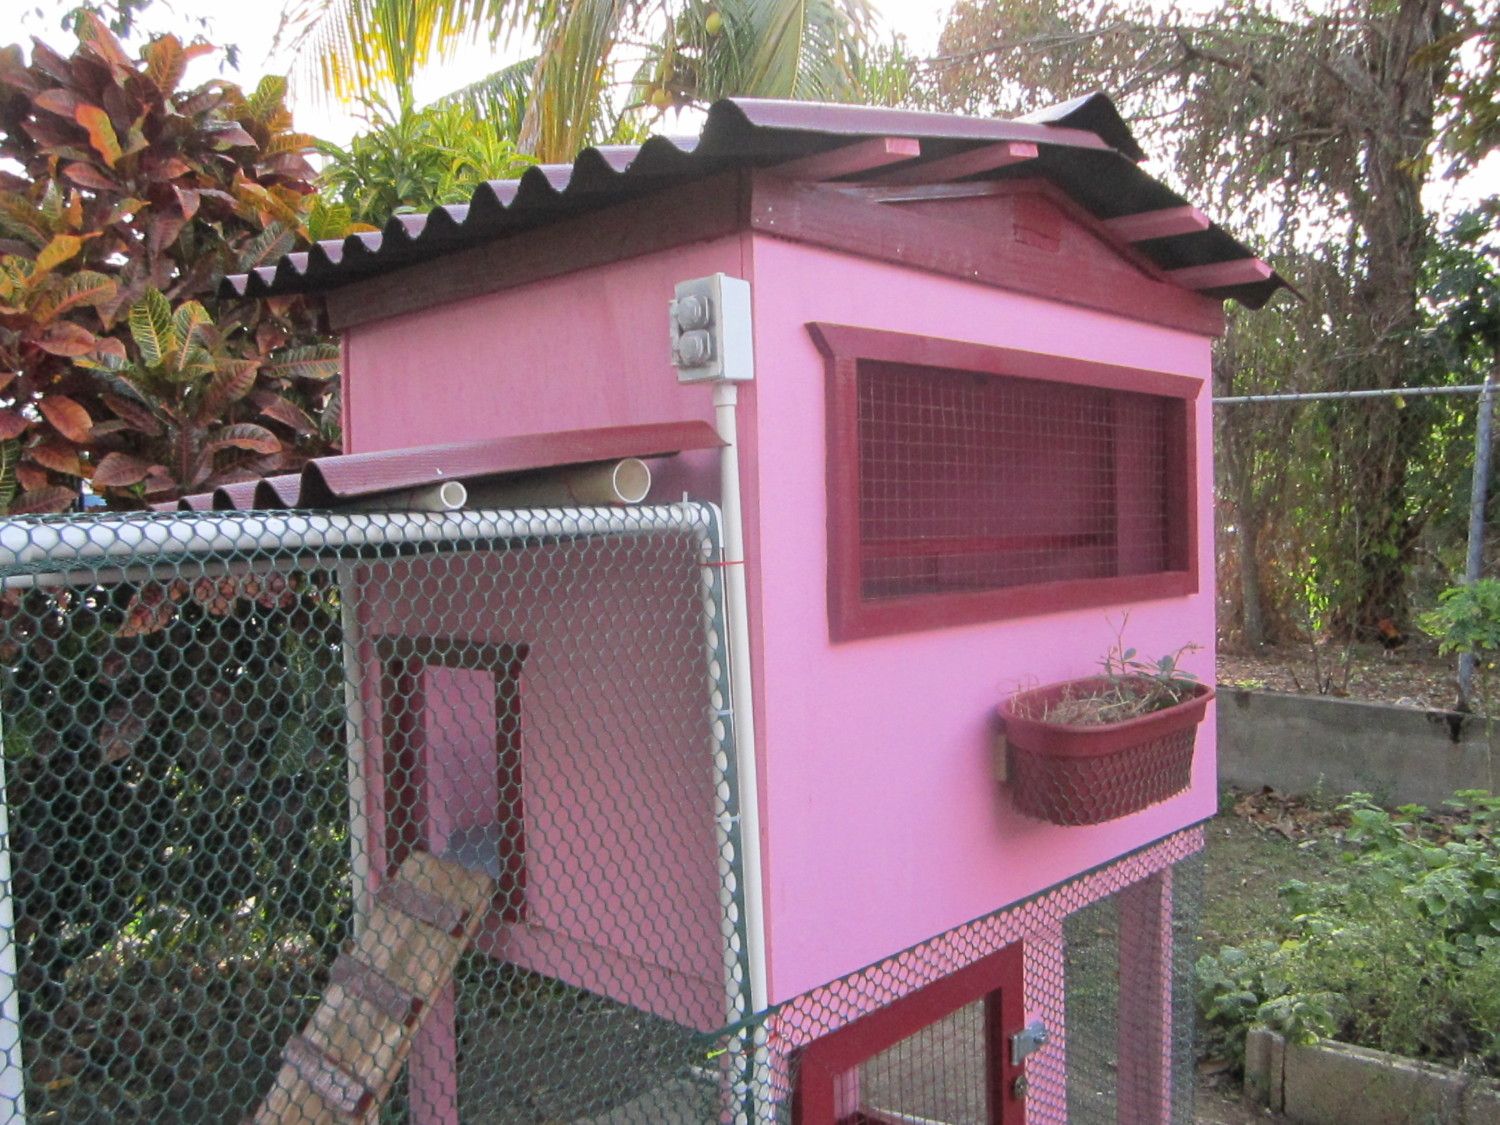
Finally can say the coop is finished! Today I put up green plastic chicken wire on the run...here are the pics so far,,,

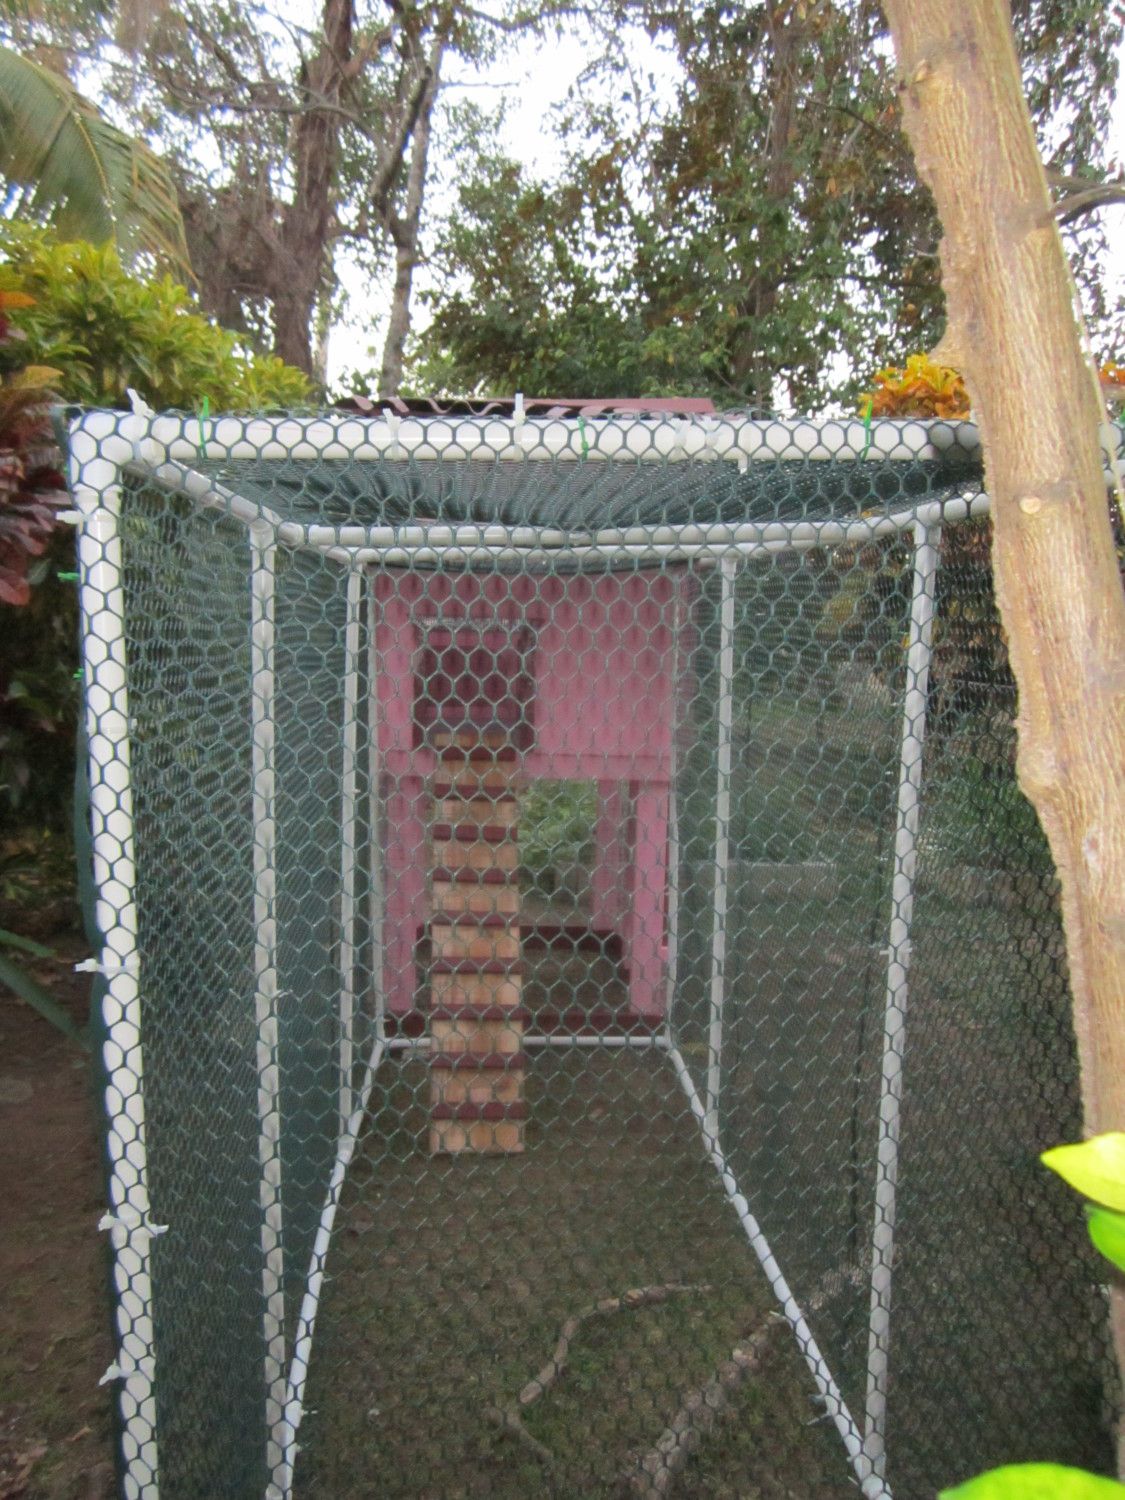
With a leftover piece of the over the door& ramp/ladder."ondura" corrugated asphaltic roofing sheet & PVC tubes built a little roof on the attached run
I'll update when I get the chickens
January 29,2012
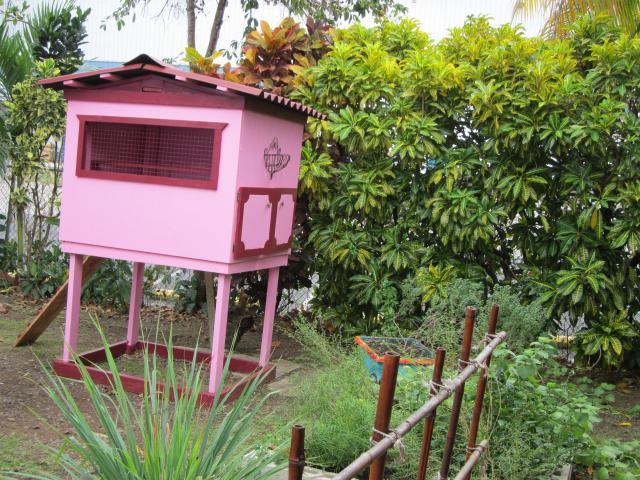
Last minute finishing touches with my husband's help & the Chickens are here!!!
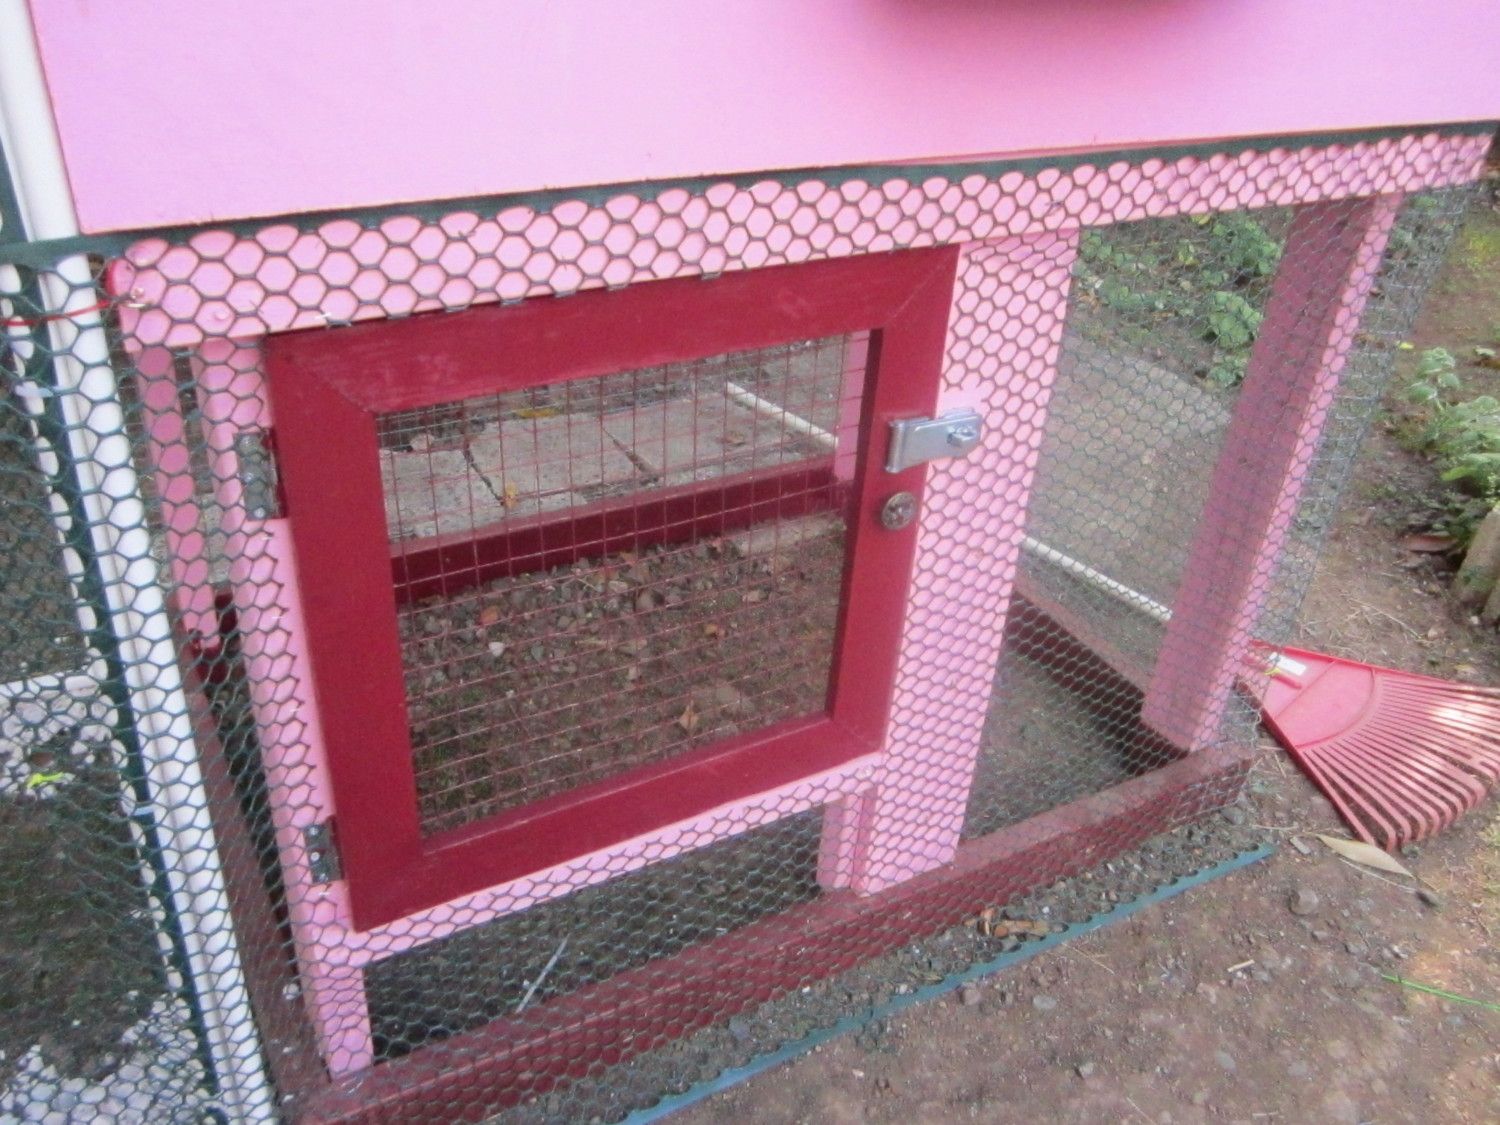
Just for aesthetic reasons the front of under the coop run 's wire was changed ( a suggestion of my husband)

We add gravel inside & outside around the run.
Probably we will put some concrete blocks (like we do for the rised beds) around it.
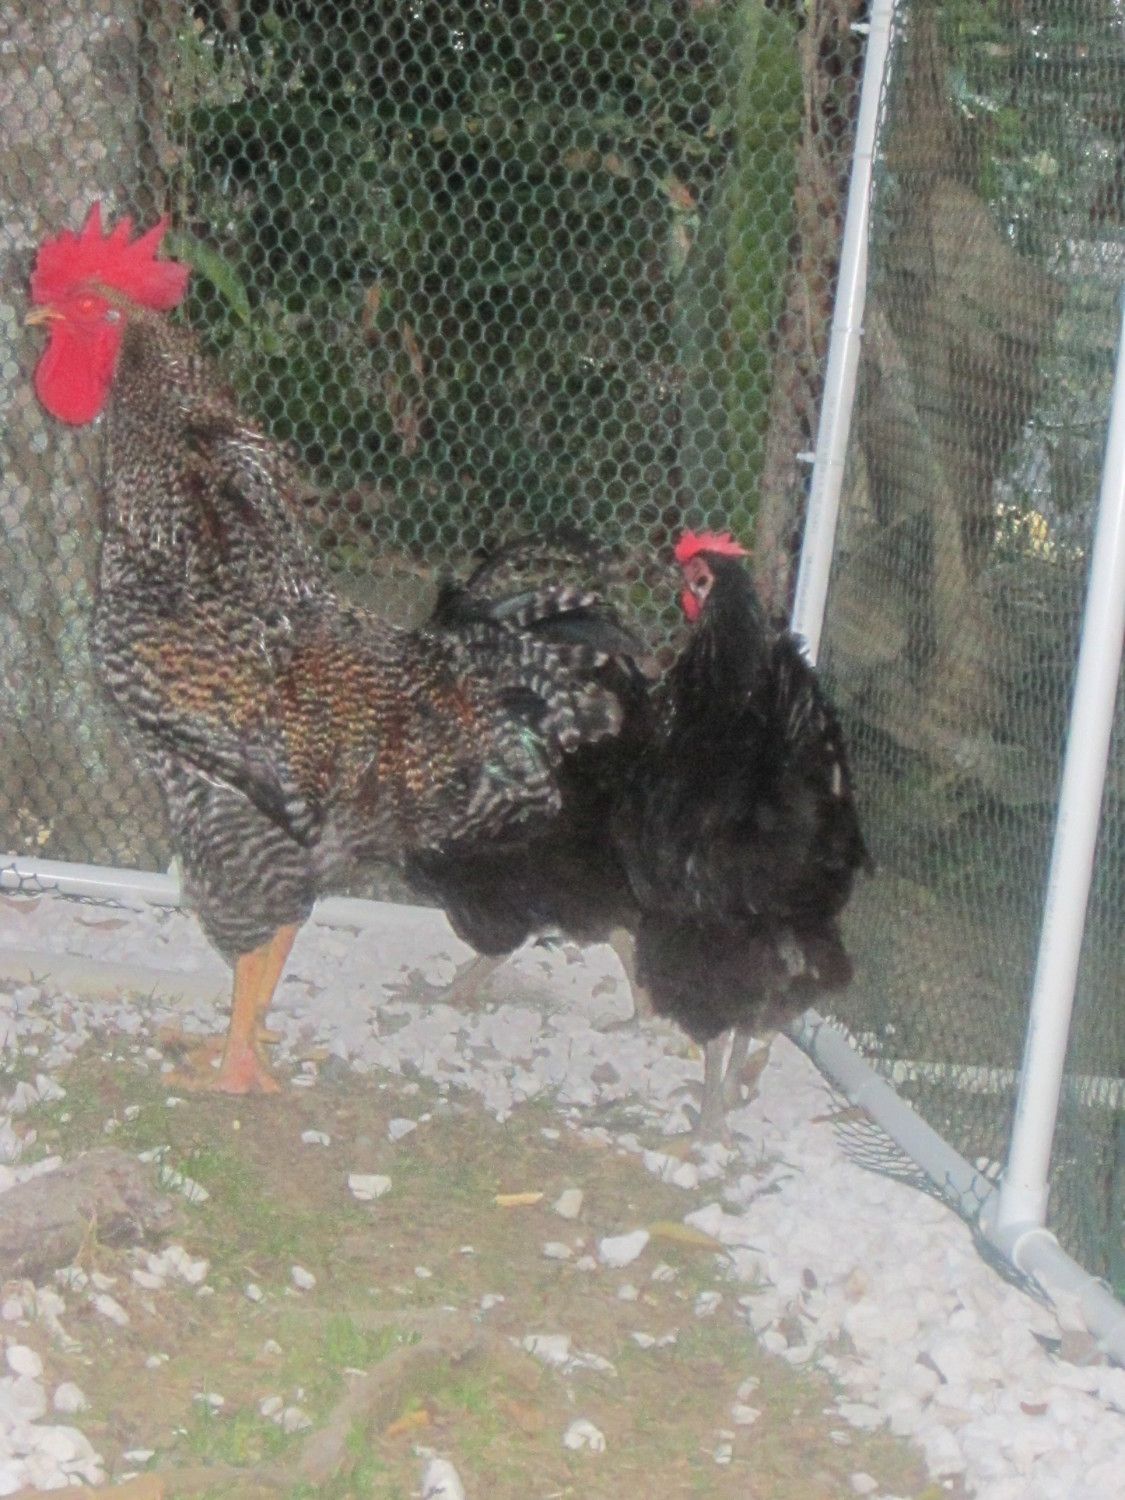
They are bigger than I remember, still young, one year old girls started laying last summer,
I'm told that they are Black Sex Link...
You can get to know them a little here: https://www.backyardchickens.com/a/villa-gallina-residents

UPDATE
This weekend God willing will be adding some roofing to the run... is raining almost daily & i want them to be more comfort... probably will add some sand in the run under the coop too... pics soon!
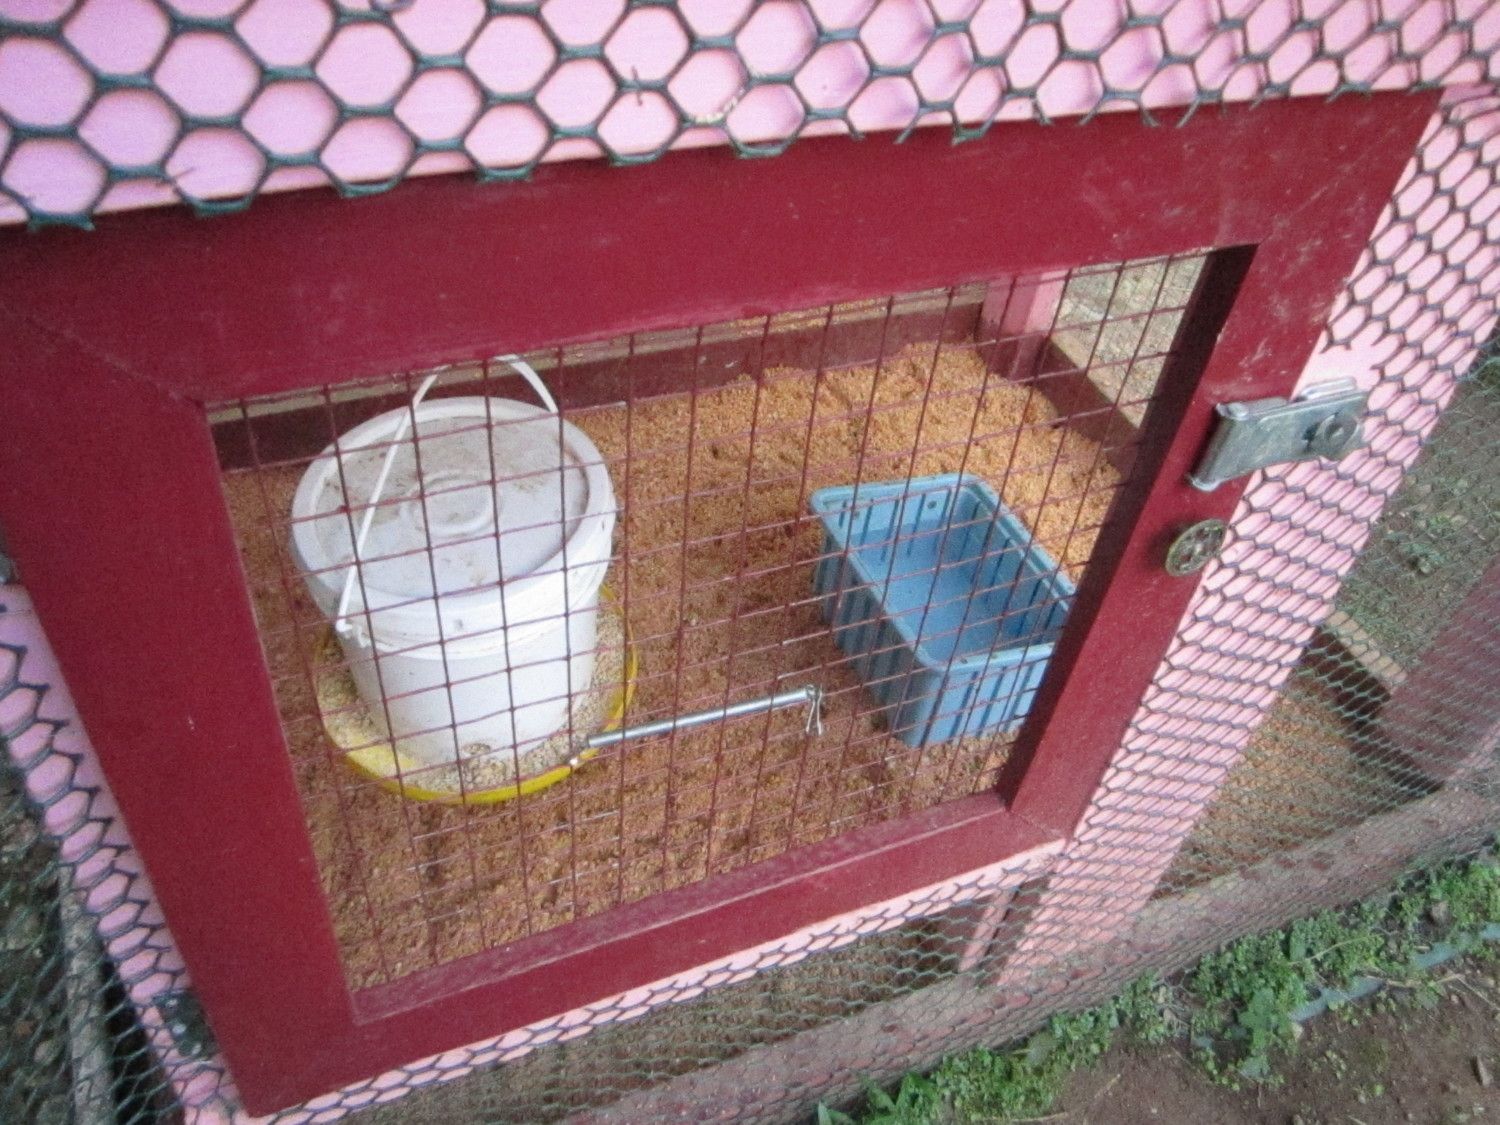
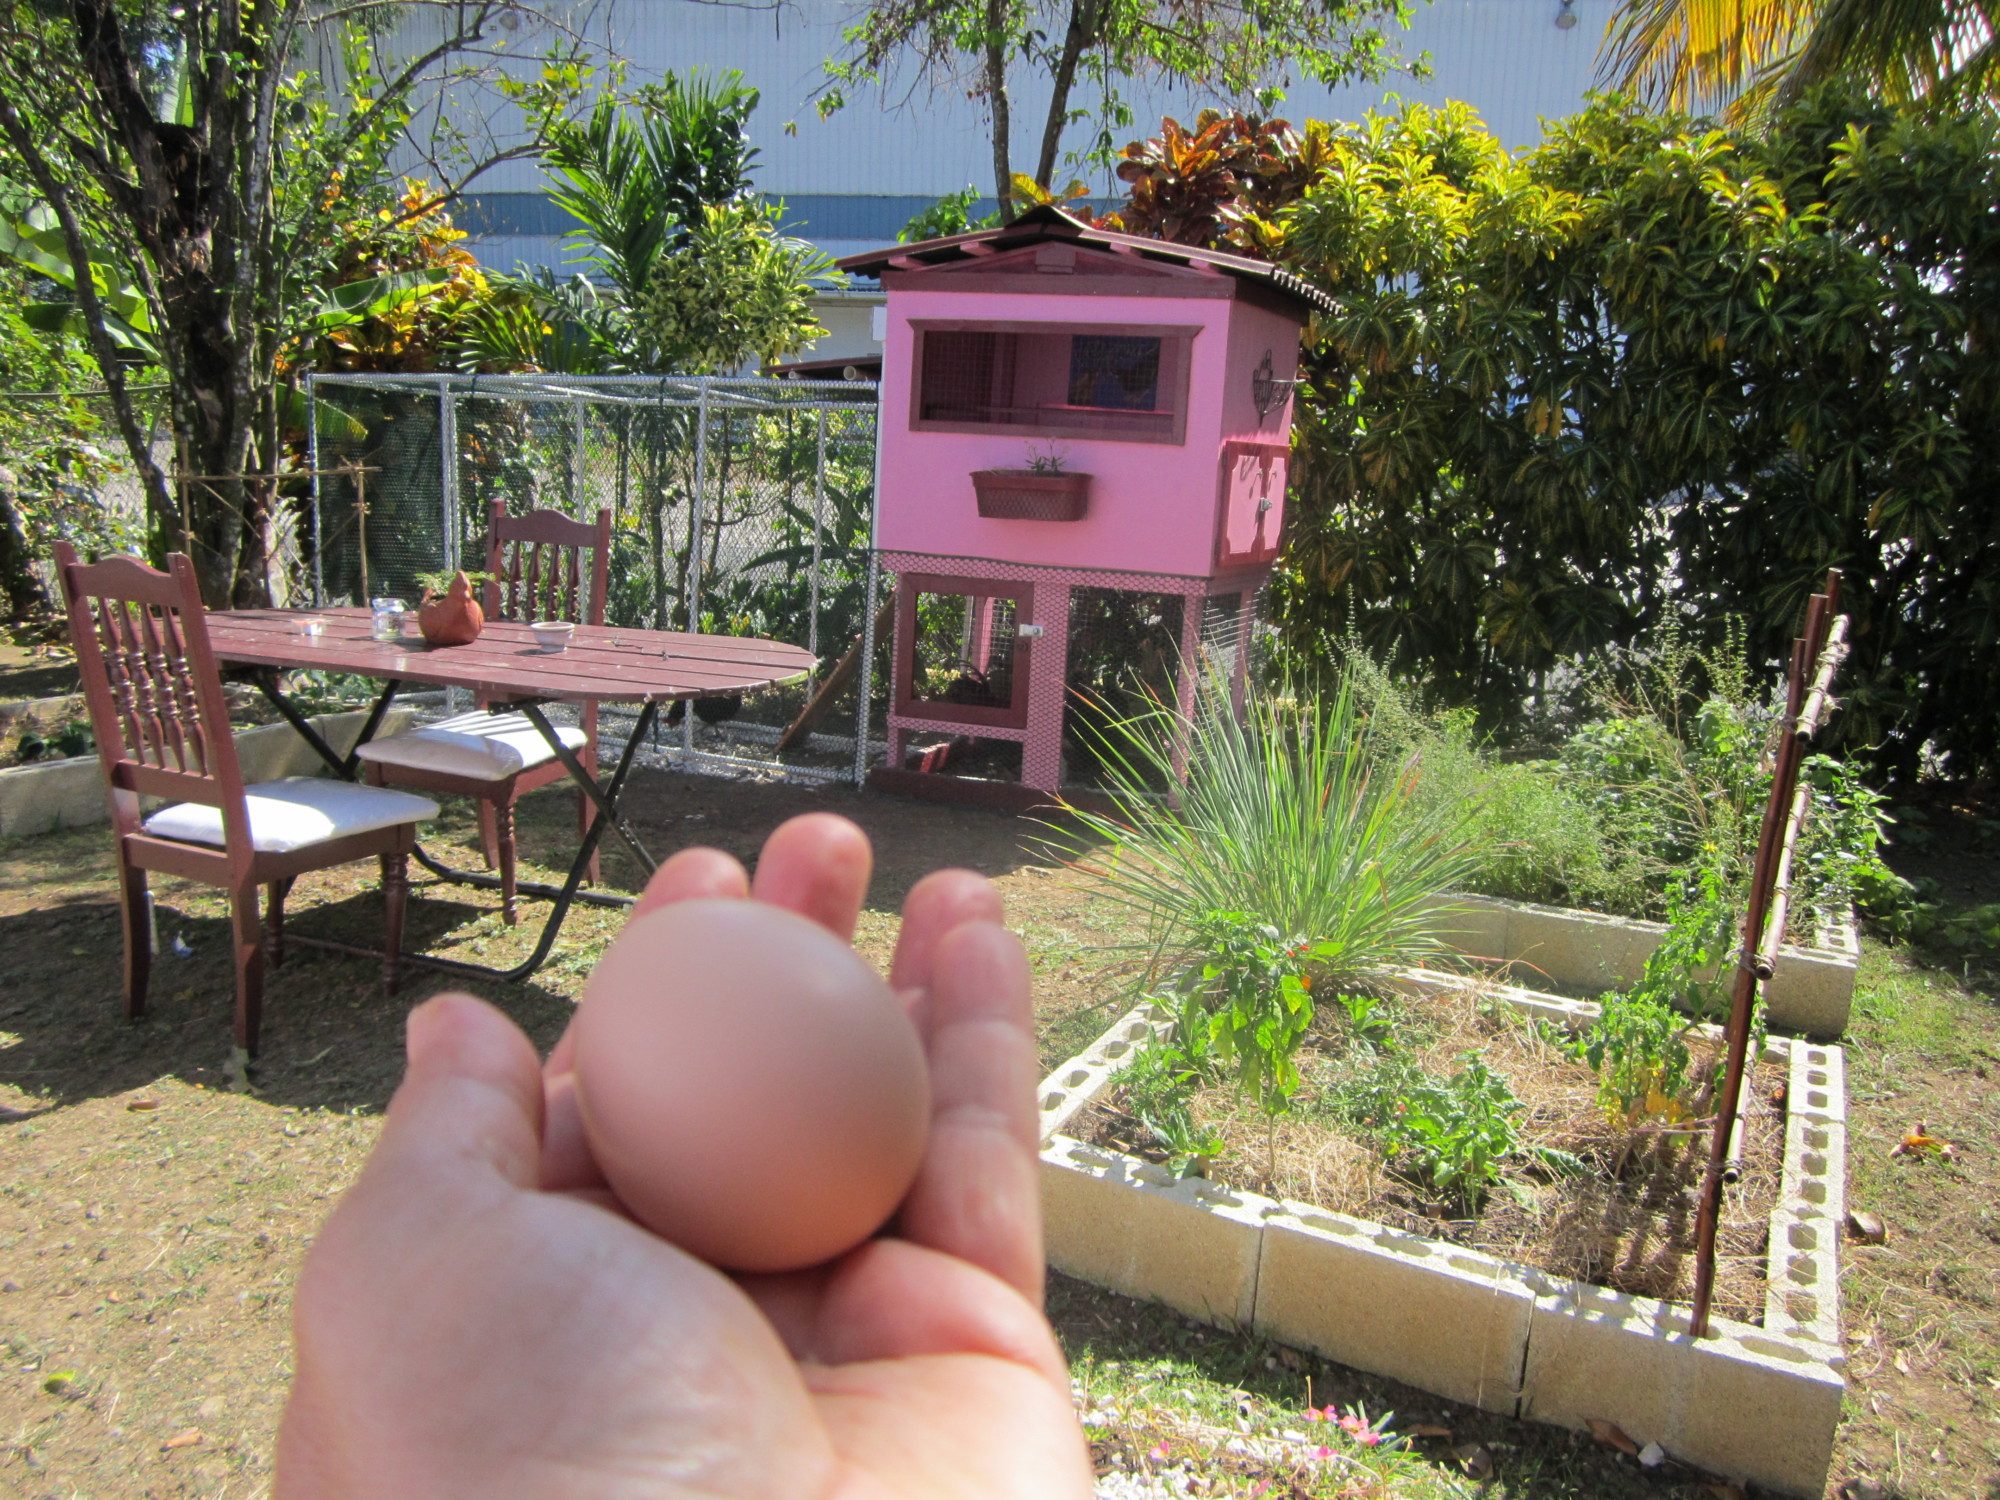
Just add 2 bags of coarse sand under the coop where they have fresh water (change it twice a day) & food (30% protein mixed with layer's pellets). Greens,fruits,veggies scraps, lentil sprouts, crackled corn, oatmeal, yogurt,sunflower seeds are some of the goodies that are served sparingly/randomly on a daily basis.
April 16, 2012
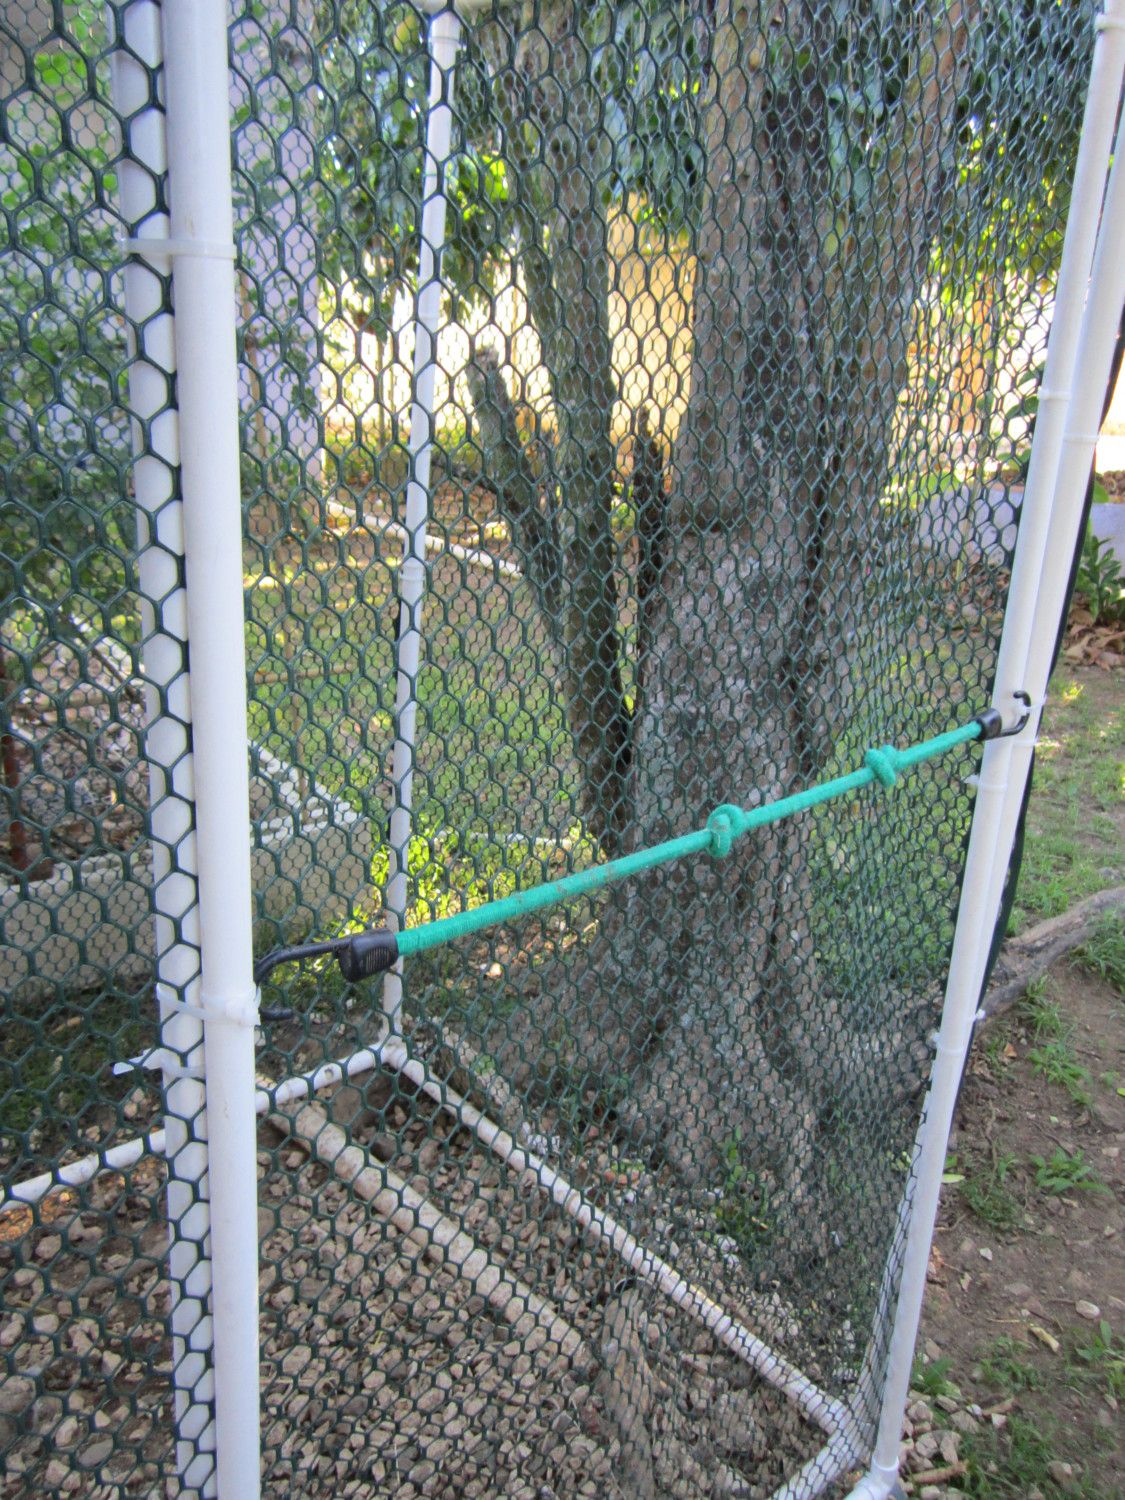
Latest improvement, a door was finally added making possible to a human to get inside the run. Is not the fancier door, just a pvc rectangular frame covered with chicken wire & attached by plastic straps, as a closing device I'm using and elastic band with hooks on each end.
August, 7, 2012
After 6 month of being a happy chicken owner & of using this coop, I'll tell what I learn so far:
- Making a slant top part for the nest is not practical if some part of the roost will be above it.
- The roost indeed should be of a piece of wood, 1"x3" (specially if your chickens are big.
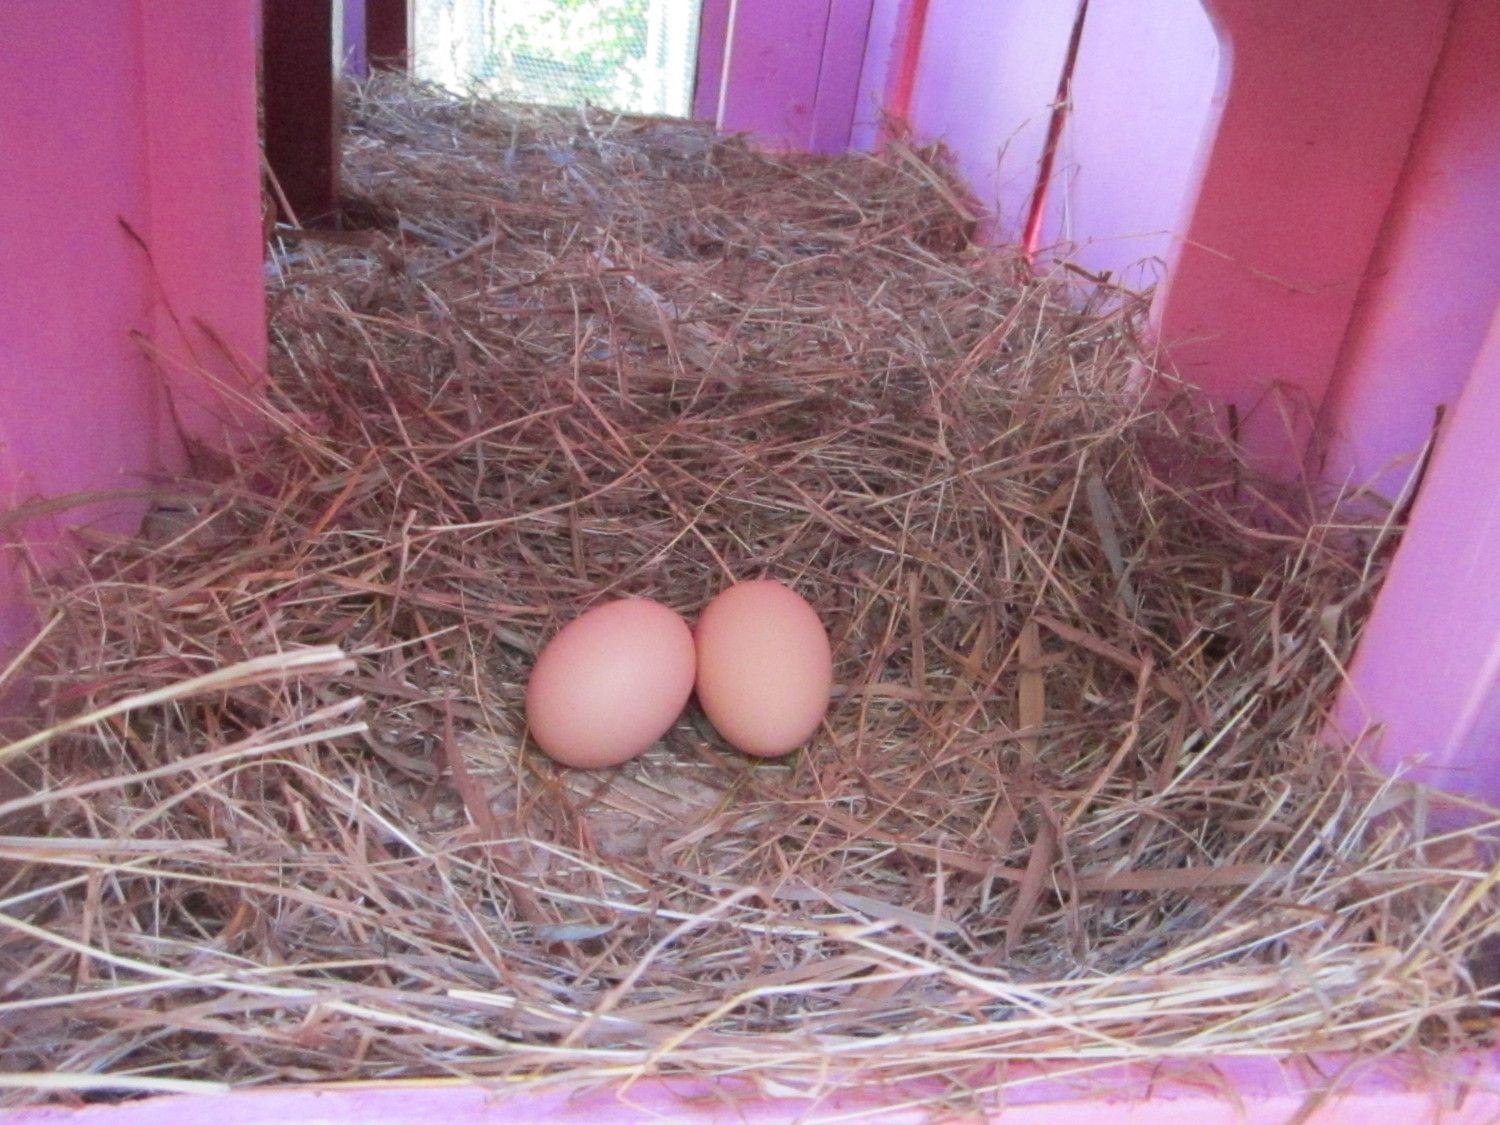
- Making more than one nest is totally not necessary if you have less than 6 hens
- Skipping preparing properly the land where you plan to put your coop/run was a major mistake... it should be flat, well leveled and if possible made some solid foundation, with good drainage... on top of it the best is to have a thick layer of sand (and it should be a fine sand, the coarse one in the pic don't last a week as they scrap it out)
- If living in a tropical place heat & rain are two elements to take care of, so adding some kind of roofing protruding over the window openings is a must, as well as some barrier against the windy-rain in the side of the run that is most likely the wind blows the rain in...
November 10,2012
UPDATE
The roost was substituted months ago for a wider one (1"x3" ) and today I modified the nests, leaving only the side the girls use hopefully, now the top part of the set don't get full of poop!

Almost a year later...
Almost a year later...
I just built a small housing for a couple of Kikirikis check it out!
https://www.backyardchickens.com/a/kikiriki-tropical-coop
Home Improvements in Villa Gallina!
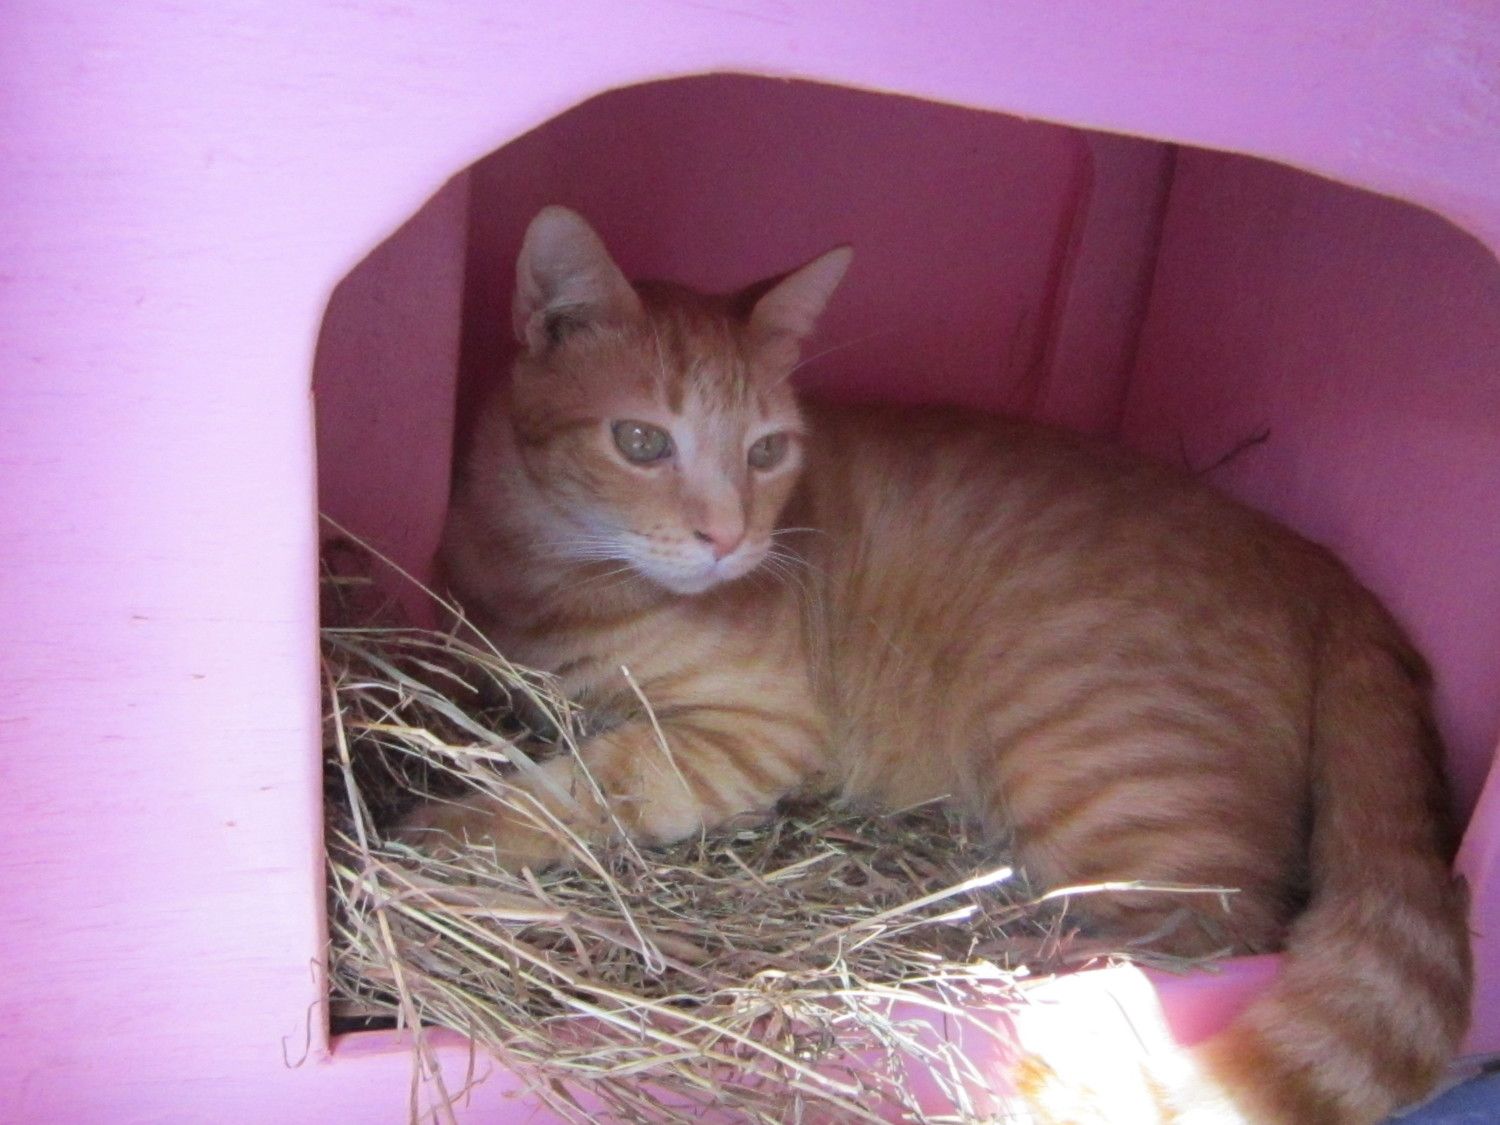
Four years ago I started the adventure of chicken husbandry, starting with the construction of Villa Gallina. The tiny coop has suffer some changes since as well as it occupants has change, non of it original residents still alive; actually, the rooster is Favio, a handsome black cooper maran, Yamina, a mutt with some black star among her genes, that lays small cream eggs, Karaya a longhorn/ eastern egger that lays big blue eggs, Raphaelle a lovely red layer who is the youngest and lays big brown eggs.
Villa Gallina "housing" has change quite a bit. The most recent improvement was actually making its run smaller ( instead of 9'long x 3'wide x 4.5'long is 8'x 3'x4' ) now that the chickens spent most of the time free range in the backyard they dont need as much space in the run. I substitute the old plastic "chicken wire" for metal 1"x1" wire, and change de "human door" to the front. I add a swing for their amusement.
The floor is made of PVC 1in panel , the front wall is a 1/4 in x 1/4in attached to a 1in PVC tube frame, the door opening was cut out to fit the cover of a cat litter 5 gallon bucket and the three outer walls are cover with a blue inexpensive awning.
Yesterday 4/27/2015 A new lady move to Villa Gallina
And Today, 4/27/2015 Yamina have her first two baby chicks!!!
Turn out, that Yamina is a very good mama hen, she stay in her "maternity room " until her last egg hatched on May. A total of 7 chicks of different ages... only one died on day 2. So she got to rise 6 chicks, 2 boys and 4 girls. I give away 2 girls and a boy, and keep 1 boys and 2 girls.
With 8 adult chickens, its obvious the run is too little to leave them there 24/7... so I decided to leave them freerange in the backyard from 7 am to 7 pm.... not a good idea... they eat and scratch most of my veggie/ herbs/ ornamental plants and dig holes everywhere, not to mention the chicken poo all over the backyard.
So today a trip to the store was in order to buy what i need to increase the size of the run and here are the material list so far:
8 pvc tubes 3/4"
21' of chicken wire 1"x1" x 2'
100 straps
pvc adhesive
8 - 3/4" pvc elbows
14- 3/4" pvc T
1 ondura corrugated asphalt roofing sheet
Fastforward 5 years...
53 days ago, huracain María hit PuertoRico

A
Our island was devastated. We still have most of the country without electricity, cumunications and or water service. Many people lost partially or totally their homes due to the winds and or the floods. Agriculture suffer great losses. Many roads were damaged, and entire cities specially in the mointains got incomunicated. Many people died as an aftermath due to the imposibility of getting the medical treatment on time for preexisting conditions or new sickness. Its been a painfull process for all. But I am very grateful because on our home we were 43 days without electricity and internet, 20 days without running water and a big tree from my neighbor's fall exactly on my tiny chicken coop and run but other than that we are fine.Now we are planing on reconstruct Villa Gallina, make the coop it a little bigger and add a nest box outside in order to increase the sleeping space of my flock of 9 hens and 1 rooster.

♡

The following photo was took on November 13,2019

Update November 15, 2020
This is how Villa Gallina looks in this days. I paint it last week. Almost 10 years of backyardchickening ♡


