Building a 8'x8' Coop
We needed a larger coop. We have a 4x8 tractor with penthouse that serves as a soil-builder for our raised beds. Also we have a mini-tractor/brooder that sits in the garage. We need the garage space.
So the plan was to build a coop that will serve two purposes. 1- house my RIRs, and provide a small section to brood and grow off future chicks. Each will have it's own pop door and run. The basic floor plan will be 8'x8' with a single sloping roof. All lumber is to have a minimal amount of cutting. All ply or OSB sheets are to be installed with no cutting, except the incline of the roof angle.
Provided here will be the materials list, Costs, and cut sizes as well as assembly methods. Hold on - here we go!
| Material | Price | Number |
| 2x6x8 | Free | 9 |
| 2x6x8 PT | $4.97 | 4 |
| 23/32 x 4' x 8' OSB T&G Flooring | $12.44 | 2 |
| Liquid Nails | 1.57 | 1 |
| #12 x 3 1/4 Galvanized Nails 5 lbs | 17.97 | 1 |
| 2x4x8 studs | 20 | |
| 1/2" x 4' x 8' sheathing or plywood | 8 | |
1. Take the nine 2x6x8' boards and cut 7 of them to 93" exactly. Take the remaining 2 and leave them at full length. However, check the length and make sure they are not too long- if so, trim them to exactly 96". Using your tape measure, mark lines at 16, 32, 48, 64, and 80 inches. Do this on both 96" boards. Then nail or screw them together in this manner.
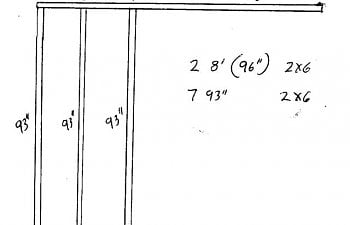
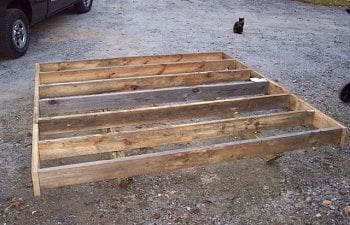
Once you have nailed it all together, it should look like the picture below. Measure from one corner to the opposite corner, and then cross corners and measure the other way. If your floor is square both measurements should be the same. It not then bump the longer corner with your hammer until the cross measurements are the same. Now you are ready to install the runners ( skids). These are not needed if you do not wish to ever move your coop. If you are like me and desire to rearrange things from time to time, then you can install these and you will have a portable coop that you can hook to with your truck or tractor.
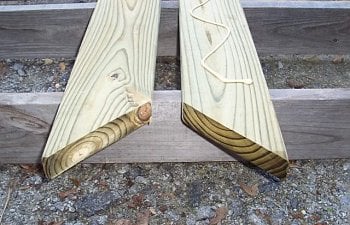
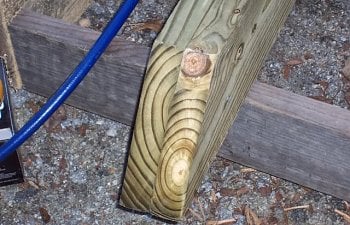
2. Now take the two pressure treated 2x6x8s and cut a 45 degree angle cut on both ends of all four. Once those are cut, then lay a snake-like bead of Liquid Nails along the broad side of two of them. Get your garden hose and spray a little water on the other two boards. ( Water activates Liquid Nails which is a polyurethane glue ) Then sandwich and nail together a unglued board to a glued one and you will end up with two 4x6 runners. Measure in from the 96" 2x6s on each side 16" and mark. Glue and toenail your runners to the 2x6s all the way across. Then flip your floor section over. You are now ready to nail down your flooring once you make sure that everything is level. Prop up with blocks under the runners until level, or else do the remainder of the construction on a surface you know to be flat.
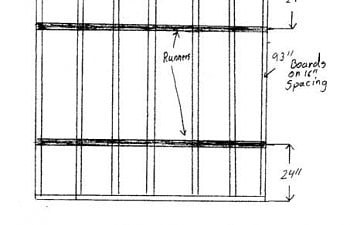
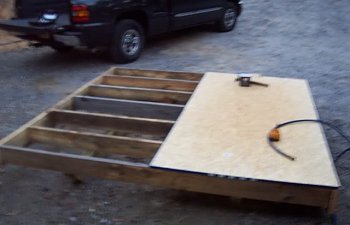
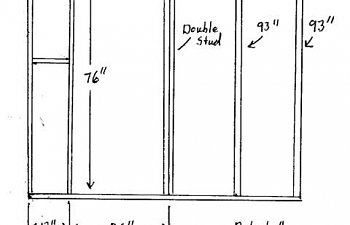
When nailing the flooring ( decking ) on start at one corner on the 96" board. Lay your decking so that the 48" side is running with the 93" boards. In other words, you want the 96" side to be running with the 96" board below it. Nail one corner then line up the 96" side and nail it all the way down spacing your nails every 12" or so. Then square up the frame with the sheet of decking and nail the joists. Add your other sheet and you are ready for studs. Below is the stud plan for the side walls. You will need two of these.

It is easier than you think to get all this square. Lay out everything on the newly built floor that is square because of your 4x8 sheets. In other words, Use your known square edges to build your two walls. Nail from the bottom and top. Wait until erected to install the stringers. After building the 1st side, leave it laying on the floor and build your other side right on top of it, as this will ensure that you have exact matching sides, which will help maintain squareness in your coop. Now set them aside and we will tackle the front and back walls, then install all the walls at one time. Below are the plans for the rear and front.


Some notes on the Front. Lay out from the right hand side. Outside stud - 24" - 48". Then install the double stud. This stud will hold the hinges for the Door. Make sure to place the short board between the left hand stud and the outside stud on the left. This will keep your door frame from warping. Note detail A on the door header. Make sure that you build this feature as shown with the vertical 2x4 towards the outside of the coop.
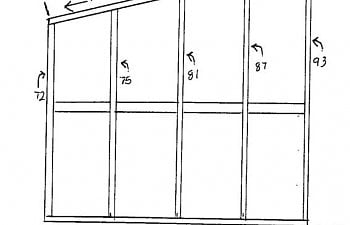
It is easier than you think to get all this square. Lay out everything on the newly built floor that is square because of your 4x8 sheets. In other words, Use your known square edges to build your two walls. Nail from the bottom and top. Wait until erected to install the stringers. After building the 1st side, leave it laying on the floor and build your other side right on top of it, as this will ensure that you have exact matching sides, which will help maintain squareness in your coop. Now set them aside and we will tackle the front and back walls, then install all the walls at one time. Below are the plans for the rear and front.
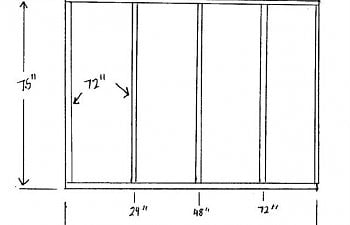
Some notes on the Front. Lay out from the right hand side. Outside stud - 24" - 48". Then install the double stud. This stud will hold the hinges for the Door. Make sure to place the short board between the left hand stud and the outside stud on the left. This will keep your door frame from warping. Note detail A on the door header. Make sure that you build this feature as shown with the vertical 2x4 towards the outside of the coop.
