Winter 2018/2019 and the five gallon duck-waterer in the duck house is frozen solid. On top of that i broke my left ankle and all duck-chores fell onto my wife's shoulders… So i decided to go ahead and start to automate as many duck-chores as possible, starting with a maintenance free waterer.
The previous owner of my property left some pieces of 3" PVC pipe behind in the barn and i decided to build the waterer out of a roughly 90cm (3') long pipe.
Parts List
Make a template to cut out ~30% of the PVC-pipe's wall by using one of the pipe-caps, i drew two circles on a piece of paper. The distance between the circles is the width of the cut-out in the pipe. Join the circles with two straight lines, like in the picture below.

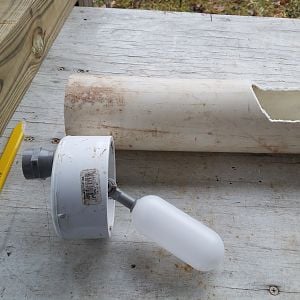
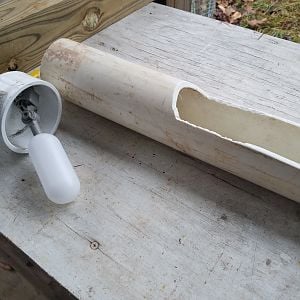
Cut out the template and glue it to one side of the pipe. The cut out should leave a closed section of the pipe that is large enough to cover the float valve. Then trace the outline of the template on the pipe, remove the template and cut the pipe. My experience was that a hacksaw with a metal cutting blade works best. However, not being born with great DIY skills my result was rather poor, as can be seen in the following picture. Use the first-aid kit if necessary.
Step 2: Installing the float valve
The float valve in the picture below is available on eBay and comes with an adapter to a standard garden hose, which is very useful if you don't plan on installing fixed 2" water-pipes for the waterer. If you search for »1/2" Adjustable Float Valve w/ Garden Garden Hose Adapter« you will find the right thing.
Using the power drill with the 2" metal drill bit i drilled a hole into the flat-end pipe-cap and installed the float valve.
…
You can see where this is going:
But don't install the pipe-caps now, first comes…
Step 3: Installing the 90° elbow
Using the power drill with the ½" metal bit, drill a hole into the bottom of the pipe - away from the opening you've cut in step 1; the dirty water will drain out here. Screw the 90° elbow into the hole and secure it with pipe glue. It should look like in the pictures below.
…
Step 4: Installing the pipe-caps
Now you can install the pipe-end-caps. If your PVC-pipe is clean (mine wasn't) and you are familiar with the use of PVC-pipe glue on large surfaces (can make you dizzy) you can use the pipe-glue. I used the white silicone caulking… The result should look a bit like a weird propulsion-device out of a science-fiction movie:
There is the float valve:
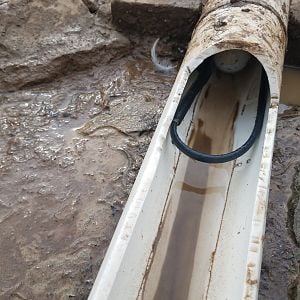
Attaching two pieces of ½" PVC pipe with the ball valve was just the last trivial step, i didn't even used pipe-glue as there is no pressure at all in that pipe.
Step 5: Using the waterer
Using my (not so) superior wood working skills, i managed to cut a piece of 2x4 to length, added two shorter pieces of scrap-wood and made some kind of a primitive support for the pipe, attached the pipe with some long zip-ties, connected a garden hose and placed it in the duck-run:
And as usual with everything new in their area the ducks thought »this is yet another duck killing device from our evil humon!« and stayed as far away from it as they could. But after a while they realized that there's clean water to drink in there and quickly started to turn it into the usual mess. Not this time ducks! - Watch what happens when the valve is opened:
Experience and Outlook:
The semi-automatic duck-waterer is in use for five months and it saved me a lot of work. I know my ducks have fresh drinking water available at all time during the day, which is very soothing. Once daily, on the way into the duck house i open the valve and let the water flow while i'm collecting the eggs and on the way back i just close the valve. Water duty is done!
In case the little piggies manage to make the waterer really, really dirty, usually after periods of heavy rain when the ground is really muddy, there's an old dishwashing brush close by, it just neds to be moved through the pipe and it's clean again.
No duck has ever tried to bathe in the waterer, but it's deep enough for them to clean their nostrils. And nobody has ever pooped into the water.
I'm still thinking about how to prevent the water from freezing during the winter, the garden hose can be buried to protect it from frost and need some kind of heating device for the waterer should be installed…
Another thing would be replacing the manual valve with an electric one that i could hook up to a micro-controller, connected to my WiFi network to remotely control the valve from my computer or phone. There could even be a »muck-sensor« installed, so that the micro-controller can sense that the water is dirty and flush the water out. Unfortunately those electric valves are ludicrously expensive.
Also the ugly wood-stand needs to be replaced with something nicer and sturdier.
And i need a second one for the duck-house itself!")
That journey is not over yet!
Update on 2020-01-11: Finally I put that pipe heating-cable, for which i almost have ruined the whole built, to good use. However, as that thing is not certified to be used fully submerged you need to click on that spoiler-button below to prove that your electric installation has, what is called an "Earth leakage circuit breaker" or in more modern installations you should have what is called a "residual current circuit breaker". Make sure that your electricity installation is equipped with such a safety device before you continue. And whatever you do, you do on your own risk, you have been warned.
The pipe-heating cable i am using has a three prong plug with a nice indicator light. I signals red, when the electricity is connected, but the thermostat has switched the heater off and it will be green, when the cable is actually heating.
The first thing the heating cable must protect is the sillcock at the house as well as the divider. A metal divider was used on purpose because the brass conducts heat better.
From the sillcock the cable is running parallel to the hose; i used just releasable zip-ties to tie it to the hose. And additionally attached some foam insulation.
I bought a welding-gas hose instead of an ordinary garden hose because those hoses are made of rubber and won't bust should the water freeze.
There was already an extra hole in the waterer through which the heating cable enters the waterer.
Inside the waterer i just looped the cable back on itself, so that the ducks cannot play with the thermostat.
So far the cable was able to prevent the sillcock, the hose and half of the waterer from freezing. The coldest we experienced here in WV were three consecutive nights at -10°C (14F).
Apologies for all the dirt, the ducks have successfully removed all vegetation around the waterer and turned the ground into ankle deep mud…
The next improvement steps will be:
Update on 2020-02-17: Fixed broken image links. - So far the pipe heating cable has done a good job. The water in the waterer stayed in its liquid form and neither the hose, not the sillcock froze, even during the coldest night of this winter, where we went down to -9°C (16F). ANd the Duckies love their waterer to pieces!
The previous owner of my property left some pieces of 3" PVC pipe behind in the barn and i decided to build the waterer out of a roughly 90cm (3') long pipe.
Parts List
- Piece of 3" PVC pipe
- Float valve with garden-hose adapter
- PVC pipe 3" flat end-cap
- PVC pipe 3" round end-cap
- PVC pipe 90° elbow ½"
- PVC pipe straight ½"
- PVC pipe ball-valve ½"
- PVC pipe-glue
- White silicone caulk
- Scrap-wood
- Zip-ties
- ½" drill bit for metal
- Power drill
- Hacksaw with metal blade
- First Aid Kit
- Walkie-Talkie in case the first-aid kit is insufficient
Make a template to cut out ~30% of the PVC-pipe's wall by using one of the pipe-caps, i drew two circles on a piece of paper. The distance between the circles is the width of the cut-out in the pipe. Join the circles with two straight lines, like in the picture below.
Why using the pipe-caps to draw the circles? - The ratio of a circle's circumference to its diameter is the constant pi with a value of 3.14… - so if your cutout is one diameter wide on the circumference of the pipe you are cutting away roughly 30% of the pipe.
Step 2: Installing the float valve
The float valve in the picture below is available on eBay and comes with an adapter to a standard garden hose, which is very useful if you don't plan on installing fixed 2" water-pipes for the waterer. If you search for »1/2" Adjustable Float Valve w/ Garden Garden Hose Adapter« you will find the right thing.
Using the power drill with the 2" metal drill bit i drilled a hole into the flat-end pipe-cap and installed the float valve.
 …
… 
You can see where this is going:
But don't install the pipe-caps now, first comes…
Step 3: Installing the 90° elbow
Using the power drill with the ½" metal bit, drill a hole into the bottom of the pipe - away from the opening you've cut in step 1; the dirty water will drain out here. Screw the 90° elbow into the hole and secure it with pipe glue. It should look like in the pictures below.
 …
… 
Step 4: Installing the pipe-caps
Now you can install the pipe-end-caps. If your PVC-pipe is clean (mine wasn't) and you are familiar with the use of PVC-pipe glue on large surfaces (can make you dizzy) you can use the pipe-glue. I used the white silicone caulking… The result should look a bit like a weird propulsion-device out of a science-fiction movie:
There is the float valve:
Attaching two pieces of ½" PVC pipe with the ball valve was just the last trivial step, i didn't even used pipe-glue as there is no pressure at all in that pipe.
The screw up step: The way to hell is covered in good intentions!
Don't follow this step!!! I only describe this here to show you how you can screw up a very good solution if you try to overdo. - My downfall began when i found below pip-heating cable in the internet:
»Great thing!« i thought, if i install that into the waterer the water won't freeze and i can even protect the exposed sections of the garden hose. So i ordered one…
The idea was to install the heating cable in a loop inside the waterer, like this:
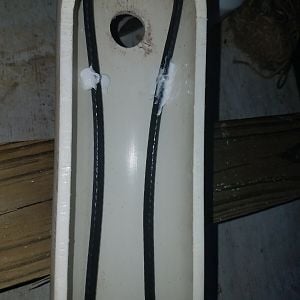
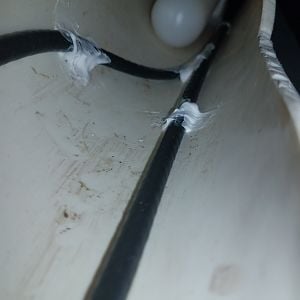
In order to attach the cable to the PVC pipe, i first tried hot glue. This doesn't stick to the pipe. Silicone doesn't stick either. So i drilled 2mm holes into the pipe, secured the cable with zip-ties and tried to seal the holes. - Unsuccessfully. Again tried hot glue and silicone and the damn thig was leaking like a colander.
…
On top of that, i realized that the heating cable will prevent the water from flowing freely through the pipe, preventing it from flushing most of the duck-dirt out of the waterer.
It was all bad! - So i removed the cable and the cable ties and fortunately was able to seal the holes in the pipe with the white silicone. No heated waterer! - But i'm still thinking about it…
Don't follow this step!!! I only describe this here to show you how you can screw up a very good solution if you try to overdo. - My downfall began when i found below pip-heating cable in the internet:
»Great thing!« i thought, if i install that into the waterer the water won't freeze and i can even protect the exposed sections of the garden hose. So i ordered one…
The idea was to install the heating cable in a loop inside the waterer, like this:
In order to attach the cable to the PVC pipe, i first tried hot glue. This doesn't stick to the pipe. Silicone doesn't stick either. So i drilled 2mm holes into the pipe, secured the cable with zip-ties and tried to seal the holes. - Unsuccessfully. Again tried hot glue and silicone and the damn thig was leaking like a colander.
 …
… 
On top of that, i realized that the heating cable will prevent the water from flowing freely through the pipe, preventing it from flushing most of the duck-dirt out of the waterer.
It was all bad! - So i removed the cable and the cable ties and fortunately was able to seal the holes in the pipe with the white silicone. No heated waterer! - But i'm still thinking about it…
Step 5: Using the waterer
Using my (not so) superior wood working skills, i managed to cut a piece of 2x4 to length, added two shorter pieces of scrap-wood and made some kind of a primitive support for the pipe, attached the pipe with some long zip-ties, connected a garden hose and placed it in the duck-run:
And as usual with everything new in their area the ducks thought »this is yet another duck killing device from our evil humon!« and stayed as far away from it as they could. But after a while they realized that there's clean water to drink in there and quickly started to turn it into the usual mess. Not this time ducks! - Watch what happens when the valve is opened:
Experience and Outlook:
The semi-automatic duck-waterer is in use for five months and it saved me a lot of work. I know my ducks have fresh drinking water available at all time during the day, which is very soothing. Once daily, on the way into the duck house i open the valve and let the water flow while i'm collecting the eggs and on the way back i just close the valve. Water duty is done!
In case the little piggies manage to make the waterer really, really dirty, usually after periods of heavy rain when the ground is really muddy, there's an old dishwashing brush close by, it just neds to be moved through the pipe and it's clean again.
No duck has ever tried to bathe in the waterer, but it's deep enough for them to clean their nostrils. And nobody has ever pooped into the water.
I'm still thinking about how to prevent the water from freezing during the winter, the garden hose can be buried to protect it from frost and need some kind of heating device for the waterer should be installed…
Another thing would be replacing the manual valve with an electric one that i could hook up to a micro-controller, connected to my WiFi network to remotely control the valve from my computer or phone. There could even be a »muck-sensor« installed, so that the micro-controller can sense that the water is dirty and flush the water out. Unfortunately those electric valves are ludicrously expensive.
Also the ugly wood-stand needs to be replaced with something nicer and sturdier.
And i need a second one for the duck-house itself!
That journey is not over yet!
Update on 2020-01-11: Finally I put that pipe heating-cable, for which i almost have ruined the whole built, to good use. However, as that thing is not certified to be used fully submerged you need to click on that spoiler-button below to prove that your electric installation has, what is called an "Earth leakage circuit breaker" or in more modern installations you should have what is called a "residual current circuit breaker". Make sure that your electricity installation is equipped with such a safety device before you continue. And whatever you do, you do on your own risk, you have been warned.
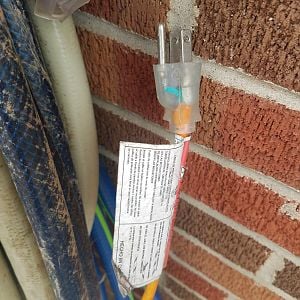 The pipe-heating cable i am using has a three prong plug with a nice indicator light. I signals red, when the electricity is connected, but the thermostat has switched the heater off and it will be green, when the cable is actually heating.
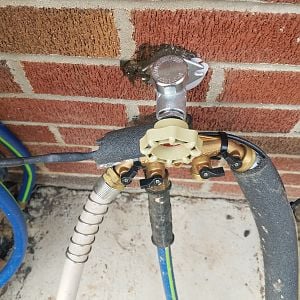 The first thing the heating cable must protect is the sillcock at the house as well as the divider. A metal divider was used on purpose because the brass conducts heat better.
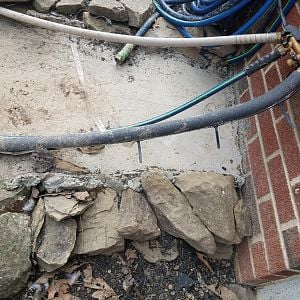 From the sillcock the cable is running parallel to the hose; i used just releasable zip-ties to tie it to the hose. And additionally attached some foam insulation.
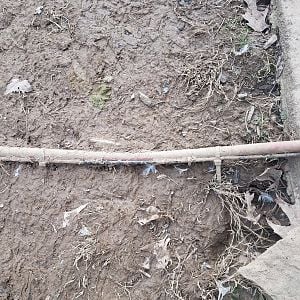 I bought a welding-gas hose instead of an ordinary garden hose because those hoses are made of rubber and won't bust should the water freeze.
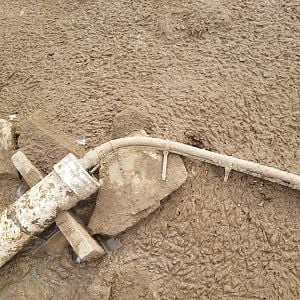 There was already an extra hole in the waterer through which the heating cable enters the waterer.
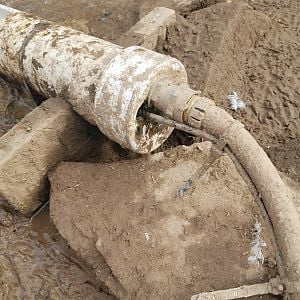
 Inside the waterer i just looped the cable back on itself, so that the ducks cannot play with the thermostat.
Apologies for all the dirt, the ducks have successfully removed all vegetation around the waterer and turned the ground into ankle deep mud…
The next improvement steps will be:
- Dig a one foot pit into the ground and fill it with gravel
- Place the waterer on top of that gravel
- Cover the gravel with some cheap patio stones from orange bucket
Update on 2020-02-17: Fixed broken image links. - So far the pipe heating cable has done a good job. The water in the waterer stayed in its liquid form and neither the hose, not the sillcock froze, even during the coldest night of this winter, where we went down to -9°C (16F). ANd the Duckies love their waterer to pieces!

