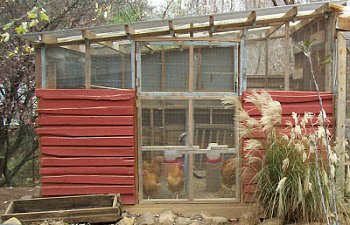
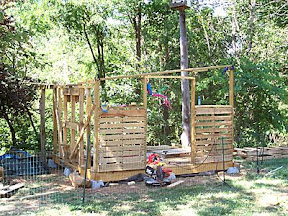
Hen House: 99 square feet We began with the hen house design. Large enough to accommodate 20-25 hens. Two banks of nest boxes and a very open design. A wire divider can be added to create a small area for brooding chicks and includes one of the nest boxes for broody hens.
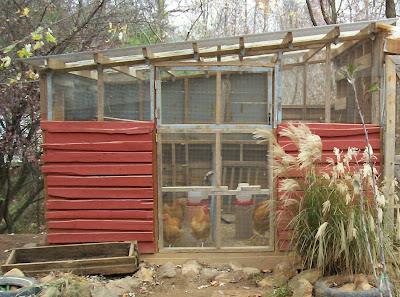
Aviary: 63 square feet
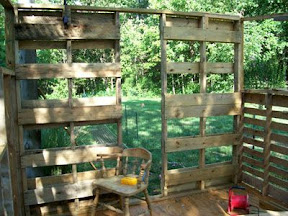
The Aviary was added after we completed the main Hen House because we felt we needed more room to expand! It is fully secure and can be separated from the Hen House or integrated.
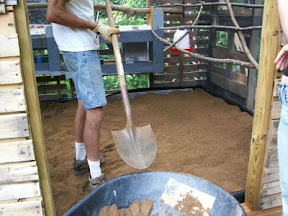
- We use course construction sand as the flooring in all of our chicken coops & pens.
- 2X4’s as roosts for perching

Pier blocks are used with 2X6’s and landscape fabric to set the foundation
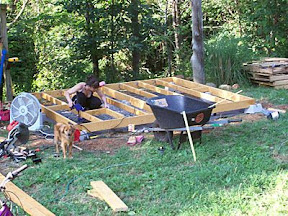
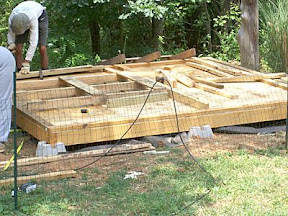
Floor joists completed and here I am installing supports to help unify the flooring. Showing late afternoon shade.
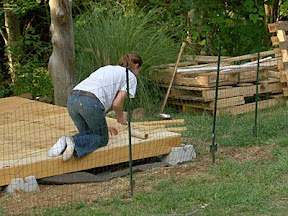
DD sealing the installed plywood floor. We will be using a Pond liner over it
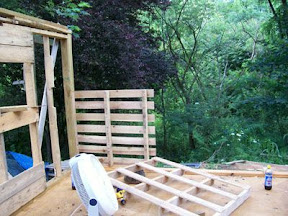
First wall, the low wall 5'9" tall is up & braced. We only had to scab together 1 joist for this wall. The center 3 joists & boards are one complete pallette that we found, which determined this walls height. You can see the pallettes for the front wall being prepped.

Front wall is up & complete with only the top board scabbed together. It certainly took a while to figure out & I'm sure there was a better way to do it, but with some strapping it'll work! Onto the back wall..
Back wall complete using 3 whole palettes! DD is working hard to help the project along!

The last wall is complete!!!!!!! We used two full 7’ tall palettes to do it. Talk about EASY!
A closer shot of the back wall, and the roof joists. You can see the empty space in the back wall for the poop shelf door

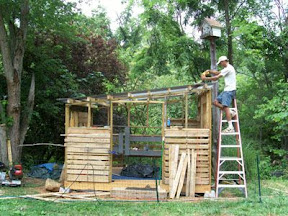
My husband is installing the TufTex panel roofing we chose, alternating clear with smoke panels
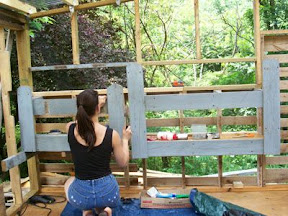
We’re closing up the wall, the pond liner is in, tree branch perches have been fashioned and we’re getting ready to add the construction sand on the floor

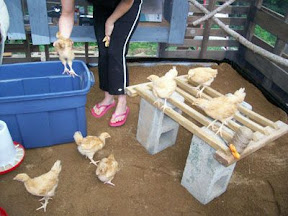
7 Buff Orpingtons move in!
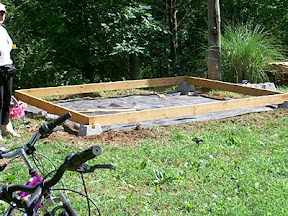
We begin by removing grass from the site & clean out the footprint 9’ X 11’

We added some of our driveway rocks to hold down the fabric & here you see the center support installed & the floor joists going in
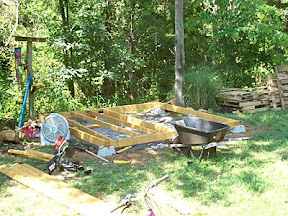
Here is hubby & I laying out the plywood sheeting for the floor base.

Framing our first wall, the low side of the coop.
Our temporarily clamped partial front wall. This is another complete pallette which really makes framing easy. Above the pallette here will be completely open with screen 3 seasons a year.

Back wall started using one full palette
The last wall is now going up, the first part is already being secured into place. It is a single 7’ tall palette!
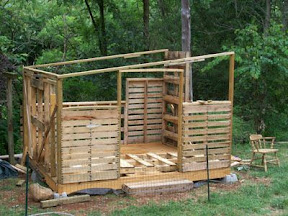
Roof joists are in and ready for roofing
We are getting so close!!!

Using scrap woods to build the nest boxes. On the left we have the “broody box” which can be seperated with fencing from the rest of the nests & house to give broody an area to raise chicks
Finishing roofing and adding welded wire to windows & doors throughout

The sand is going in. It’s alway so pretty when it’s fresh!
Well the hen house is ready to move in the chicks
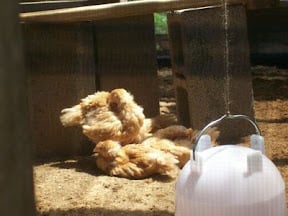
And they love that they can sun bathe & dust bathe all in one place!
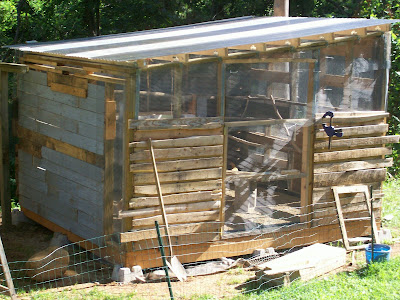
And the hen house is complete!
We have stripped the inside from it's original setup, it's now only sand with two perches, one on either side. I didn't end up liking the nest boxes and they were in the way when we wanted to divide it. I've since been converted to storage totes as nest boxes and am very happy with them. When the house goes back to a single coop configuration, we'll build some shelves along the back wall again to set the storage totes on top of.
We just love this place otherwise!
Update August 2011 - 3 years after construction
So we're finally ready to call it permanent. I decided on a permanent perch setup that would accommodate how we will run our poultry in the future. It of course takes time, in my case 3 years before I realized what systems work best for us.