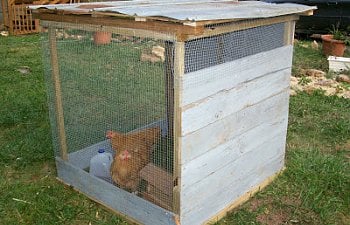
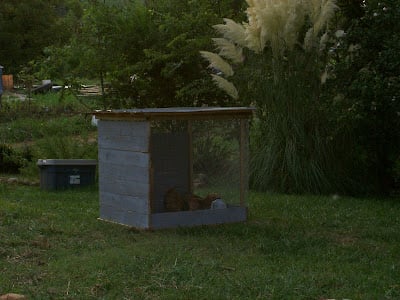
Dawn on the Farm's 'Mini Coop'
 Two of our Roosters came back from their first APA Poultry Show and had no place to live in isolation/quarantine. So we quickly constructed this Mini Coop to hold them for a few weeks. Since then, this house has become the home for one of our alternate breeding roosters.
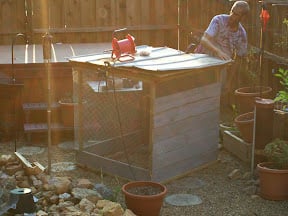
It's very basic, about 4 square feet, and is lightweight enough for one person to move around the yard. It is covered with materials we had laying around the farm, with a skeleton we purchased from Lowe's Home Improvement store. In the winter months, we park it somewhere permanently where it can be in the sun, add a temporary run, and we fill the bottom with sand & straw, and cover it in plastic. This would make a great main shelter for a few bantam chickens, or single housing for one standard sized chicken. Now, let me show you how we did it.
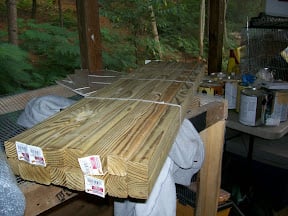
This is a pack of what are called Ballasters. You can find them underneath the completed railing panels at Lowe's. They are intended to fill in custom made railings, these are the vertical pieces. They were $.99 for 36" lengths, and $1.19 for the 42" lengths. We purchased the 42" lengths in a bundle.
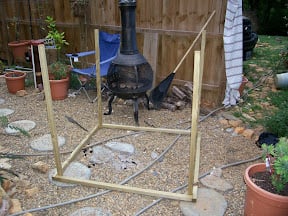
They are approximately 1"X1" pieces and when pre-drilled, make excellent lightweight, pressure treated timbers for a small dwelling like the Mini Coop. They are also a nice size already and don't need to be trimmed down.
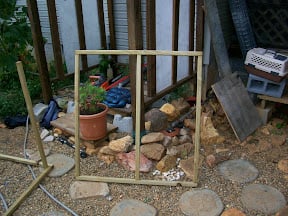
We started with 8 ballasters, and created a basic frame, by pre-drilling the holes and then putting the pieces together in a way that made sense to us.
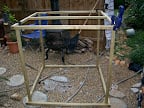
Then we created a basic square roof frame with one center support out of 5 more ballasters. Again, pre-drilling holes is IMPERATIVE! Then we put the roof on the frame.
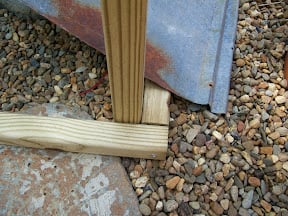
We added a 2X4 to the FRONT of the coop to create the "rise" that the roof would need to drain off any rain or weather.
Then we used 5 pieces of 1X4 that we had laying around to create the "roof joists" necessary to complete the roofing structure. You can see the metal roofing panels lying there, they are the next step.
You can see up close how we made the connections between ballasters.
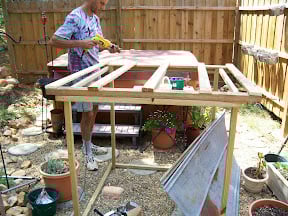
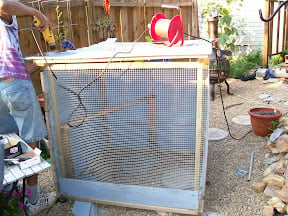
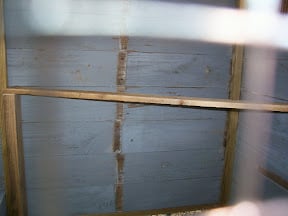
I cut down some other scrap wood we had from an old fence (the blue/grey siding) and applied it to 2 adjoining walls and created a splash guard/perimeter around the bottom. On one of the walls, I left a siding board off, and used hardware cloth to create a vent. I wrapped the other two sides with 1/2" hardware cloth/welded wire.
Then we added 2 scrap pieces of plywood ontop of the roof frame (not shown) and
applied the metal roofing & screwed it down to finish it off on the outside.
You can see that I've added a perch created from a scrap 1X4 and a couple of 2X4 pieces. It runs diagnally through the coop because there isn't a lot of room to begin with, but because I wanted to make sure that both ends of the perch were on the solid sides of the coop, not the wire.
What I don't have pictured is that later, I
used 2 pieces of 2X4 and attached those ONTOP of 3 of the siding pieces, on the outside, to join them together. Then I unscrewed those 3 panels, now securely attached to eachother with the 2X4 pieces and added 2 hinges to the top most siding piece. Then I put it all back on the coop and now have a hinged door that is 3 siding panels tall and is the length of the back of the coop. It's easy to open and the 2X4s make good handles. We added a slide bolt latch to the bottom piece of the siding "door" and can close it easily like that. LATER on, after a lot of rain, our 3 panel siding door swelled too much to close, so we replaced it completely with a piece of plywood the same size, same hinges & slide bolt latch, and now it works perfectly all the time.
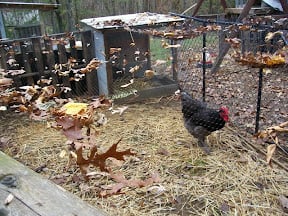
It's a wonderful little coop and I'm thrilled more than a year later to use it. We keep the solid walls to the wind or rain and now use hanging feeders/waterers so that we can move it easily without disturbing the food & water system. This would be a great place to use the PVC feeders often seen all over BYC forums, so you could fill it from the outside and it would always move with the coop.
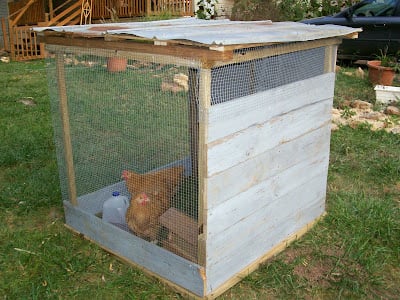
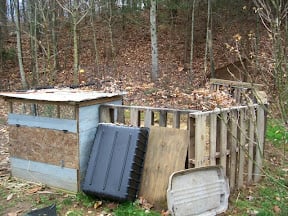
You can see here how we have it setup with a run. Half the run is made of pallets, which work great, and the top is fruit tree netting The other side of the run is an adjoining run. You can also see in the left photo the new plywood replacement door we created after the first one swelled up too much to use. And the rooster gets into his run at the corner of the coop where we pulled up the welded wire just enough for him to get out.
It's very basic, about 4 square feet, and is lightweight enough for one person to move around the yard. It is covered with materials we had laying around the farm, with a skeleton we purchased from Lowe's Home Improvement store. In the winter months, we park it somewhere permanently where it can be in the sun, add a temporary run, and we fill the bottom with sand & straw, and cover it in plastic. This would make a great main shelter for a few bantam chickens, or single housing for one standard sized chicken. Now, let me show you how we did it.
They are approximately 1"X1" pieces and when pre-drilled, make excellent lightweight, pressure treated timbers for a small dwelling like the Mini Coop. They are also a nice size already and don't need to be trimmed down.
We started with 8 ballasters, and created a basic frame, by pre-drilling the holes and then putting the pieces together in a way that made sense to us.
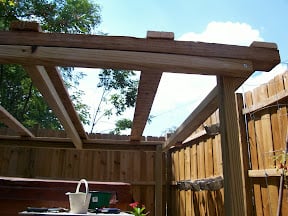
Then we used 5 pieces of 1X4 that we had laying around to create the "roof joists" necessary to complete the roofing structure. You can see the metal roofing panels lying there, they are the next step.
You can see up close how we made the connections between ballasters.
Then we added 2 scrap pieces of plywood ontop of the roof frame (not shown) and
You can see that I've added a perch created from a scrap 1X4 and a couple of 2X4 pieces. It runs diagnally through the coop because there isn't a lot of room to begin with, but because I wanted to make sure that both ends of the perch were on the solid sides of the coop, not the wire.
What I don't have pictured is that later, I
It's a wonderful little coop and I'm thrilled more than a year later to use it. We keep the solid walls to the wind or rain and now use hanging feeders/waterers so that we can move it easily without disturbing the food & water system. This would be a great place to use the PVC feeders often seen all over BYC forums, so you could fill it from the outside and it would always move with the coop.
I hope that this inspires you and gives you some ideas for your own coop(s).