I embarked on raising chickens for eggs after having a conversation with a fellow Master Composter who raises chickens.
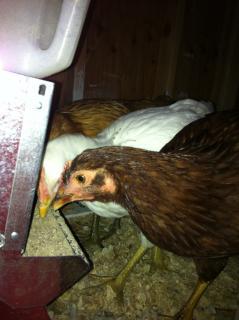
Well, as my wife said, I should have built the coop first. After 12-13 weeks, my Amercauna, Rhode Island and Delware were ready to get out of the pallet brooder that I built.
Quick Links
External Nesting Box - Wife calls it a drive through
Water nipple system, if you can call it a system
Chicken Behaviors. You have got to see this, it's funny.
The Design
The coop begins: March 13, 2011

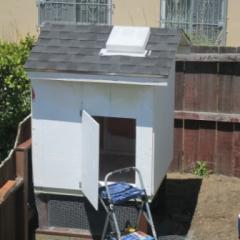
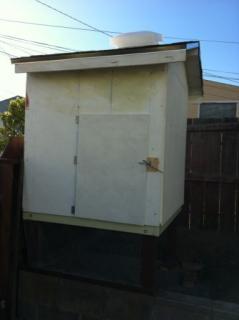
The coop has about 22" underneath. This area will serve as a secure external area where the chickens can get a dust bath and just hang loose.
Not very sexy, but it will work. I used hardward cloth and a pneumatic crown nailer (it was faster), but I think that a large washer along screw would be just as good if not better.
This side is where the door will be installed. A bit overkill on the studs, huh? I had to keep reminding myselft that chickens are living in this building, not people.
Rain, rain, go away.
Yes, I went with a gable roof. Ugh! Pythagorean theorem and bird mouth cuts.. Let's just say my birds mouth cuts were not perfect.
ok. So the paint doesn't match with the stained bottom pieces. Oh well.
Today, May 22, 2011, I installed a temporary wall, see the stained painted plywood in the run area?
I will work on extending the run another 3-4 feet.
My wife will be happy that the chickens are now in the home, outside. She said, my chickens were smelling up the house.
My wife was very patient.
I will post more pictures after I have complete the final tasks.
I hope you enjoyed my coop.
As of May 25, 2011
My coop is still a work in progress. Again, trying to keep the floor clear of any items in order to provide more space for the chickens, I installed a rabbit feeder on the door. At this time, it is temporary, but it works.
I used a rabbit feeder and a one gallon plastic jug to hold the feed. I am guessing that the feed supply will last at least two days.
As of June 4, 2011
As I compost the chicken poops, I thought rather than letting the poop go to in the area under the coop, I decided on putting compost in the bottom area.
I will turn the compost once per week and when I feel it is good enough, I will transfer it to my composting bins to finish it off.
As of July 9, 2011
This picture is hilarious. I also have a video. Click here to check it out.
As of July 23-24, 2011
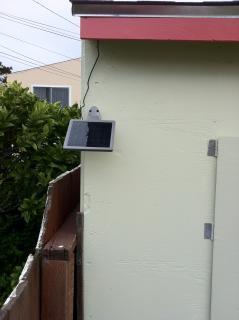
I finally installed the solar LED light system in the coop and left the light on last night (July 23rd). Ooops.
Anyhow, the next morning (July 24), one of my hens laid her first egg.. Yippee!. I ended up getting two eggs that day. Check out my first egg page.
August 25, 2011
September 5, 2011 - My Wife Calls it a Drive Through
I decided to install a nesting box that protrudes from the coop as my three chickens are big and my 4x4 coop is too small.
I also moved the perch as the hens were squished on the 22" inch perch. I installed a 27" round perch.
The Drive Through Nesting Box.
The New Round Perch
As of Sept. 6, 2011
Well, as my wife said, I should have built the coop first. After 12-13 weeks, my Amercauna, Rhode Island and Delware were ready to get out of the pallet brooder that I built.
Quick Links
External Nesting Box - Wife calls it a drive through
Water nipple system, if you can call it a system
Chicken Behaviors. You have got to see this, it's funny.
The Design
- 4x4x4
- Gable roof. Should have just made a pitch roof, would have been easier
- Collapsible roost and poop tray
- As of 5/25/2011: Rabbit wall Feeder installed. Check it out! Check out my video on Flickr!
- As of June 4, 2011: Decided on using compost in the bottom of the coop rather than sand. Check it out!
- Used screw on the external plywood and on the sole plates just in case I need to dismantle it
- Costs: $528.16 with lots of extra nails and crown staples for my pneumatic tools)
- New! Sept 5, 2011: Installed new external nesting box (My wife calls it a drive through) and perch. Check it out!
- Two sides of the coop rest on my retaining wall
- The underneath of the coop has rock and sand
- Have not yet built the run door.
- Purchased almost everything new, ($528.16 with lots of extra nails and crown staples for my pneumatic tools)
- I am handy and have tools, but I am no architect or construction worker. I am weekend hack.
- Nesting box,- June 7, Done
- paint exterior, Done
- install roof caps atop the peak of the gable
- complete the run and deal with the run door,
- install pitched 2x4 over door to keep out the rain/water, (I didn't need this. With the recent rain, no rain got in through the door)
- install solar panel LED
- install ladder on hatch - Done
- need to add more screws on the sole plate
- Do as much design on paper first. I did!
- Listen to your wife/spouse. I should have built my coop first.
- my 4x4x4 coop took over two months to build on the weekends and a few days off.
The coop begins: March 13, 2011
| 
|
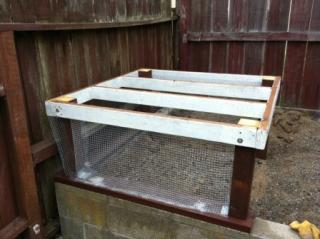
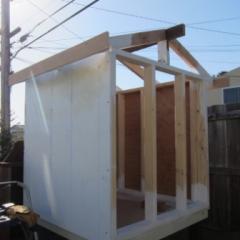
The frame legs are treated 4x4 and the floor joists are treated 2x4
| After having purchased 15/32" and testing it (160 lbs) I felt that 19/32" would be better. 19/32" was better. |

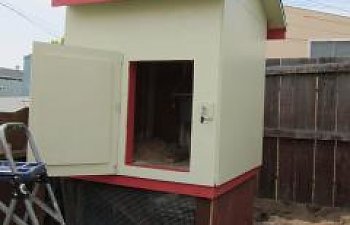
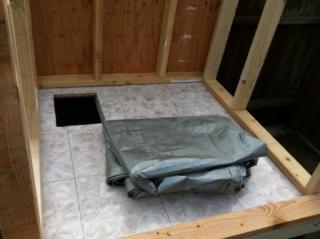
The coop has about 22" underneath. This area will serve as a secure external area where the chickens can get a dust bath and just hang loose.
Not very sexy, but it will work. I used hardward cloth and a pneumatic crown nailer (it was faster), but I think that a large washer along screw would be just as good if not better.
This side is where the door will be installed. A bit overkill on the studs, huh? I had to keep reminding myselft that chickens are living in this building, not people.
| 
|
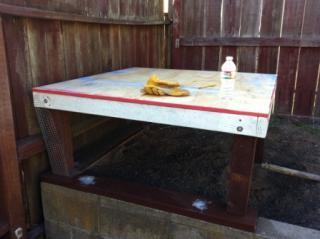
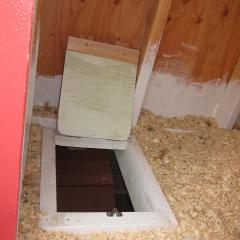
I purchased and installed vinyl to make cleaning easier. Notice the hole in the floor? I built a ladder, but have yet to install it as the run beneath the coop is still unsecured. For now, I just put a piece of wood with a heavy brick atop the hatch. | The hatch opening. |
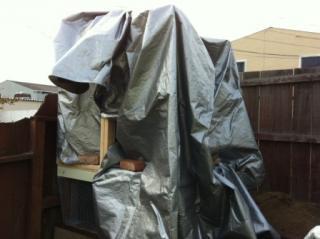
Rain, rain, go away.
Yes, I went with a gable roof. Ugh! Pythagorean theorem and bird mouth cuts.. Let's just say my birds mouth cuts were not perfect.
| 
| 
| 
|
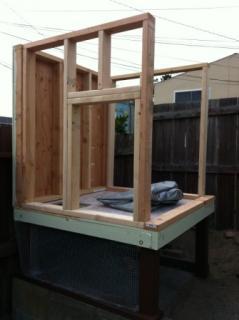
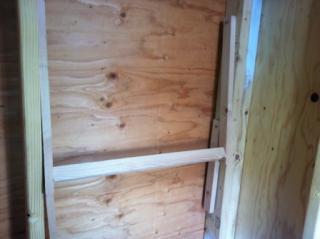
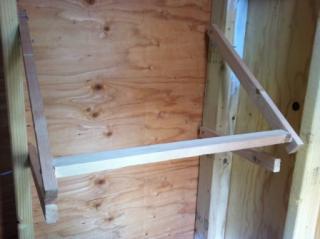
Because my coop is small, I had to design the inside with flexbility. It took me a while to come up with this idea of a collapsible roost.
| A picture of the roost and support for poop tub. Notice the large nails? I drilled the screw holes, in the 2x1s, larger to allow the wood to pivot. The actual 2x1s are held in position with a nail (drilled hole in 2x4 studs for easy removal). I may redo using 2x3s. | I think that the roost is too high because when I visited my chickens after the first two hours, they were huddled on the floor in the corner. I put all three on the roost and put in a temporary step in the hopes they will use it get up and down onto the roost. I may have to lower it, but I will give it some time. | Today, May 22nd, I lowered the roost. Monitoring, the chickens shortly after proved that they were able to get up onto the roost without another step. There is 14" from the floor to the bottom of the tub. If I purchase another more shallow tub, then I will have even more clearance. The goal is to have as much floor space as possible. I had a gallon of interior red paint, so I painted the inside door jam red. Interior paint is easier to clean. |
| 
|
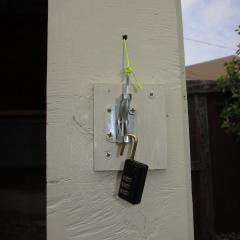
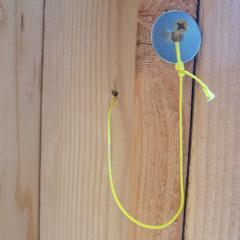
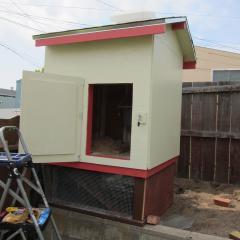
The outside of my coop as of May 15th. I installed a skylight/vent (http://duraflo.com/) purchased from Amazon. I also have a solar panel LED lamp that I will install. | Funny thing. You see the gate lock that I installed? Well after I installed it, I wanted to sit inside the coop to see how the door sealed and how much light the skylight let in. Well, you probably guessed that I locked myself in. Luckily my wife was home and I had my cell phone on me, otherwise I would have had to kick the door down. I since drilled a hole through the wall, pulled through a string into the inside of the coop and attached a string to the external latch. I will attach a picture later. |
| 
|
| 5/22/2011: This is the gate lock that installed. Notice the string attached. I installed it after I locked myself in. | 5/22/2011: I installed the string through an angled drilled hole and attached it to a washer so the string wouldn't fall through. |
| 
| 
|
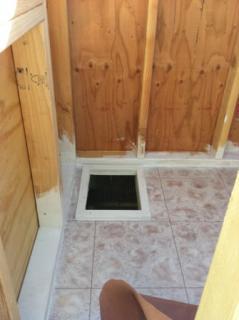
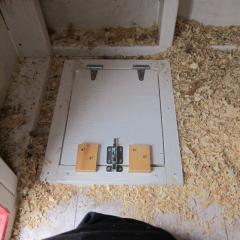
Installed the ladder and the hatch today, May 22, 2011. This is a picture of the hatch opened. | This is a pictures of the hatch closed. I had to push the chickens down the hatch and into the run area (not very big). | A picture of the steep ladder that I installed on May 22nd. I had to put food on the ladder just so they would know to go up the ladder into the coop. It worked. |
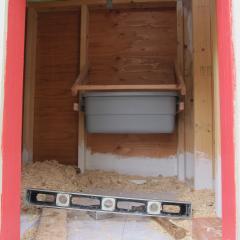
ok. So the paint doesn't match with the stained bottom pieces. Oh well.
Today, May 22, 2011, I installed a temporary wall, see the stained painted plywood in the run area?
I will work on extending the run another 3-4 feet.
My wife will be happy that the chickens are now in the home, outside. She said, my chickens were smelling up the house.
My wife was very patient.
I will post more pictures after I have complete the final tasks.
I hope you enjoyed my coop.
As of May 25, 2011
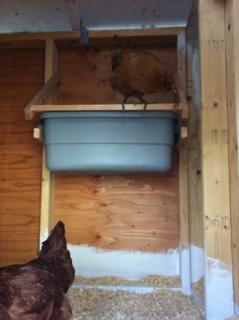
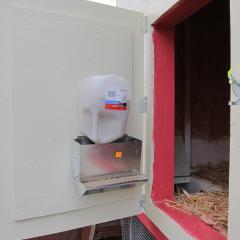
My coop is still a work in progress. Again, trying to keep the floor clear of any items in order to provide more space for the chickens, I installed a rabbit feeder on the door. At this time, it is temporary, but it works.
I used a rabbit feeder and a one gallon plastic jug to hold the feed. I am guessing that the feed supply will last at least two days.
| 
|
I affixed a gallon jug above the feeder. When the feed gets depleted, the feed in the jug will replenish the feeder. The only thing that I think is a problem is that the chickens have a larger access area to the feed. I have seen them use their beak to sweep away feed to get to the stuff that they like. The swept feed ends up on the floor. I have a video of the chickens eating. http://www.flickr.com/photos/malindawg/5758808336/in/photostream | A view of my temporary feeder. I think that I may raise it a bit. Of course I will probably install a better looking and functional container. |
As of June 4, 2011
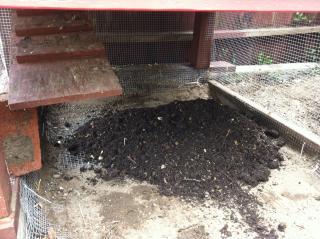
As I compost the chicken poops, I thought rather than letting the poop go to in the area under the coop, I decided on putting compost in the bottom area.
I will turn the compost once per week and when I feel it is good enough, I will transfer it to my composting bins to finish it off.
| 
|
| I removed the sand and begun adding the almost finished compost. | My chickens can forage for worms and other living and edible bugs in the compost., |
As of July 9, 2011
This picture is hilarious. I also have a video. Click here to check it out.
As of July 23-24, 2011
I finally installed the solar LED light system in the coop and left the light on last night (July 23rd). Ooops.
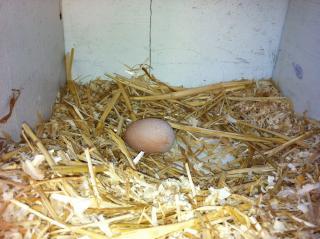
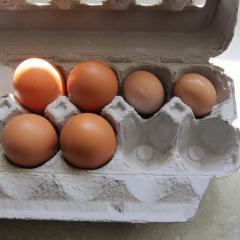
Anyhow, the next morning (July 24), one of my hens laid her first egg.. Yippee!. I ended up getting two eggs that day. Check out my first egg page.
| 
| 
|
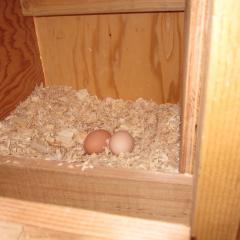
| First Egg at the bottom right hand corner. Found at 8:00 am PDT | Second egg was actually in the nesting box which I found at 16:00 PDT. Woohoo! | My two eggs compared to Trader Joe eggs. |
August 25, 2011
| |
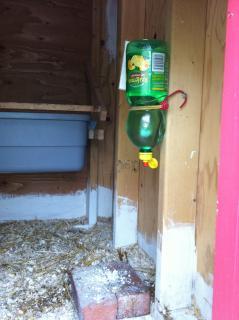
I installed a Lemon juice waterer with a nipple on the end of the opening. The opening was almost exactly 5/16". With a bit of plumbers tape, I had no leaks. The hope is now I won't have to waste so much water because they dirty it. I also have another bottle just like this one, so it will make it easy to change it. |
September 5, 2011 - My Wife Calls it a Drive Through
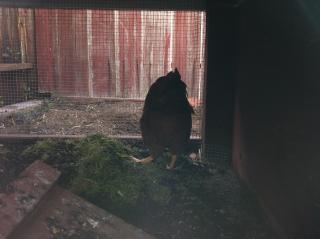
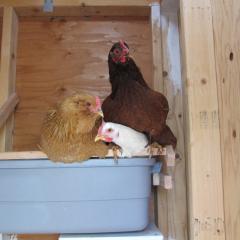
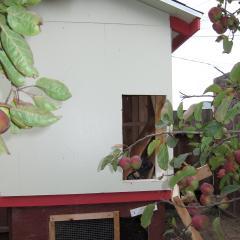
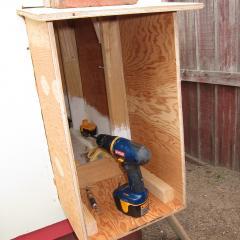
I decided to install a nesting box that protrudes from the coop as my three chickens are big and my 4x4 coop is too small.
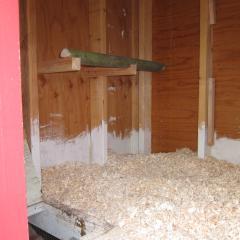
I also moved the perch as the hens were squished on the 22" inch perch. I installed a 27" round perch.
The Drive Through Nesting Box.
| 
| 
| 
| 
|
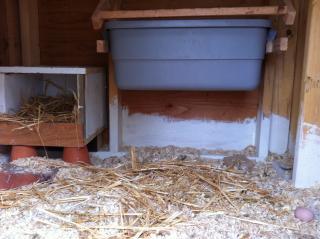
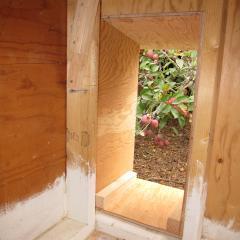
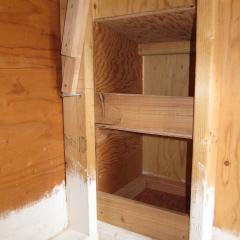
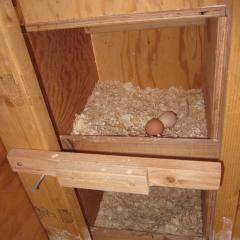
| Cut a 13"x23.5" hole between the studs | Installed the base first and then the sides. Note that no screws are installed just yet. I needed to ensure that all parts fit. | Notice the bricks atop the nesting box. The weight of the bricks helped keep the box in place while I screwed in the panels. | This is the inside of the nesting box. I used extra piece of redwood fence cut in 4" high pieces | The outside. I reused the cutout from the side of the coop as a temporary cover as I ran out of time. This coming weekend, I will replace the temp back wood and replace it with a hinged door which will allow me to clean it out and remove the eggs without having to open the main door. |
The New Round Perch
| 
|
| I moved the perch to the left side of the coop to provide more length, 22" versus 27" | I think that the rounded perch may be a bit too round. I had a square perch previously. I will monitor and change to square if necessary. I also noticed that my hens now face the wall. My previous perch had a large tub beneath it to catch all the poops, but I noticed that more poops was on the floor and saw that they were facing the wall. I thought that they were having trouble turnng around as they were too squished, but they do the same thing (face the wall) with the new perch. |
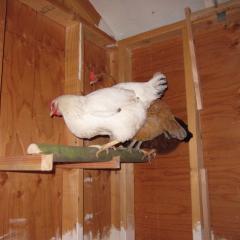
As of Sept. 6, 2011
| 
|
| After the install the Amerecauna and the Rhode Island laid an egg in the top bunk | I still have some work to do like install a better staging perch to make it easier for the hens to access the coop. The bottom nest was disturbed, but no eggs in that nest. |