I've wanted ducks for years and this year I finally found the type of duck that fits my needs and wants. Problem is I didn't have a duck house...so I set out to build one! In this article I will show you how I converted a large dog house into a small duck house. This house would also make a great little chicken coop (see second page for optional modifications!). This was mostly a one-woman job.
I found this large dog house on Craigslist for $50. It's over a decade (maybe two!) old, but it's still in good shape as the siding is cedar. It measures approximately 36" x 53" on the inside and is VERY heavy.
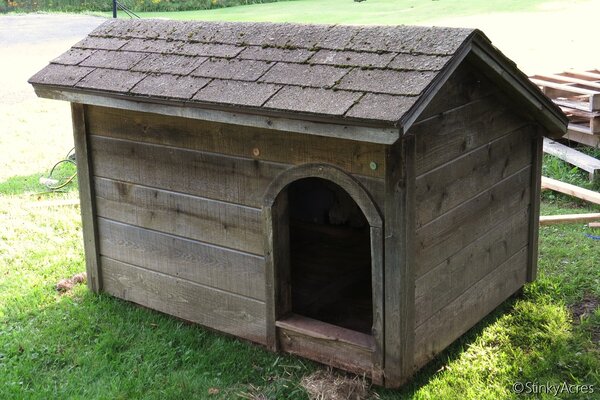
The old dog house
The first order of business was to clean out the inside. I removed the center divider and scraped, swept, and vacuumed as much as I could. It still smells like dog, but it'll do!
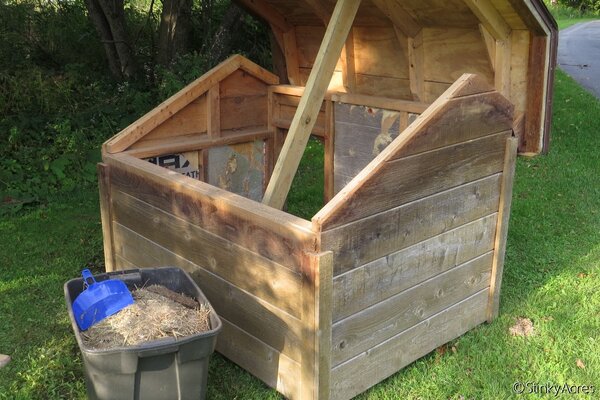
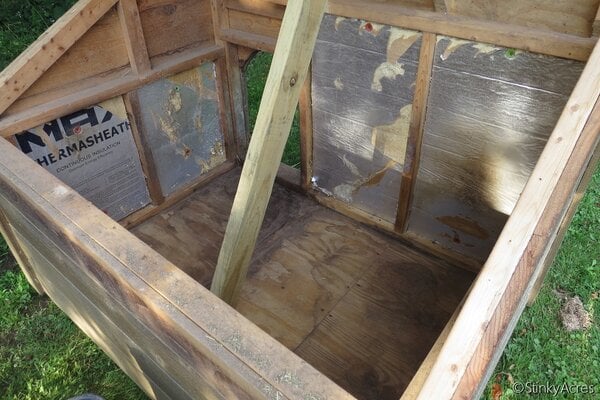
All clean and ready for modification
The next task was to add ventilation. I cut out two holes between the studs at each gable end and covered them with hardware cloth, stapling it on the inside. Go buy an oscillating tool if you don't have one already - it's a game changer!
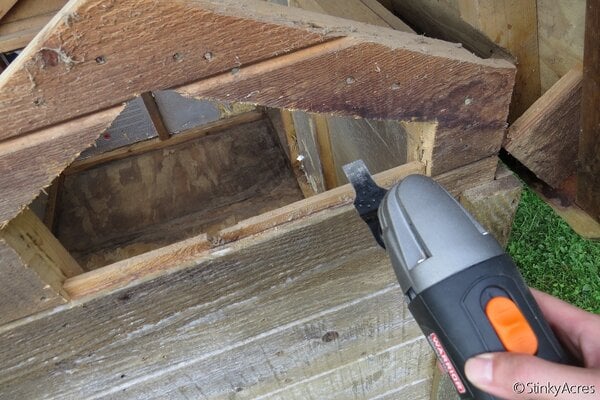
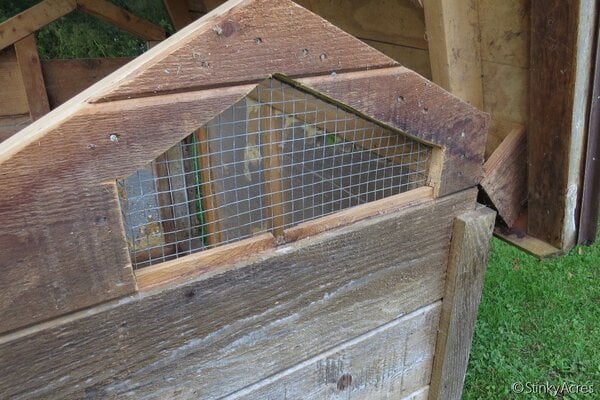
Adding ventilation
Next, I built some doors. I cut out a new door opening on the left side for better access and built the door out of the siding I removed. For the front door I created a drawbridge-type door out of the cedar planks from the center divider I took out earlier. I routed a 1/2" rabbet along the edges for a nice draft-free fit. Both doors got recycled latches.
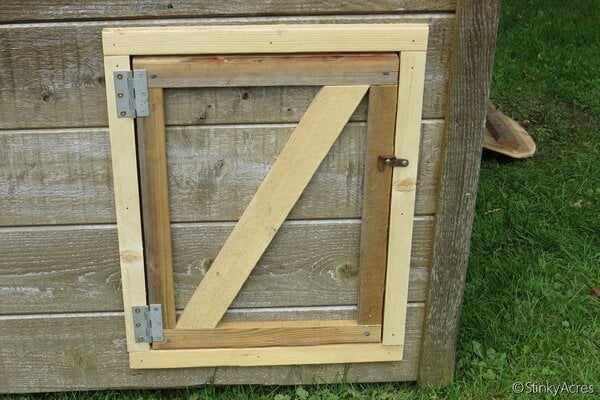
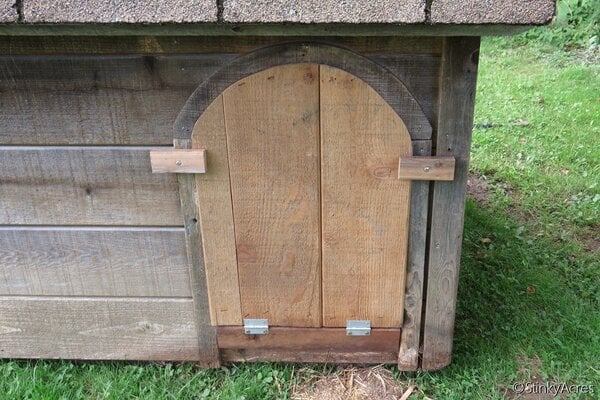
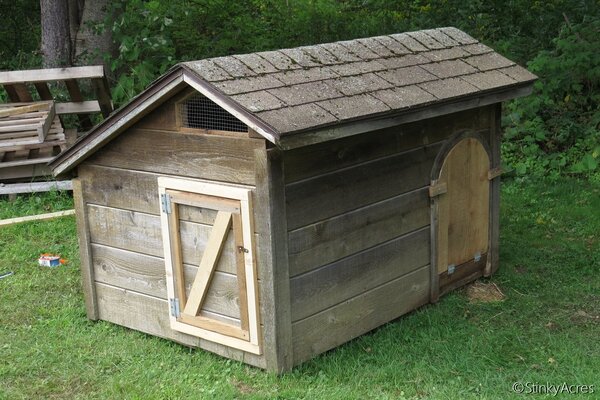
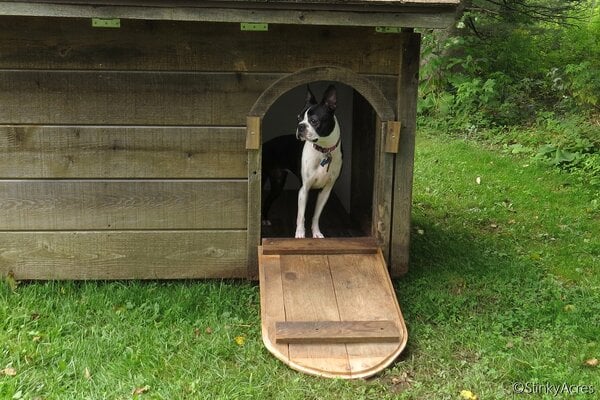
Two new old doors. Dorie thinks it's too nice for ducks!
Before I could tackle the inside I had to reinstall the roof prop (third photo down). No one wants a heavy roof closing on top of their head!
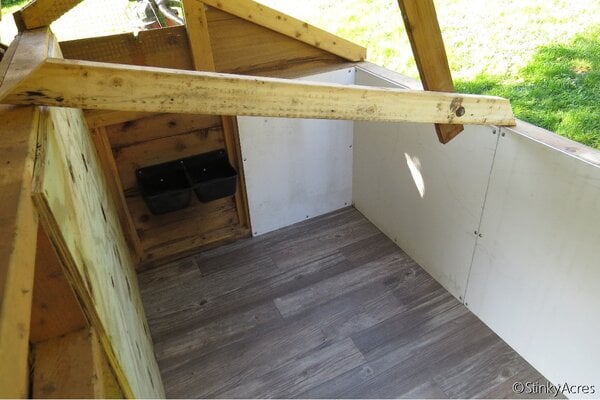
Now that the roof was safely supported I could work on making the interior easier to clean and water resistant. I cut out a piece of vinyl sheet flooring I had lying around and secured it to the plywood subfloor at the corners with tough double-sided tape.
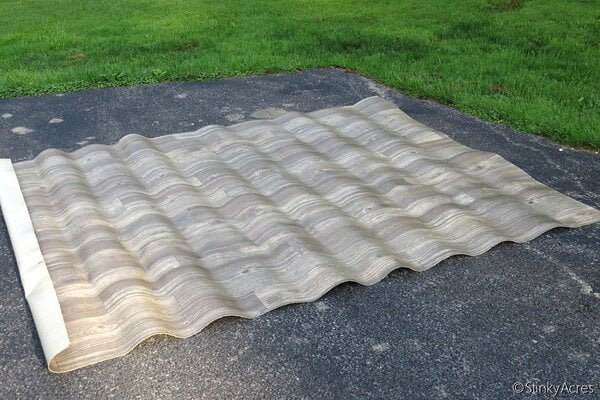
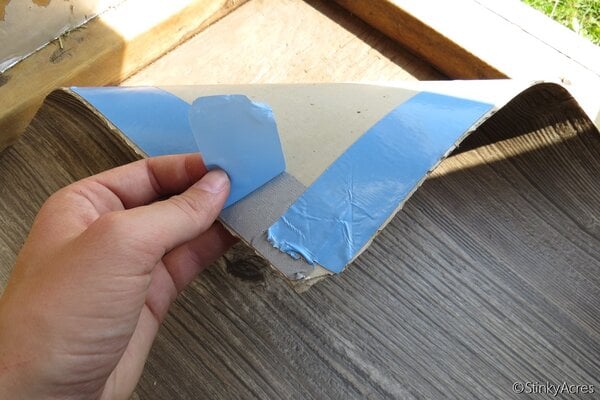
Installing vinyl sheet flooring
I used a PVC sheet material on the back walls. These particular PVC sheets can be cut with regular woodworking blades and be screwed or nailed to the studs. The dog house came with insulation between the studs and it needed to be covered to prevent the ducks from ingesting it. I covered the front walls later with plywood.
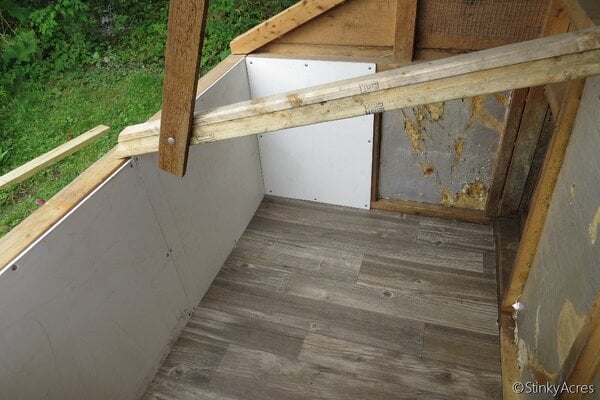
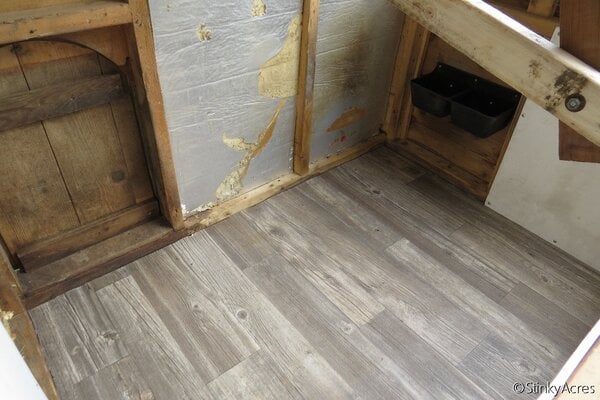
The inside so far
I decided to work on the elevated platform next. This involved leveling concrete blocks (which isn't too easy on our very sloped lawn!) and building a basic floor frame on 4x4 posts. I added a plywood floor later for stability.
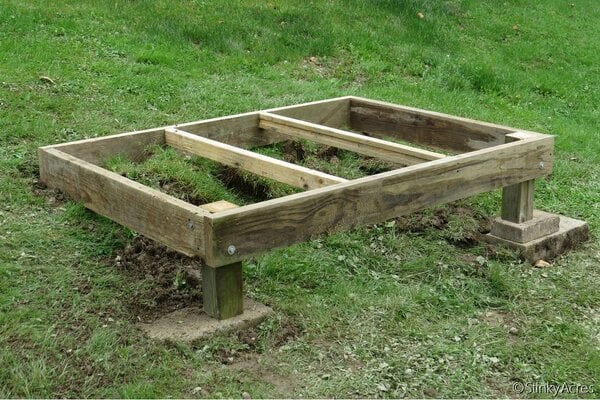
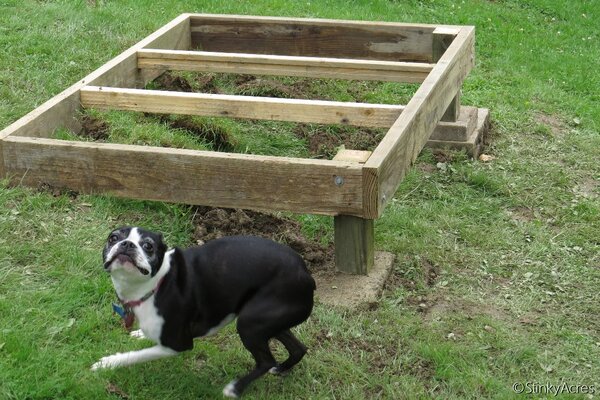
The duck house platform and a very happy Dorie
Then it was time to move the very heavy duck house and lift it up onto the platform. Taking off the roof and convincing four family members to help carry it made it a lot easier!
After it was set in place I installed pressure-treated trim around the base (which was rotted and ugly), added the finishing touches to the inside, and built a ramp. And the dog house duck house is done!
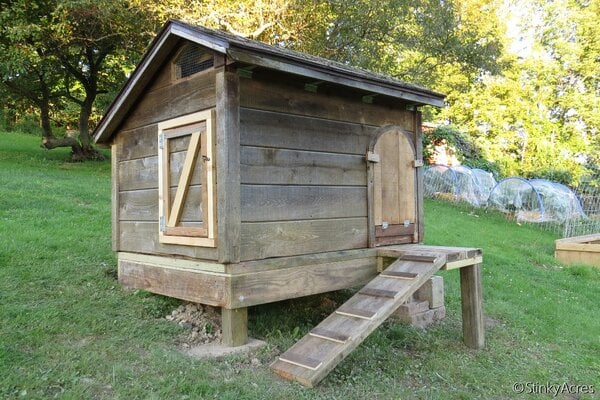
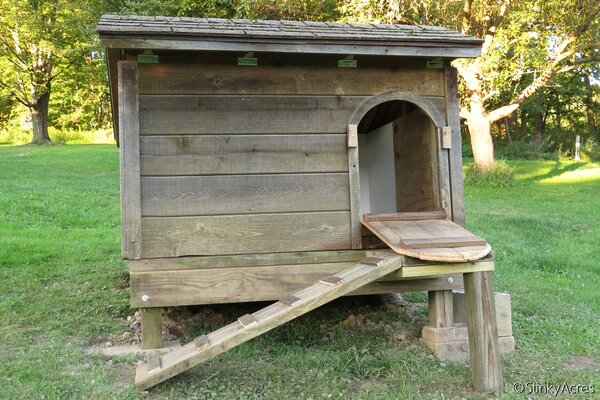
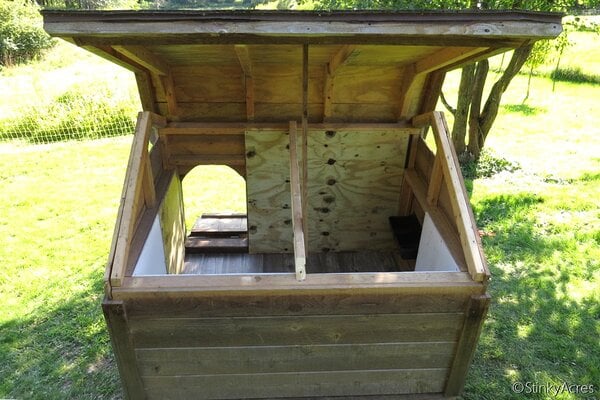
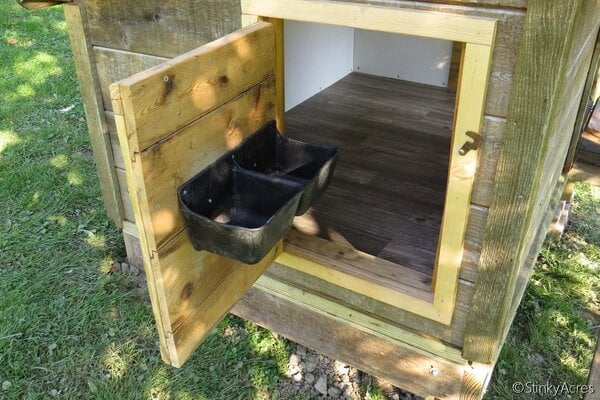
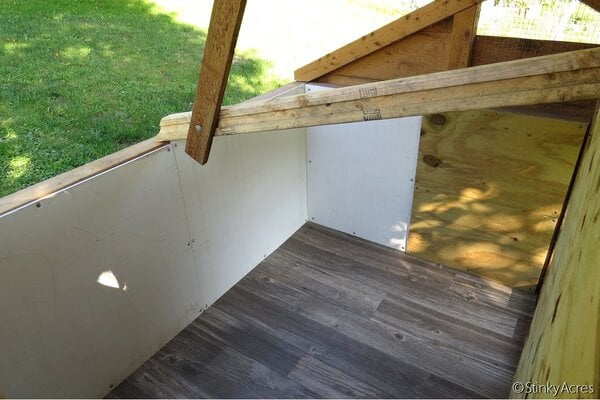
The finished duck house
I spent approximately $215 on this build, which doesn't include things like screws and materials I saved from other projects and demo around the house.
Materials used:
- Large cedar dog house ($50 + $39 for delivery)
- Gorilla double-sided cloth tape ($8)
- Veranda 1/4"' white PVC trim sheets ($54)
- Galvanized narrow utility hinges ($11)
- 1/2" pressure treated plywood ($40)
- Pressure treated 2x4 ($6)
- 1/4" x 3" lag screws ($4)
- 1 1/2" stainless steel finishing nails ($3)
- 2" screws
- 1 1/4" screws
- 3 1/8" screws
- Stainless steel staples
- Repurposed hardware
- Scrap lumber
- Vinyl sheet flooring remnant
- Leftover concrete blocks
- Leftover hardware cloth
Tools used:
- Miter saw
- Table saw
- Circular saw
- Oscillating tool
- Jigsaw
- Power drill/driver
- Impact driver
- Palm/trim router
- Staple gun
- Measuring tape
- C-clamps
- Hammer
- Spirit level
- Rafter square
- Pencil
- Marker
- Scissors
- Utility knife
Update #1: It's been a few months and so far I have been happy with my dog house duck house. The hinged roof has been especially helpful and the house is placed at the perfect height - I can easily reach in to clean the house and catch ducks for examination. I have made a few modifications since, mostly in preparation for the winter. You can check out the modifications I made on the next page.
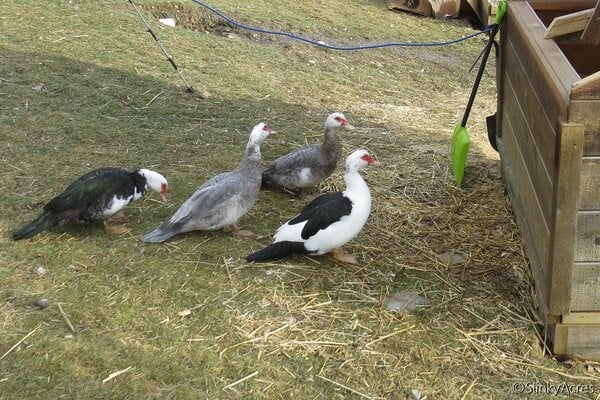
My ducks like to watch me clean out their house ❤
Update #2: During its first winter I discovered a couple minor flaws in my design. One thing that looks nicer than it functions is the drawbridge door. The ducks love to sit and, of course, poop on the door when it's open. It needs to be cleaned almost every evening in order for me to close it. And, even worse, it broke a couple times when ice formed on the lip. However, I probably won't be changing the door anytime soon, but on the next page you can see modifications I did end up making.

My ducks using the ramp and porch
Optional Modifications
Removable Roosting Bar
The roosting bar is just a 2x4 installed wide side up. I cut the hangers out of scrap wood with the jigsaw and screwed them to the wall. Simple but effective.

My Muscovy ducks settling down in the duck house for the night
Winter Ventilation
Living in the northeastern United States I wanted to be able to close the two large gable vents on those freezing and blustery winter nights. Good thing I kept the pieces I cut out! All I had to do was attach them with a hinge on each and now I can close the vents up! No latches were needed as it is a great press fit.


Vent cover for those blustery winter nights
To allow for ventilation on the nights when I close the large vents, I drilled large holes in the front soffit and covered them with hardware cloth.

24/7 ventilation under the eaves
Nesting Box
I added a nesting box to my duck house not only to provide a comfy place for my ducks to lay eggs in but also for the extra space - the nesting box is useful in the winter as a food and water area when it's too cold for my ducks to wander outside.

The dog house duck house with the new nesting box addition
The nesting box is 33" x 15" on the inside and is made mostly of materials I already had on hand. The walls are pressure-treated plywood over a scrap wood frame trimmed out with pieces of the cedar siding I took out and pallet wood. The corrugated roof is a cutoff from another project and the flashing is a piece of a heavy duty rubber mat. There are two hinges underneath the flashing and roof panel and the latch is a swivel hasp latch.


The outside of the nesting box
I brought power to the duck house via an extension cord and ran it into the nesting box. Now I have a place to plug in the infrared heater and heated water bowl. The floor is covered with a piece of vinyl sheet flooring and I've also used a boot tray to catch spills.


What the inside of the duck house looks like now with a nesting box (and heater)
The roosting bar is just a 2x4 installed wide side up. I cut the hangers out of scrap wood with the jigsaw and screwed them to the wall. Simple but effective.
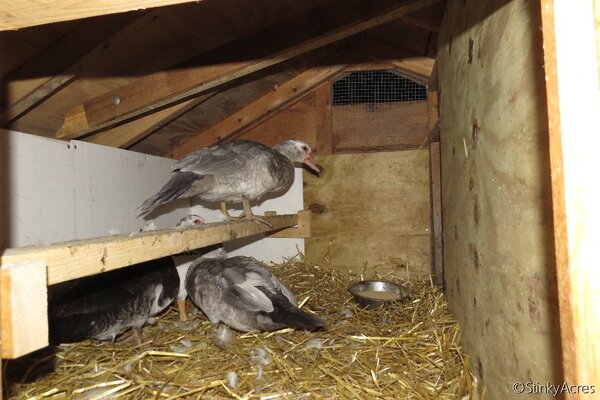
My Muscovy ducks settling down in the duck house for the night
Winter Ventilation
Living in the northeastern United States I wanted to be able to close the two large gable vents on those freezing and blustery winter nights. Good thing I kept the pieces I cut out! All I had to do was attach them with a hinge on each and now I can close the vents up! No latches were needed as it is a great press fit.
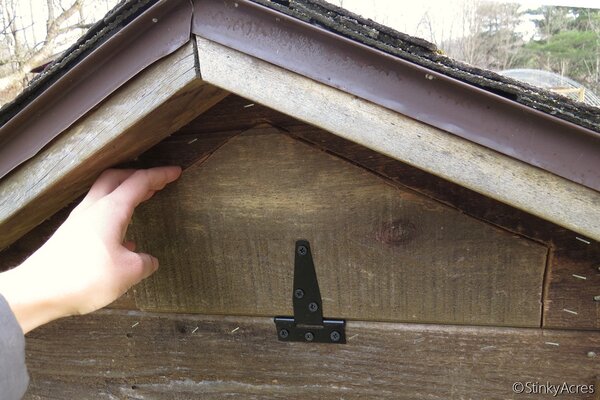
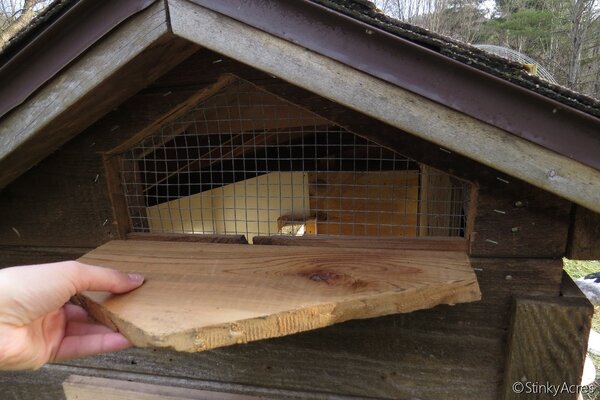
Vent cover for those blustery winter nights
To allow for ventilation on the nights when I close the large vents, I drilled large holes in the front soffit and covered them with hardware cloth.
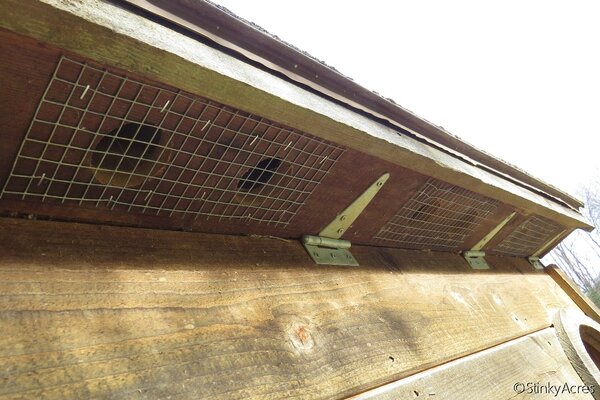
24/7 ventilation under the eaves
Nesting Box
I added a nesting box to my duck house not only to provide a comfy place for my ducks to lay eggs in but also for the extra space - the nesting box is useful in the winter as a food and water area when it's too cold for my ducks to wander outside.
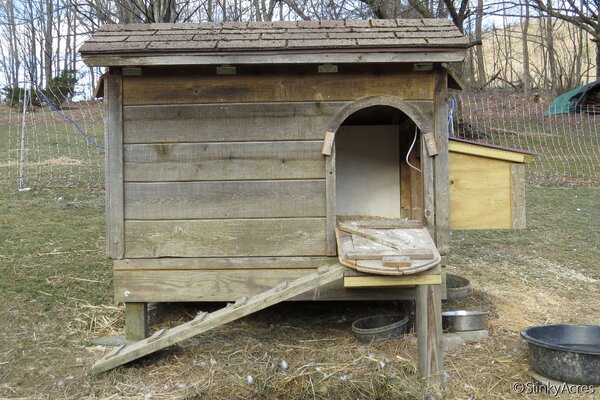
The dog house duck house with the new nesting box addition
The nesting box is 33" x 15" on the inside and is made mostly of materials I already had on hand. The walls are pressure-treated plywood over a scrap wood frame trimmed out with pieces of the cedar siding I took out and pallet wood. The corrugated roof is a cutoff from another project and the flashing is a piece of a heavy duty rubber mat. There are two hinges underneath the flashing and roof panel and the latch is a swivel hasp latch.
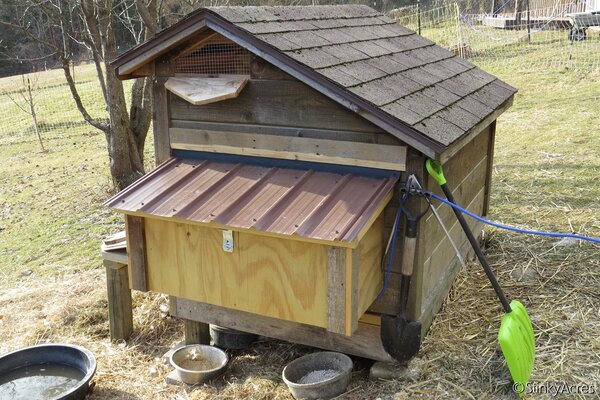
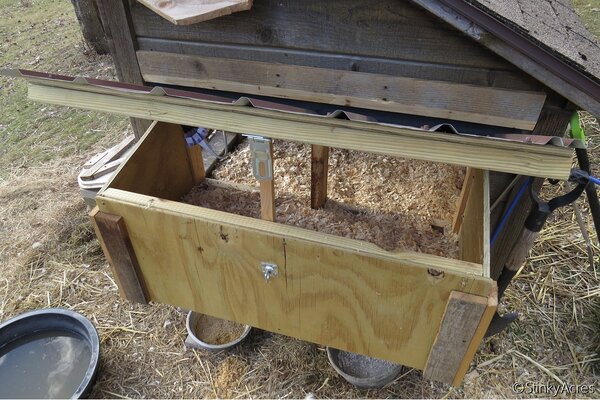
The outside of the nesting box
I brought power to the duck house via an extension cord and ran it into the nesting box. Now I have a place to plug in the infrared heater and heated water bowl. The floor is covered with a piece of vinyl sheet flooring and I've also used a boot tray to catch spills.
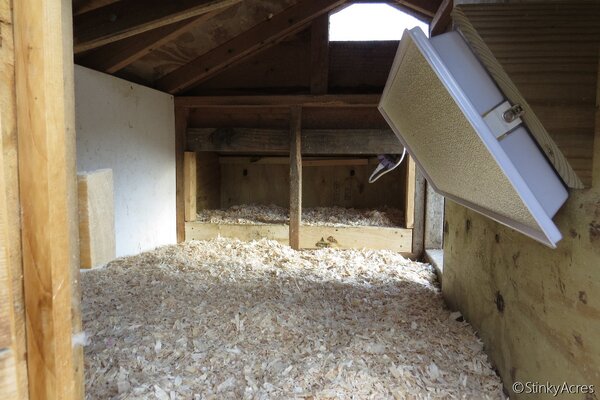
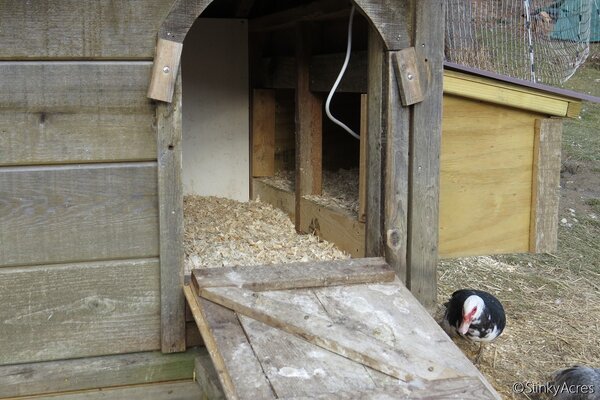
What the inside of the duck house looks like now with a nesting box (and heater)
