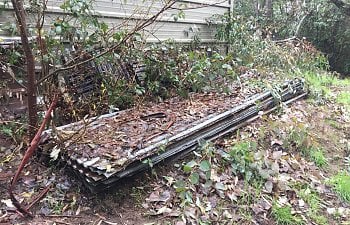
Since buying our house we've taken to enjoying chicken owning, but not so much in enjoying using or even looking at the decades-old, badly-placed chicken coop that came with the property. After discovering a pile of used corrugated metal roof panels hidden underneath some blackberries behind a shed at my in-laws, I decided it was time to build a new, better coop, in a more preferred location out in our orchard. Hopefully this article might inspire someone else to build their own coop!
Requirements:
I looked at a lot of various chicken coops for my inspiration and came up a handful of requirements:
- Deep bedding system, because I don't like regular chores of cleaning sand or emptying poop boards.
- Floor height tall enough to simply rake out contents into a wheelbarrow instead of shoveling from ground level like the old coop.
- Secure. Plenty of wildlife and predators around.
- Big enough to house maybe two dozen chickens and keep them happy enough during the week as they usually only free range when we're home all day.
- Covered/partially covered run, to provide a dry area during rainy months - old coop run was uncovered and chickens would hang out indoors beating up one another.
- Enclosed storage area, so I don't have to look at metal trash cans that drip water from the handle connections onto the feed inside.
- Internal nest boxes for more contemporary/modern aesthetics.
Design:
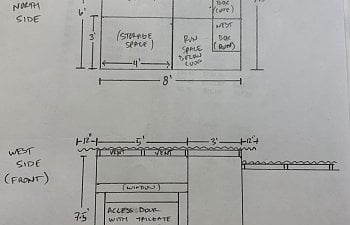
I didn't want to just copy one of the many fantastic coops I was inspired by, so I just started doodling to get an idea of what I generally wanted. This was also to work out general dimensions to do some number crunching in order to maximize the use of standard size materials (ex: 8ft length).
In the end, I didn't follow any plans or my drawings other than general dimensions - but this structure is so simple that sizes can be tweaked to fit other builds. I do have some experience with fabrication and creating things, but this is the biggest project I've ever made without anyone's help, pretty much just on weekends.
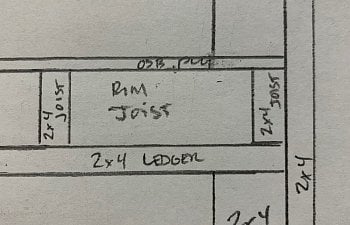
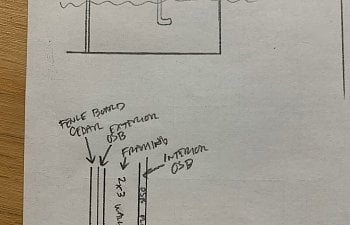
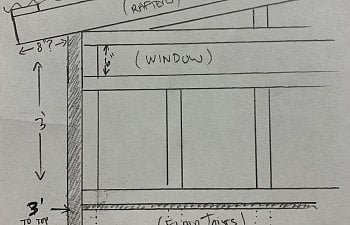
I've included a few cleaned up drawings which may help others figure stuff out. I can always make more specific drawings if requested.
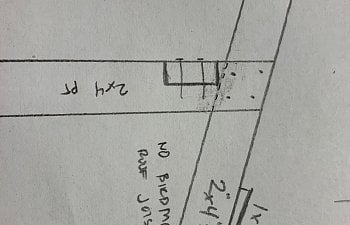
Dimensions:
- Coop footprint is 5'W x 8'D = 40sq ft.
- Entire structure's footprint is 8'D x 24'W = 192sq ft, but there's a 3'x4' storage area under the coop that eats into the run, so more like 180sq ft of run space.
- Wall heights are 7.5' @front wall, 6' @rear wall.
- The terrain is sloped, hence the cinder block step-down levels.
Materials:
I got the 12ft corrugated roof panels for free, so that was a nice savings. Looking at my receipts, I'm estimating I spent under $1500 on all my other materials: cinder block, concrete, pressure treated lumber, lots of various hardware, hardware cloth, paint, etc. I could have easily used found/repurposed/salvaged materials, but I justified the expense as an investment because my family loves eggs.
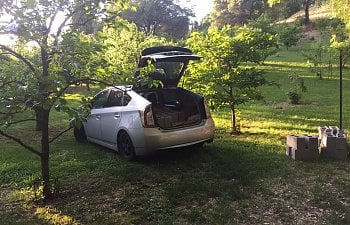
I used my Prius "pri-kup truck" work commuter to haul most of the materials only because I was doing Home Depot runs after work and it's a good 10+ miles away. The longer stuff (roof panels and 12ft 2x4s) I used a truck - but I don't see why someone couldn't use a roof rack or simply have it delivered if they don't have a truck.
The Build:
Without much of a plan, I just started out by digging some footings for my 8'x24' cinder block foundation. There's some pea-gravel underneath them.
Ran out of cinder block, so I got the first section set with some concrete so I could start building. The sill plate is bolted down with anchor bolts; four corners are 2x4s set at 8' x 5'; floor joists is at 36" to clear the height of a cart when cleaning out. Underneath was planned to be storage on one side and the rest just more run space, but later I decided to add more nesting boxes down there.
Once I got the perimeter/rim joists of the floor leveled out and fixed to the 2x4 corner posts, I used a horizontal ledger board underneath the floor joists to save on buying StrongTies; jack-studs went underneath to support and double up the corner posts; I also framed out the storage area underneath. Next I installed some OSB ply on my platforms. I was going to pre-frame the walls and overbuild them - but instead I decided it was unnecessary for a chicken coop and just built straight off the structure with less materials. After getting the roof pitch figured out, I cut the corner posts accordingly.
Once the wall framing was in, I installed OSB to hold it all together - both exterior and interior.
Front door was probably the trickiest part of the build. I wanted there to be a big door for maintenance, but also a smaller daily access door for harvesting eggs -- enter the door within a door.
EDIT: After almost a year, I rarely even use the inner tailgate door, favoring the larger swinging door - oh well!
Nesting boxes got built and test-fit to make sure things clear the door when open - they do, barely haha.
It was at this point that for whatever reason I decided 3 nesting boxes inside wasn't enough - so I built three more down below, which are only accessible from the run. Some big chickens showed up to test out the boxes

EDIT: After almost a year, all six nest boxes get used regularly by the hens; one hen doesn't even use the boxes and lays in the corner of the coop.
Then I started figuring out all the rest of the coop doors - basic lap-joint 2x4 frame with an OSB panel on top.
Mixed up all the leftover exterior paint cans I found in a shed and did like 3 coats. I'm colorblind and can't really tell you what color it ended up being...but one day my wife came home with some gray paint, so I took that as a sign to use it on all the areas that would be visible in the finished product. I didn't paint the whole thing over, figuring the cedar boards would be tight enough to hide - which it does.
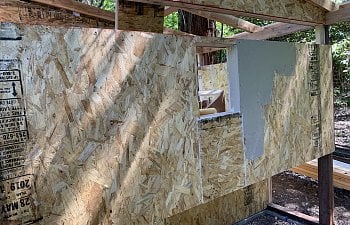
Beginning of the cedar siding. Originally was going to use visible screws for aesthetics, but instead used a nail gun to hide the mounting hardware.
Ran out of cedar fence boards, so I started working on the run...
...then I quickly realized I'd need to finish up the foundation before I could keep going. Here's a better example of how I set the blocks - alternating holes with rebar stake and a solid-fill, the rest are filled halfway with rock and capped with concrete to keep critters out; gaps are for drainage since it's a hill.
The goal here was to not make foundation so permanent just in case I ever have to demo the coop...such as the old coop where someone chose to solidify the run fencing by digging a concrete-filled trough for the whole perimeter, yaaaaay!
The whole structure is in three sections, which are just bolt down to the foundation - so in theory it can be lifted off if needed.
Run framework mostly completed. Extra rafter on the right-side is extra support structure for future pullup bar/rings if I ever get motivated to exercise, hahaha
Hardware cloth walls being installed. (Tip: cut it with angle grinder, it's sooooooooo much easier than snips!) I used pneumatic staples every 3-4".
Finished up the walls and moved on to the roof. You can kinda see in the pics that I have a hardware cloth perimeter skirting on the run area, it's at least 16" wide. There is also rock underneath it along the perimeter and rock will end up on top of it too. Interior floor I last minute decided to cover with hardware cloth after seeing evidence of a mole trying to come up from below before I was finished. Ideally I would have taken out more dirt to set it deeper, but I didn't want to get into tree roots and there is ~6" of dirt over the top. I'm also going to add a nice layer of mulch over that. (EDIT: Floor mesh depth seems to be a non-issue really, there's only one spot where they dig down to it (the spot not covered in mesh in pic below, because I didn't remove dirt against storage area to not compromise structural integrity)
Here are some shots of the coop to show how it all got finished up. I was originally going to install plastic sheeting or laminate inside - likely 1/16" plastic wall panels from Home Depot since a piece of HDPE like on the Carolina Coops costs a small fortune, but in the end I just decided to do like 4 coats of semi-gloss white paint - can always add something later (old coop interior was bare OSB w/deep bedding, after ~20yrs the walls/floor were fully intact). Interior features removable baffles/tailgates to hold back the deep bedding from falling out the door or if you remove the nest boxes. The continuous window got upgraded with swing-down panels on a simple eye-bolt and string pulley system, so I can close them off individually if it's cold and windy - probably not that necessary here in CA where the snow doesn't stick. The roosting bars are 2x3 in horizontal orientation since I've seen debate over 2x2 vs 2x4 bars, lol. Also they're installed with a simple hook/loop connection so I can easily remove them.
(EDIT: I still haven't done it, but I plan to change roost bars - eliminate the smaller section and move the tall section toward the center so that there are no bars above the nest boxes - because poop)
Here's the nest box area showing that the nest boxes simply slide out for maintenance
Bedding in and now ready for some chickens!
When you want to collect eggs, simply drop down the tailgate doors at the nest boxes
Finally got my storage area enclosed. In the future I will likely install a full extension sliding drawer/platform to pull everything out, because getting 50lb sacks in/out is a chore. BTW that's an 11lb bag of Black Soldier Fly grubs from Amazon on the left-side, which the chickens seem to LOVE just as much as mealworms, if not more!
Inside the run I put down arborist mulch to soak up the funk. The aluminum boat their dirt bath area was already on the property, so I used it as my dirt bath. It's ~4x8 footprint and filled with a mix of dirt/sand/diatomaceous earth/wood ashes. Overhead branches were my way to expand and provide more usable space for the chickens so they're not so crowded in the run. They all seem to LOVE it up there and a few of them even been sleeping there instead of in the coop! (EDIT: The last few months I'm seeing 14/15 sleeping in the run up on the branches, haha)
And lastly, here is the new chicken waterer I made. (Article for those interested)
Thanks for looking!
Almost 1yr update: Coop is doing great! Haven't lost a single chicken to predators yet. If I were to modify/change anything it's likely these things:
- Plan to add a 2x6 border on the lowest tier of cinder block. The mulch "levels out" with chicken activity and goes above the cinder block on that side.
- Plan to change up roosting bars inside coop. Eliminate small side, reconfigure tall side so no bars are above the nest boxes - because poop happens.
- The door inside a door was overkill, I just use the large door most of the time.
- I may add an elevated "time out box" inside the run - all of our cochins have gone broody this year, some twice.
- Wish I had an automatic door opener, lol.
2020 - extended the run with fencing from old coop. The extra space is appreciated. Started tossing green waste in there with wood chips and it’s like a big compost pile that in the future I’ll be able to pull from for use in the garden!
2021 - finally got that automatic door opener I’ve been wanting! Run-Chicken T50 in brown.
2022 - New flock, so decided to rework all the branches in the coop run, as well as change out the long ramp to the coop. Been meaning to do this for a while and reconfiguring the branches definitely seemed to make it much easier for the chickens to maneuver around and pick their spots at night for roosting, since they always want to sleep in the run instead of the coop. Switching out the ramp seemed to open up a ton of floor space and the new ladder seems more natural and almost easier for them to use. Also have been better securing the extra run, as we've had many losses to predators in that run (90% sure it's been a bobcat that moved into the area recently, as we've seen it around) - added HC bottom perimeter and adding overhead protection with chicken wire.
