How to build Rustic Stick Roosts
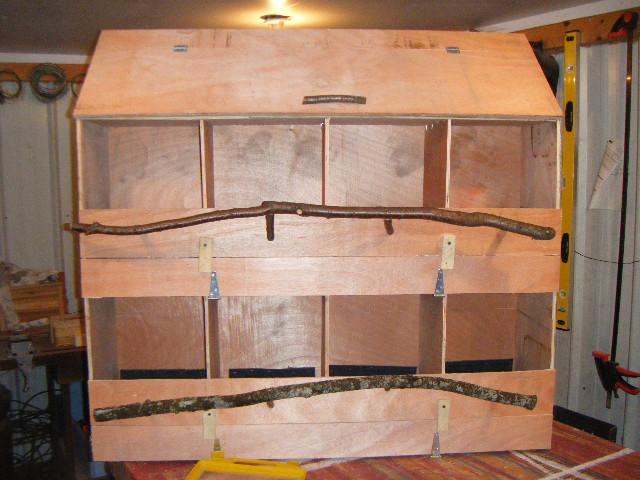
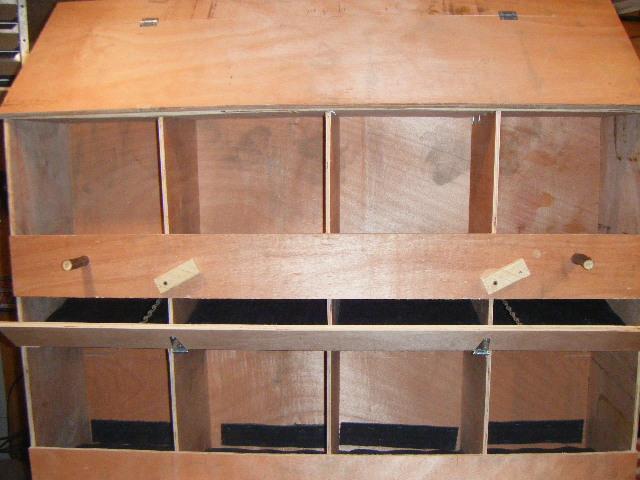
 I decided to upgrade my nest box to a front rollout box. After I was done I knew I wanted to make natural roosts like the ones I had on my original nest box. That's when I decided to go this route. See my nest box: https://www.backyardchickens.com/web/viewblog.php?id=81983
These are the required tools, however a band saw helps for quick trimming of branches and shaping the posts.
Below is a step by step of what I did to make the roosts. You can be pickier than I was in picking out the wood but I would suggest using sapplings, they flex a bit if needed and they are nice and smooth.
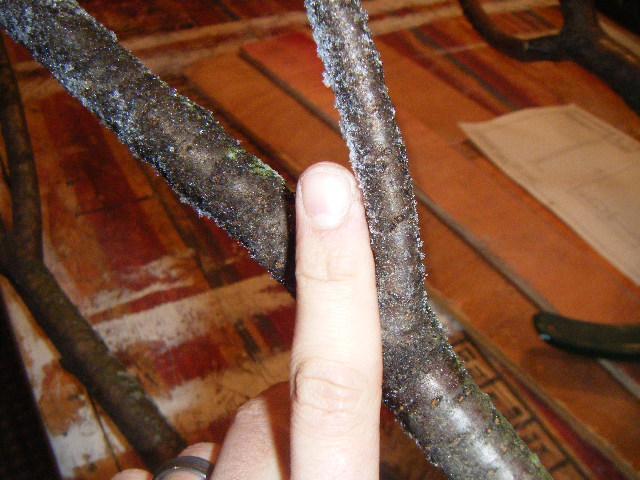
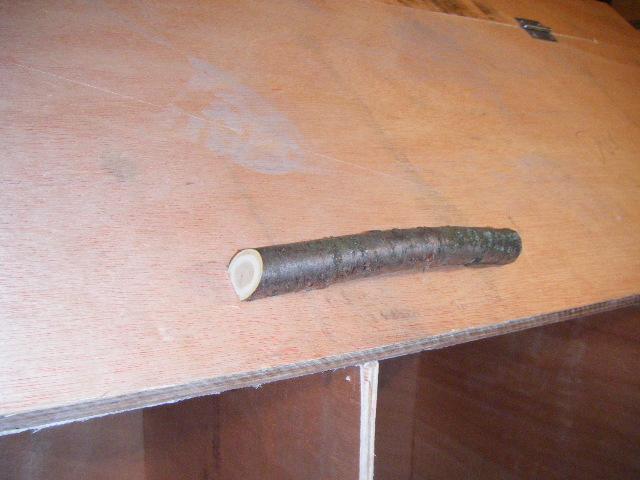
Start out by picking a suitable branch or branches. Remember you want one that has a roost about 1 1/2" in diameter and posts about 1/2"-3/4" in diameter.
Trim anything smaller off of the branch with a pruner or saw. I used a prunner as shown lower in the picture.
Next seperate any branches that are 1/2"-3/4" for the posts.
Measure your proposed roost length. I decided mine did not need to go the entire length so I went with 45" roosts.
Next find a section of the main brach that is about the right diameter and trim off. NOTE the branch does not need to be totally straight, it looks better if it's got some kinks.
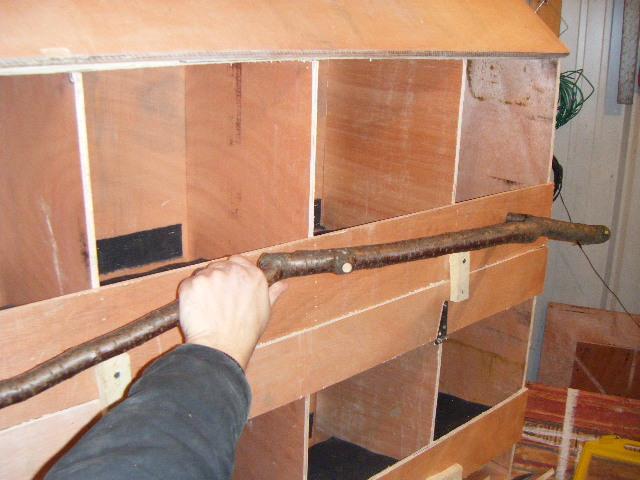
Trim off stumps from twigs and hold up the roost to get the best position. You'll want it somewhat flat and close enough to the nests (or whatever). This should work.
Next, find a drill bit that is larger than you screws and drill the two end post holes.
To keep the roost from pulling out (fat birds?) I found some washers that fit the screw. Fits nicely!
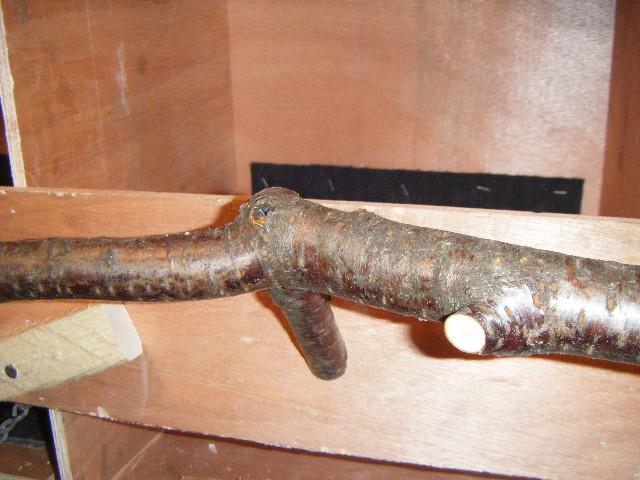
Next trim some posts to length, I chose 3" on the outer posts since my roost curves toward the box a bit. Notice the curve on the right on, that's to mate up to the roost.
Test fit where the posts will be mounting to the roost and make sure you'll have a nice joint.
Once you have your posts trimmed, drill a small hole in the center of the post (so the threads of the screws still grab. Then use a screw driver to hold the screw still and just twist the post onto the screw ... TIGHT!
half way there!
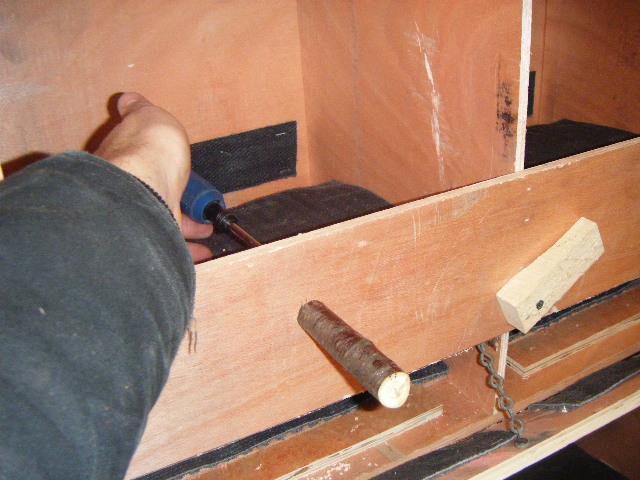
Hold the roost up and use the large drill bit and drill through where the posts will mount. Then change back to the small bit and using the roost holes drill into the posts. Then just run your screw in until tight or even a little sunk in.
Do the same for the center posts. I made them at slight angles to add some ridgedness to the roost, so drill the nest box hole at an angle and the post through the center. Mark and trim the post to length and assemble like the other posts. This angle truely adds alot of strength to the roost.
And there you have a very sturdy roost that I know your birds will just love! And it should have only cost you a couple screws and washers.
As you can see I used a older branch for the lower roost for comparison. It's oak so I think it should hold up!
Extra Extra!!
I liked the roosts so well I decided to make a handle for the cabinet door on top of my nest boxes. To make the handle I took a branch about 1" in diameter that had a curve to it (a V shaped branch would be perfect for a handle but I didn't want to promote roosting on this handle). Then using my band saw I trimmed one side of the branch flat so it rests against the door nicely. I used a clamp (I love Irwin quick clamps!), I clamped it to the door , pre-drilled with the smaller bit and scewed to to the door.
Easy!
Well, thank you for taking the time to read all of this I know it was alot. If you have any questions please feel free to email me and I'll try to help any way I can.
My freind Elmo commented also that:
A couple of thoughts. When I use natural branches for roosts, I run my hands over the branch to make sure there are no rough or sharp spots (especially where I've trimmed off other branches) that could cause abrasions on a chicken's foot...that could lead to a bumble foot infection. Where I find rough spots, I sand them down really well.
The other thing I do is remove any visible mold or fungus, and then give the branch a good spraying with Adams Flea and Tick spray. Then I sit the branch out to dry well in the sun. Mites from wild birds sometimes hide in tree bark or crevices in the wood, and I don't want to add critters like that to my coop or aviary.
Finally, make sure that the tree you pick for your natural roost isn't a toxic one. This applies more to perches for other kinds of birds than chickens, since chickens aren't wood chewers the way parrots are.
Awesome notes Elmo, thank you very much!
Thanks,
Kris
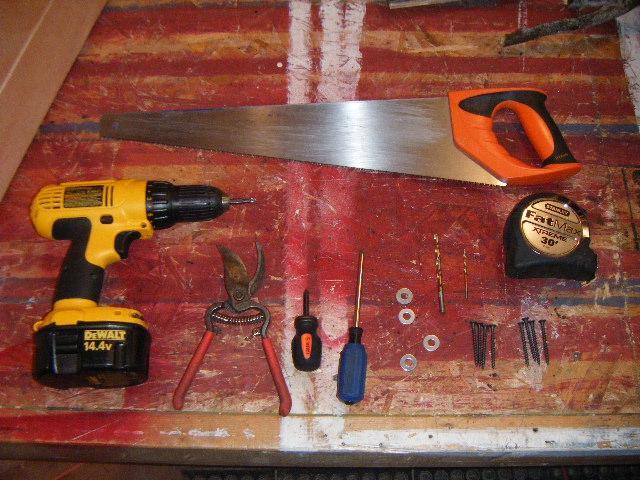
These are the required tools, however a band saw helps for quick trimming of branches and shaping the posts.
Below is a step by step of what I did to make the roosts. You can be pickier than I was in picking out the wood but I would suggest using sapplings, they flex a bit if needed and they are nice and smooth.
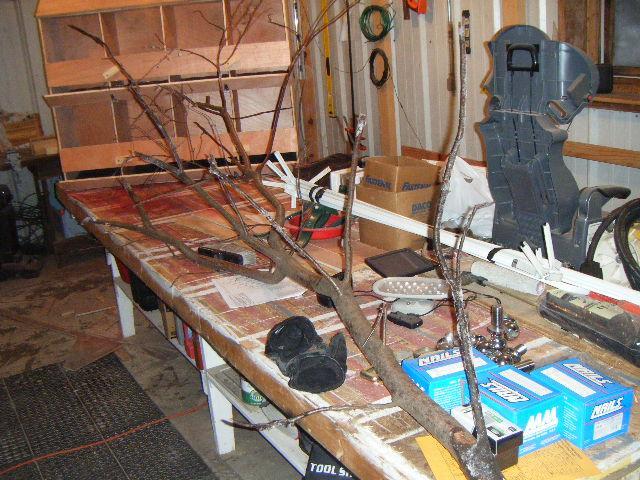
Start out by picking a suitable branch or branches. Remember you want one that has a roost about 1 1/2" in diameter and posts about 1/2"-3/4" in diameter.
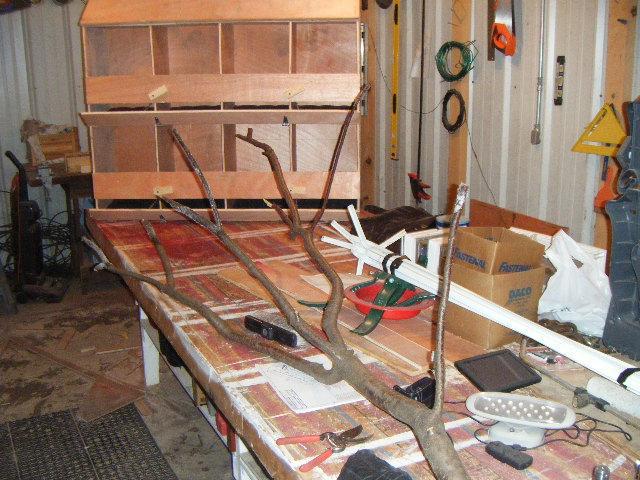
Trim anything smaller off of the branch with a pruner or saw. I used a prunner as shown lower in the picture.
Next seperate any branches that are 1/2"-3/4" for the posts.
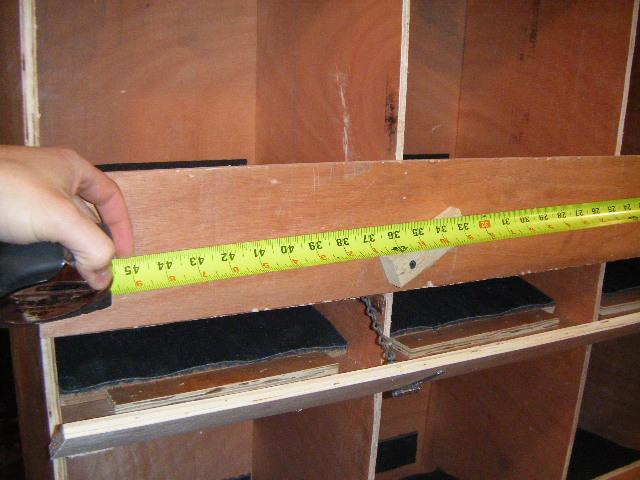
Measure your proposed roost length. I decided mine did not need to go the entire length so I went with 45" roosts.
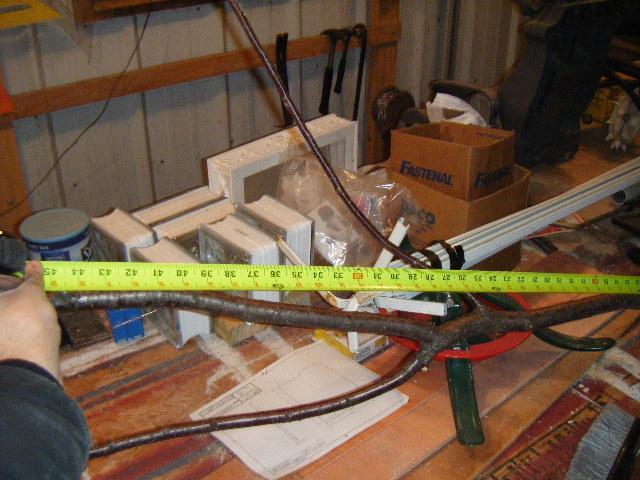
Next find a section of the main brach that is about the right diameter and trim off. NOTE the branch does not need to be totally straight, it looks better if it's got some kinks.
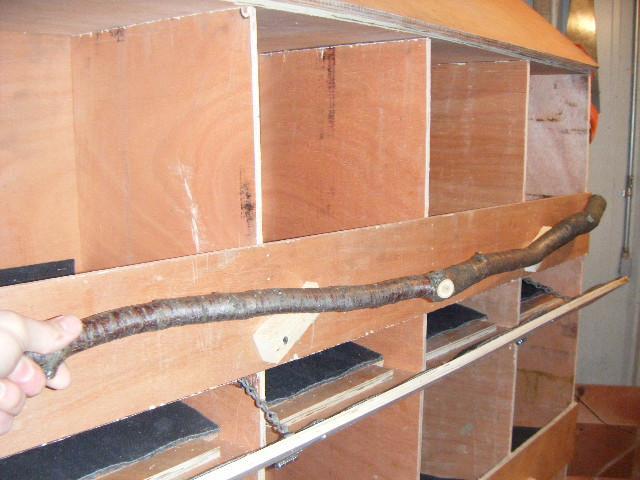
Trim off stumps from twigs and hold up the roost to get the best position. You'll want it somewhat flat and close enough to the nests (or whatever). This should work.

Next, find a drill bit that is larger than you screws and drill the two end post holes.
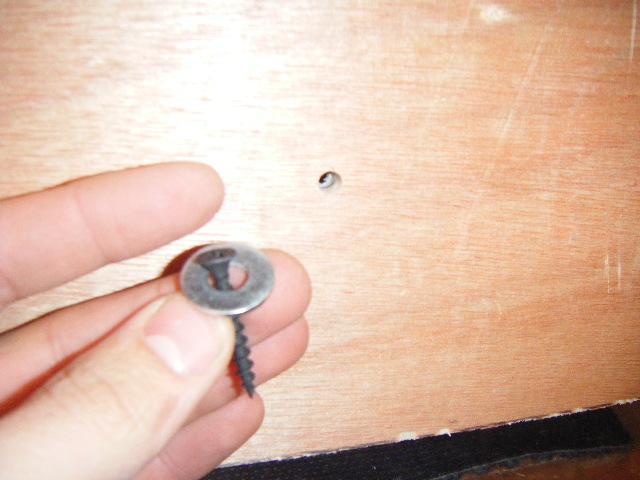
To keep the roost from pulling out (fat birds?) I found some washers that fit the screw. Fits nicely!
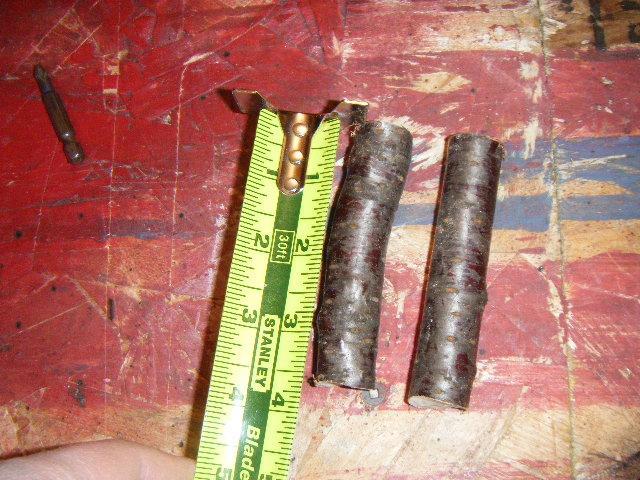
Next trim some posts to length, I chose 3" on the outer posts since my roost curves toward the box a bit. Notice the curve on the right on, that's to mate up to the roost.
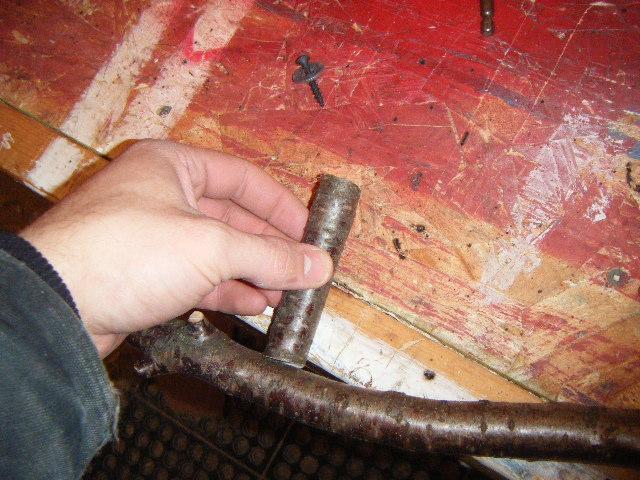
Test fit where the posts will be mounting to the roost and make sure you'll have a nice joint.
Once you have your posts trimmed, drill a small hole in the center of the post (so the threads of the screws still grab. Then use a screw driver to hold the screw still and just twist the post onto the screw ... TIGHT!
half way there!
Hold the roost up and use the large drill bit and drill through where the posts will mount. Then change back to the small bit and using the roost holes drill into the posts. Then just run your screw in until tight or even a little sunk in.
Do the same for the center posts. I made them at slight angles to add some ridgedness to the roost, so drill the nest box hole at an angle and the post through the center. Mark and trim the post to length and assemble like the other posts. This angle truely adds alot of strength to the roost.


And there you have a very sturdy roost that I know your birds will just love! And it should have only cost you a couple screws and washers.
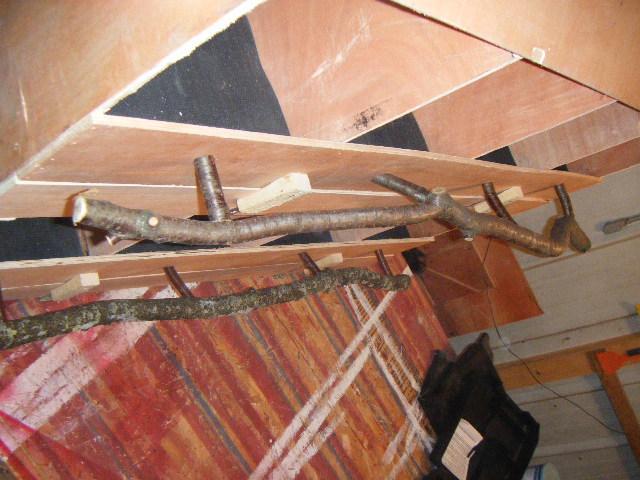
As you can see I used a older branch for the lower roost for comparison. It's oak so I think it should hold up!
Extra Extra!!
I liked the roosts so well I decided to make a handle for the cabinet door on top of my nest boxes. To make the handle I took a branch about 1" in diameter that had a curve to it (a V shaped branch would be perfect for a handle but I didn't want to promote roosting on this handle). Then using my band saw I trimmed one side of the branch flat so it rests against the door nicely. I used a clamp (I love Irwin quick clamps!), I clamped it to the door , pre-drilled with the smaller bit and scewed to to the door.
Easy!
Well, thank you for taking the time to read all of this I know it was alot. If you have any questions please feel free to email me and I'll try to help any way I can.
My freind Elmo commented also that:
A couple of thoughts. When I use natural branches for roosts, I run my hands over the branch to make sure there are no rough or sharp spots (especially where I've trimmed off other branches) that could cause abrasions on a chicken's foot...that could lead to a bumble foot infection. Where I find rough spots, I sand them down really well.
The other thing I do is remove any visible mold or fungus, and then give the branch a good spraying with Adams Flea and Tick spray. Then I sit the branch out to dry well in the sun. Mites from wild birds sometimes hide in tree bark or crevices in the wood, and I don't want to add critters like that to my coop or aviary.
Finally, make sure that the tree you pick for your natural roost isn't a toxic one. This applies more to perches for other kinds of birds than chickens, since chickens aren't wood chewers the way parrots are.
Awesome notes Elmo, thank you very much!
Thanks,
Kris